Faces Kit
SKU:K005


Description
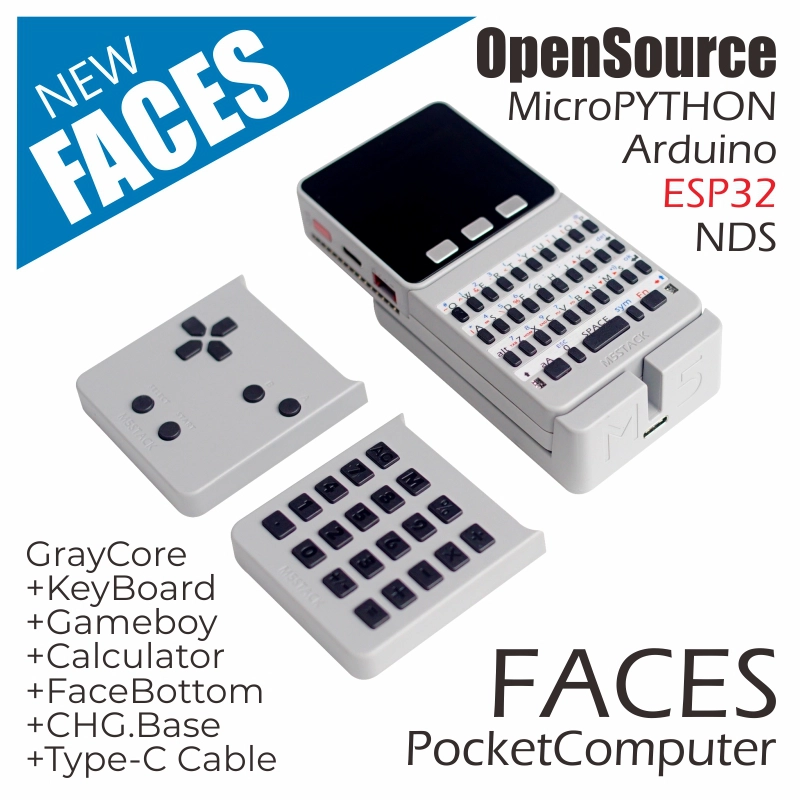
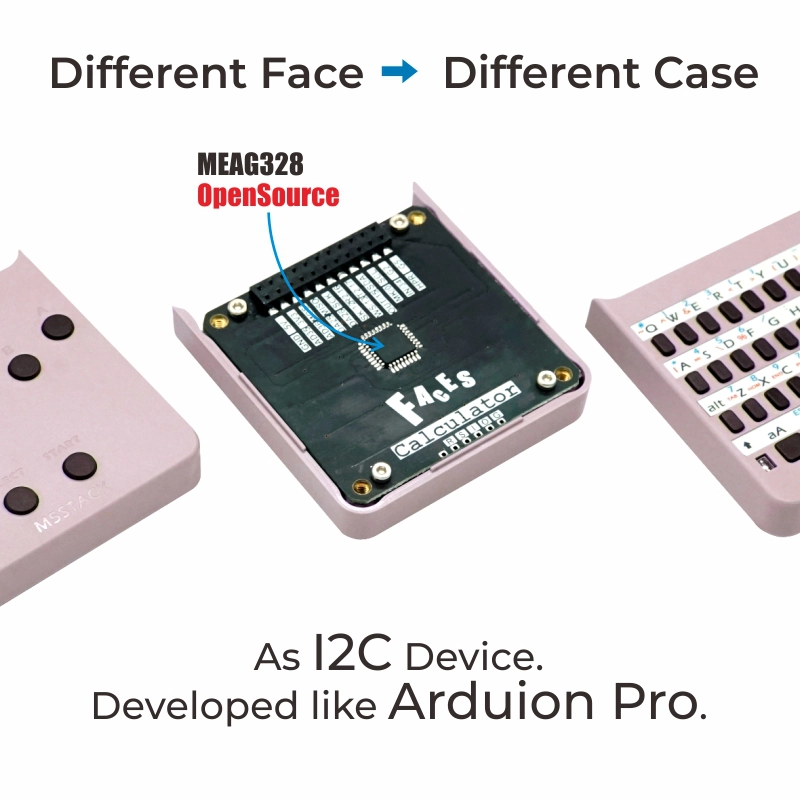
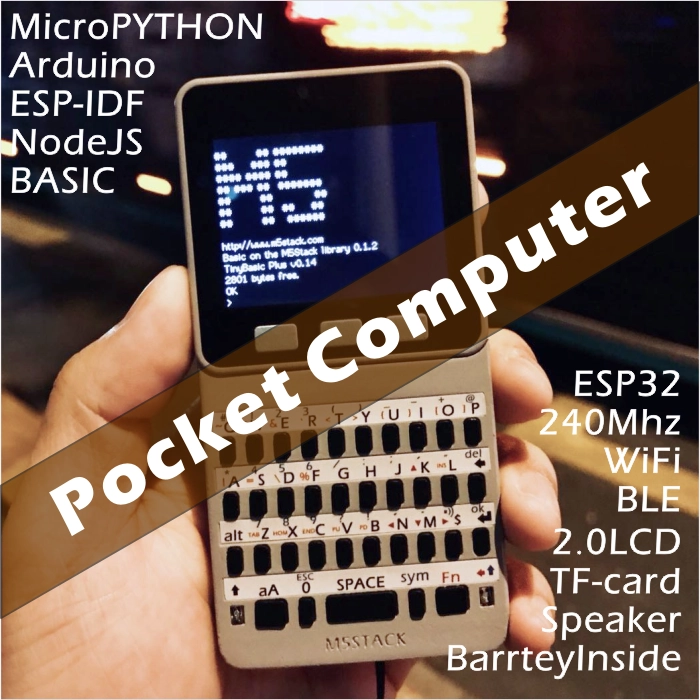
Faces Kit is a collection of functional panels. The kit includes three commonly used panels: "GameBoy (gaming keyboard)", "Calculator (numeric keypad)", and "QWERTY (full keyboard)". A MEGA328 processor is integrated inside, working in slave mode via the I2C communication protocol (0x08). Choose any of these three panels as needed to enable human–machine interaction between the user and M5Core.
Tutorial
Features
- ESP32-based development
- Built-in gyroscope, accelerometer, and magnetometer
- Integrated speaker, buttons, LCD screen, and 1 × power/reset button
- TF-card slot (expandable up to 16 GB)
- M5-Bus female connector
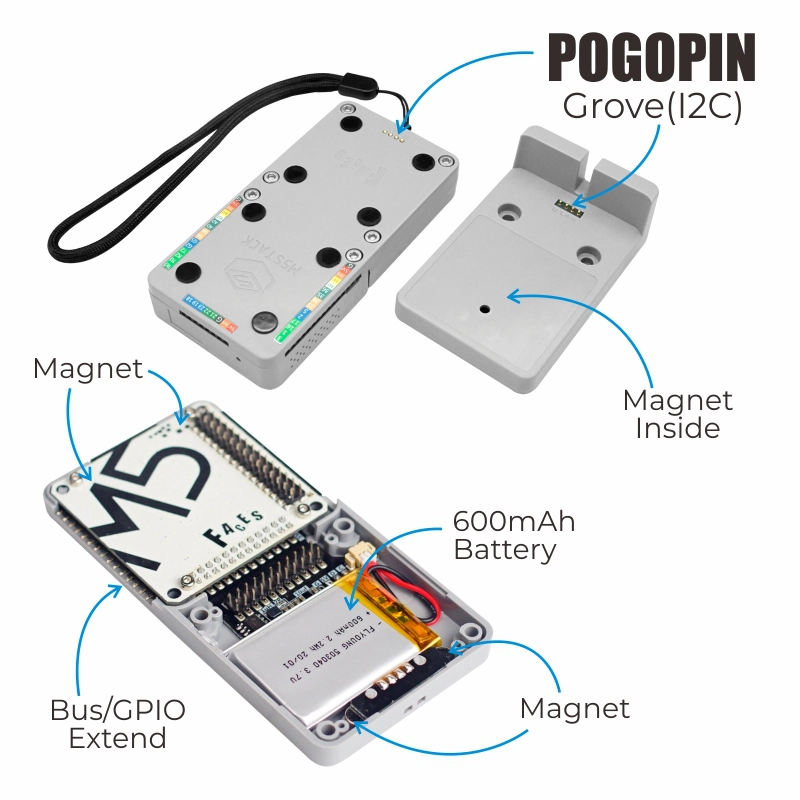
- Magnetic charging design
- Built-in lithium battery
- Extensible pins and interfaces
- Development Platform
- UiFlow1
- UiFlow2
- Arduino IDE
- ESP-IDF
- PlatformIO
Includes
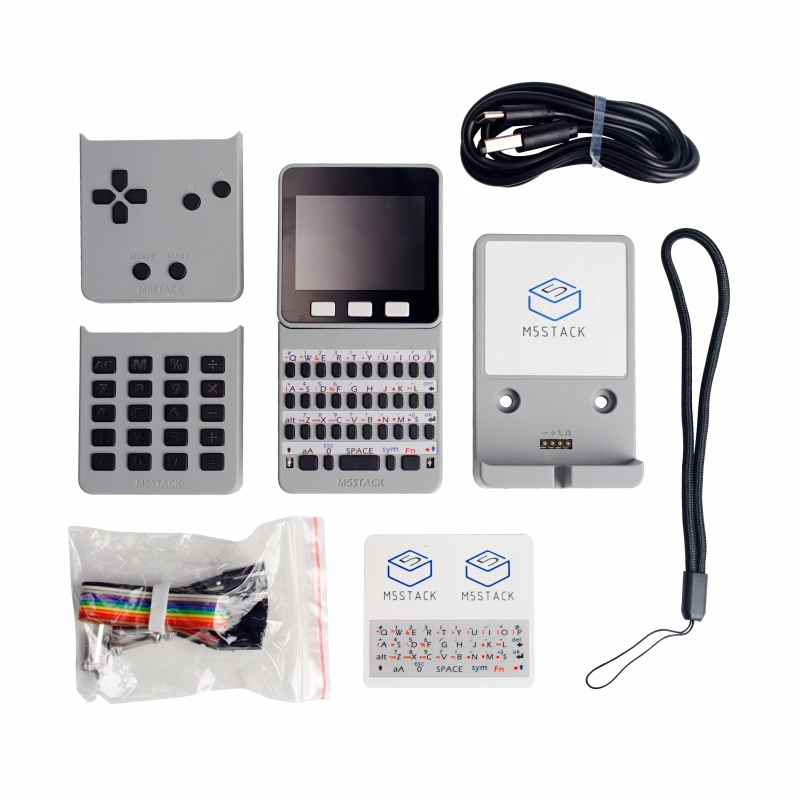
- 1 × Gray
- 1 × FACES Charging Base
- 1 × FACES Lanyard
- 1 × Panel Sticker
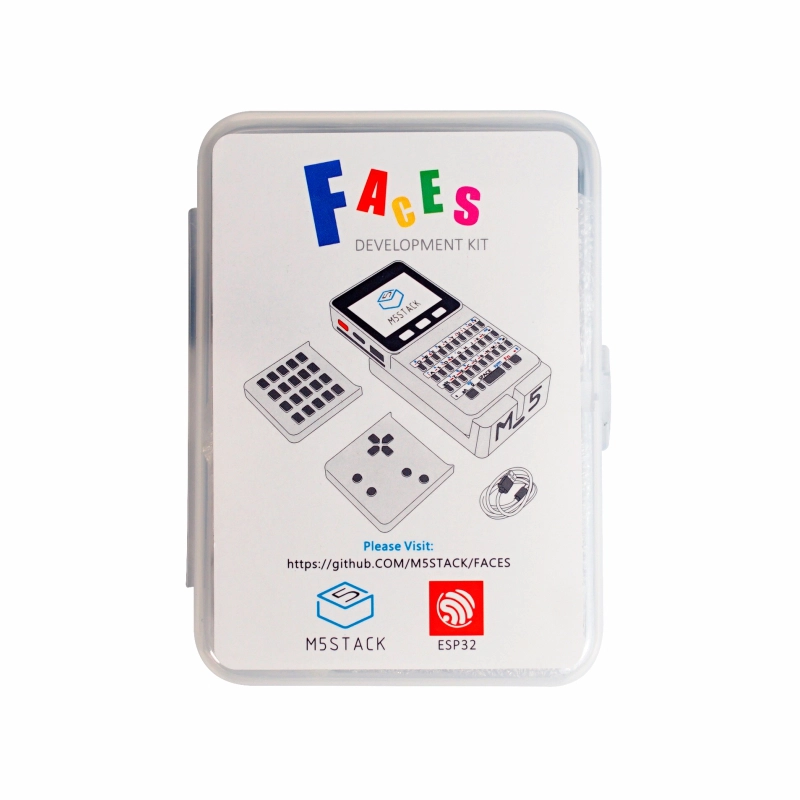
- 3 × FACES Keyboards (GameBoy, Calculator, QWERTY)
- 8 × Dupont Cables
- 6 × M3 × 12 mm Screws
- 1 × Hex Key L-Shape
- 1 × USB Type-C Cable (100 cm)
Applications
- Handheld game console
- Calculator
- Data-entry peripheral
- IoT controller
Specifications
| Main Control Resources | Parameter |
|---|---|
| SoC | ESP32-D0WDQ6@Dual-core processor, Main frequency 240MHz |
| DMIPS | 600 |
| SRAM | 520KB |
| Flash | 16MB (Old version 4MB) |
| Wi-Fi | 2.4 GHz Wi-Fi |
| Input Voltage | 5V@500mA |
| Host Interface | USB Type-C x 1, GROVE (I2C+I/O+UART) x 1 |
| Core Base Interface | PIN (G1, G2, G3, G16, G17, G18, G19, G21, G22, G23, G25, G26, G35, G36) |
| IPS Screen | 2 inch, 320x240 Colorful TFT LCD, ILI9342C, Max brightness 853nit |
| Speaker | 1W-0928 |
| Buttons | Custom buttons x 3 |
| Antenna | 2.4G 3D antenna |
| Lithium Battery | 600mAh@3.7V |
| MEMS | MPU6886+BMM150 |
| 2.4G Antenna | Proant 440 |
| Operating Temperature | 0 ~ 60°C |
| Case Material | Plastic (PC) |
| Product Size | 58.2 x 54.2 x 18.7mm |
| Product Weight | 94.0g |
| Package Size | 120.0 x 85.0 x 65.0mm |
| Gross Weight | 264.0g |
Learn
Power On/Off
- Power On: Press the red power button on the left once
- Power Off: Double-click the red power button on the left
Note: By default, the device cannot be powered off while it is powered via USB.
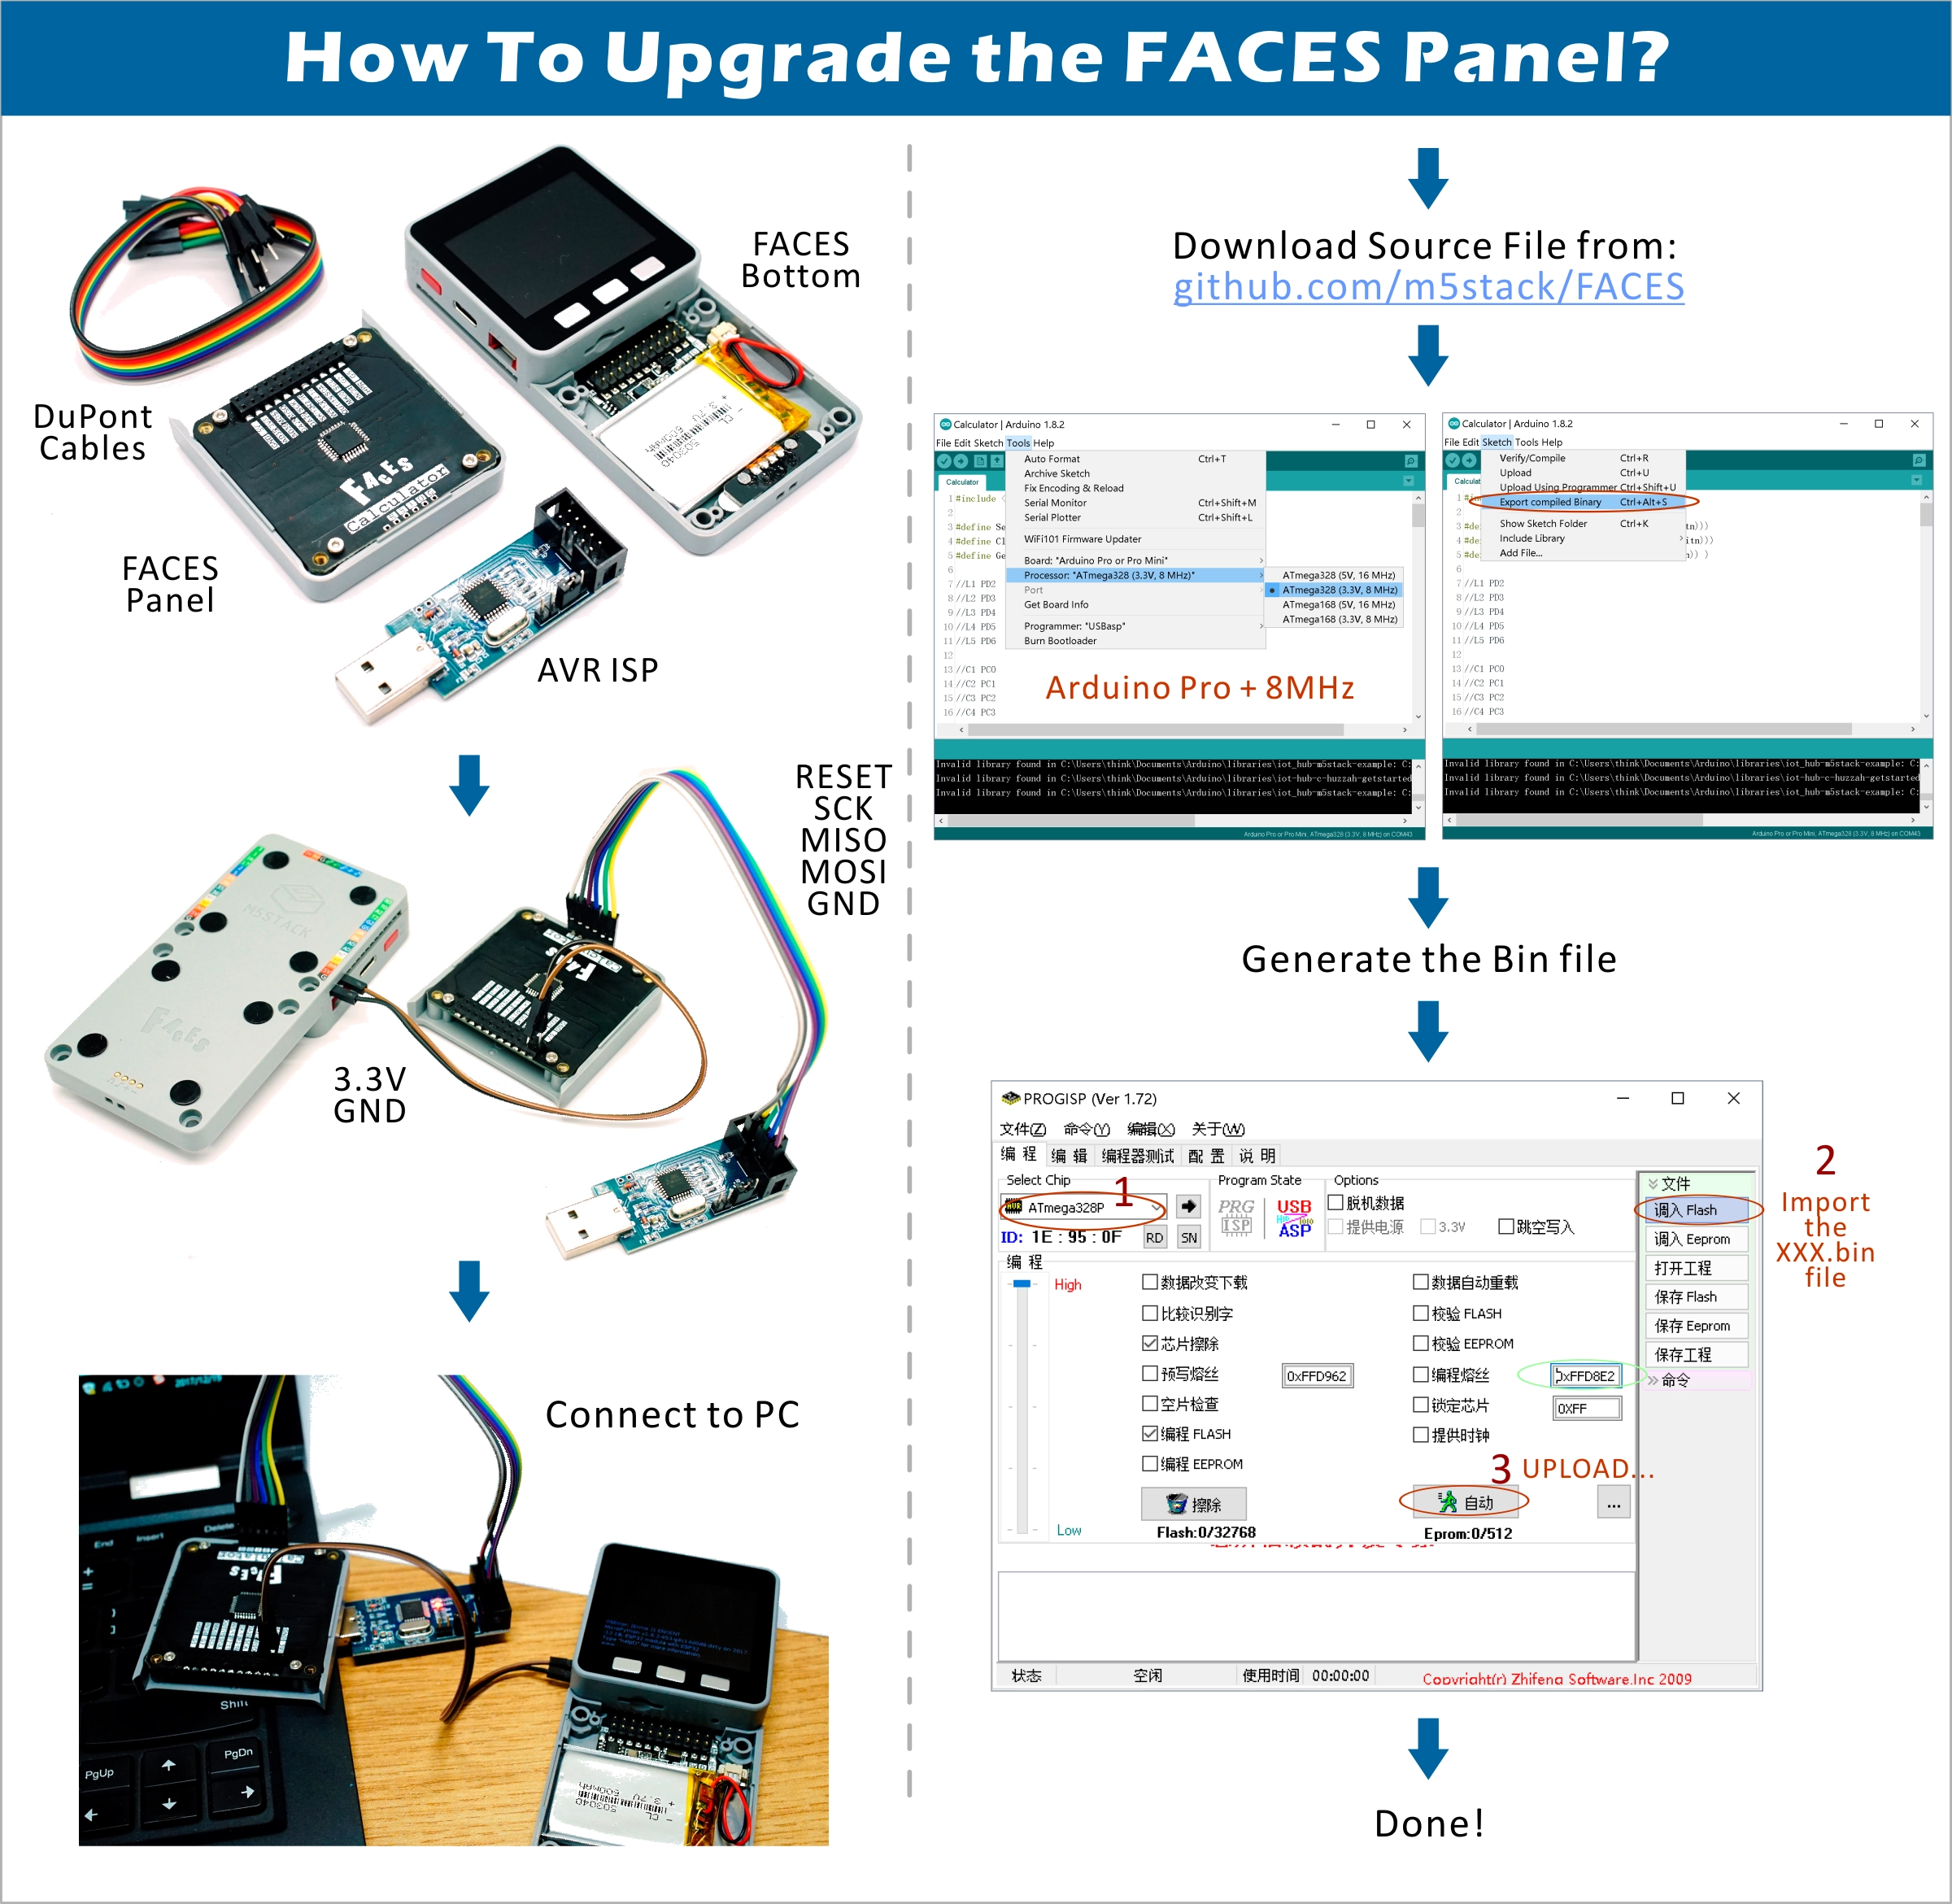
Upgrade
Schematics
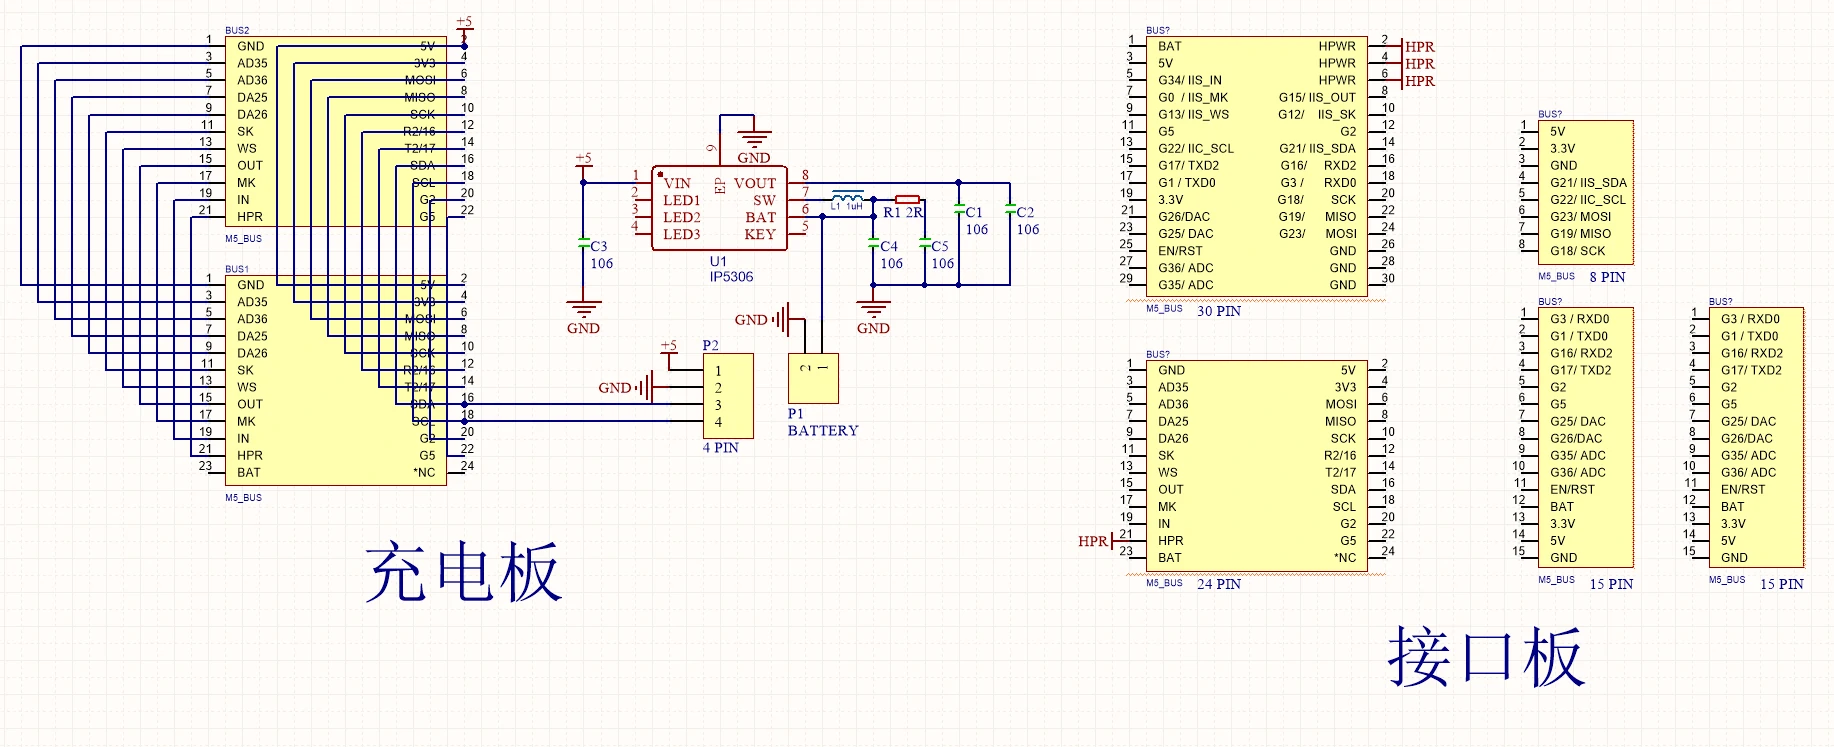
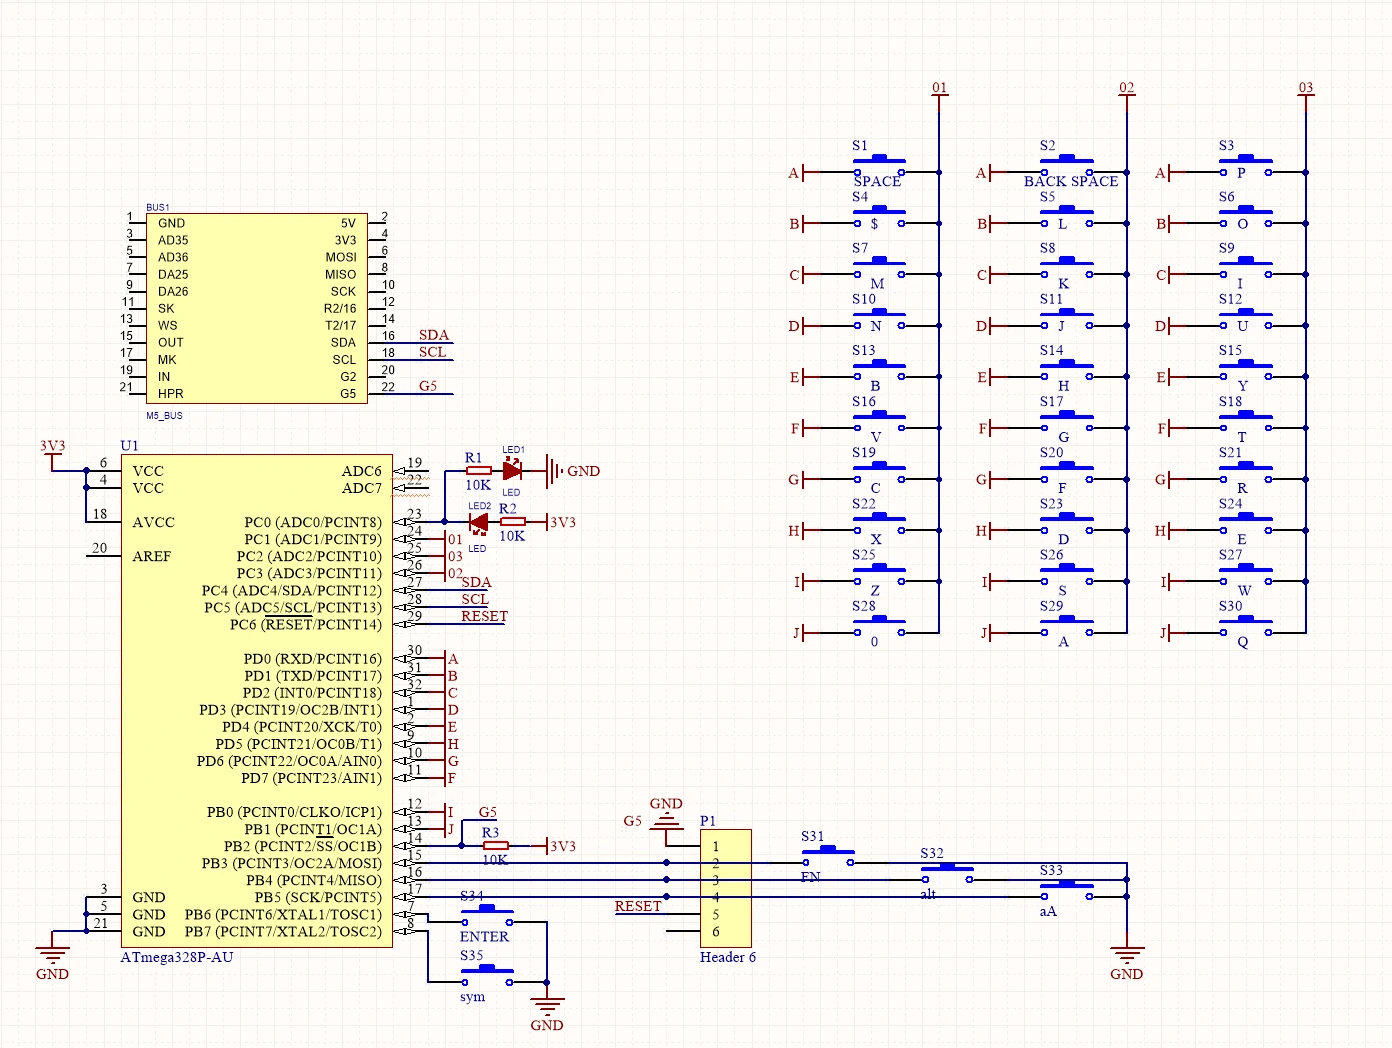
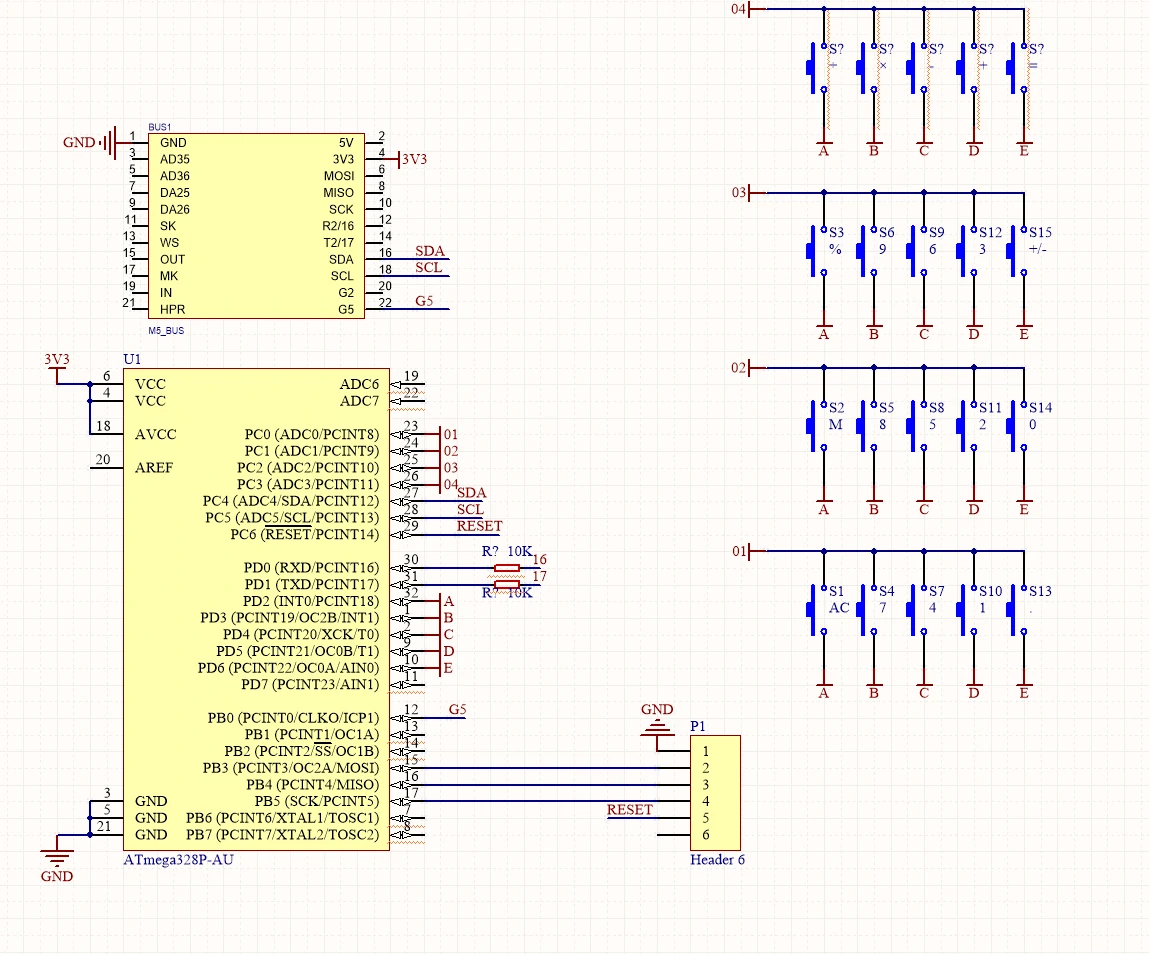
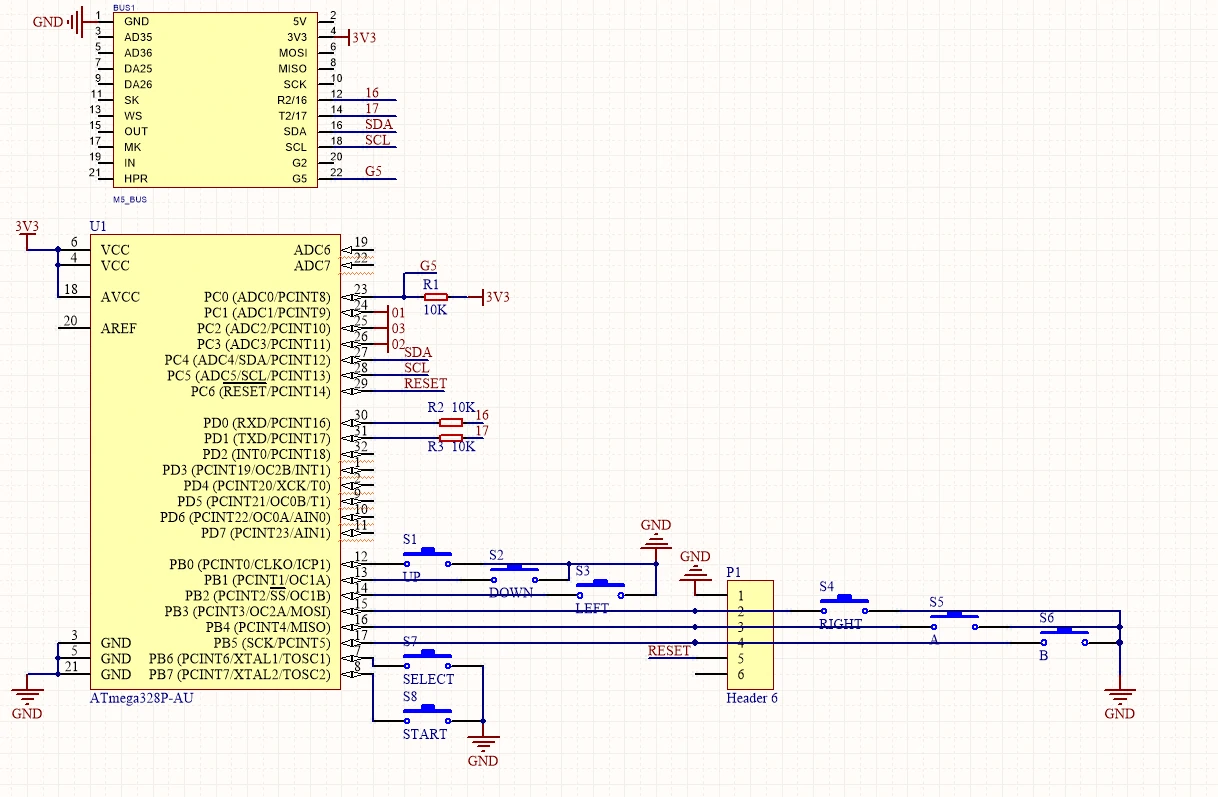


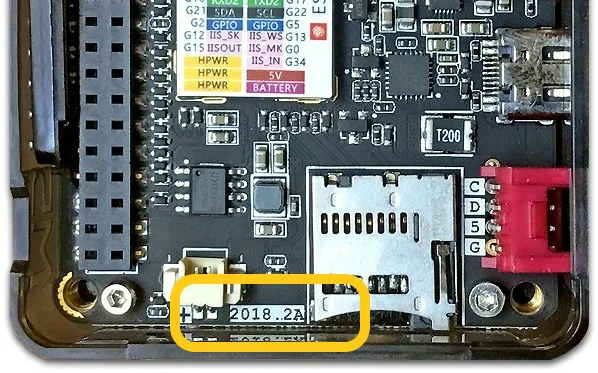
PinMap
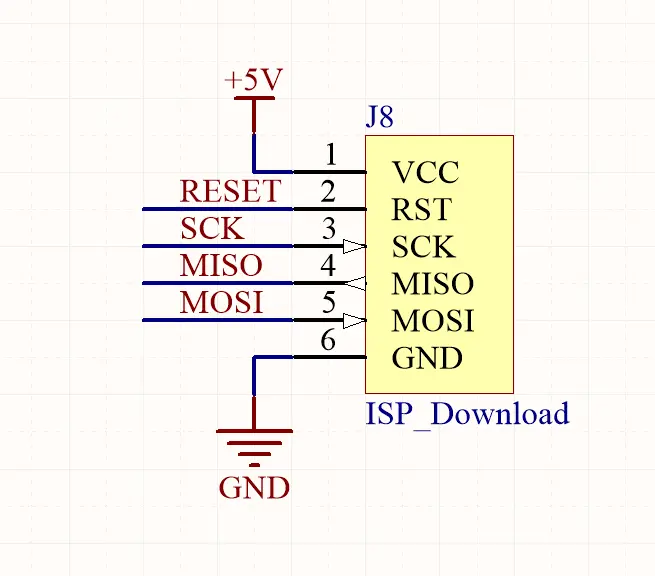
Mega328 ISP download-interface pin definition
ESP32 ADC/DAC
| ADC1 | ADC2 | DAC1 | DAC2 |
|---|---|---|---|
| 8 channels | 10 channels | 2 channels | 2 channels |
| G32-39 | G0/2/4/12-15/25-27 | G25 | G26 |
HY2.0-4P
| HY2.0-4P | Black | Red | Yellow | White |
|---|---|---|---|---|
| PORT.A | GND | 5 V | G21 | G22 |
| PORT.B | GND | 5 V | G26 | G36 |
| PORT.C | GND | 5 V | G16 | G17 |
IP5306 Charging/Discharging Voltage Parameters
| Charging | Discharging |
|---|---|
| 0.00 ~ 3.40 V → 0 % | 4.20 ~ 4.07 V → 100 % |
| 3.40 ~ 3.61 V → 25 % | 4.07 ~ 3.81 V → 75 % |
| 3.61 ~ 3.88 V → 50 % | 3.81 ~ 3.55 V → 50 % |
| 3.88 ~ 4.12 V → 75 % | 3.55 ~ 3.33 V → 25 % |
| 4.12 ~ / → 100 % | 3.33 ~ 0.00 V → 0 % |
M5-Bus
| FUNC | PIN | LEFT | RIGHT | PIN | FUNC |
|---|---|---|---|---|---|
| GND | 1 | 2 | G35 | ADC | |
| GND | 3 | 4 | G36 | ADC | |
| GND | 5 | 6 | RST | EN | |
| MOSI | G23 | 7 | 8 | G25 | DAC/SPK |
| MISO | G19 | 9 | 10 | G26 | DAC |
| SCK | G18 | 11 | 12 | 3V3 | |
| RXD0 | G3 | 13 | 14 | G1 | TXD0 |
| RXD2 | G16 | 15 | 16 | G17 | TXD2 |
| Int SDA | G21 | 17 | 18 | G22 | Int SCL |
| GPIO | G2 | 19 | 20 | G5 | GPIO |
| I2S_SK | G12 | 21 | 22 | G13 | I2S_WS |
| I2S_OUT | G15 | 23 | 24 | G0 | I2S_MK |
| HPWR | 25 | 26 | G34 | I2S_IN | |
| HPWR | 27 | 28 | 5V | ||
| HPWR | 29 | 30 | BAT |
For more information on pin allocation and remapping, please refer to the ESP32 datasheet.
Structure
Datasheets
Softwares
Arduino
- Faces Kit Arduino Quick Start
- Faces Kit Arduino Test Examples
- Faces Kit Arduino API
- GameBoy Arduino Test Program
- KeyBoard Arduino Test Program
- Calculator Arduino Test Program
UiFlow1
UiFlow2
USB Driver
Click the links below to download the driver that matches your operating system. Two driver chip versions exist: CP210X (for CP2104 versions) and CP34X (for CH9102 versions). After unzipping, choose the installer matching your OS bitness. (If unsure which USB chip your device uses, install both drivers. CH9102_VCP_SER_MacOS v1.7 may report an error during installation, but the driver is actually installed—just ignore the message.)
| Driver Name | Applicable Chip | Download |
|---|---|---|
| CP210x_VCP_Windows | CP2104 | Download |
| CP210x_VCP_MacOS | CP2104 | Download |
| CP210x_VCP_Linux | CP2104 | Download |
| CH9102_VCP_SER_Windows | CH9102 | Download |
| CH9102_VCP_SER_MacOS v1.7 | CH9102 | Download |
Easyloader
| Easyloader | Download | Note |
|---|---|---|
| Faces Kit Factory Firmware Easyloader | download | / |
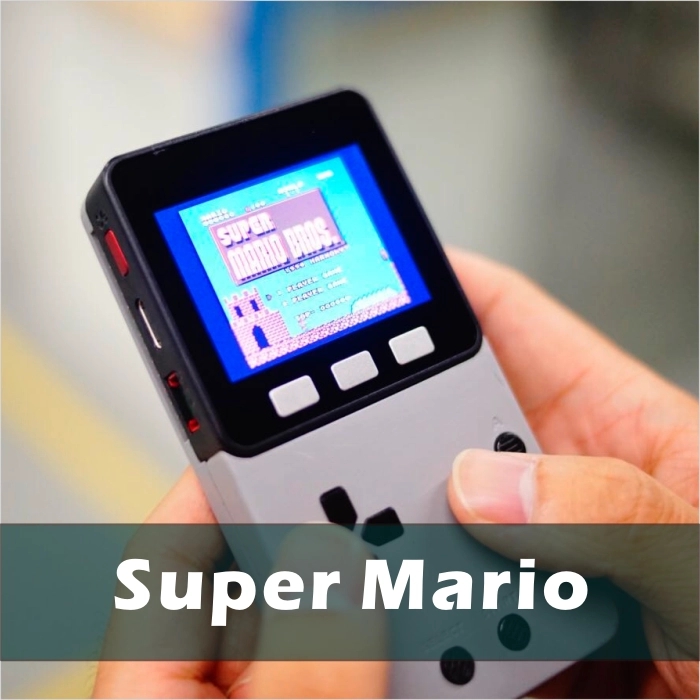
GameBoy Keyboard
If you want to play classic games with M5Core, the GameBoy panel paired with M5Core is the perfect solution. Simply upload a game-emulator program to M5Core and connect the GameBoy panel. Connection diagram:
ESPTool flashing tutorial: gameboy_burn_a_nes_game
Click here to flash a sample game with one click
The other two panels (Calculator keyboard and full keyboard) can be used in applications requiring data entry or complex control. When replacing panels, it is recommended to remove the M5Core first and then disassemble the panel to reduce difficulty.
Others
- Key string values
| Key | AC | M | % | ÷ | 0-9 | X | - | + | = | +/- | . |
|---|---|---|---|---|---|---|---|---|---|---|---|
| Val | A | M | % | / | 0-9 | * | - | + | = | ` | . |
| ESP32 Chip | G23 | G19 | G18 | G14 | G27 | G33 | G32 | G4 |
|---|---|---|---|---|---|---|---|---|
| ILI9342C | MOSI/MISO | / | CLK | CS | DC | RST | BL | |
| TF Card | MOSI | MISO | CLK | CS |
Key Int Values (Int values are the ASCII value of each key)
| Key | AC | M | % | ÷ | 0-9 | X | - | + | = | +/- | . |
|---|---|---|---|---|---|---|---|---|---|---|---|
| Val | 65 | 77 | 37 | 47 | |||||||
| 48-57 | 42 | 45 | 43 | 61 | 96 | 46 |
Video
- Faces Kit Factory Firmware Introduction
Version Change
| Release Date | Product Change |
|---|---|
| 2017.12 | Initial release |
| 2019.6 | MPU9250 changed to MPU6886 + BMM150 |
| 2019.7 | TN screen changed to IPS screen |
