

UiFlow Tutorial
UiFlow1 Quick Start
2. Firmware & Program 1.0
UiFlow1 Development Guide
Project Management
Use LTE network
UiFlow1 Blockly
Event
UI
Unit
Module
Hat
UiFlow2 Quick Start
2. Firmware & Program 2.0
UiFlow2 Development Guide
UI Editor
Device Security & Sharing
UiFlow2 Video Column
UiFlow2 Web IDE Introduction
UiFlow2 Introduction
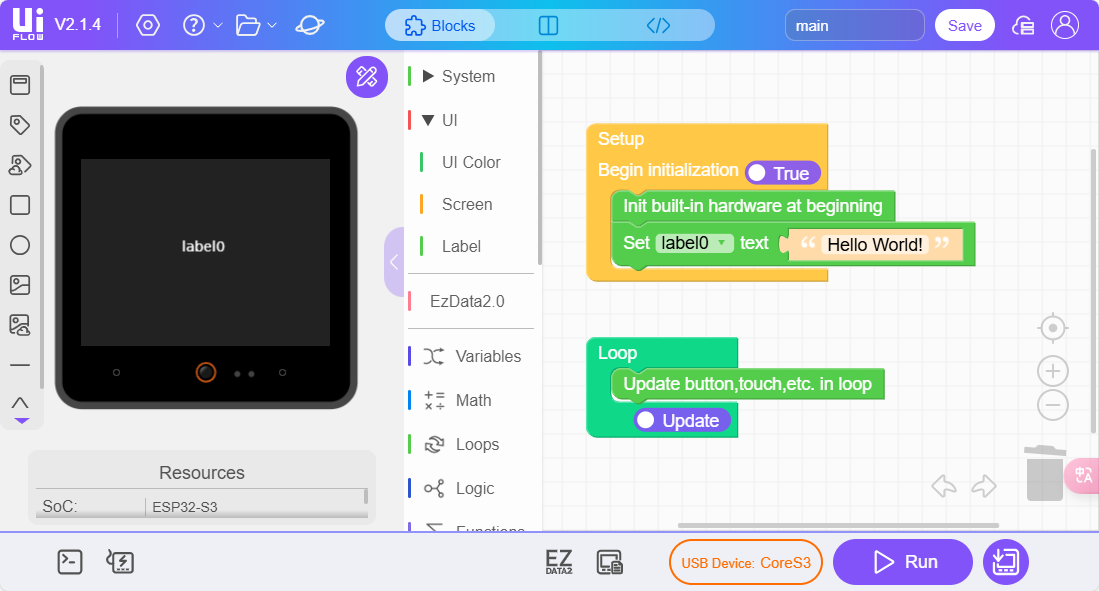
UiFlow2 is a graphical programming web integrated development environment (IDE). Based on Blockly drag-and-drop block programming, it supports one-click wired/wireless program deployment, compile-free running, and quick control of M5Stack devices and hundreds of sensor modules without writing code. Based on UiFlow 1, UiFlow 2 adds features such as project sharing and device sharing, making team collaboration easier and providing a more efficient development experience to help users move from concept to product faster.
- Visit UiFlow2 Web IDE
- See UiFlow2 Development Guide
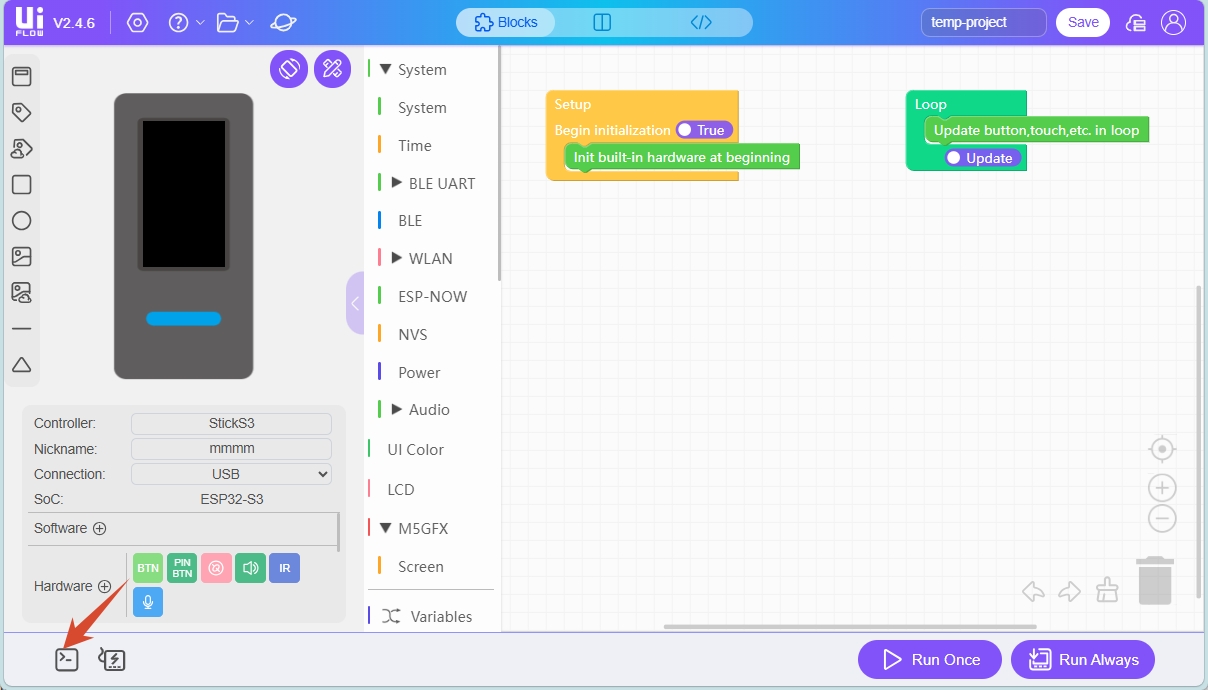
Device Connection Methods
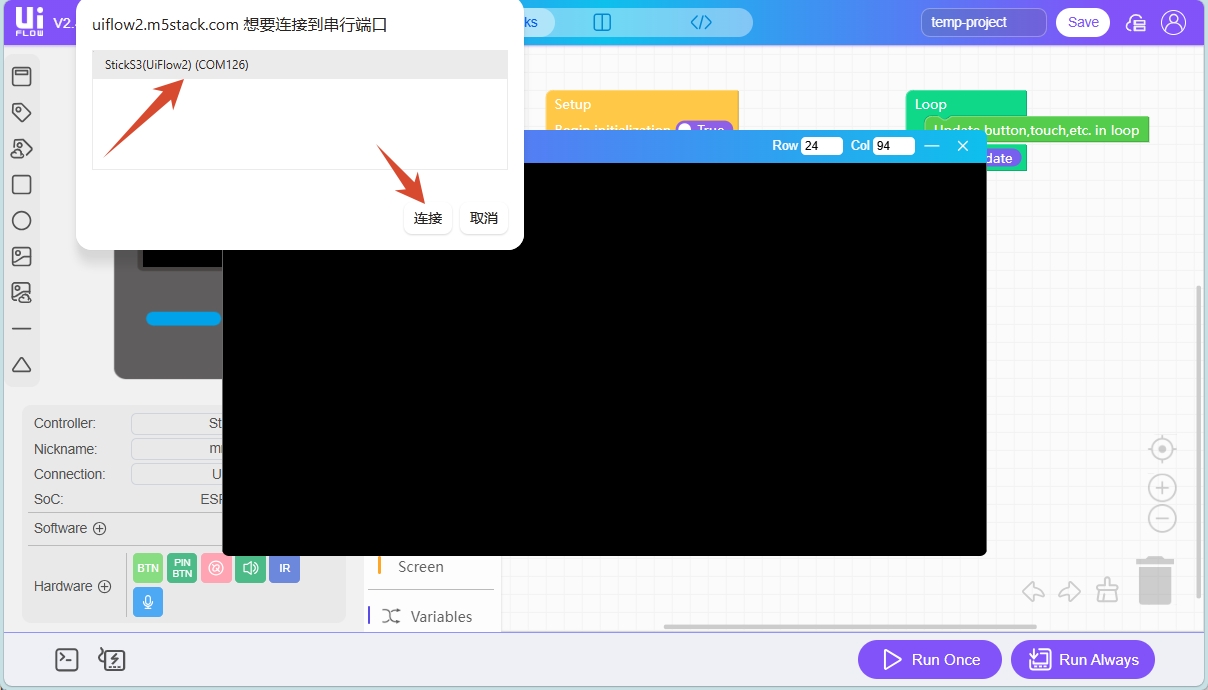
Before developing on a device, burn the corresponding UiFlow2 firmware first. After connecting the device to UiFlow2 via Access Code or USB, you can deploy and debug programs. The following describes the two connection methods:
- Access Code method: The device deploys programs over the network. Enter the device access code on the UiFlow2 page. After configuration is complete, programs can be deployed wirelessly.
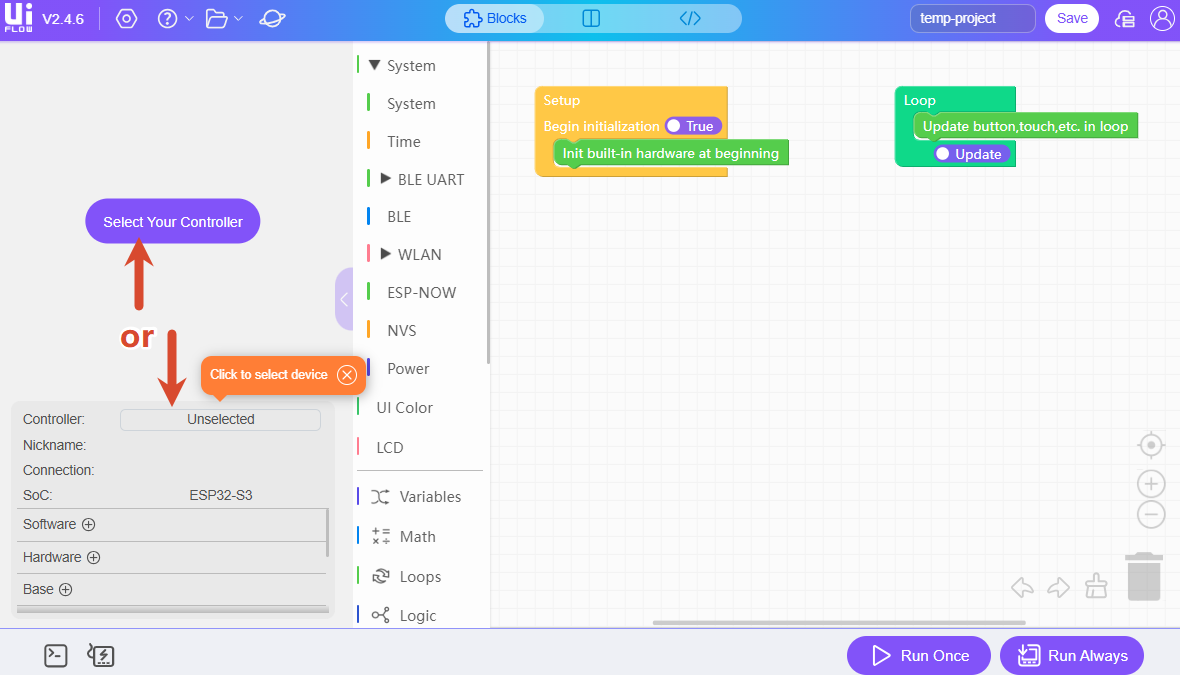
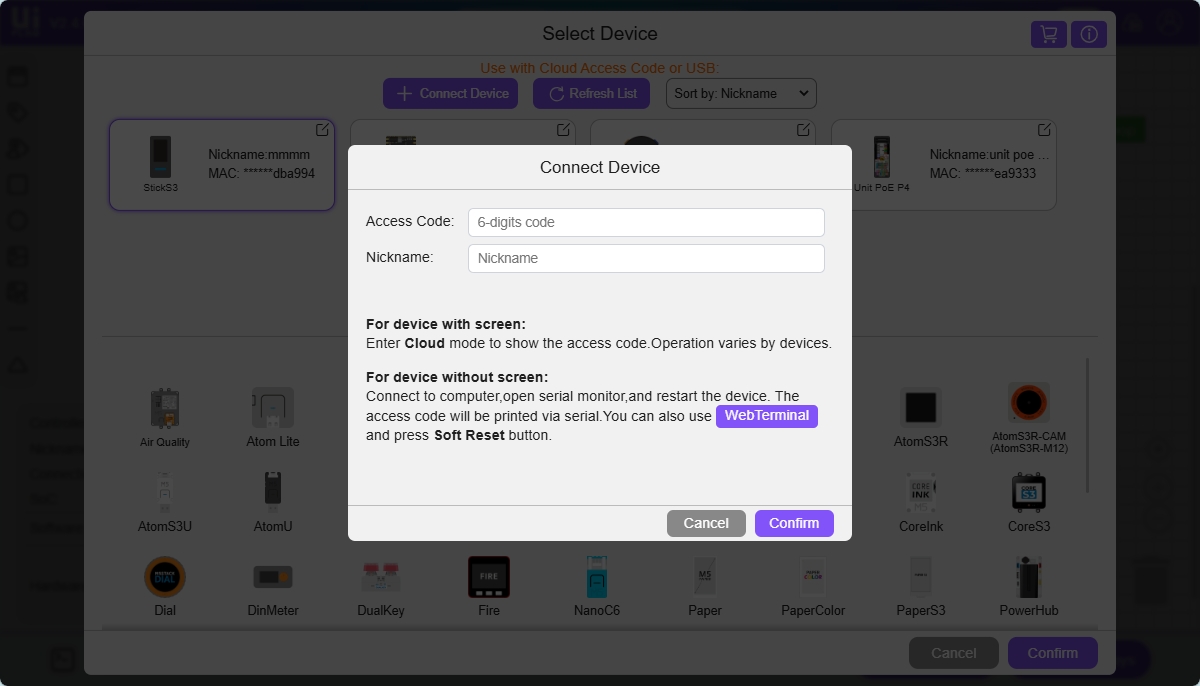
- USB method: Connect the device to the computer with a USB Type-C data cable, then select the corresponding serial port on the UiFlow2 page to complete the connection.
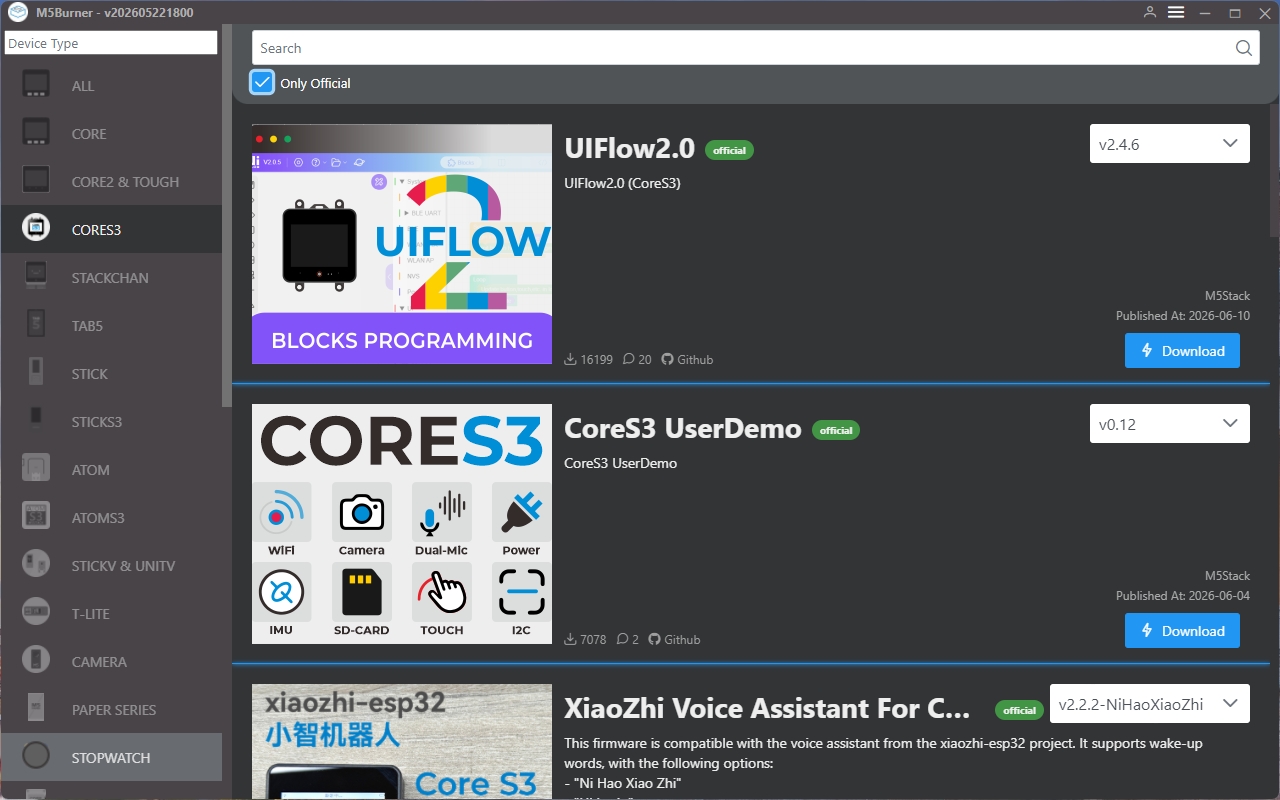
M5Burner
M5Burner is M5Stack's official dedicated firmware burning software. UiFlow2 firmware for all product series can be burned through M5Burner, and device configuration information such as Wi-Fi can also be preset during the burning process.
In addition to firmware burning, M5Burner also supports firmware export and firmware sharing, allowing completed firmware to be published to M5Burner for other users to download. For detailed tutorials, see Firmware Export and Firmware Publishing.
Download the corresponding version of M5Burner according to your operating system, then unzip and run the program:
| Software Version | Download Link |
|---|---|
| M5Burner_Windows | Download |
| M5Burner_MacOS | Download |
| M5Burner_Linux | Download |
Firmware Burning
Refer to the tutorial for the corresponding product to burn UiFlow2 firmware and run programs.