Home Assistant
Voice Assistant
キット
センサー
Chain DualKey Home Assistant 連携ガイド
このガイドでは、Chain DualKey プログラマブルデュアルキー開発ボードを Home Assistant に統合し、ボタン操作および拡張モジュールの制御を実現する方法について説明します。
必要なもの
- Home Assistant ホスト。
- Home Assistant に ESPHome Builder をインストールして有効化しておくこと。
- Chain DualKey。
- Chain Angel。
- Chain Encoder。
- Chain Key。
- Chain Joystick。
- Chain Tof。
ご注意
本チュートリアルでは、ファームウェアの コンパイルおよびアップロードに ESPHome 2025.1.2 を使用しています。コンパイル/アップロードに問題が発生した場合は、このバージョンの ESPHome への切り替えをご検討ください。
デバイスの追加
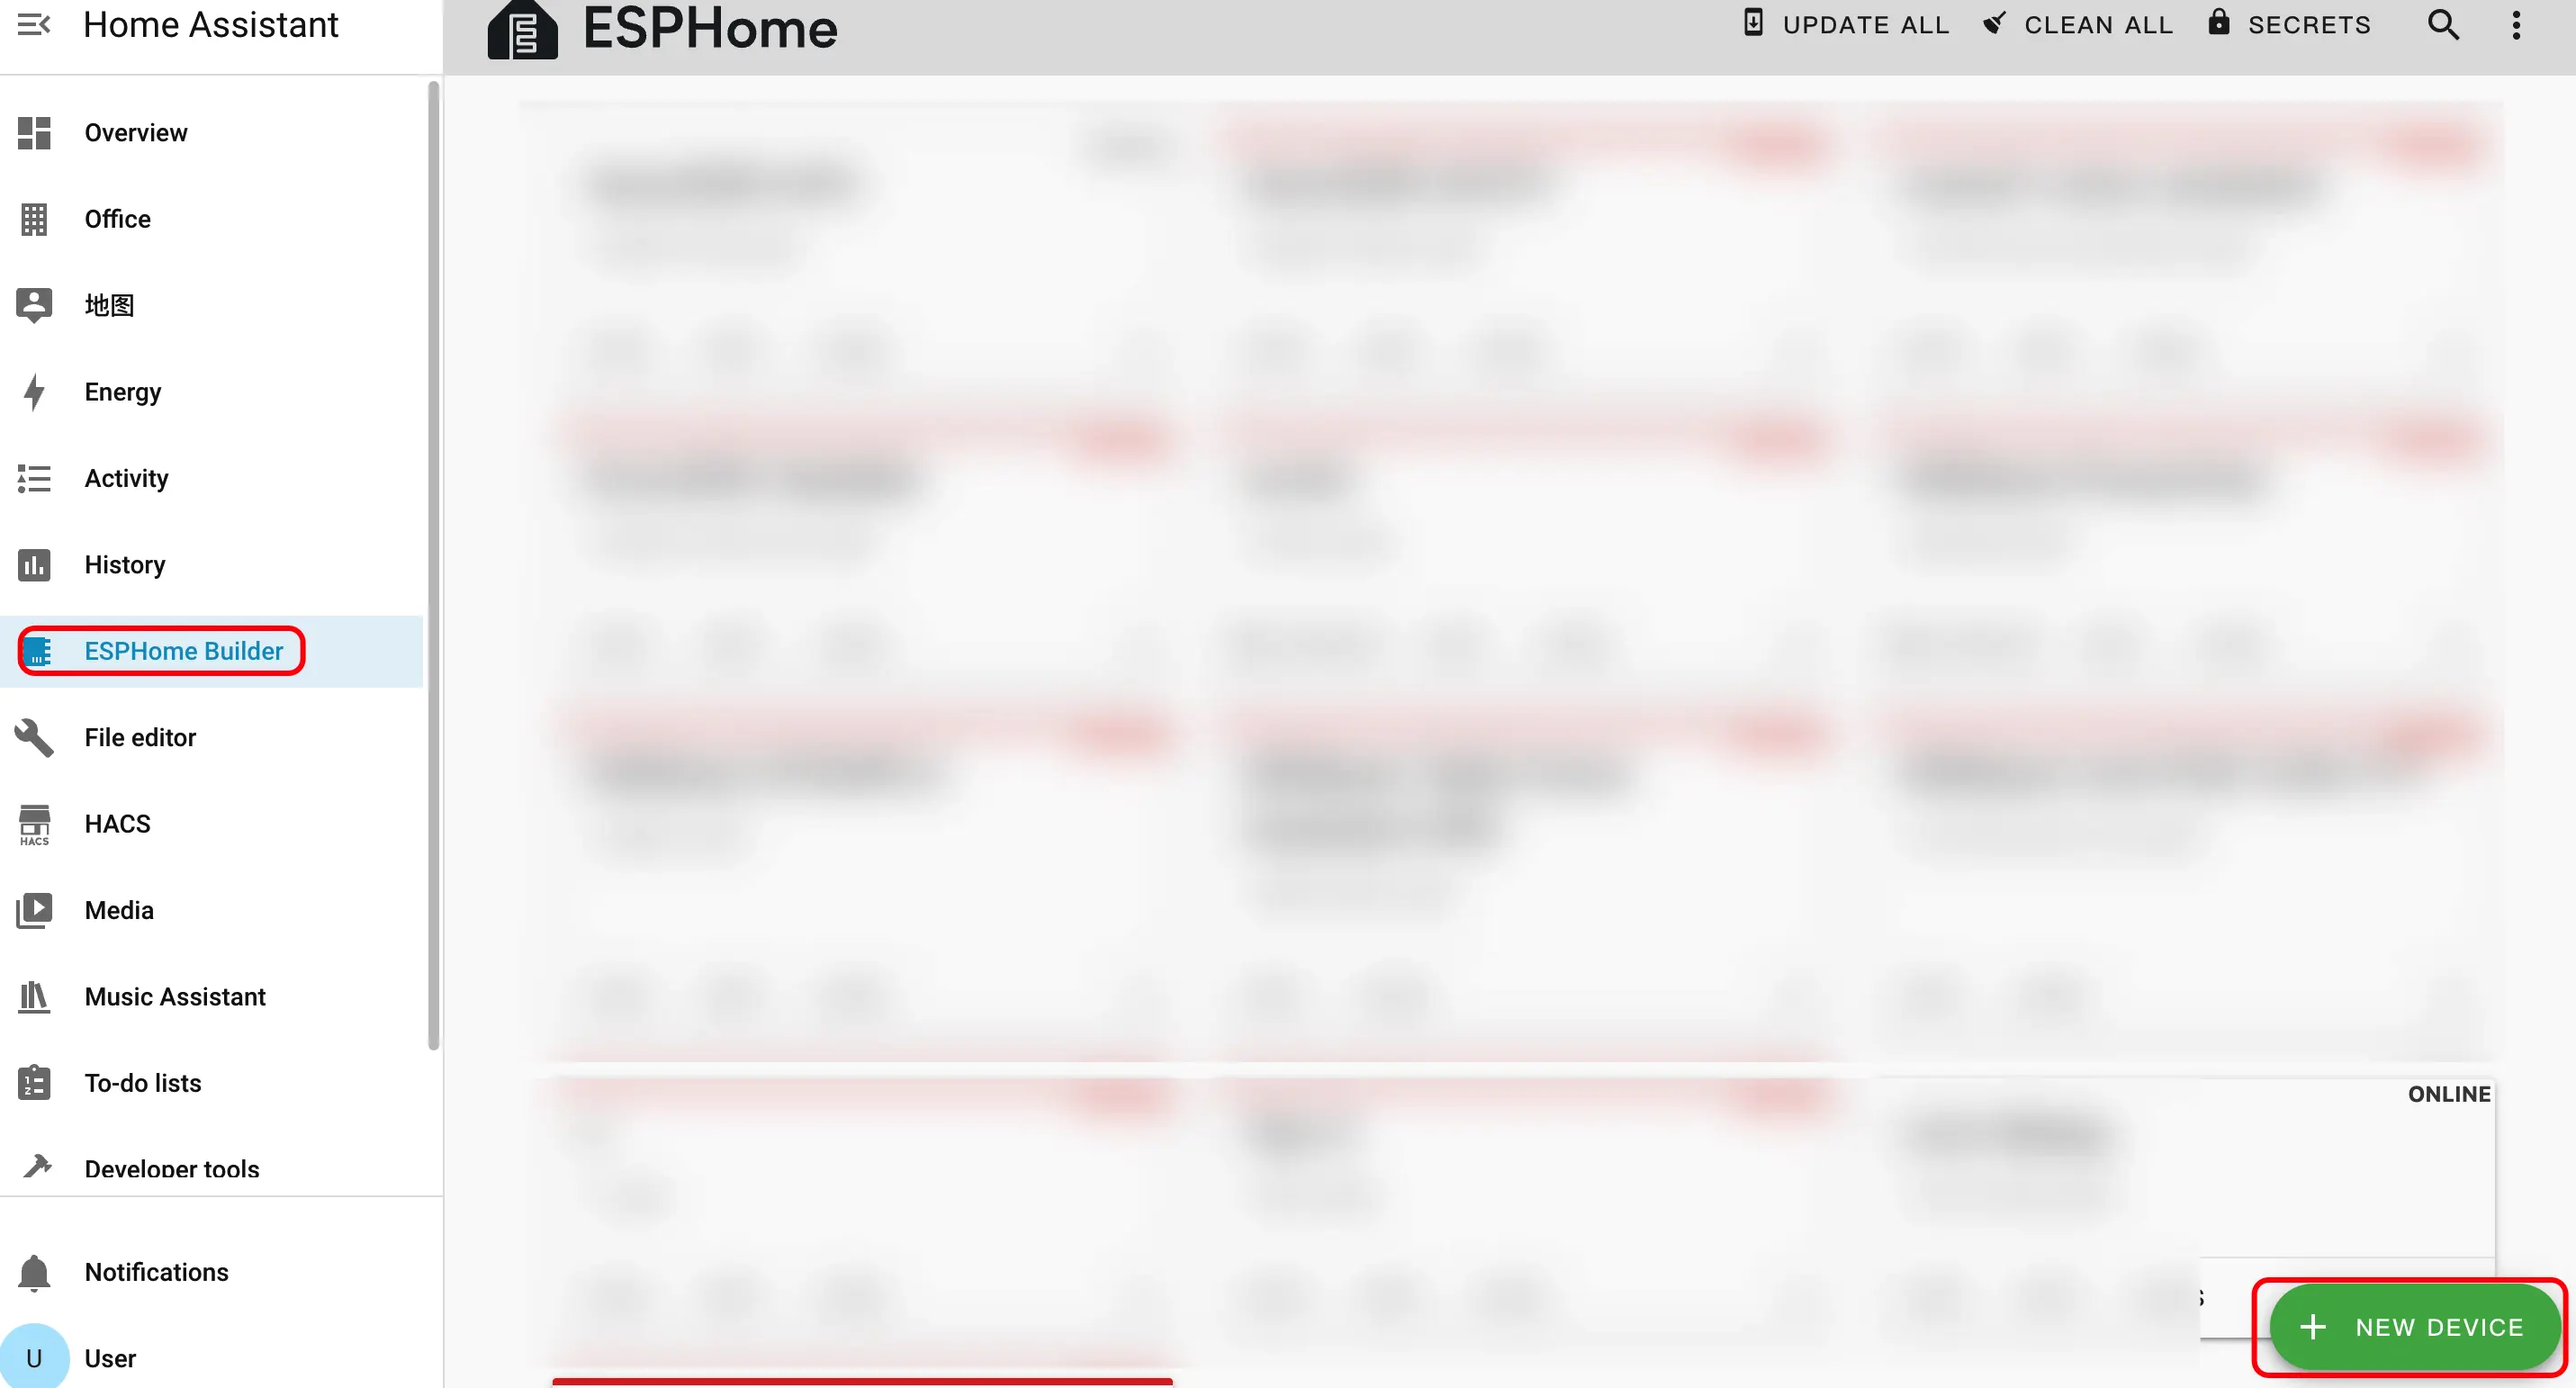
- 新しいデバイスを作成します。右下の緑色のボタンをクリックしてデバイスを作成します。
- デバイス名を作成します。
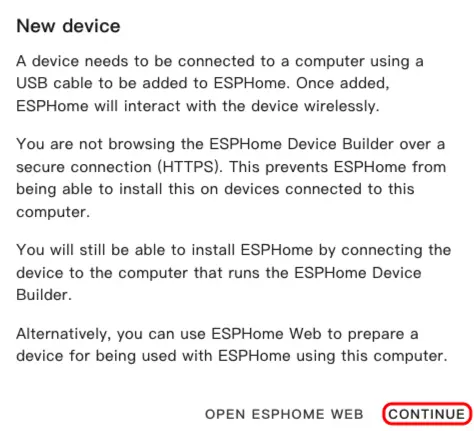
CONTINUEをクリックします。
New Device Setupをクリックします。

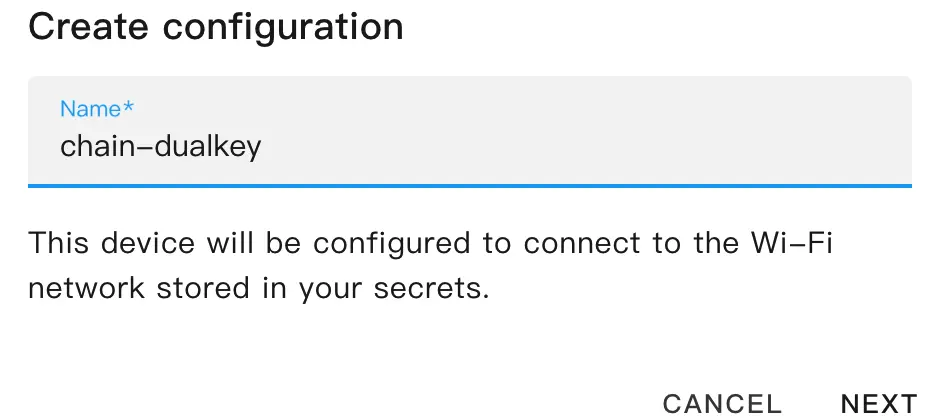
- デバイス名を入力し、
NEXTをクリックします。
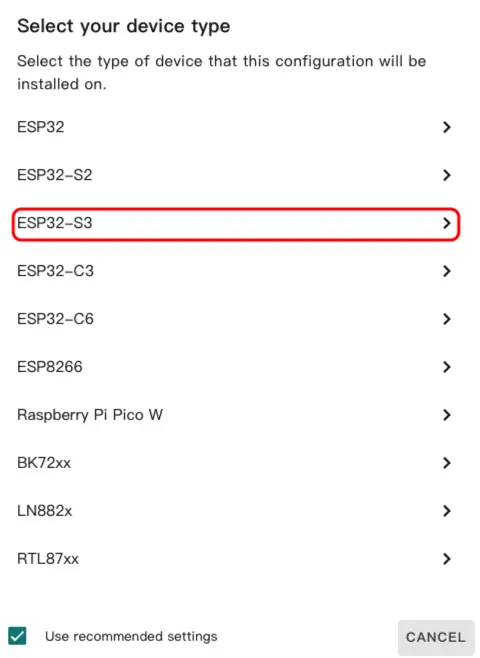
デバイスタイプを選択します。
ESP32-S3をクリックします。
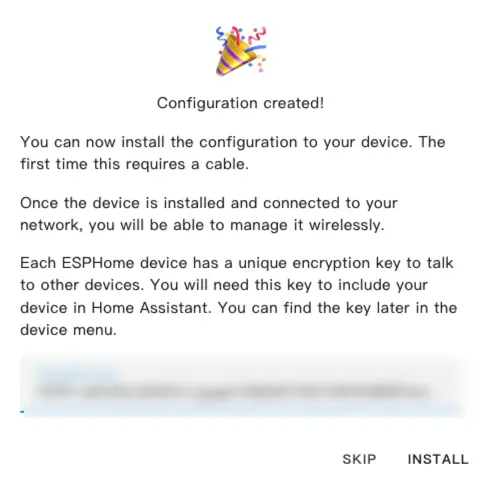
SKIP をクリックします。
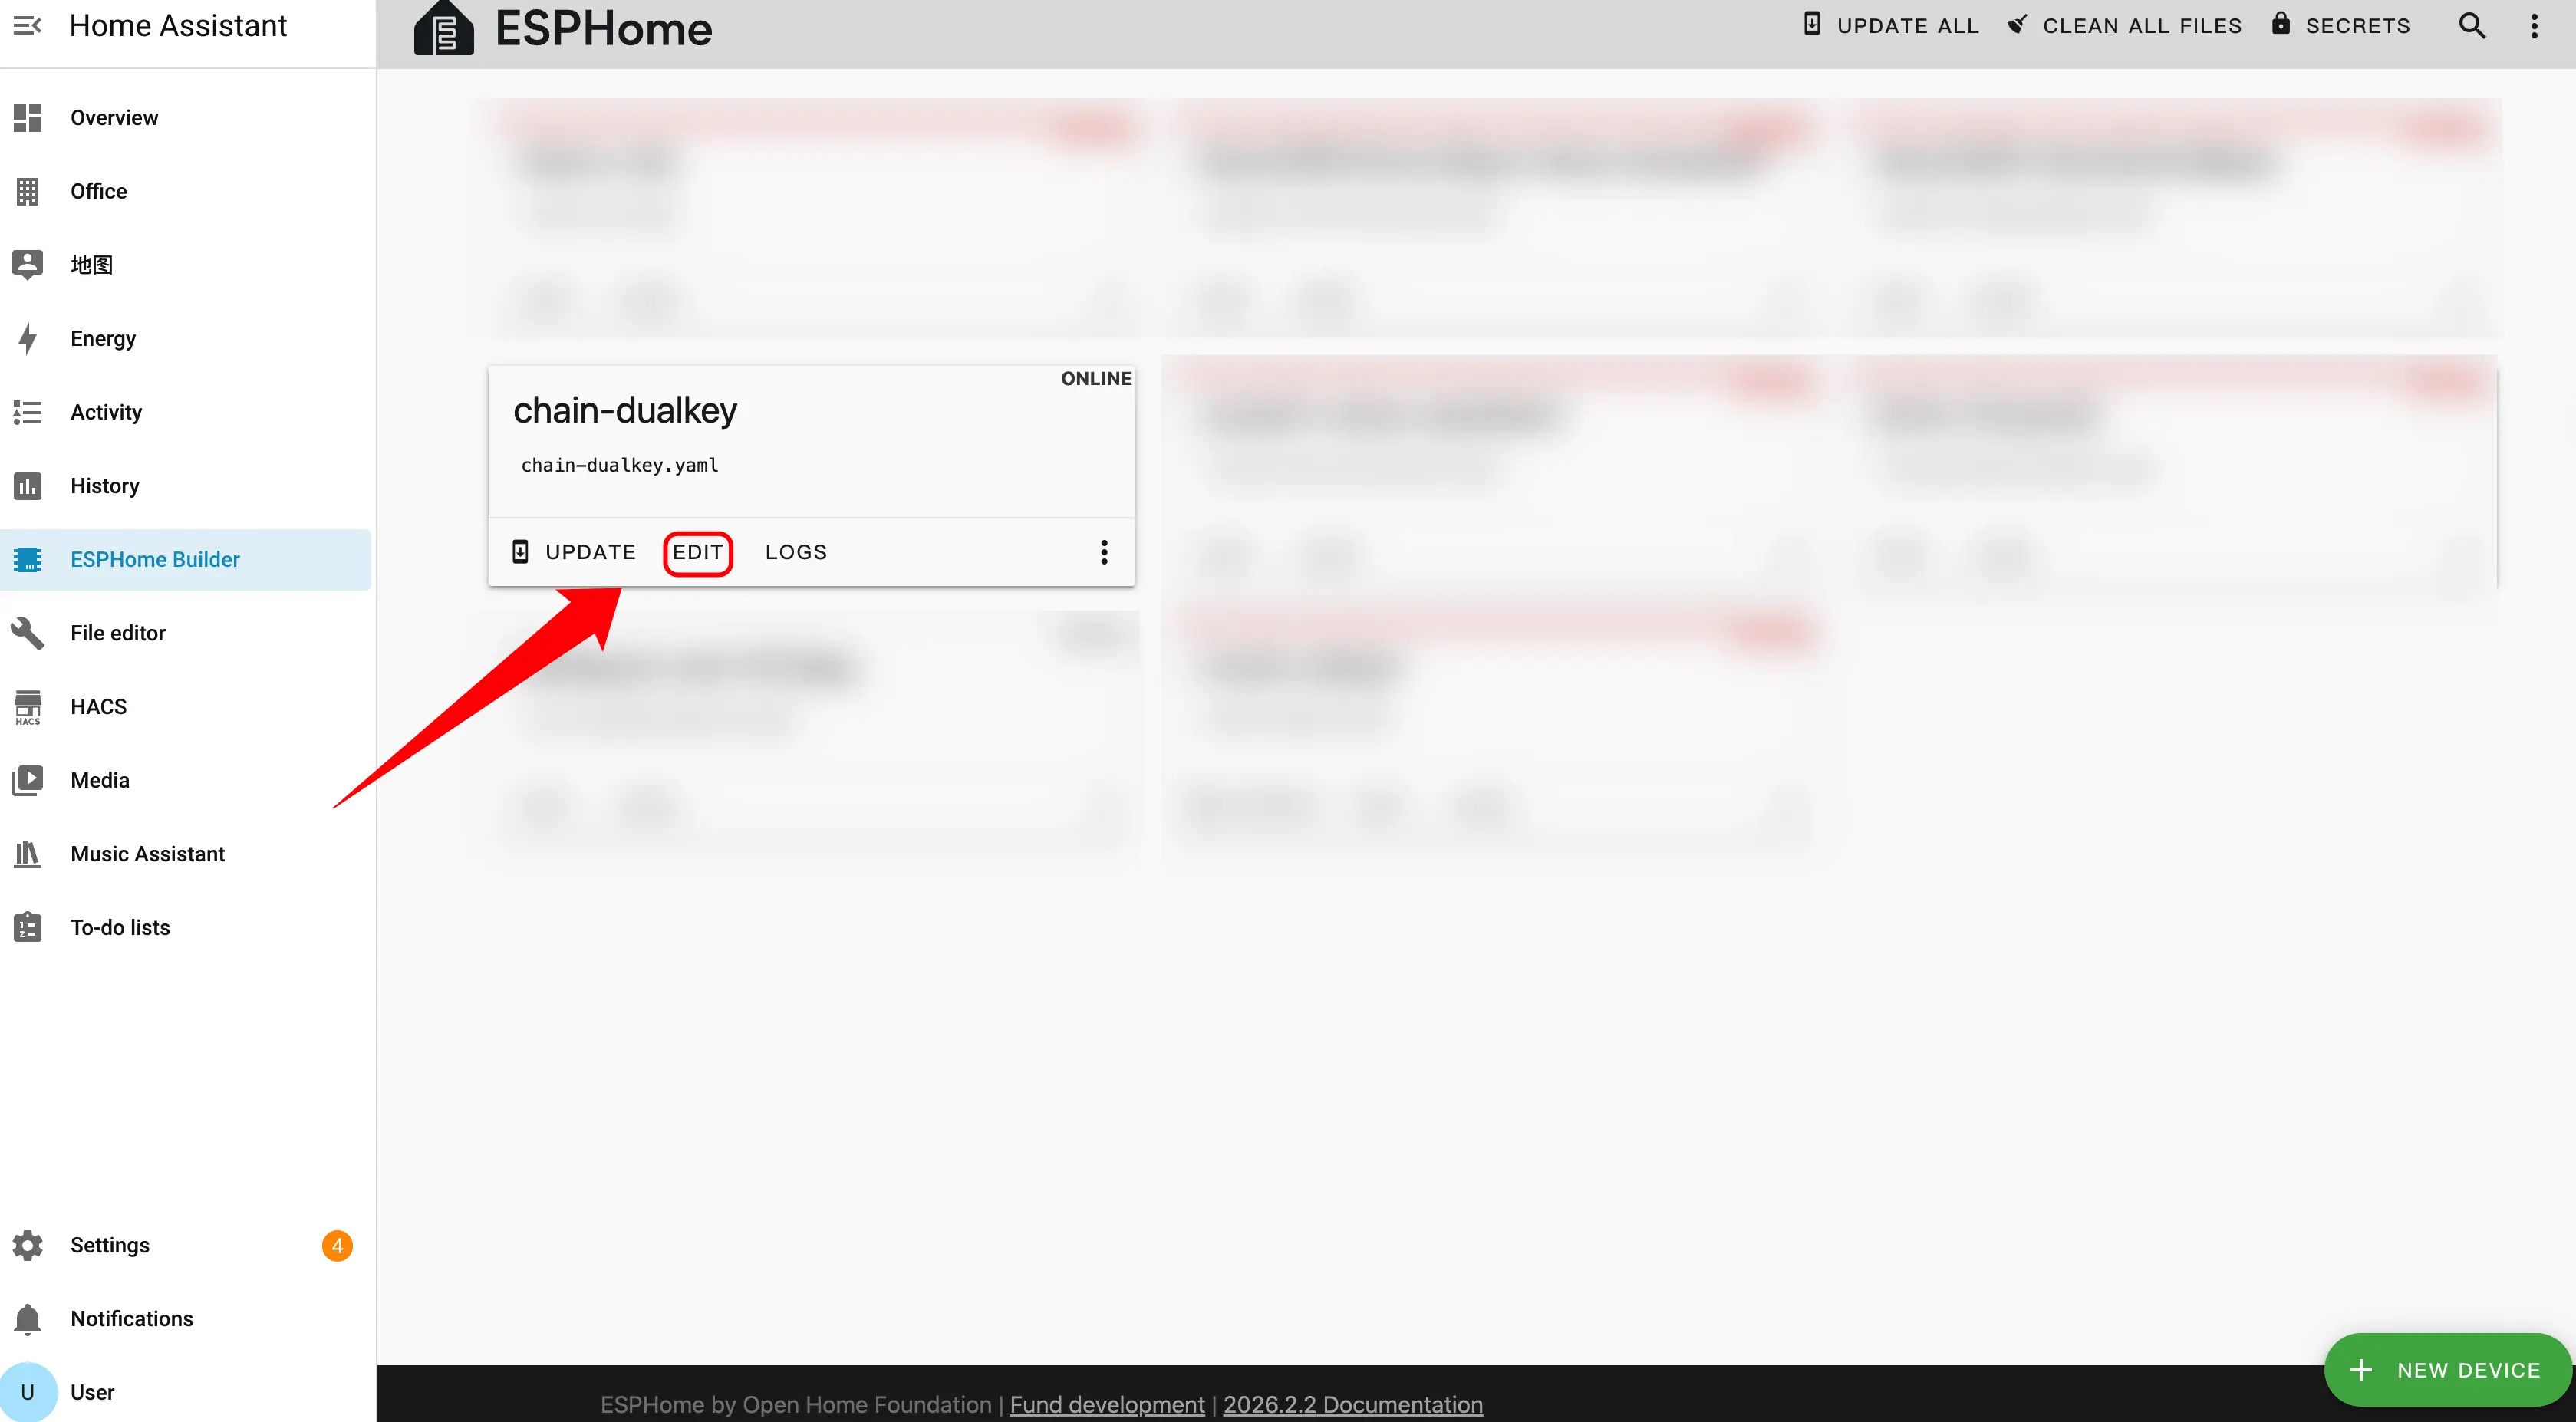
- YAML ファイルを編集します。
EDITをクリックすると、YAML ファイルを使用してデバイスの機能をカスタマイズできます。
デバイス設定
Master はシステムのメインコントローラーとして機能します。拡張センサーを接続する際は、接続方向と ID 番号の順序を正しく区別する必要があります。
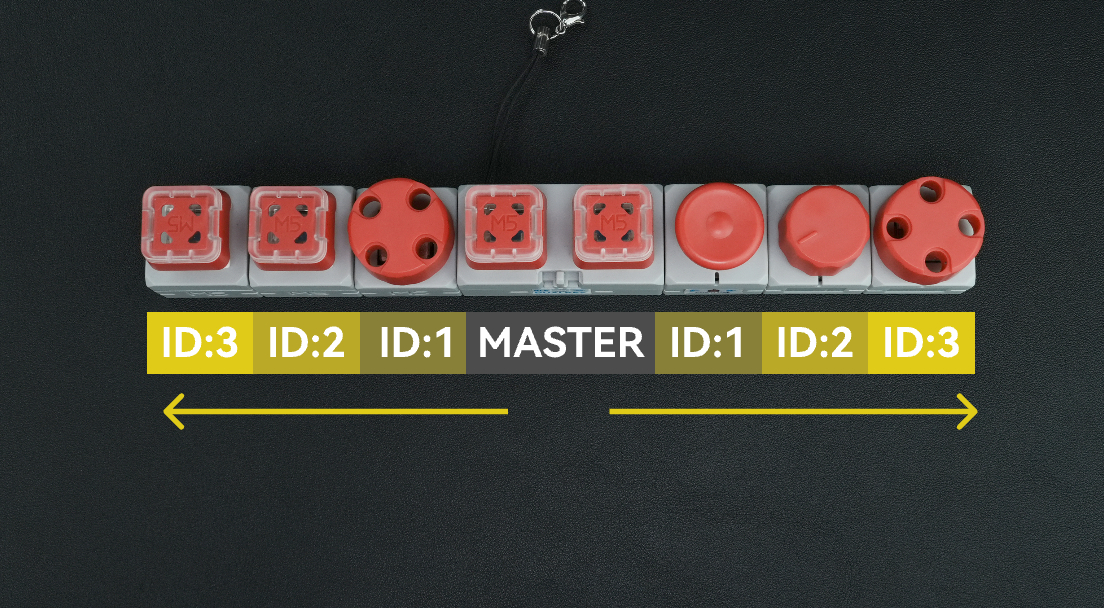
方向の選択
拡張センサーが Master のどちら側に接続されているかに応じて、対応する uart_id を選択します。
- Master の左側に接続 →
chain_uart_leftを使用します。 - Master の右側に接続 →
chain_uart_rightを使用します。
ID 番号のルール
chain_id は、Master に対する拡張センサーの位置を示します。
- 番号は Master に最も近いモジュールから始まります。
- ID は順番に増加します(ID:1 → ID:2 → ID:3 …)。
- 左右それぞれで独立して番号が付けられます。
- 正しい順序については上図を参照してください。
設定例
uart_id:chain_uart_left。chain_id:1。
Chain DualKey
uart:
  - id: chain_uart_right
    tx_pin: GPIO6
    rx_pin: GPIO5
    baud_rate: 115200

  - id: chain_uart_left
    tx_pin: GPIO48
    rx_pin: GPIO47
    baud_rate: 115200

sensor:
  - platform: adc
    pin: GPIO10
    name: "ADC_BAT"
    update_interval: 1s

  - platform: adc
    pin: GPIO2
    name: "ADC_VBUS"
    update_interval: 1s

  - platform: adc
    pin: GPIO9
    name: "ADC_CHARGE"
    update_interval: 1s

output:
  - platform: gpio
    id: pwr_en
    pin: GPIO40

light:
  - platform: esp32_rmt_led_strip
    id: key_light_raw
    internal: true
    pin: GPIO21
    num_leds: 2
    chipset: ws2812
    rgb_order: GRB
    restore_mode: ALWAYS_OFF

  - platform: partition
    name: "Key Light 1"
    id: key_light_1
    segments:
      - id: key_light_raw
        from: 0
        to: 0

  - platform: partition
    name: "Key Light 2"
    id: key_light_2
    segments:
      - id: key_light_raw
        from: 1
        to: 1

binary_sensor:
  - platform: gpio
    name: "KEY_2"
    pin:
      number: GPIO17
      inverted: true
      mode: INPUT_PULLUP
    filters:
      - delayed_on: 10ms
      - delayed_off: 10ms

    on_press:
      - light.turn_on:
          id: key_light_2
          transition_length: 0ms

    on_release:
      - light.turn_off: key_light_2

  - platform: gpio
    name: "KEY_1"
    pin:
      number: GPIO0
      inverted: true
      mode: INPUT_PULLUP
    filters:
      - delayed_on: 10ms
      - delayed_off: 10ms

    on_press:
      - light.turn_on:
          id: key_light_1
          transition_length: 0ms

    on_release:
      - light.turn_off: key_light_1

  - platform: gpio
    name: "SWITCH_1"
    pin:
      number: GPIO7
      mode: INPUT

  - platform: gpio
    name: "SWITCH_2"
    pin:
      number: GPIO8
mode: INPUTChain Key
external_components:
  - source: github://m5stack/esphome-yaml/components
    components: [m5stack_chain_key]
    refresh: 0s

binary_sensor:
  - platform: m5stack_chain_key
    id: chain_key_1
    name: "Chain Key Button"
    uart_id: xx
    chain_id: xx
    update_interval: 50ms

output:
  - platform: m5stack_chain_key
    id: chain_key_rgb_r
    chain_key_id: chain_key_1
    channel: rgb_red

  - platform: m5stack_chain_key
    id: chain_key_rgb_g
    chain_key_id: chain_key_1
    channel: rgb_green

  - platform: m5stack_chain_key
    id: chain_key_rgb_b
    chain_key_id: chain_key_1
    channel: rgb_blue

light:
  - platform: rgb
    name: "Key RGB"
    red: chain_key_rgb_r
    green: chain_key_rgb_g
blue: chain_key_rgb_bChain Angle
external_components:
  - source: github://m5stack/esphome-yaml/components
    components: [m5stack_chain_angle]
    refresh: 0s

sensor:
  - platform: m5stack_chain_angle
    id: chain_angle_1
    name: "Chain Angle"
    uart_id: xx
    chain_id: xx
    update_interval: 50ms

output:
  - platform: m5stack_chain_angle
    id: chain_angle_rgb_r
    chain_angle_id: chain_angle_1
    channel: rgb_red

  - platform: m5stack_chain_angle
    id: chain_angle_rgb_g
    chain_angle_id: chain_angle_1
    channel: rgb_green

  - platform: m5stack_chain_angle
    id: chain_angle_rgb_b
    chain_angle_id: chain_angle_1
    channel: rgb_blue

light:
  - platform: rgb
    name: "Angle RGB"
    red: chain_angle_rgb_r
    green: chain_angle_rgb_g
blue: chain_angle_rgb_bChain Encoder
external_components:
  - source: github://m5stack/esphome-yaml/components
    components: [m5stack_chain_encoder]
    refresh: 0s

sensor:
  - platform: m5stack_chain_encoder
    id: chain_encoder_1
    name: "Chain Encoder"
    uart_id: xx
    chain_id: xx
    update_interval: 100ms

output:
  - platform: m5stack_chain_encoder
    id: chain_encoder_rgb_r
    chain_encoder_id: chain_encoder_1
    channel: rgb_red

  - platform: m5stack_chain_encoder
    id: chain_encoder_rgb_g
    chain_encoder_id: chain_encoder_1
    channel: rgb_green

  - platform: m5stack_chain_encoder
    id: chain_encoder_rgb_b
    chain_encoder_id: chain_encoder_1
    channel: rgb_blue

light:
  - platform: rgb
    name: "Encoder RGB"
    red: chain_encoder_rgb_r
    green: chain_encoder_rgb_g
    blue: chain_encoder_rgb_b

binary_sensor:
  - platform: m5stack_chain_encoder
    name: "Encoder Button"
chain_encoder_id: chain_encoder_1Chain Joystick
external_components:
  - source: github://m5stack/esphome-yaml/components
    components: [m5stack_chain_joystick]
    refresh: 0s

sensor:
  - platform: m5stack_chain_joystick
    id: chain_joystick_x
    name: "Chain Joystick X"
    uart_id: xx
    chain_id: xx
    axis: x
    update_interval: 50ms

  - platform: m5stack_chain_joystick
    name: "Chain Joystick Y"
    uart_id: xx
    chain_id: xx
    axis: y
    update_interval: 50ms

output:
  - platform: m5stack_chain_joystick
    id: chain_joystick_rgb_r
    chain_joystick_id: chain_joystick_x
    channel: rgb_red

  - platform: m5stack_chain_joystick
    id: chain_joystick_rgb_g
    chain_joystick_id: chain_joystick_x
    channel: rgb_green

  - platform: m5stack_chain_joystick
    id: chain_joystick_rgb_b
    chain_joystick_id: chain_joystick_x
    channel: rgb_blue

light:
  - platform: rgb
    name: "Joystick RGB"
    red: chain_joystick_rgb_r
    green: chain_joystick_rgb_g
    blue: chain_joystick_rgb_b

binary_sensor:
  - platform: m5stack_chain_joystick
    name: "Joystick Button"
chain_joystick_id: chain_joystick_xChain ToF
external_components:
  - source: github://m5stack/esphome-yaml/components
    components: [m5stack_chain_tof]
    refresh: 0s

sensor:
  - platform: m5stack_chain_tof
    id: chain_tof_1
    name: "Chain ToF"
    uart_id: xx
    chain_id: xx
    update_interval: 100ms

output:
  - platform: m5stack_chain_tof
    id: chain_tof_rgb_r
    m5stack_chain_tof_id: chain_tof_1
    channel: rgb_red

  - platform: m5stack_chain_tof
    id: chain_tof_rgb_g
    m5stack_chain_tof_id: chain_tof_1
    channel: rgb_green

  - platform: m5stack_chain_tof
    id: chain_tof_rgb_b
    m5stack_chain_tof_id: chain_tof_1
    channel: rgb_blue

light:
  - platform: rgb
    name: "ToF RGB"
    red: chain_tof_rgb_r
    green: chain_tof_rgb_g
blue: chain_tof_rgb_b設定例
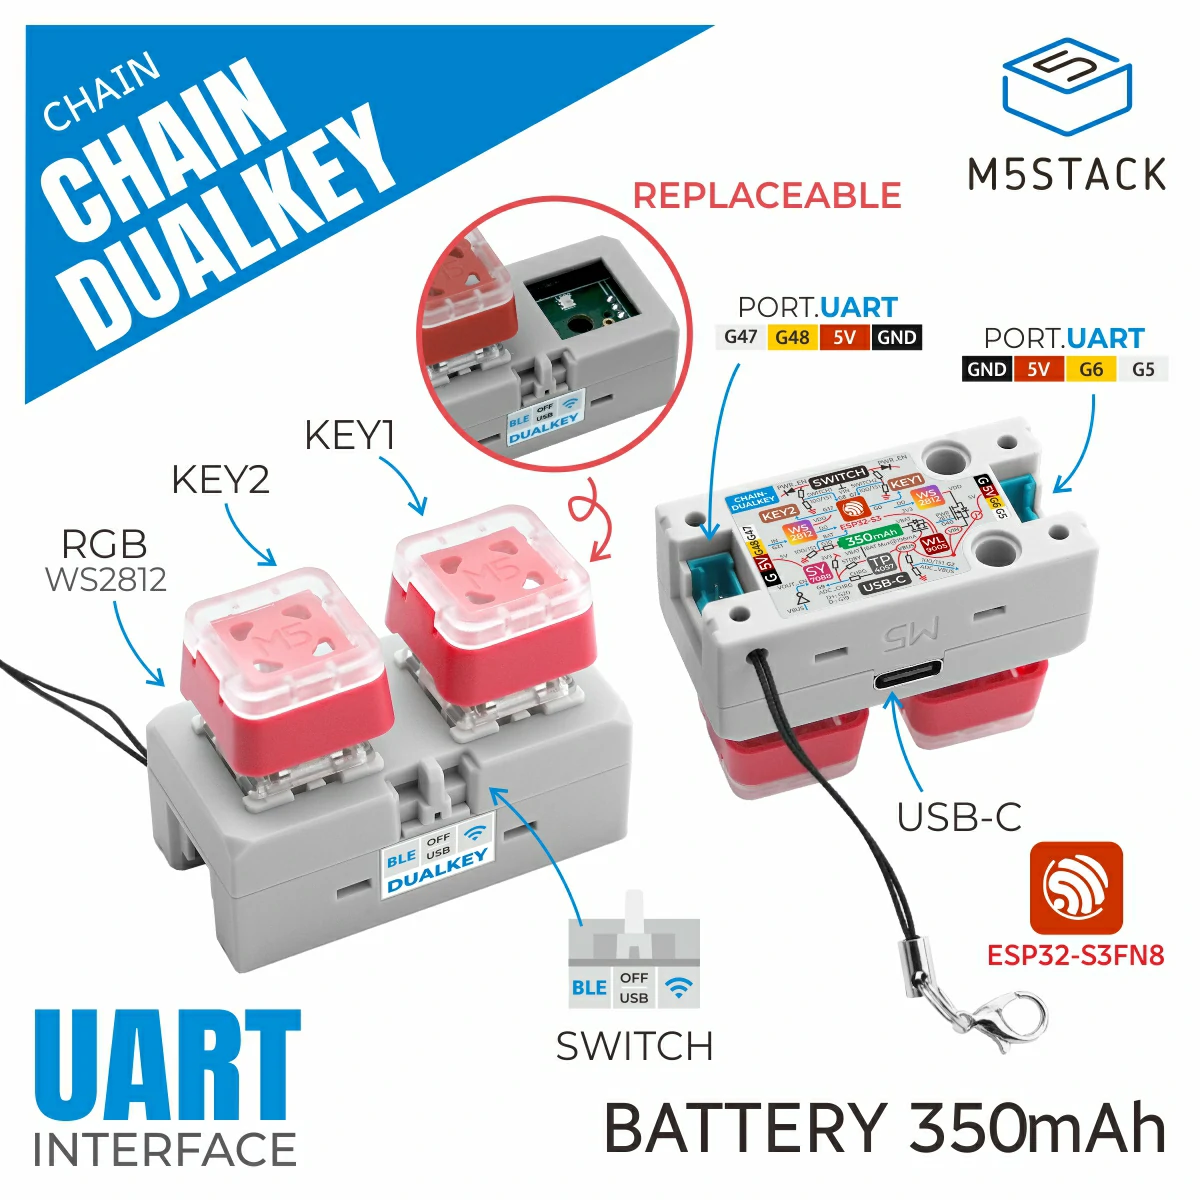
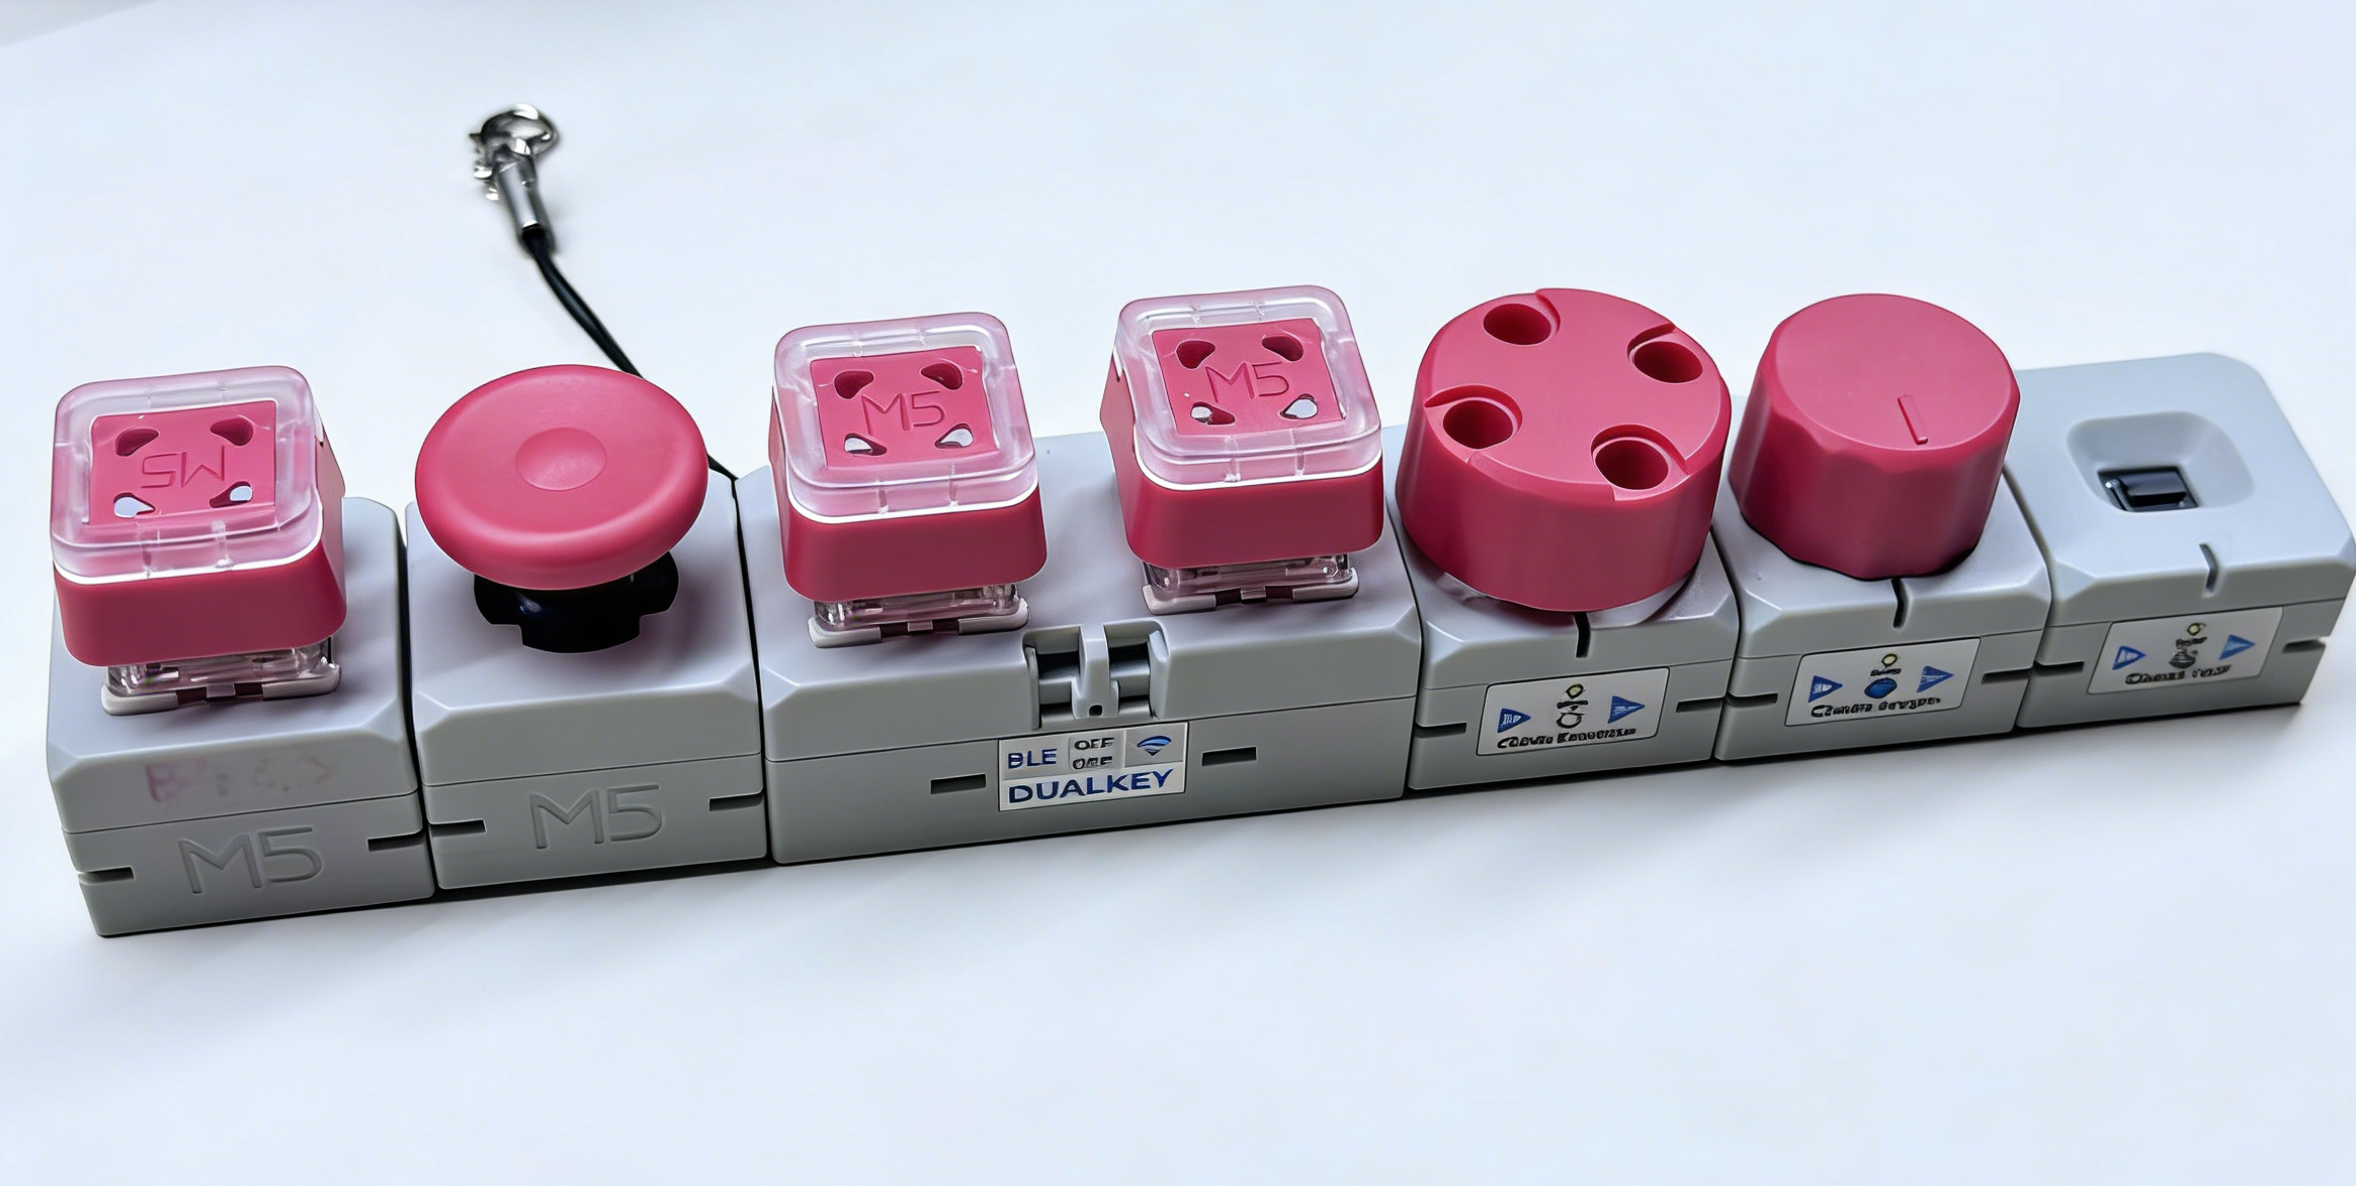
以下のコード例は、上図に示した接続順序に基づいて設定されています。
外部コンポーネント
使用モジュール:Chain Angle、Chain Encoder、Chain ToF、Chain Joystick、Chain Key。
- External コンポーネントを追加します。この設定ブロックは、Chain シリーズに関連するすべての外部コンポーネントを導入するために使用します。特定のモジュール(例:Chain Encoder や Chain ToF)を使用しない場合は、components リストから対応する項目を削除できます。
external_components:
  - source: github://m5stack/esphome-yaml/components
    components:
      [
        m5stack_chain_angle,
        m5stack_chain_encoder,
        m5stack_chain_tof,
        m5stack_chain_joystick,
        m5stack_chain_key,
      ]
refresh: 0sUART コンポーネント
使用モジュール:メインコントローラーの左右の HY2.0 インターフェースに接続されているすべての Chain シリーズモジュールで共有される UART バス。
- Uart コンポーネントを追加します。この例では、
chain_uart_rightとchain_uart_leftがそれぞれメインコントローラーの右側と左側の HY2.0 インターフェースに対応しています。後続の Chain モジュールのuart_idは、実際の接続方向と一致させる必要があります。
captive_portal:
uart:
  - id: chain_uart_right
    tx_pin: GPIO6
    rx_pin: GPIO5
    baud_rate: 115200

  - id: chain_uart_left
    tx_pin: GPIO48
    rx_pin: GPIO47
baud_rate: 115200センサーコンポーネント
使用モジュール:Chain Encoder、Chain Angle、Chain ToF、Chain Joystick(X/Y)、DualKey バッテリー関連の ADC センサー。
- Sensor コンポーネントを追加します。この例では、メインコントローラーの右側に Chain Encoder(ID 1)、Chain Angle(ID 2)、Chain ToF(ID 3)が順番に接続され、左側に Chain Joystick(ID 1、X/Y 2 軸)が接続されています。また、バッテリー残量に関連する ADC チャンネル(BAT、VBUS、CHARGE)もセンサーとして有効化されています。
sensor:
  - platform: m5stack_chain_encoder
    id: chain_encoder_1
    name: "Encoder"
    uart_id: chain_uart_right
    chain_id: 1
    update_interval: 100ms

  - platform: m5stack_chain_tof
    id: chain_tof_1
    name: "ToF Distance"
    uart_id: chain_uart_right
    chain_id: 3
    update_interval: 100ms

  - platform: m5stack_chain_angle
    id: chain_angle_1
    name: "Angle"
    uart_id: chain_uart_right
    chain_id: 2
    update_interval: 100ms

  - platform: m5stack_chain_joystick
    id: chain_joystick_x
    name: "Joystick X"
    uart_id: chain_uart_left
    chain_id: 1
    axis: x
    update_interval: 100ms

  - platform: m5stack_chain_joystick
    name: "Joystick Y"
    uart_id: chain_uart_left
    chain_id: 1
    axis: y
    update_interval: 100ms

  - platform: adc
    pin: GPIO10
    name: "ADC_BAT"
    update_interval: 1s

  - platform: adc
    pin: GPIO2
    name: "ADC_VBUS"
    update_interval: 1s

  - platform: adc
    pin: GPIO9
    name: "ADC_CHARGE"
update_interval: 1s出力コンポーネント
使用モジュール:Chain Encoder、Chain Key、Chain Joystick、Chain Angle、Chain ToF の RGB ライト、および DualKey の電源制御。
- Output コンポーネントを追加します。
pwr_enGPIO 出力は Chain 拡張バスへの給電を制御するために使用されます。バスに接続されたモジュールが正常に動作するよう、通常はオン状態を維持する必要があります。
output:
  - platform: gpio
    id: pwr_en
    pin: GPIO40

  - platform: m5stack_chain_encoder
    id: chain_encoder_rgb_r
    chain_encoder_id: chain_encoder_1
    channel: rgb_red

  - platform: m5stack_chain_encoder
    id: chain_encoder_rgb_g
    chain_encoder_id: chain_encoder_1
    channel: rgb_green

  - platform: m5stack_chain_encoder
    id: chain_encoder_rgb_b
    chain_encoder_id: chain_encoder_1
    channel: rgb_blue

  - platform: m5stack_chain_key
    id: chain_key_rgb_r
    chain_key_id: chain_key_1
    channel: rgb_red

  - platform: m5stack_chain_key
    id: chain_key_rgb_g
    chain_key_id: chain_key_1
    channel: rgb_green

  - platform: m5stack_chain_key
    id: chain_key_rgb_b
    chain_key_id: chain_key_1
    channel: rgb_blue

  - platform: m5stack_chain_joystick
    id: chain_joystick_rgb_r
    chain_joystick_id: chain_joystick_x
    channel: rgb_red

  - platform: m5stack_chain_joystick
    id: chain_joystick_rgb_g
    chain_joystick_id: chain_joystick_x
    channel: rgb_green

  - platform: m5stack_chain_joystick
    id: chain_joystick_rgb_b
    chain_joystick_id: chain_joystick_x
    channel: rgb_blue

  - platform: m5stack_chain_angle
    id: chain_angle_rgb_r
    chain_angle_id: chain_angle_1
    channel: rgb_red

  - platform: m5stack_chain_angle
    id: chain_angle_rgb_g
    chain_angle_id: chain_angle_1
    channel: rgb_green

  - platform: m5stack_chain_angle
    id: chain_angle_rgb_b
    chain_angle_id: chain_angle_1
    channel: rgb_blue

  - platform: m5stack_chain_tof
    id: chain_tof_rgb_r
    m5stack_chain_tof_id: chain_tof_1
    channel: rgb_red

  - platform: m5stack_chain_tof
    id: chain_tof_rgb_g
    m5stack_chain_tof_id: chain_tof_1
    channel: rgb_green

  - platform: m5stack_chain_tof
    id: chain_tof_rgb_b
    m5stack_chain_tof_id: chain_tof_1
channel: rgb_blueライトコンポーネント
使用モジュール:DualKey 上の WS2812 キーライト、および各 Chain モジュール上の RGB インジケーターライト。
- Light コンポーネントを追加します。このセクションでは、DualKey の各ボタンの RGB バックライト(
key_light_rawをkey_light_1とkey_light_2に分割)を設定し、各 Chain モジュールに対応する RGB ライトエンティティを定義することで、Home Assistant から個別に制御できるようにします。
light:
  - platform: esp32_rmt_led_strip
    id: key_light_raw
    internal: true
    pin: GPIO21
    num_leds: 2
    chipset: ws2812
    rgb_order: GRB
    restore_mode: ALWAYS_OFF

  - platform: partition
    name: "Key1 LED"
    id: key_light_1
    segments:
      - id: key_light_raw
        from: 1
        to: 1

  - platform: partition
    name: "Key2 LED"
    id: key_light_2
    segments:
      - id: key_light_raw
        from: 0
        to: 0

  - platform: rgb
    name: "Encoder RGB"
    red: chain_encoder_rgb_r
    green: chain_encoder_rgb_g
    blue: chain_encoder_rgb_b

  - platform: rgb
    name: "Key RGB"
    red: chain_key_rgb_r
    green: chain_key_rgb_g
    blue: chain_key_rgb_b

  - platform: rgb
    name: "Joystick RGB"
    red: chain_joystick_rgb_r
    green: chain_joystick_rgb_g
    blue: chain_joystick_rgb_b

  - platform: rgb
    name: "Angle RGB"
    red: chain_angle_rgb_r
    green: chain_angle_rgb_g
    blue: chain_angle_rgb_b

  - platform: rgb
    name: "ToF RGB"
    red: chain_tof_rgb_r
    green: chain_tof_rgb_g
blue: chain_tof_rgb_bバイナリセンサーコンポーネント
使用モジュール:DualKey 上のメカニカルボタンおよびサイドのディップスイッチ、Chain Key・Chain Encoder・Chain Joystick 上のボタン。
- Binary Sensor コンポーネントを追加します。このセクションでは、すべてのボタン関連の入力を定義します。2 つのメカニカルキー(
KEY 1、KEY 2)とそれに連動したバックライト制御、バス上の Chain Key モジュールのボタン、エンコーダーボタン、ジョイスティックボタン、および 2 つのサイドスイッチ(SWITCH 1、SWITCH 2)が含まれます。実際の使用シーンに応じて、Home Assistant でこれらのエンティティ名を変更できます。
binary_sensor:
  - platform: gpio
    name: "KEY 2"
    pin:
      number: GPIO17
      inverted: true
      mode: INPUT_PULLUP
    filters:
      - delayed_on: 10ms
      - delayed_off: 10ms

    on_press:
      - light.turn_on:
          id: key_light_2
          transition_length: 0ms

    on_release:
      - light.turn_off: key_light_2

  - platform: gpio
    name: "KEY 1"
    pin:
      number: GPIO0
      inverted: true
      mode: INPUT_PULLUP
    filters:
      - delayed_on: 10ms
      - delayed_off: 10ms

    on_press:
      - light.turn_on:
          id: key_light_1
          transition_length: 0ms

    on_release:
      - light.turn_off: key_light_1

  - platform: m5stack_chain_key
    id: chain_key_1
    name: "Key Module Button"
    uart_id: chain_uart_left
    chain_id: 2
    update_interval: 50ms

  - platform: m5stack_chain_encoder
    name: "Encoder Button"
    chain_encoder_id: chain_encoder_1

  - platform: m5stack_chain_joystick
    name: "Joystick Button"
    chain_joystick_id: chain_joystick_x

  - platform: gpio
    name: "SWITCH 1"
    pin:
      number: GPIO7
      mode: INPUT

  - platform: gpio
    name: "SWITCH 2"
    pin:
      number: GPIO8
mode: INPUTファームウェアのダウンロードと書き込み
- 変更が完了したら、右上の
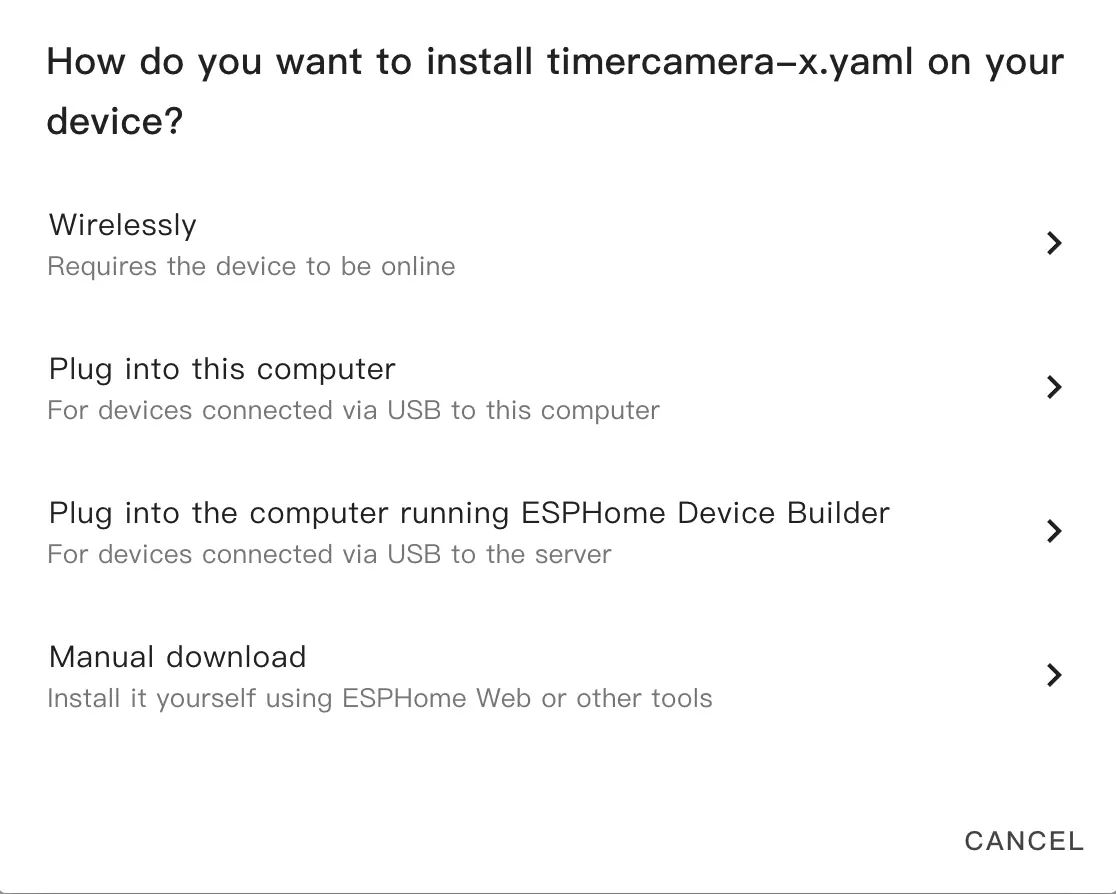
SAVEとINSTALLをクリックし、ポップアップダイアログでManual Downloadを選択します。
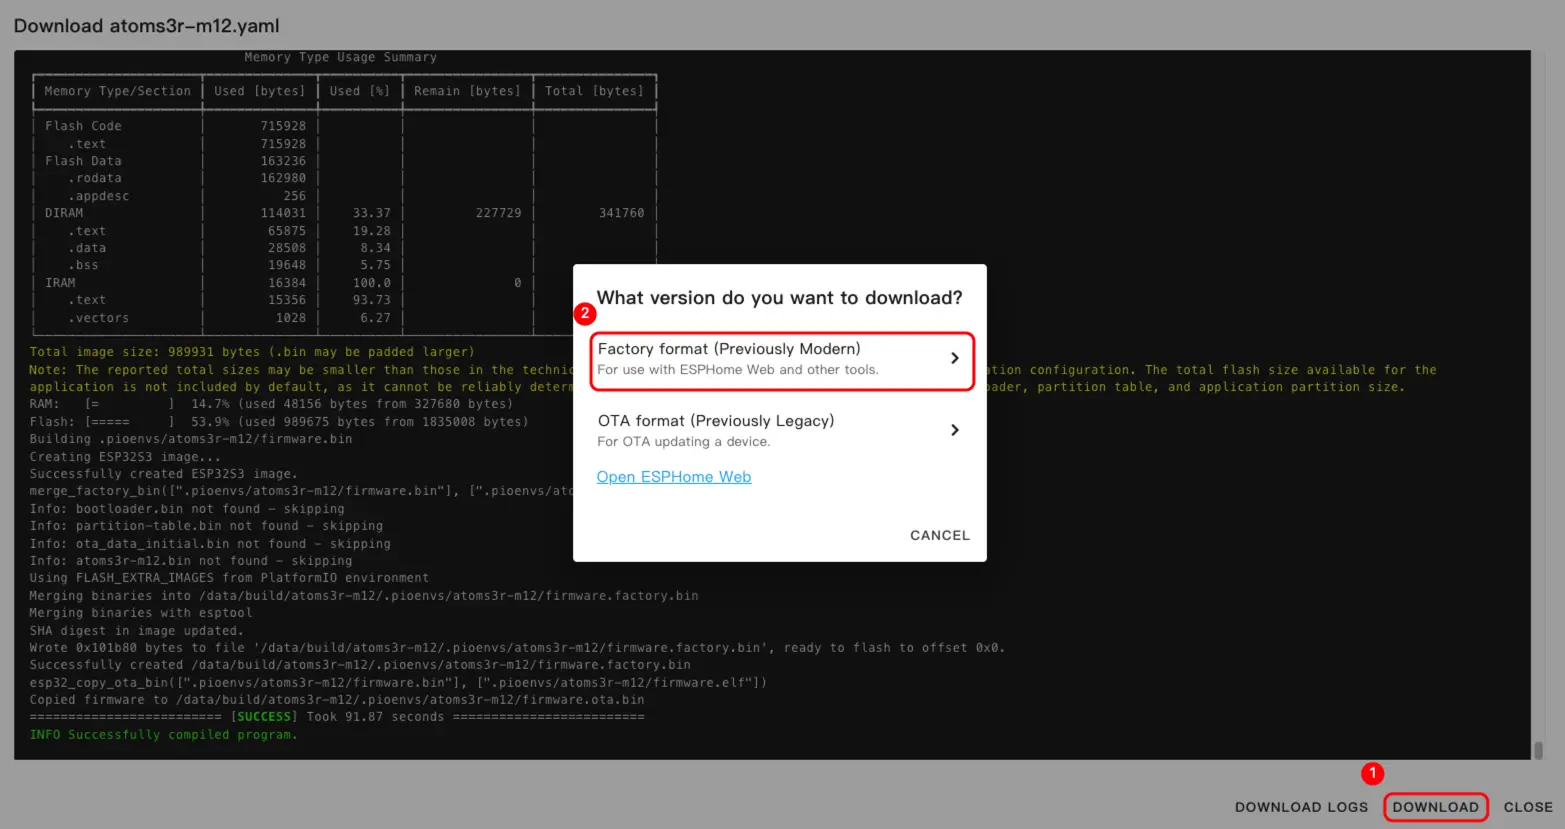
- ファームウェアのコンパイルが完了したら、
DownloadをクリックしてFactory format(Previously Modern)オプションを選択してダウンロードします。
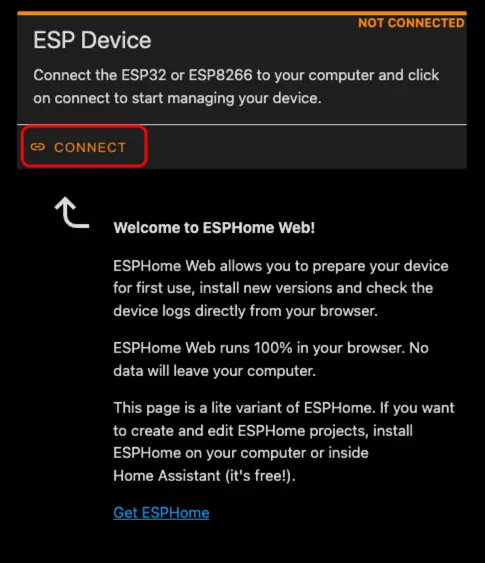
- USB Type-C ケーブルでデバイスをホストに接続します。ESPHome Web を開き、
CONNECTをクリックしてデバイスに接続します。
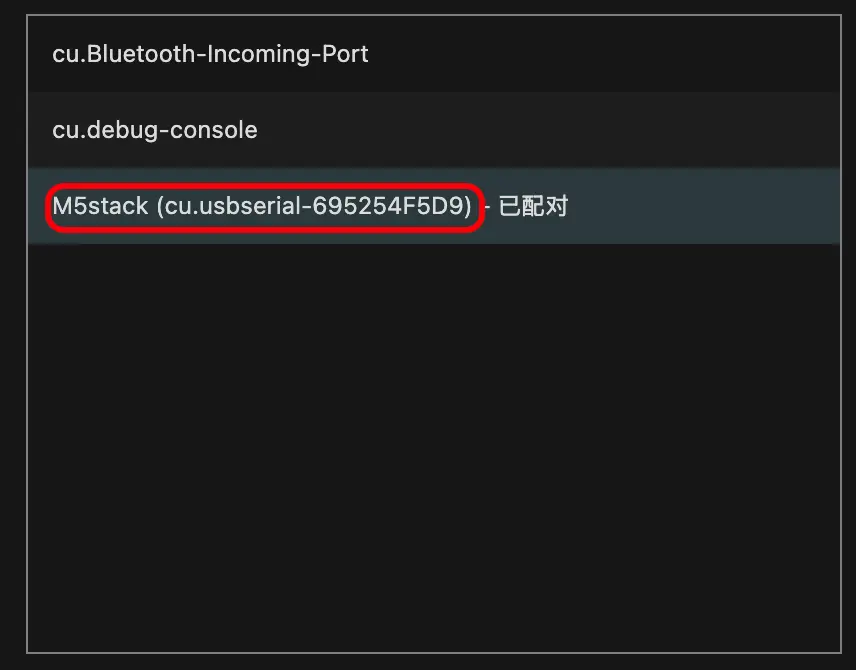
- 対応するシリアルポート番号を確認します。
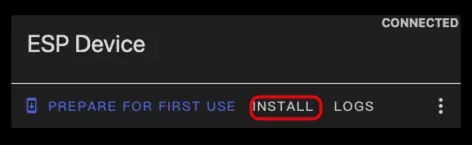
INSTALLをクリックします。
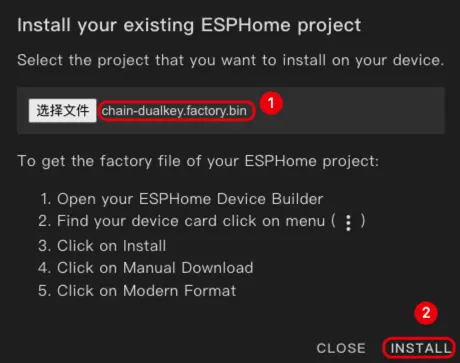
- コンパイル済みのファームウェアを選択してアップロードします。
- ファームウェアの書き込みが完了したら、ハードウェアリセットを完了させるために電源を再投入してください。
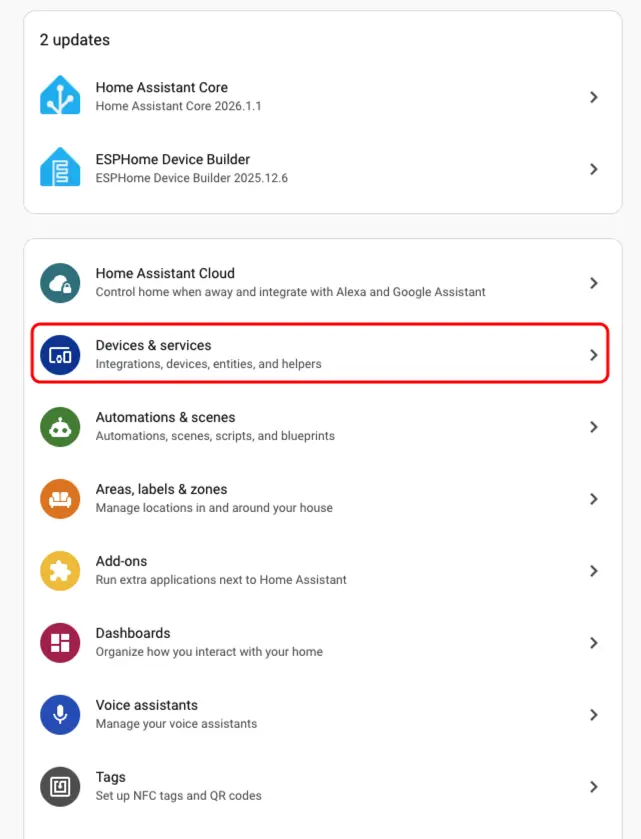
使い方
- Home Assistant で
Settings->Device & servicesをクリックしてデバイスを確認します。
Discoverエリアで対応するデバイスを見つけることができます。
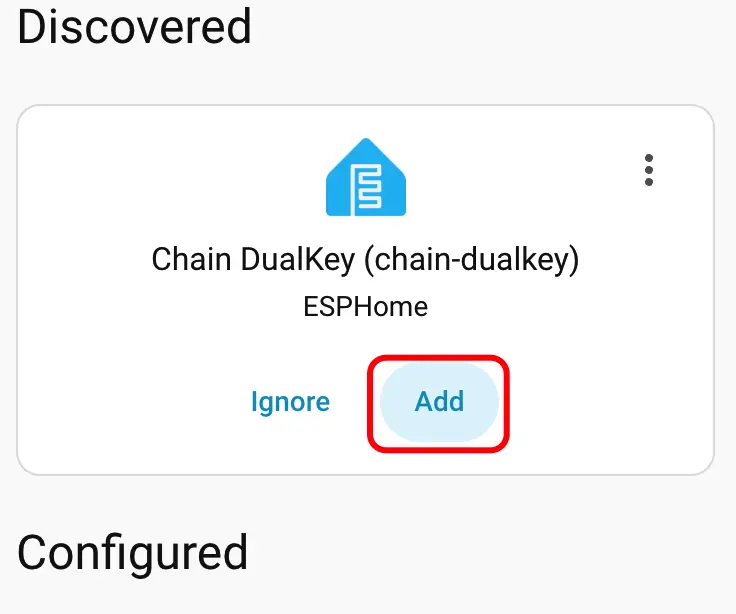
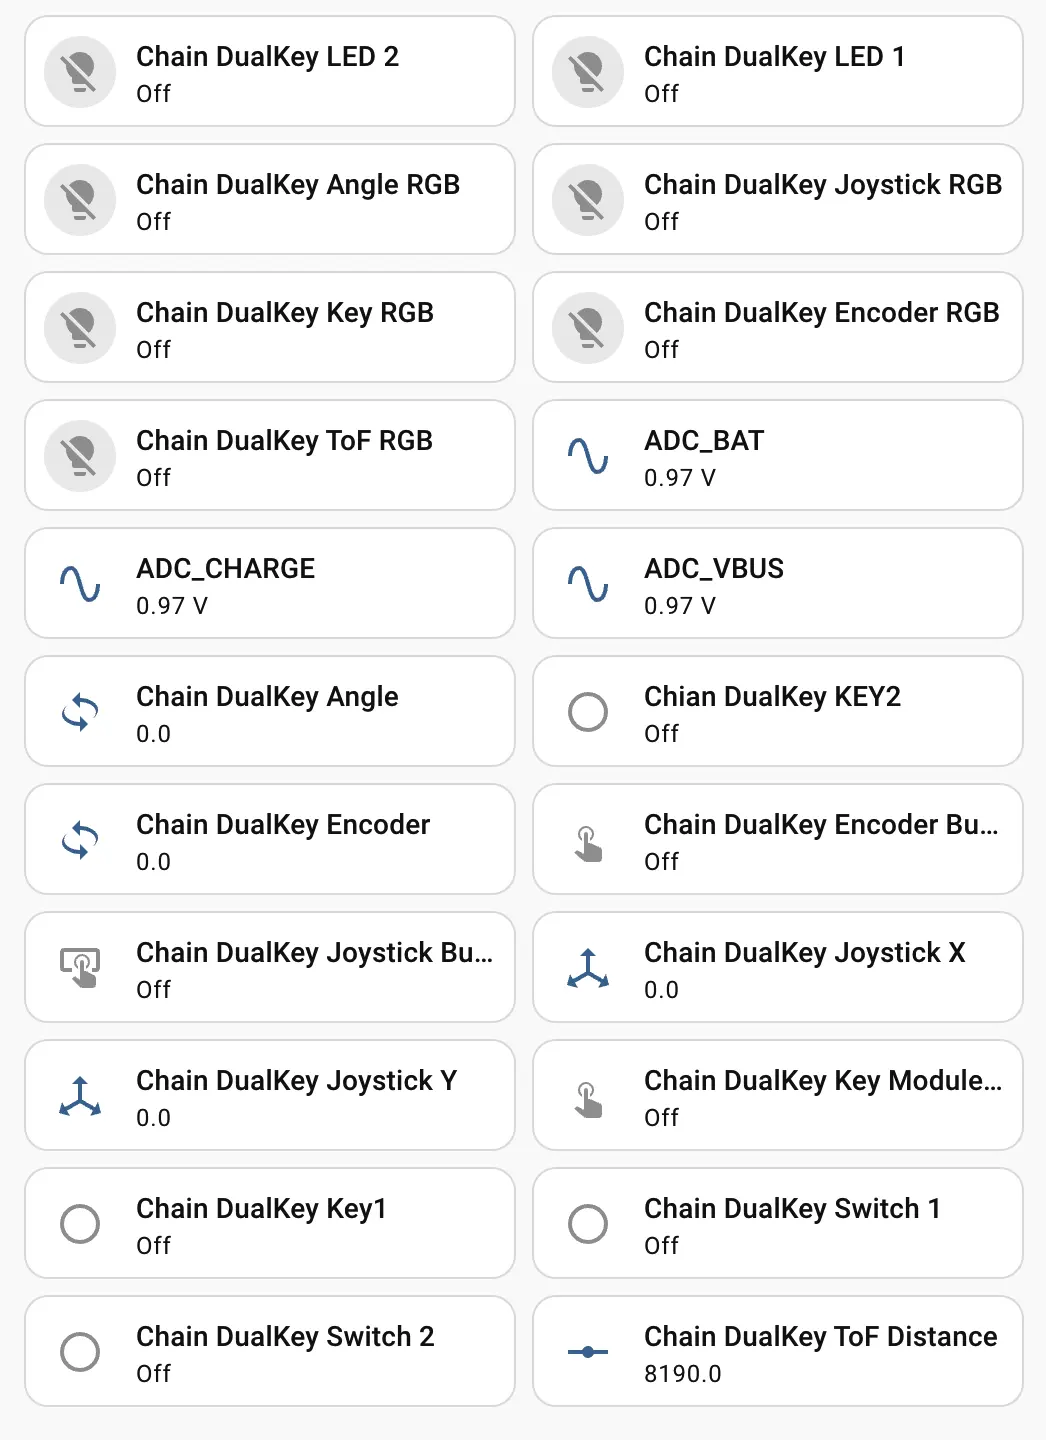
- デバイスを追加すると、データが正しく表示されます。
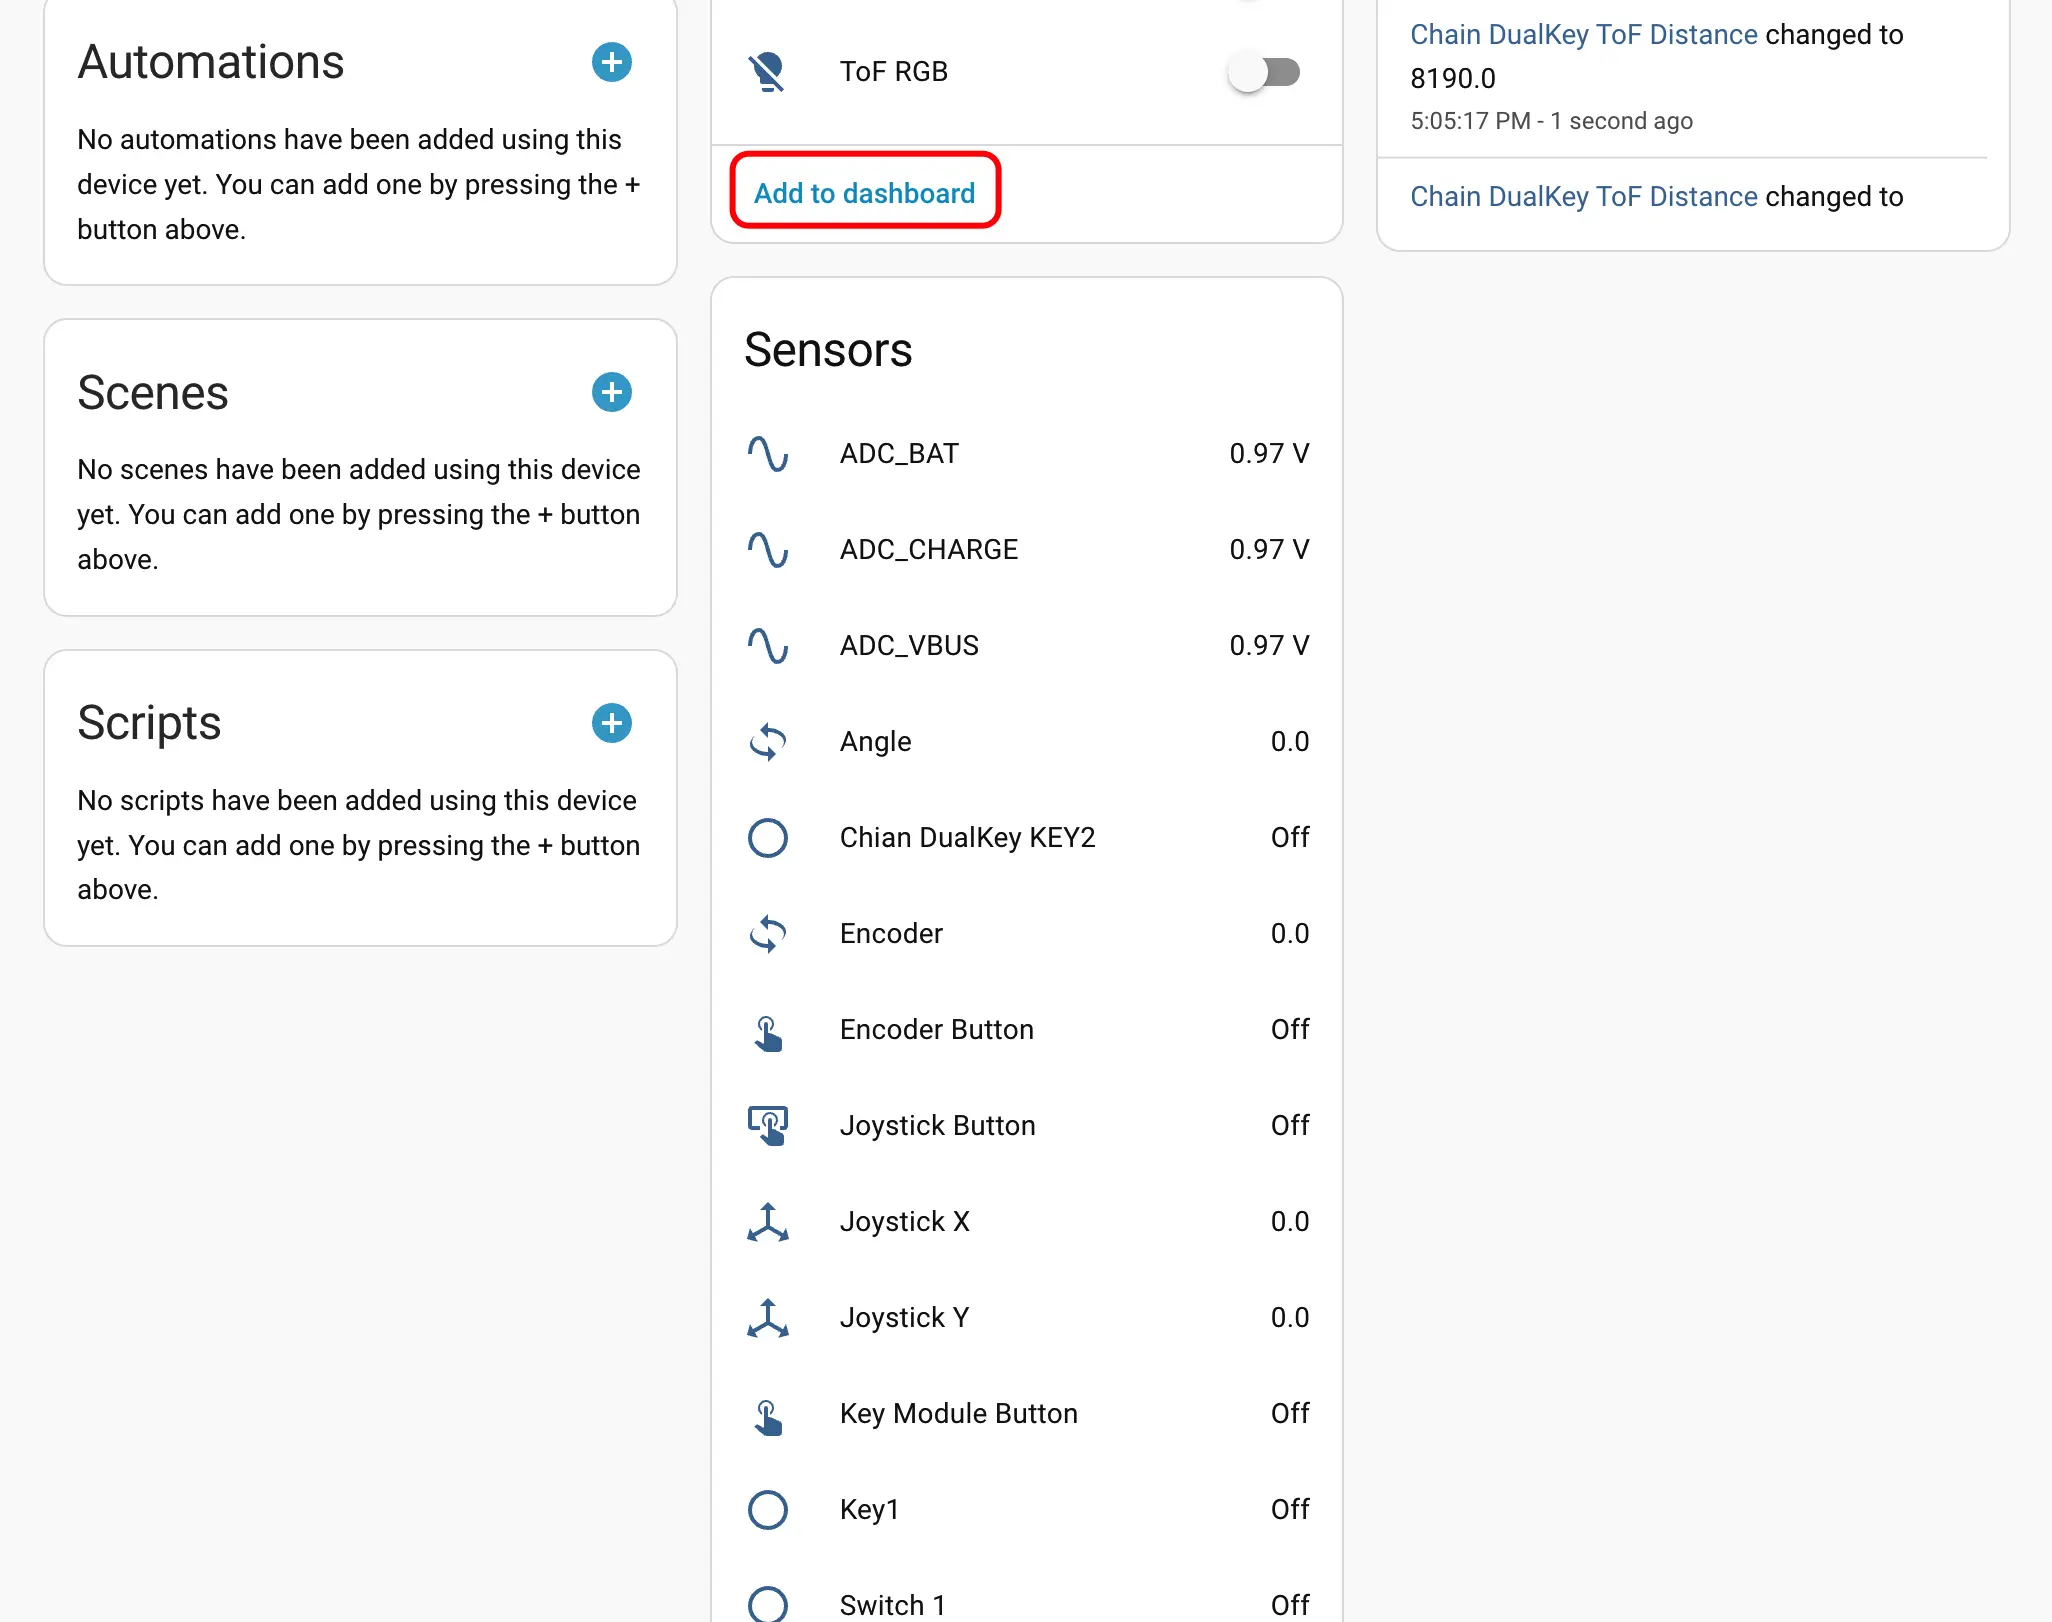
- 最後に、これらのエンティティをダッシュボードに追加すると、以下のような表示結果が得られます。