Home Assistant
Voice Assistant
Kit
Sensor
Unit AC Measure Home Assistant Integration
This tutorial will introduce how to use the Unit AC Measure AC electrical parameter measurement unit with the AtomS3R main controller and integrate it into Home Assistant to achieve real-time monitoring of AC voltage, current, active power, and energy consumption.
Preparation
- Hardware List
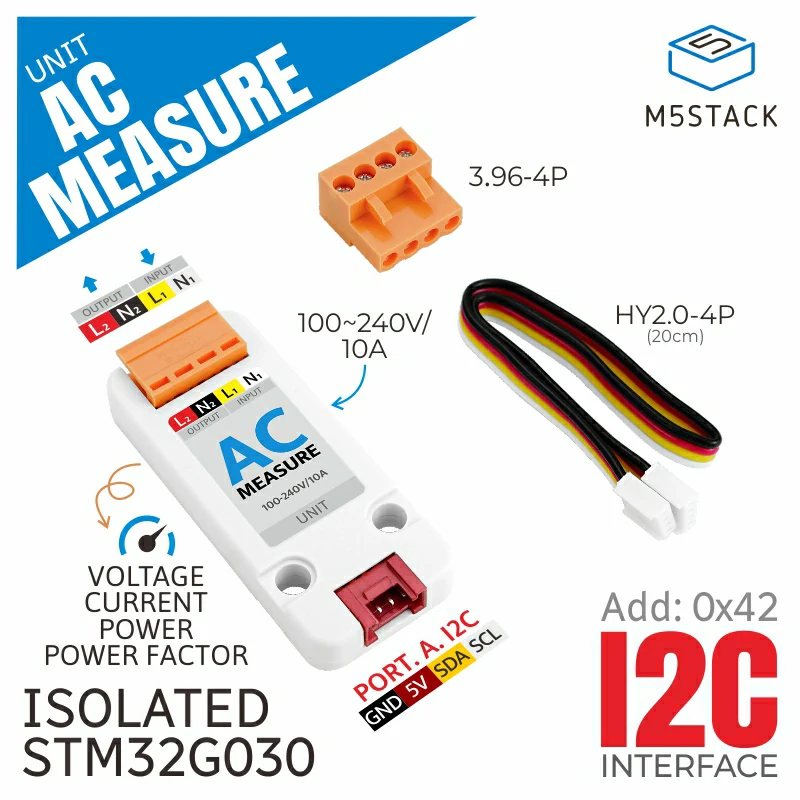
- 1 x Unit AC Measure
- 1 x AtomS3R
- 1 x HY2.0-4P Grove Cable (20cm)
- 1 x Home Assistant Host (Server, Mini PC, NAS, etc.)
- Software and Versions
- Home Assistant 2026.2.0 or above
- ESPHome Device Builder 2026.2.2 or above
Create Device
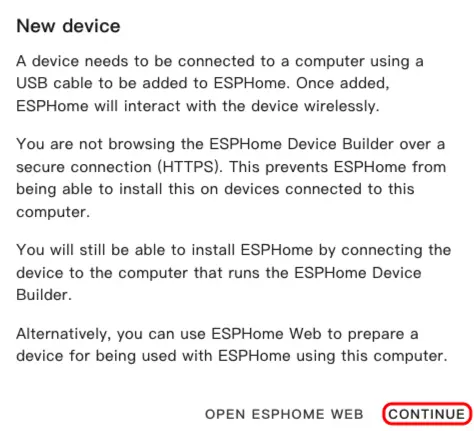
- Open the ESPHome Dashboard. If the initial guidance interface appears, click
CONTINUE.
- Click the green + button in the lower right corner to start creating a new device.
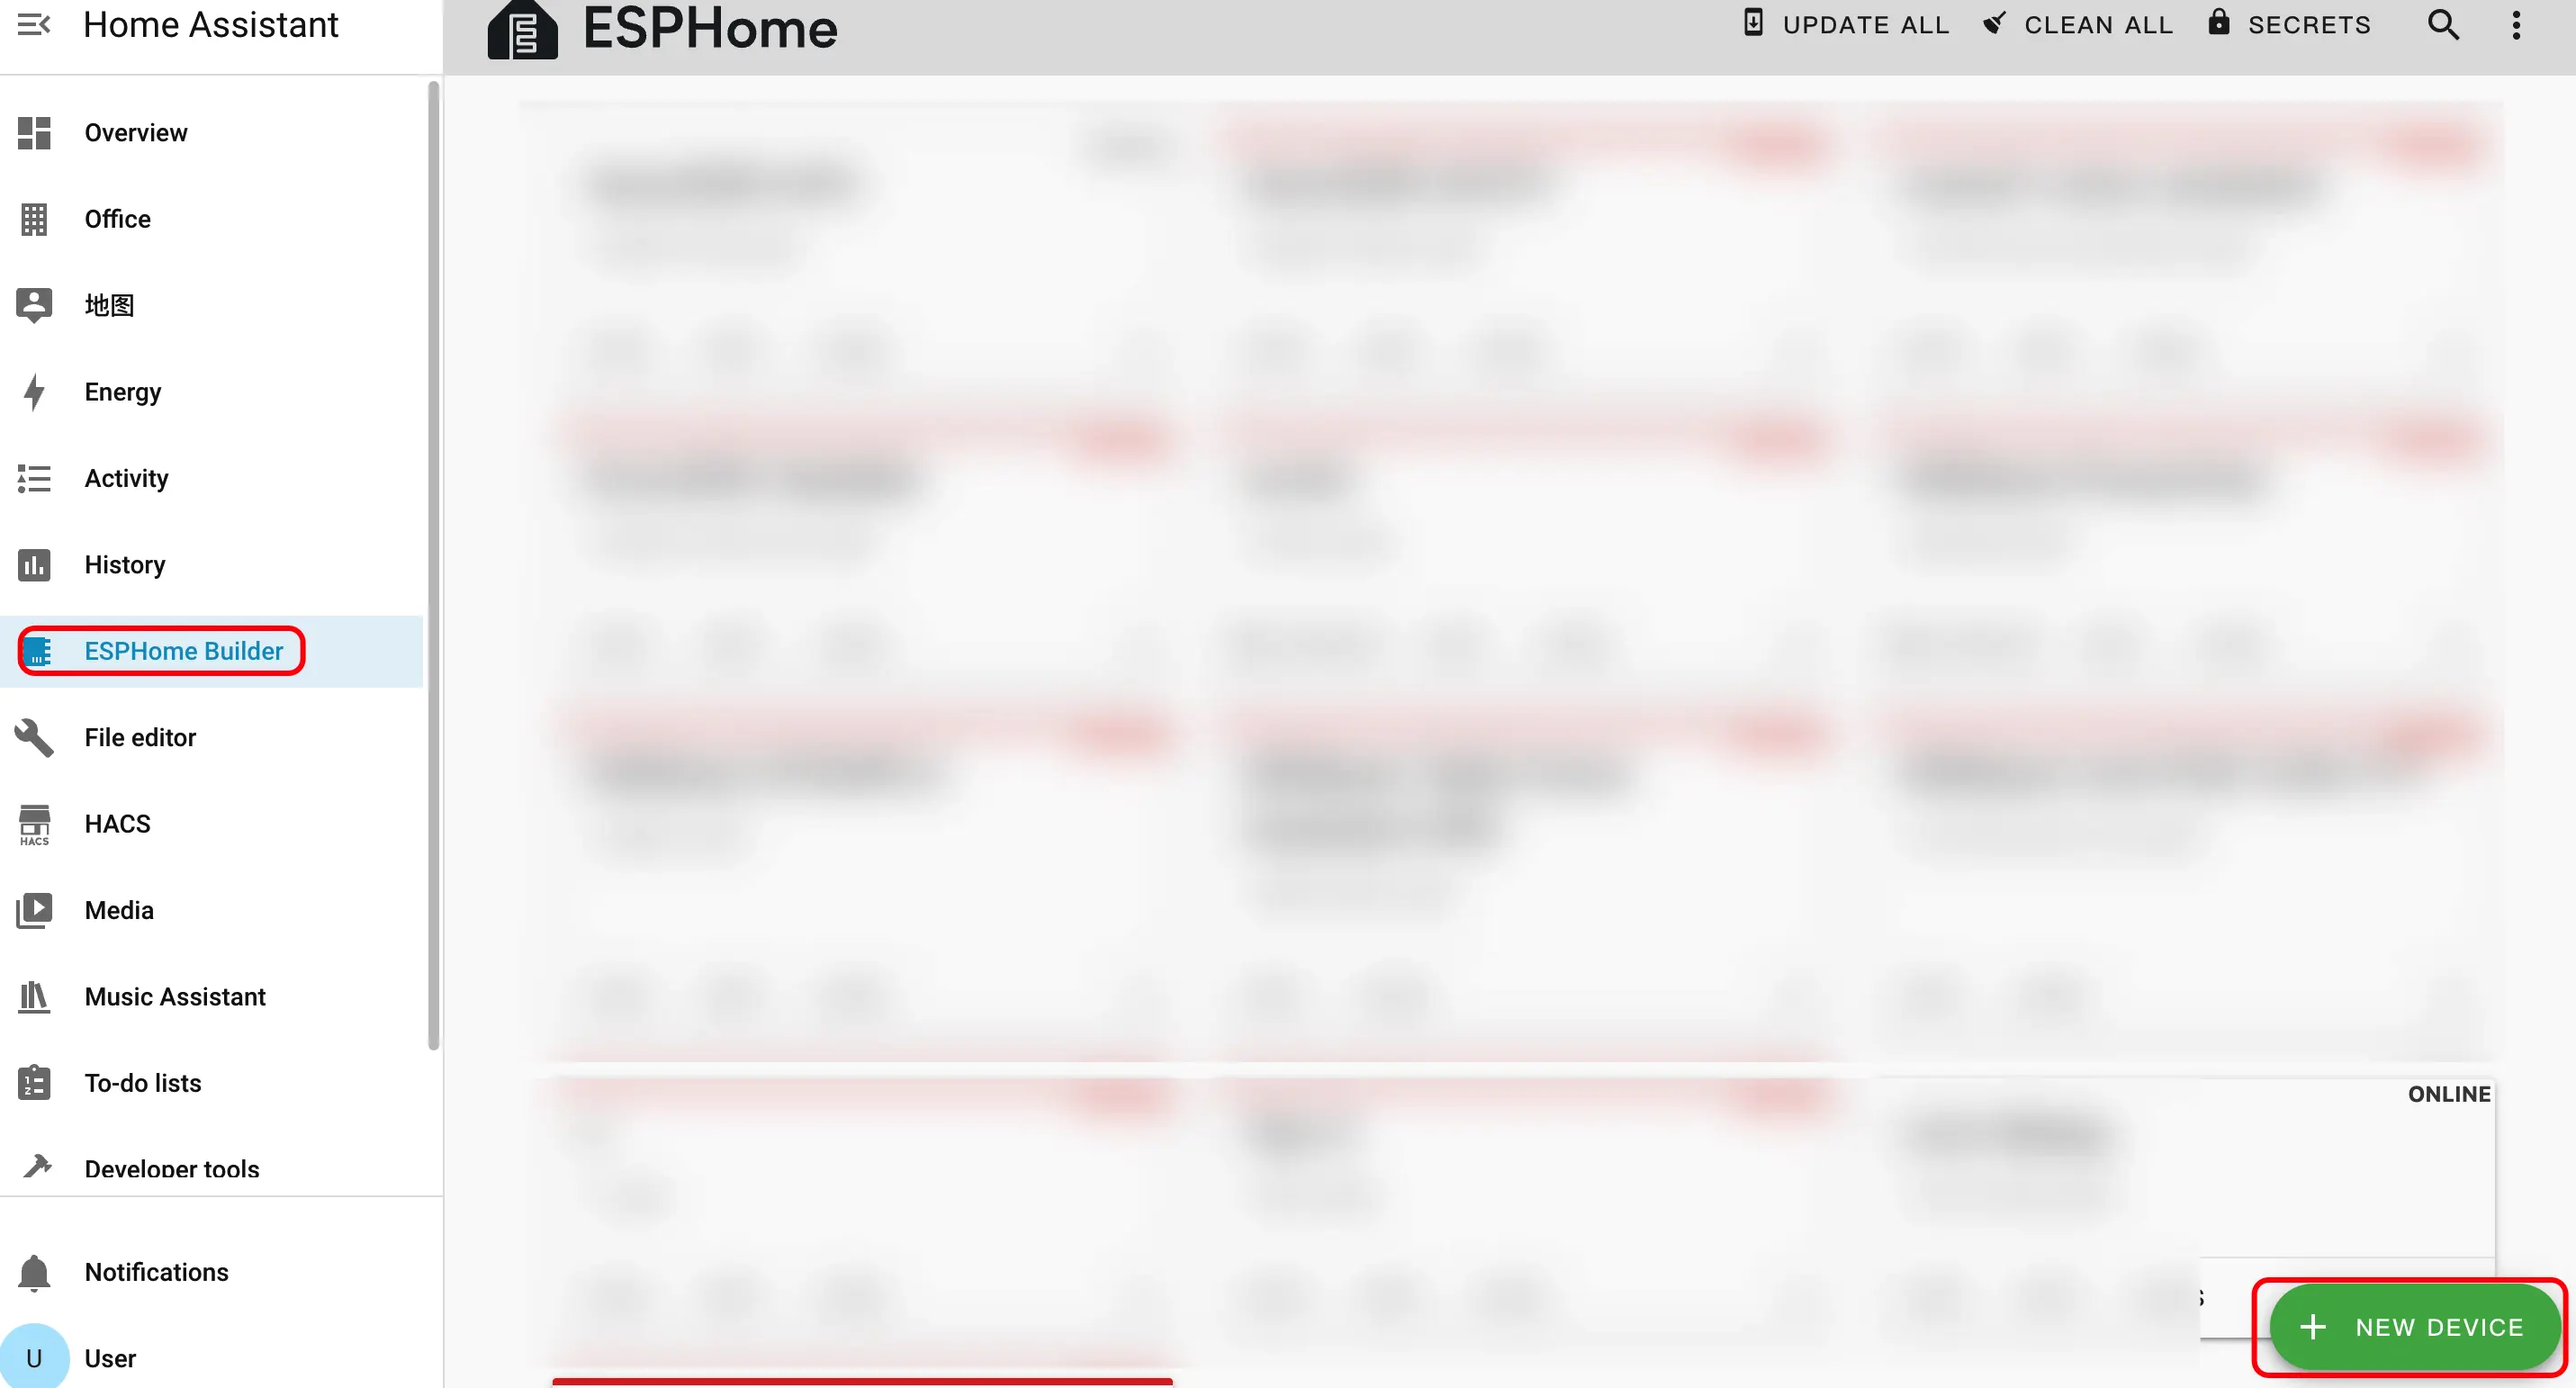
- Click
New Device Setupto enter the device creation wizard.

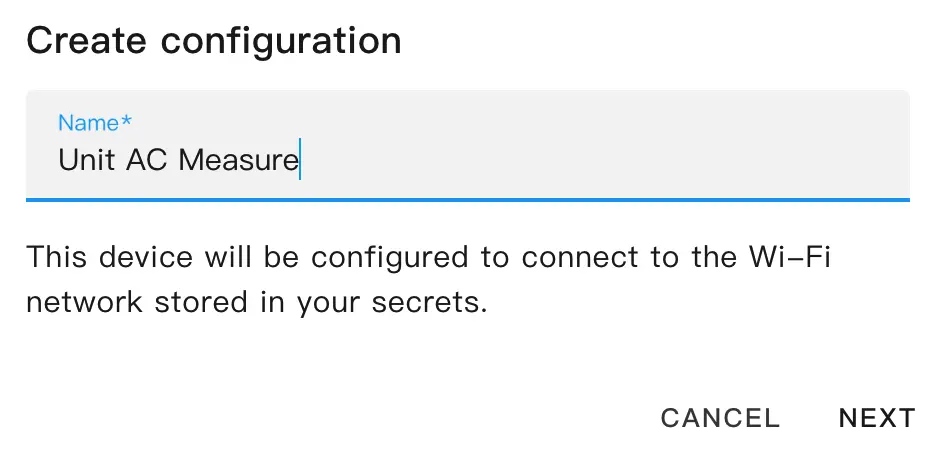
- Enter the device name and click
NEXT.
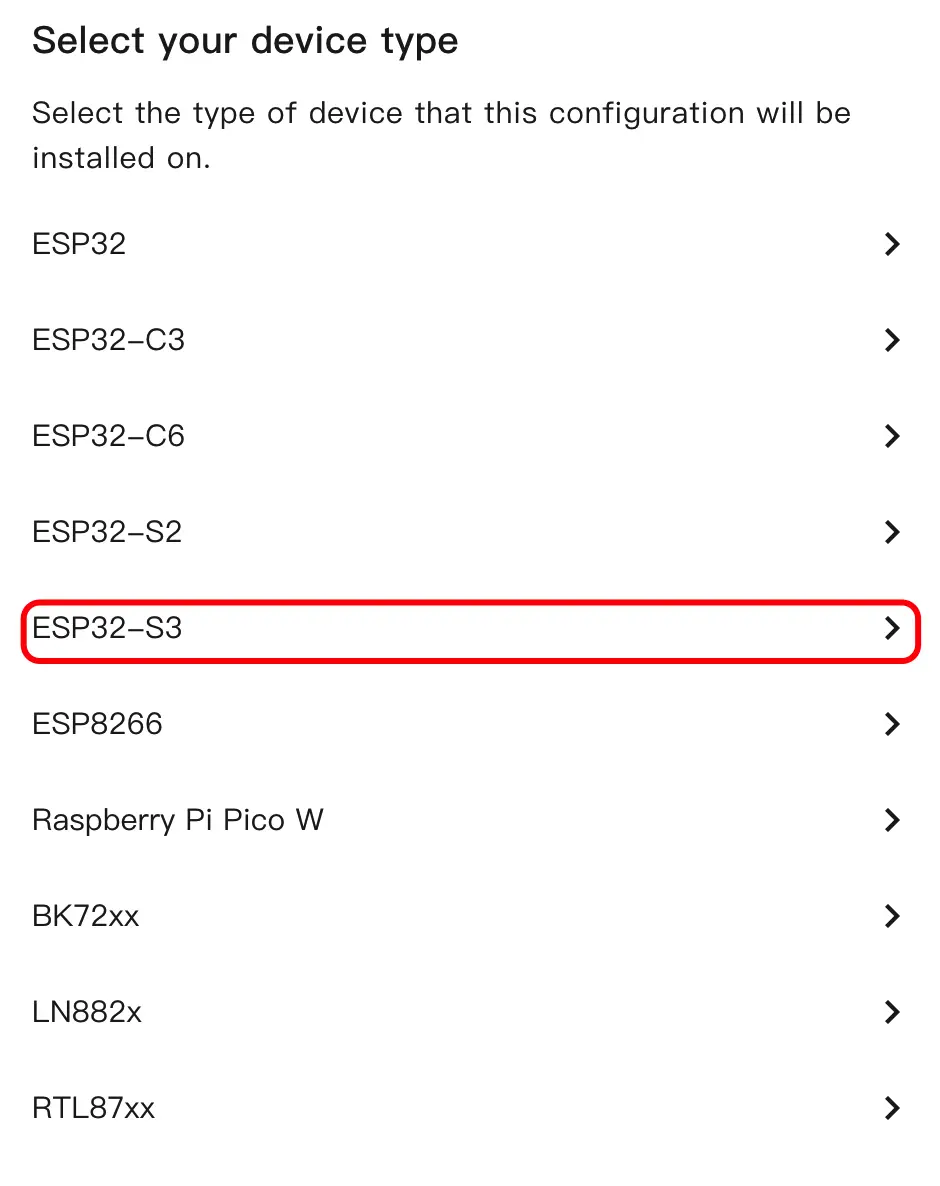
- Select the device type, click
ESP32S3.
- Click
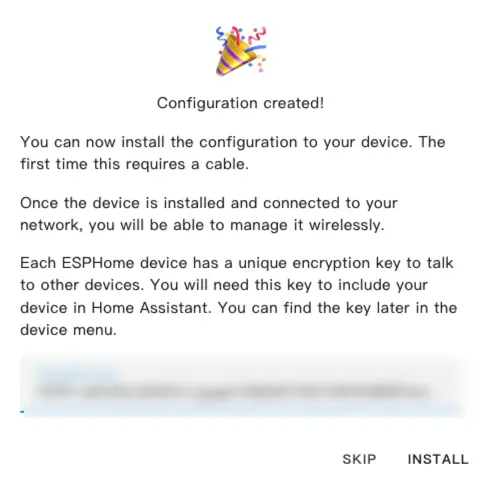
SKIPto skip the encryption key setting.
- Click
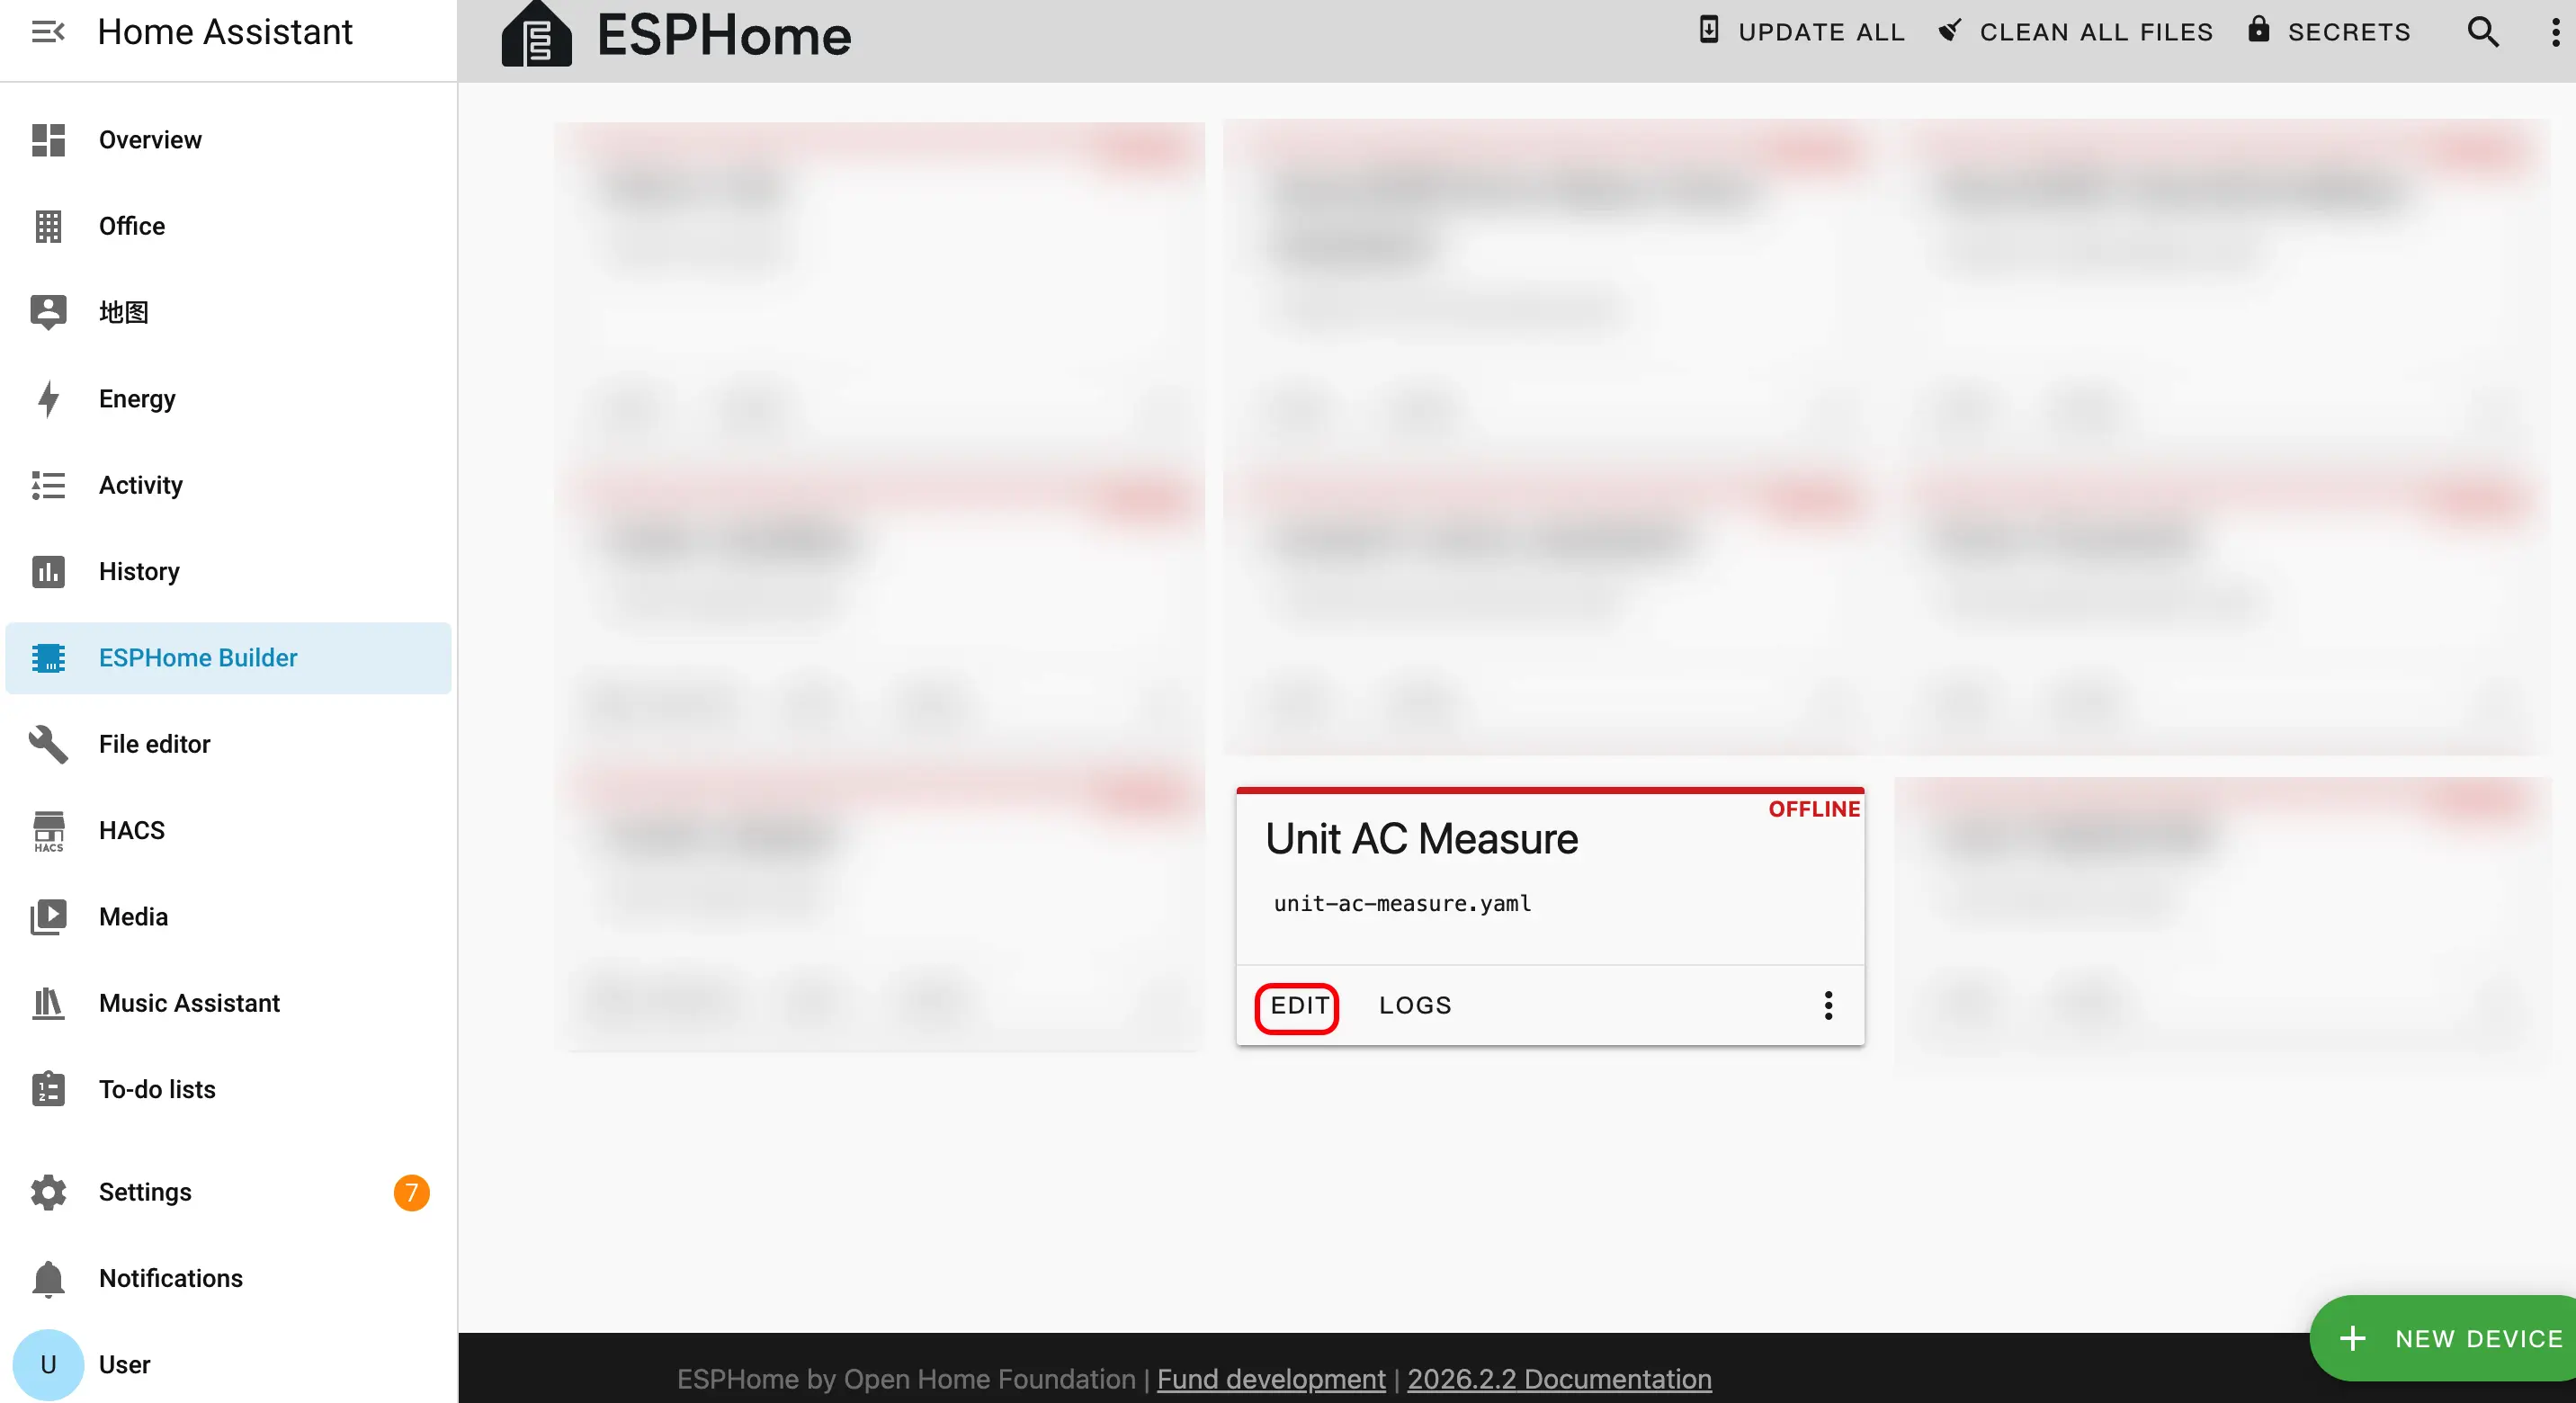
EDITto enter the YAML configuration page and customize device functions.
Modify Configuration
External Components Configuration
Add the External Components configuration in the YAML file to load the unit_acmeasure sensor driver.
external_components:
  - source: github://m5stack/esphome-yaml/components
    components: unit_acmeasure
refresh: 0sI2C Bus Configuration
Add the I2C component to configure the communication pins between Unit AC Measure and AtomS3R.
i2c:
  sda: GPIO2
  scl: GPIO1
scan: trueDescription
The PORT.A interface of AtomS3R corresponds to SDA: GPIO2, SCL: GPIO1. If using other ports, please adjust according to the actual pins.
Sensor Configuration
Add the Sensor component to enable AC measurement-related sensor entities.
sensor:
  - platform: unit_acmeasure
    id: acmeasure1
    address: 0x42
    update_interval: 2s
    voltage:
      name: AC Voltage
    current:
      name: AC Current
    power:
      name: Active Power
    apparent_power:
      name: Apparent Power
    power_factor:
      name: Power Factor
    energy:
name: EnergyMain Parameter Descriptions:
| Parameter | Value | Description |
|---|---|---|
address | 0x42 | I2C address of Unit AC Measure. |
update_interval | 2s | Time interval for updating AC measurement values to Home Assistant. |
voltage | AC Voltage | Reports the AC voltage (RMS) of the measured circuit. |
current | AC Current | Reports the AC current (RMS). |
power | Active Power | Reports the active power in Watts (W). |
apparent_power | Apparent Power | Reports the apparent power in Volt-Amperes (VA). |
power_factor | Power Factor | Reports the power factor (ratio of active power to apparent power). |
energy | Energy | Reports the accumulated energy consumption. |
Download and Flash Firmware
Compile Firmware
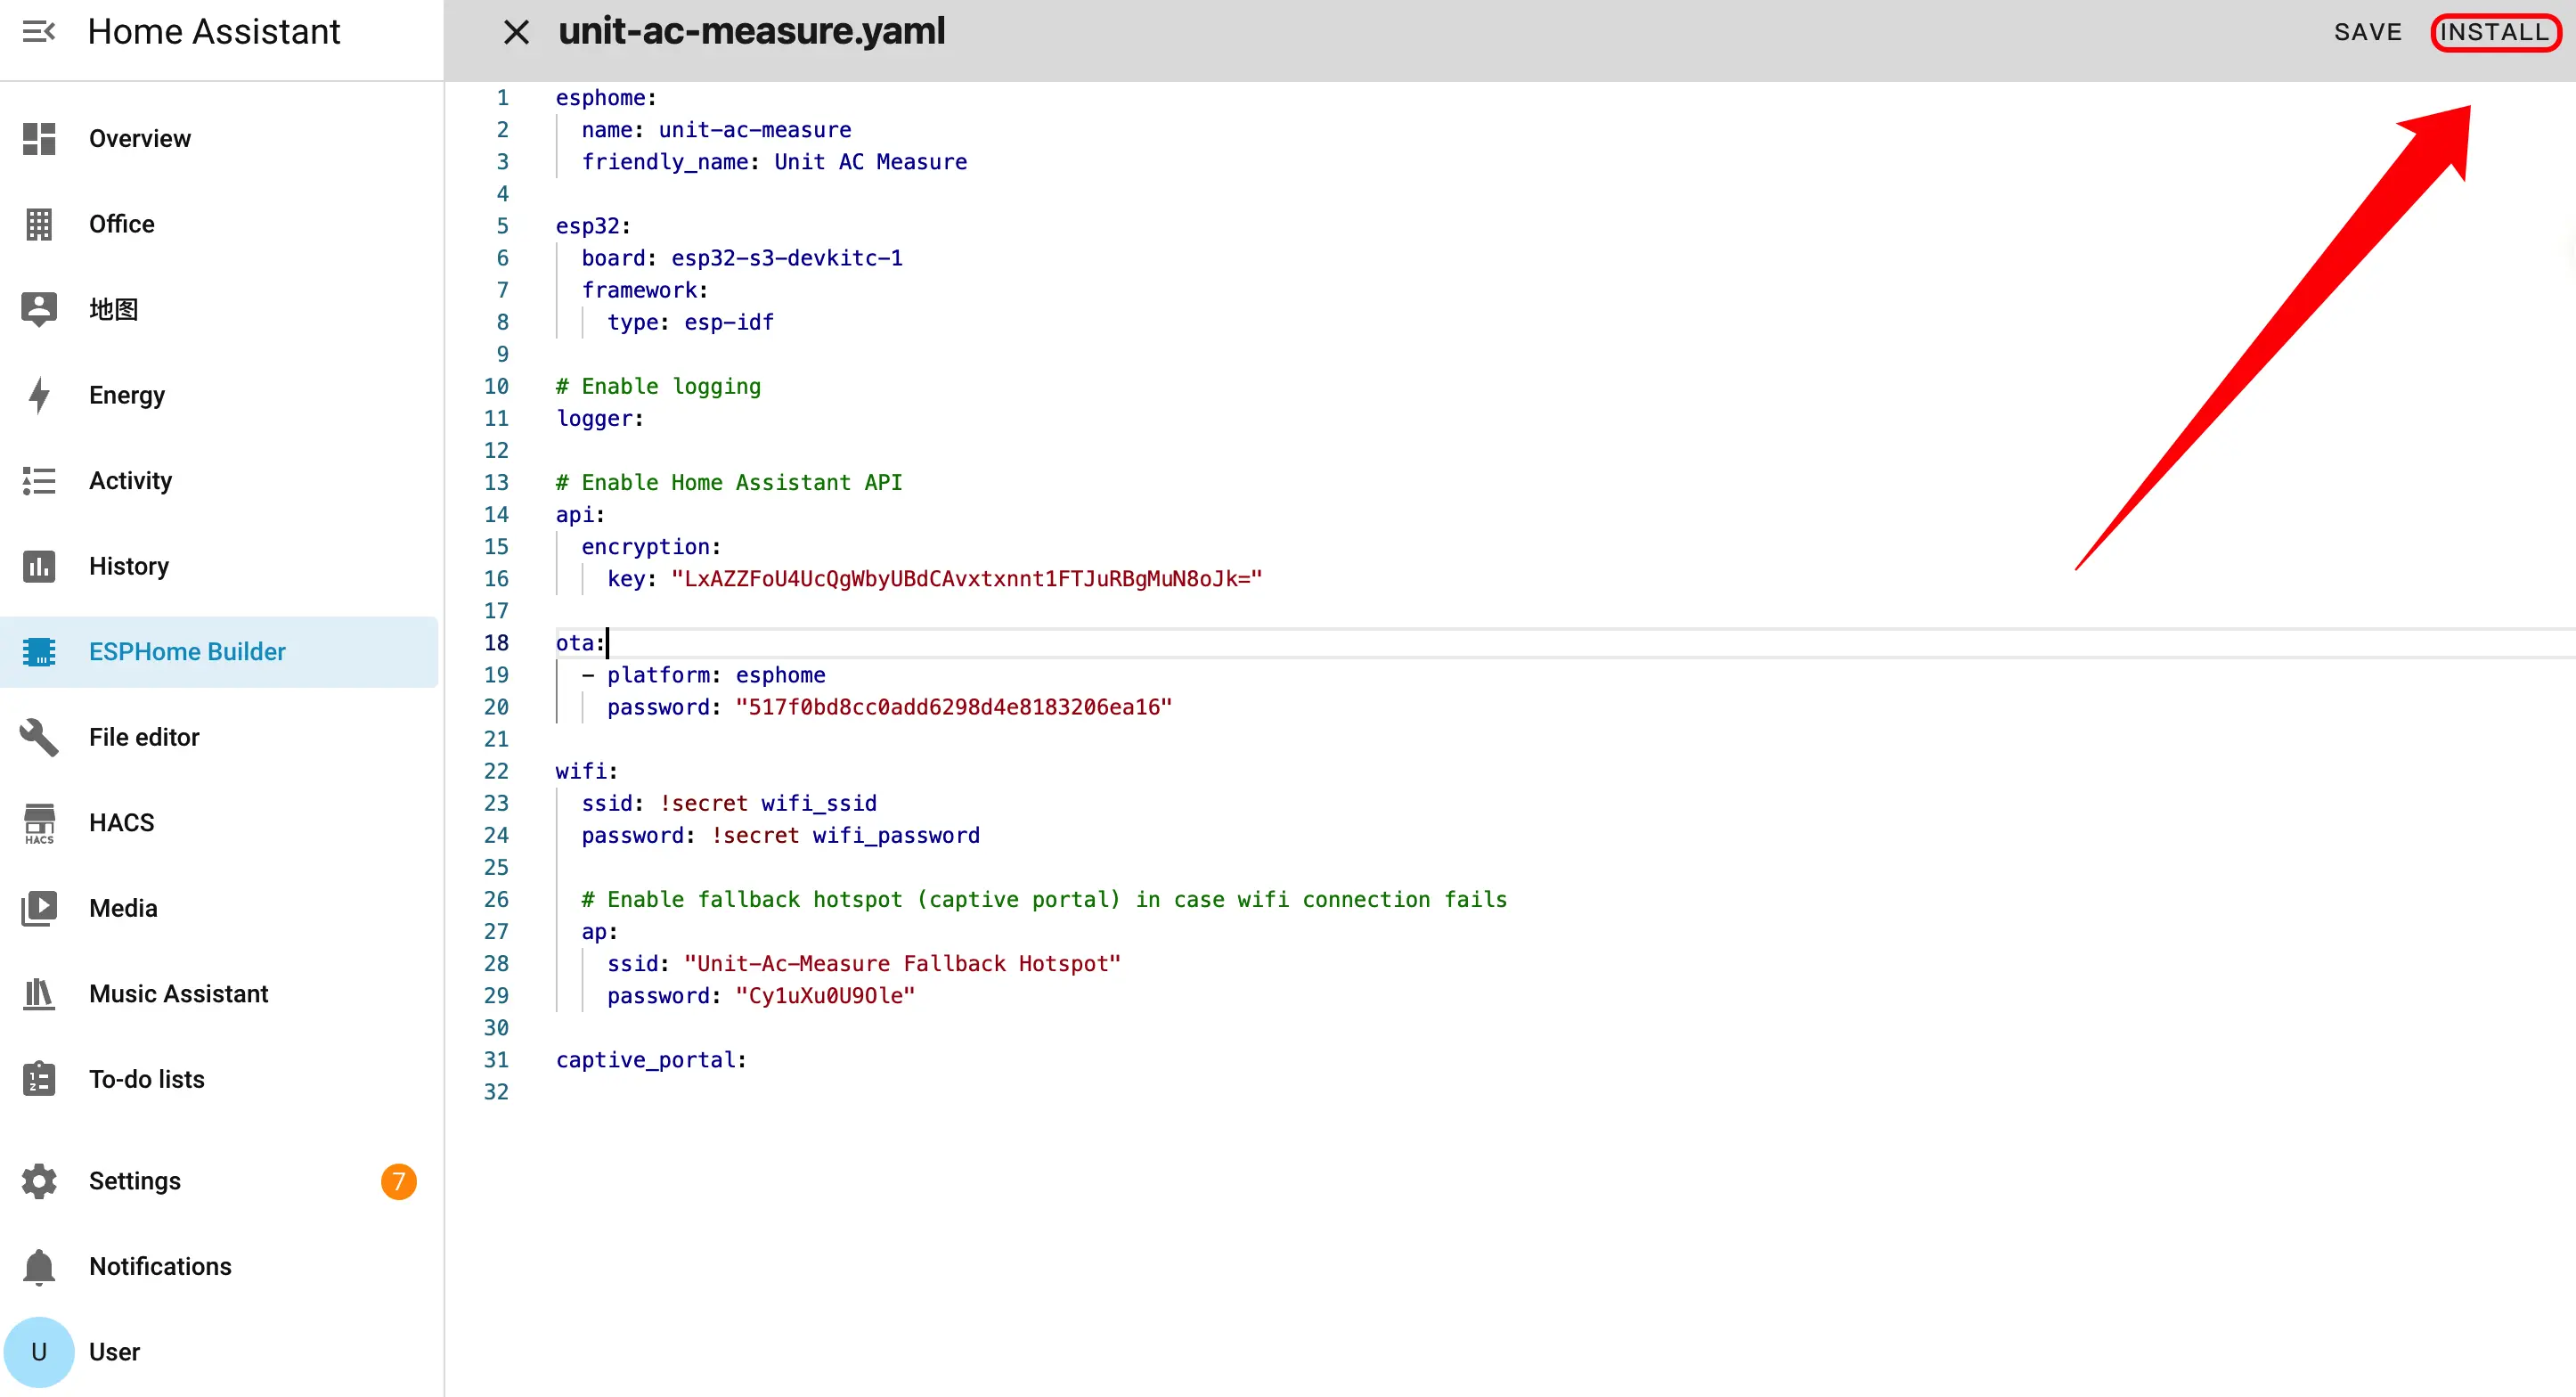
- After completing the YAML modification, click
SAVEin the upper right corner to save the configuration, then clickINSTALL.
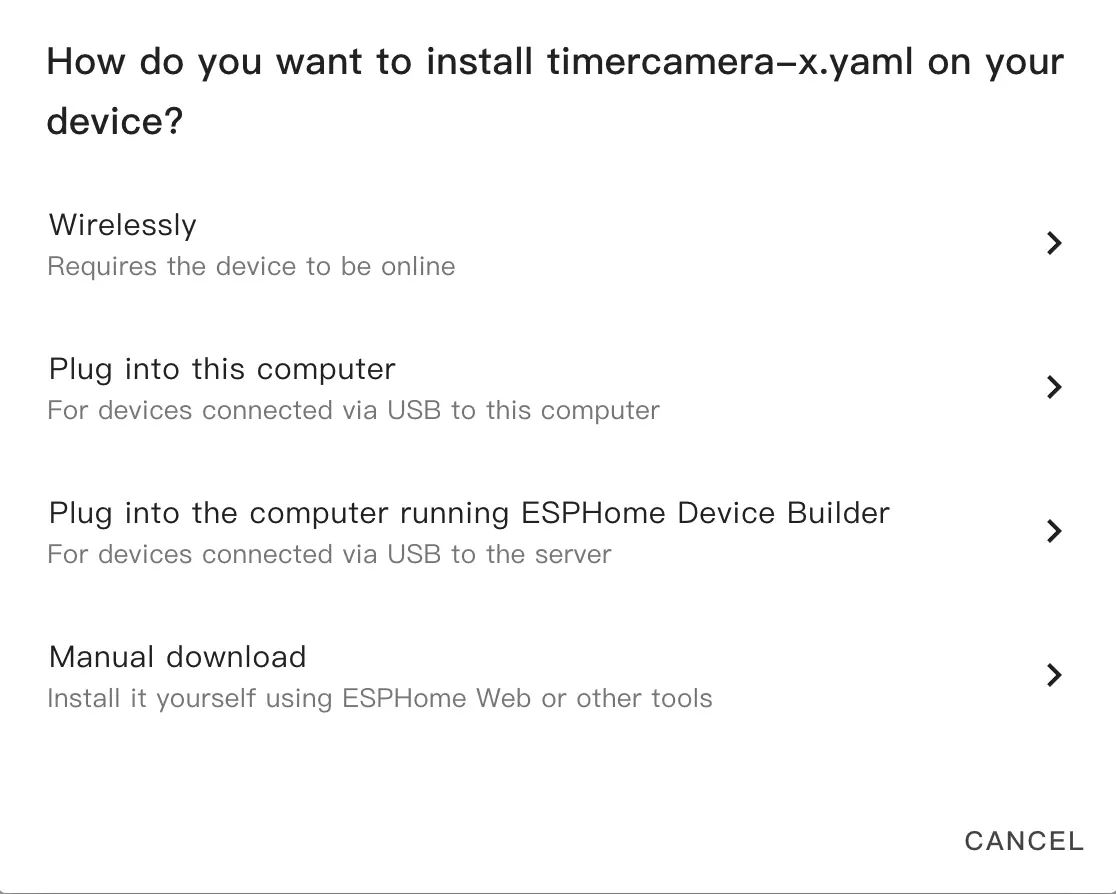
- Select
Manual Downloadin the pop-up window.
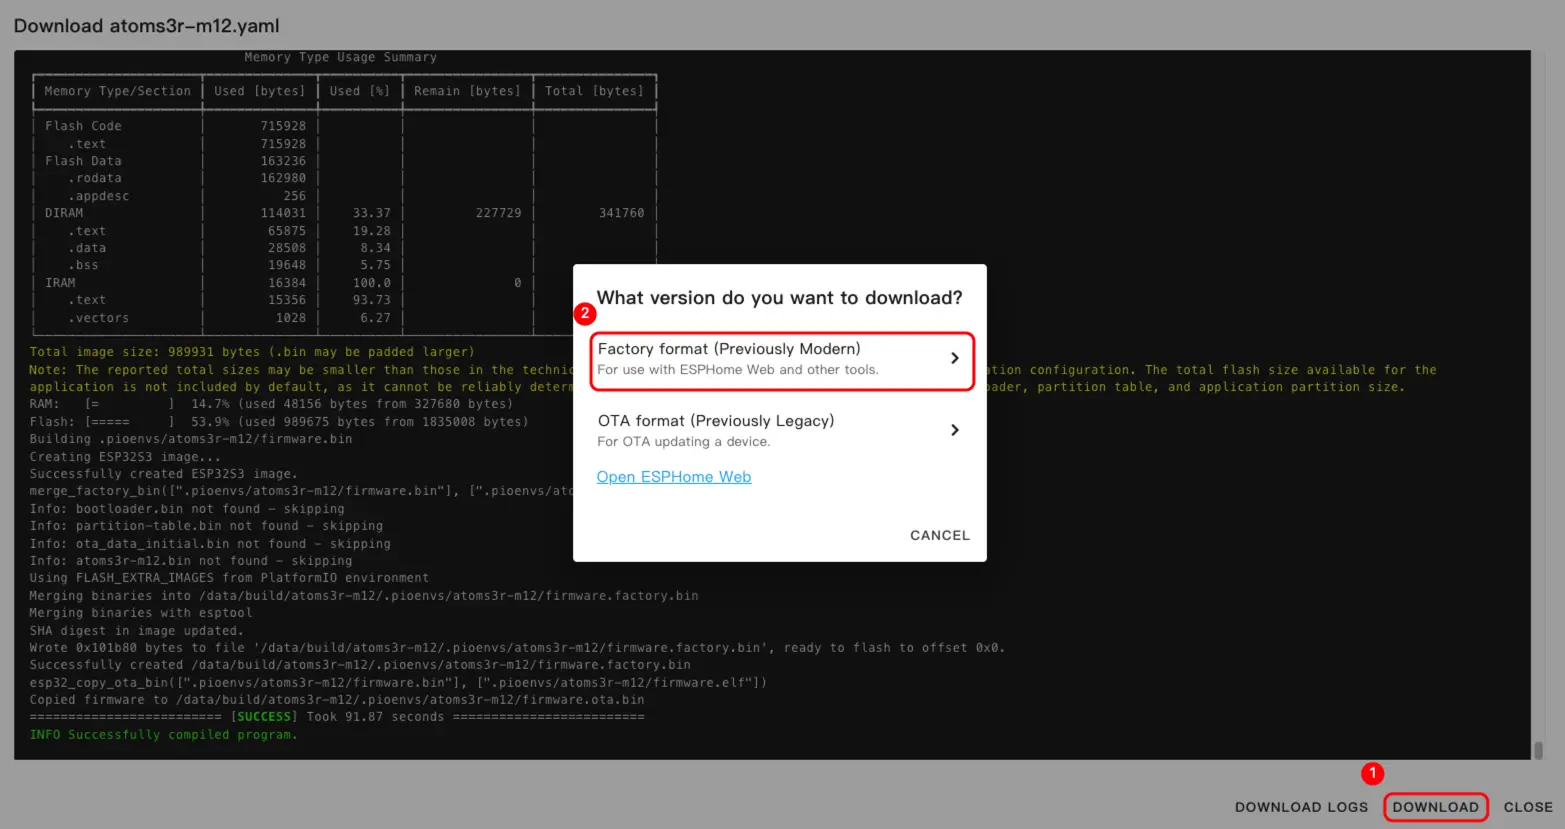
- Wait for the firmware compilation to complete, click
Downloadand selectFactory format (Previously Modern)to save the firmware locally.
Tip
The complete example configuration can be found at Unit AC Measure. The first build may take some time depending on the performance and network environment of the Home Assistant host.
Flash Firmware
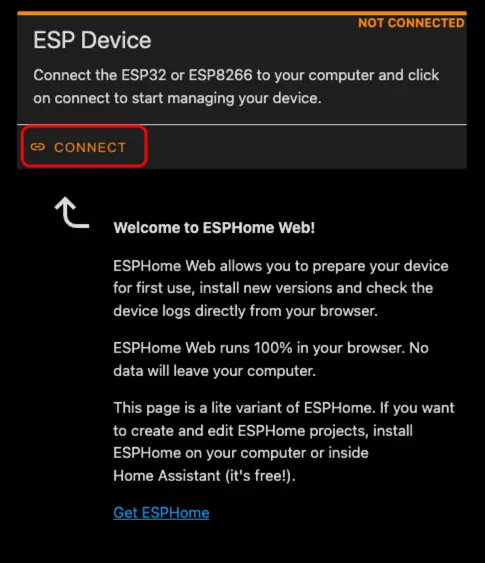
- Connect AtomS3R to the computer using a USB Type-C cable. Open ESPHome Web and click
CONNECT.
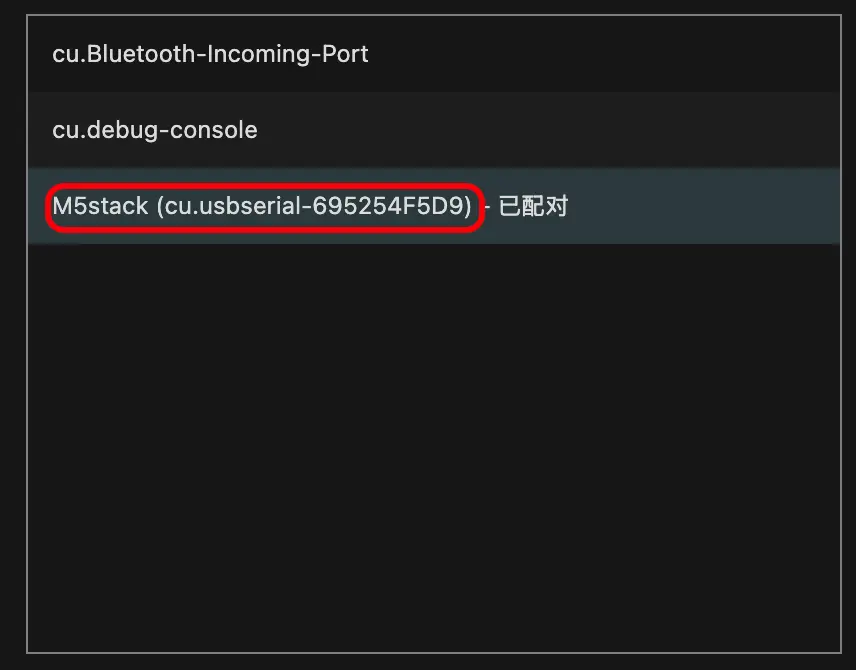
- In the pop-up serial port selection window, select the correct serial port number.
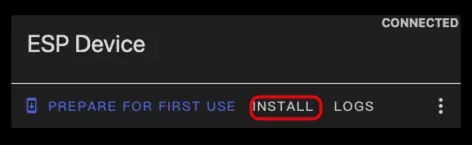
- Click
INSTALL.
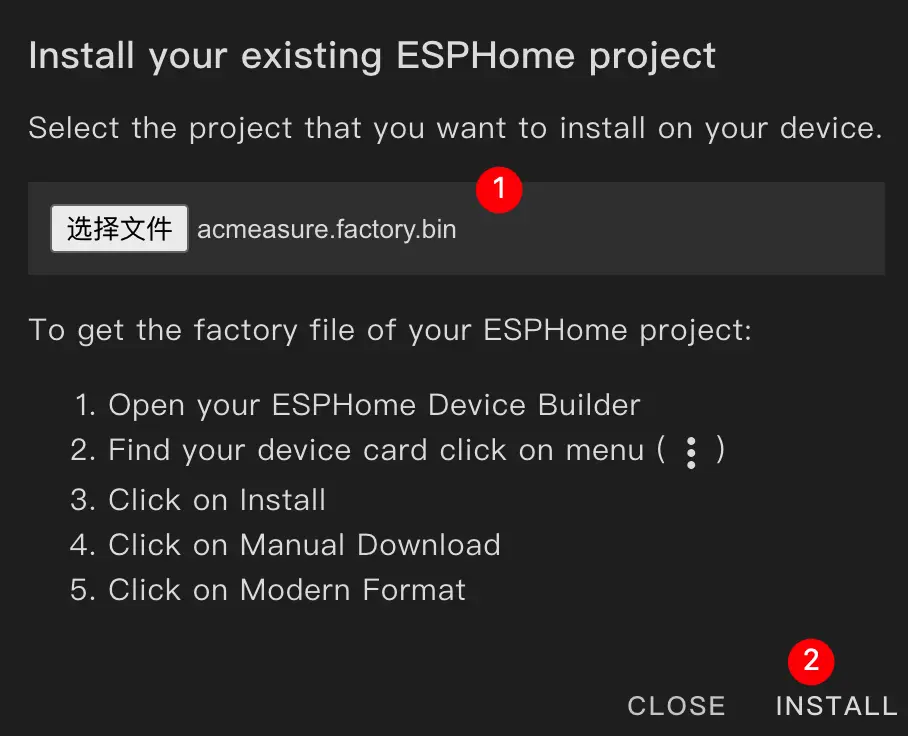
- Select the firmware file downloaded in step 3 and start flashing.
Important
The device must be reset after flashing is complete; otherwise, the firmware may not start normally.
Learn
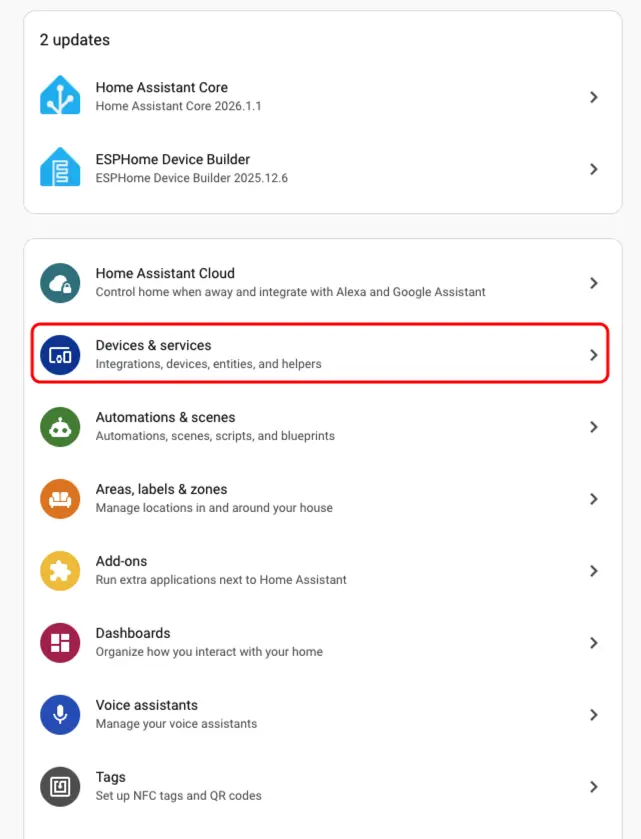
- In Home Assistant, click
Settings>Devices & Servicesin sequence to enter the integration management page.
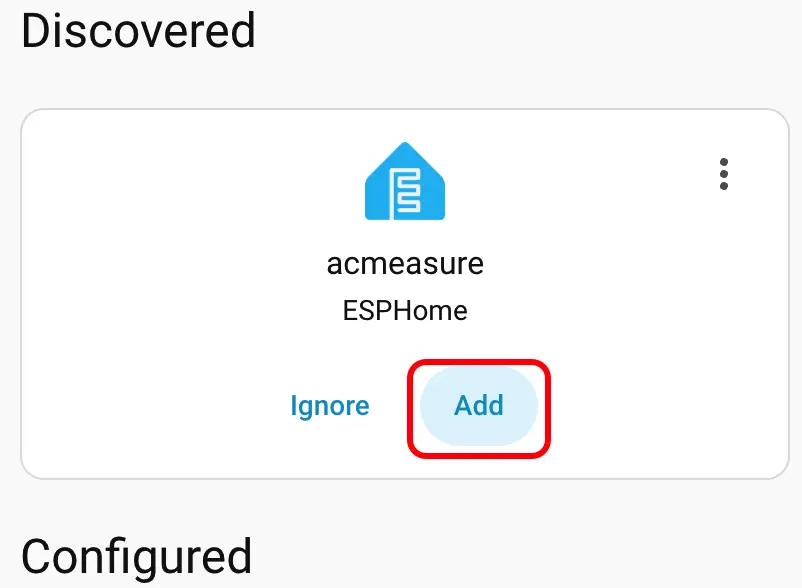
- Find the Unit AC Measure device in the
Discoveredarea, clickCONFIGURE, and follow the wizard to complete the configuration.
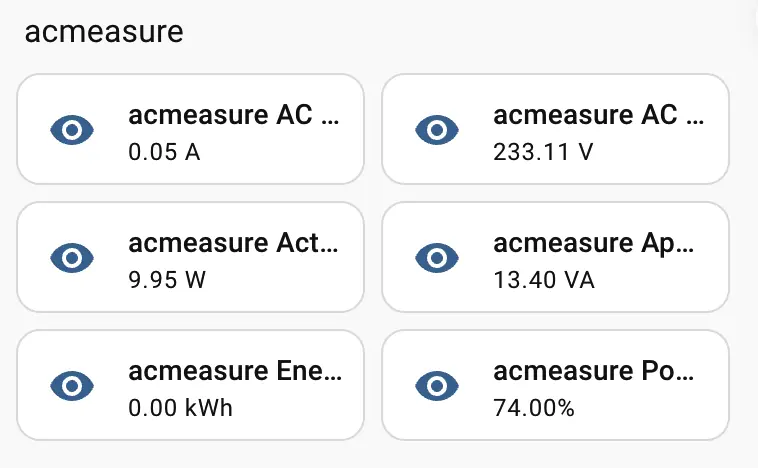
- After the device is added, multiple sensor entities can be seen on the device details page, such as AC Voltage, AC Current, Active Power, Apparent Power, Power Factor, and Energy, along with their real-time values.
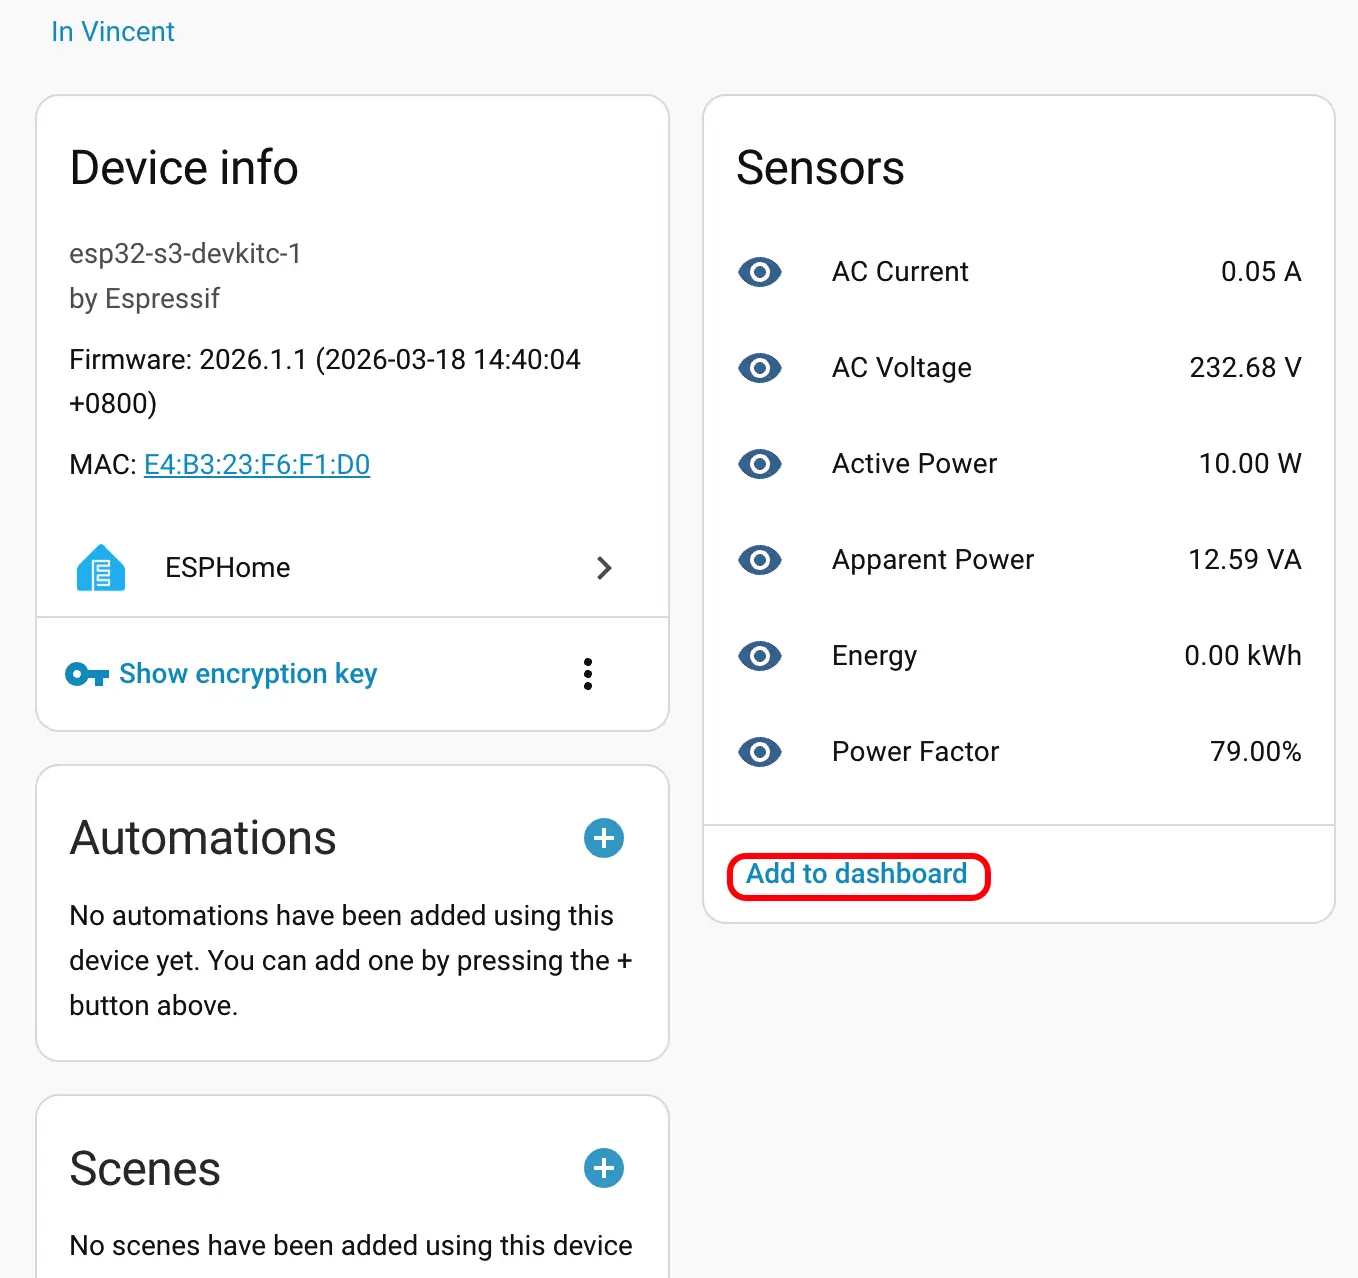
- Finally, add these sensor entities to the dashboard to monitor AC electrical parameters and power consumption in real-time.