

Home Assistant
Media Player
Expansion
Sensor
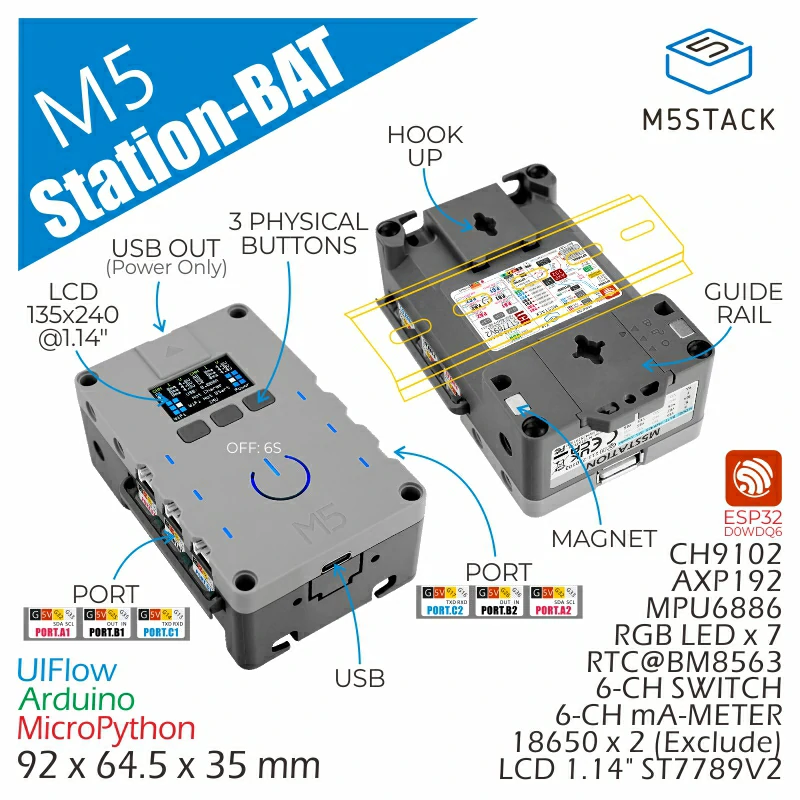
Station-Bat Controller Home Assistant Integration
This chapter introduces the full method for integrating Station-Bat into Home Assistant.
Preparation
- A host with Home Assistant installed.
- Install and enable the ESPHome Builder plugin in Home Assistant.
Tip
This tutorial uses ESPHome version 2026.2.4 for firmware compilation and flashing. If you encounter issues during the compilation/upload process, try switching ESPHome to this version and try again.
Quick Start
Click the button below to flash the firmware with one click. Follow the on-screen instructions to complete the configuration and quickly experience Station-Bat integration with Home Assistant. For one-click flashing and subsequent configuration, please refer to the tutorial.
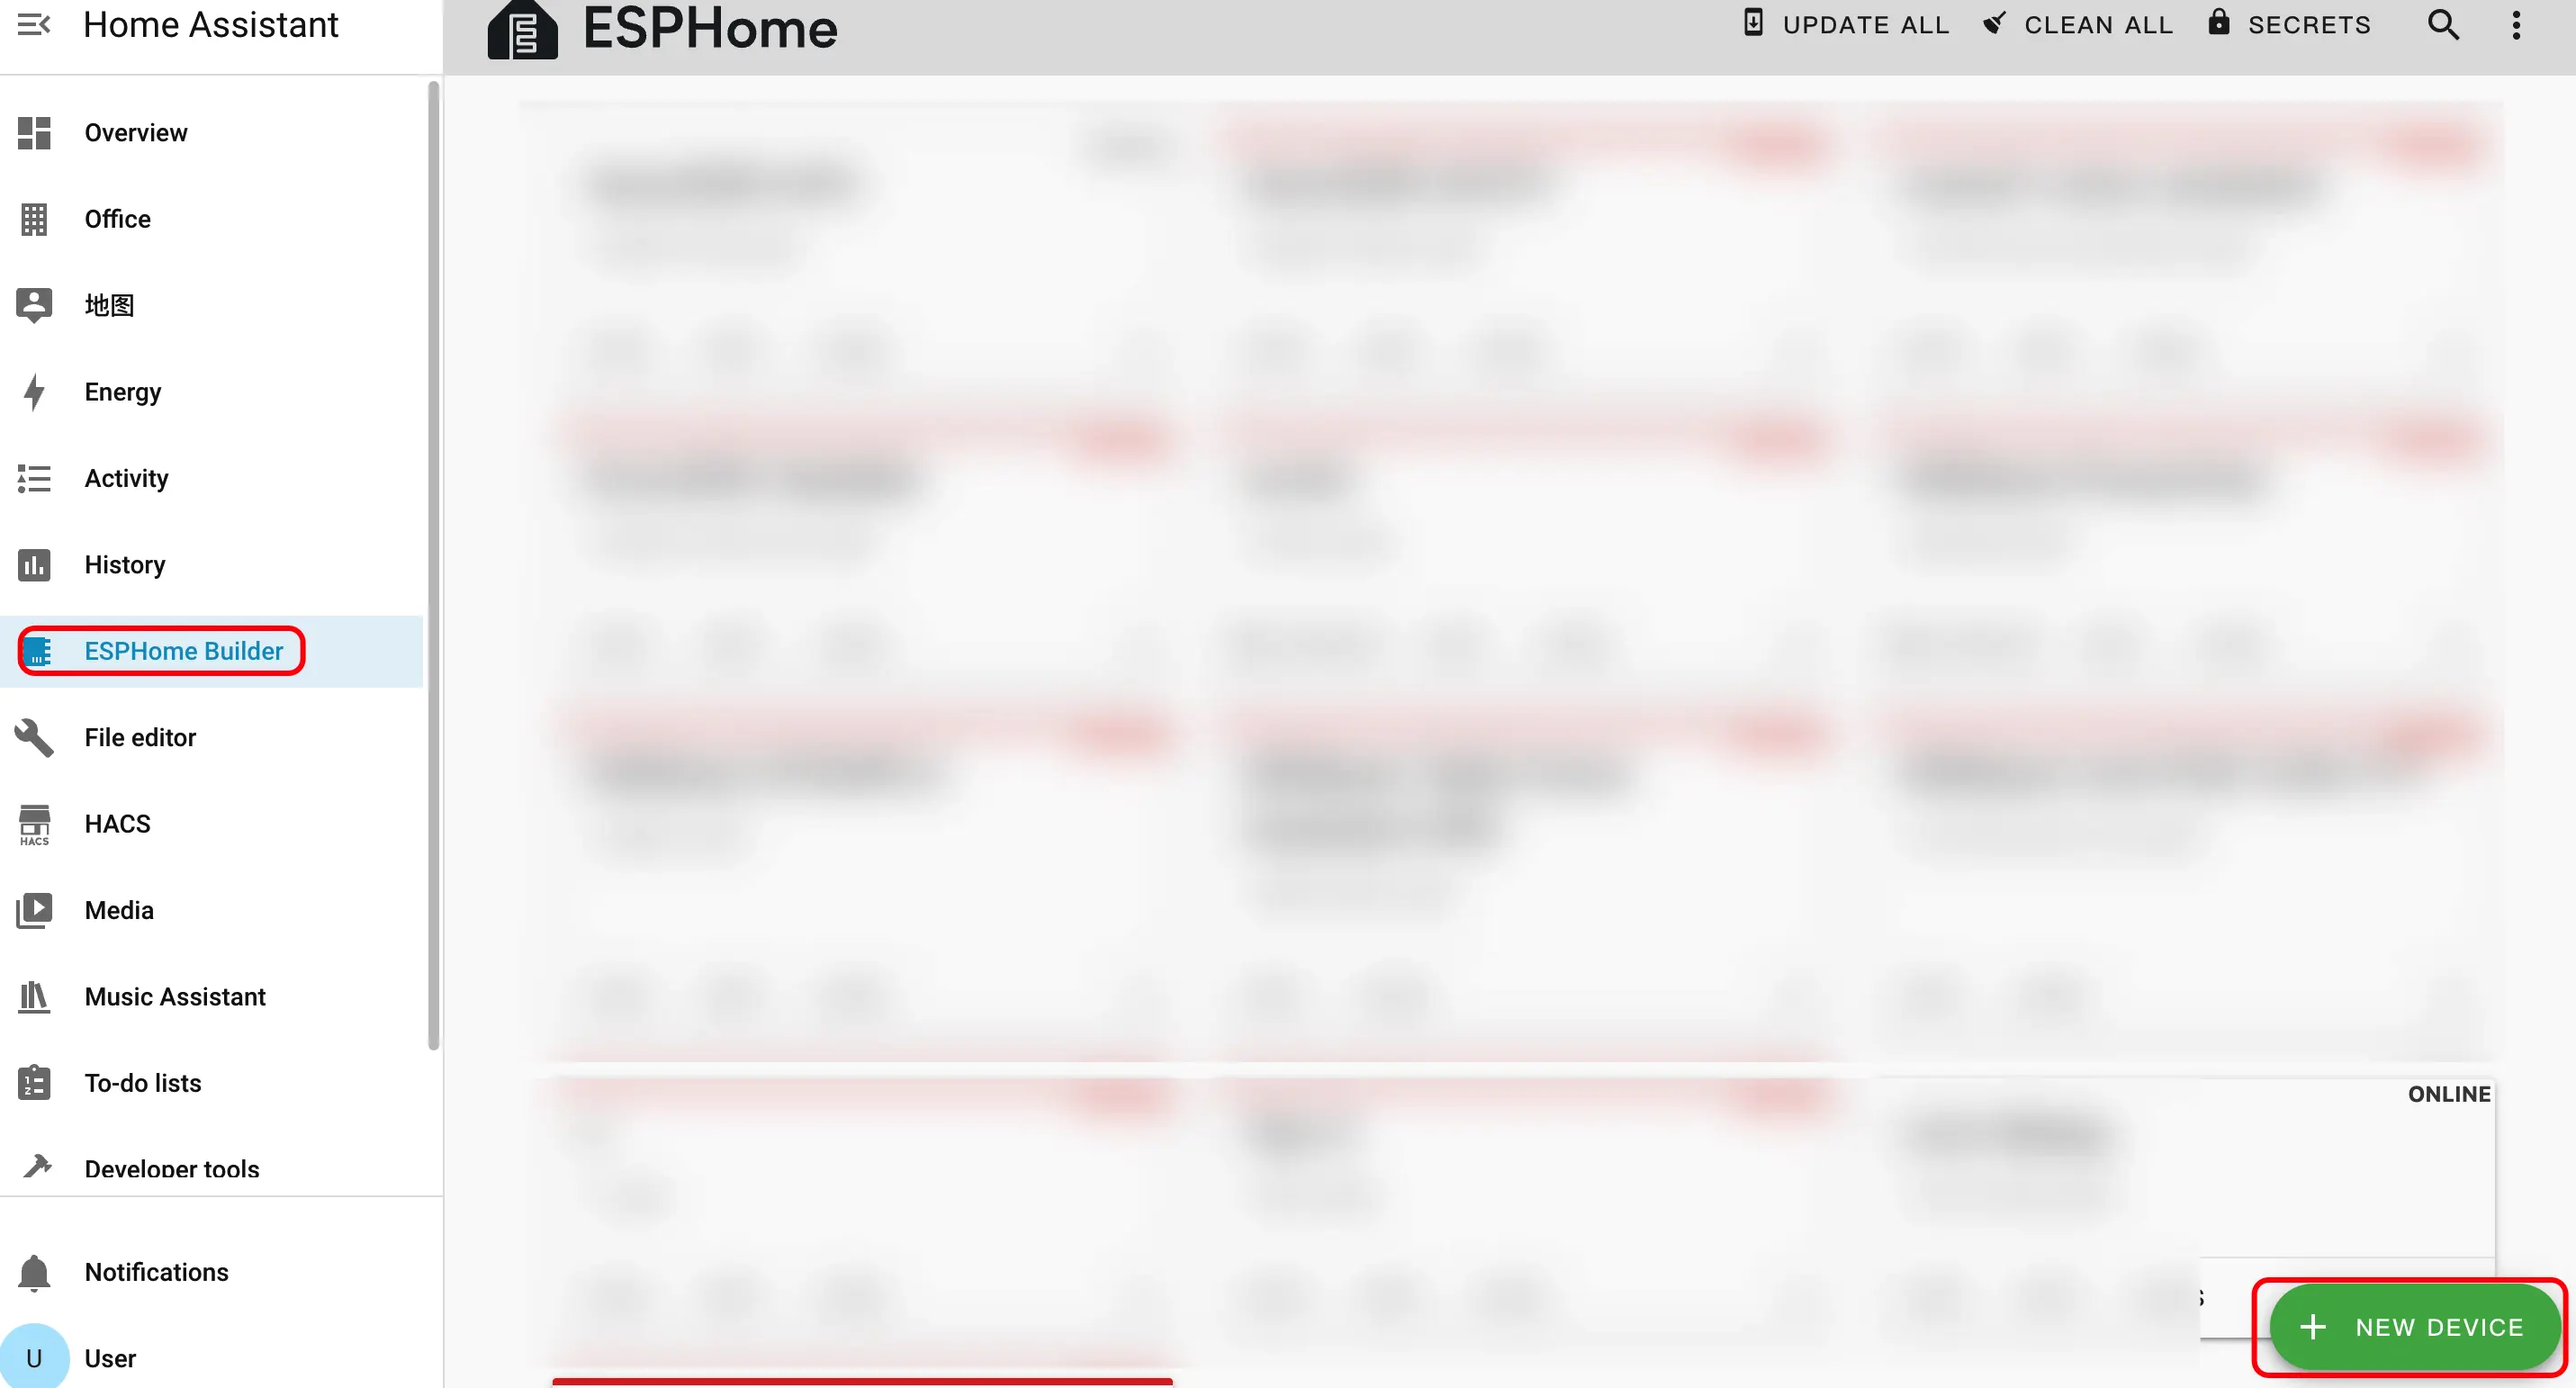
Create Device
- Click the green button in the bottom right corner to create a device.
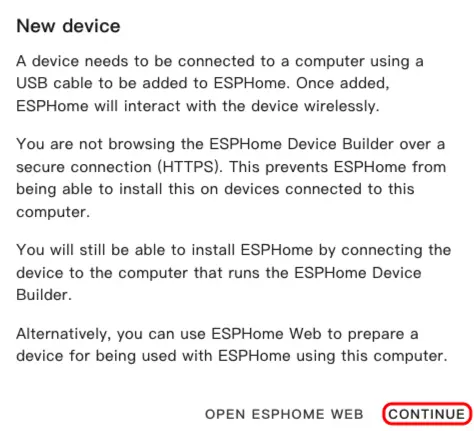
- Click
CONTINUE.
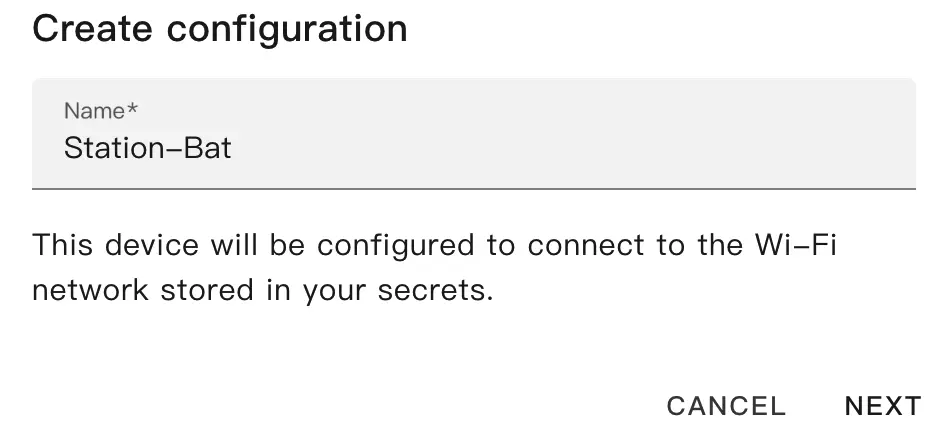
- Click
New Device Setup.

- Enter the device name and click
NEXT.
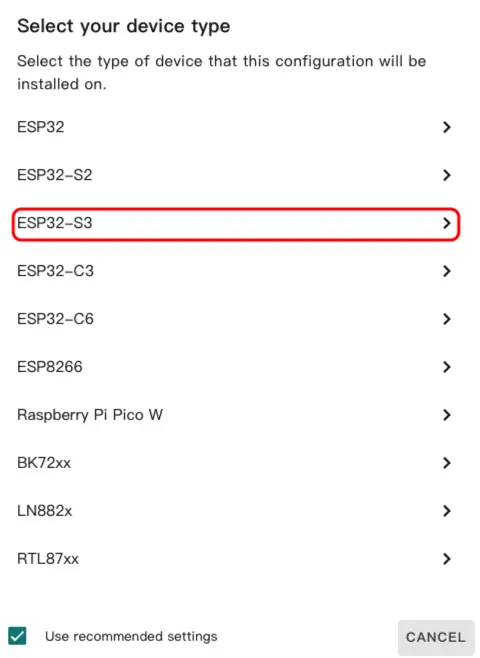
- Select
ESP32.
- Click
SKIPto skip the wizard.
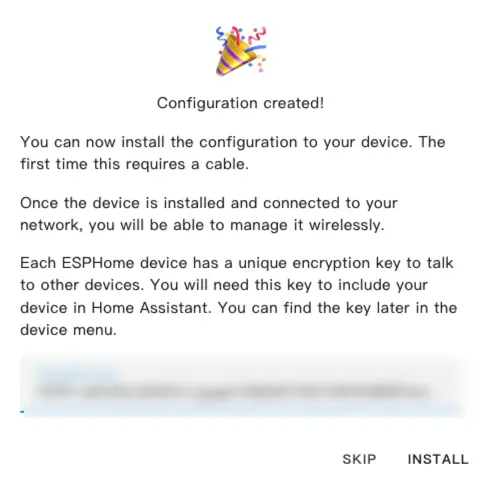
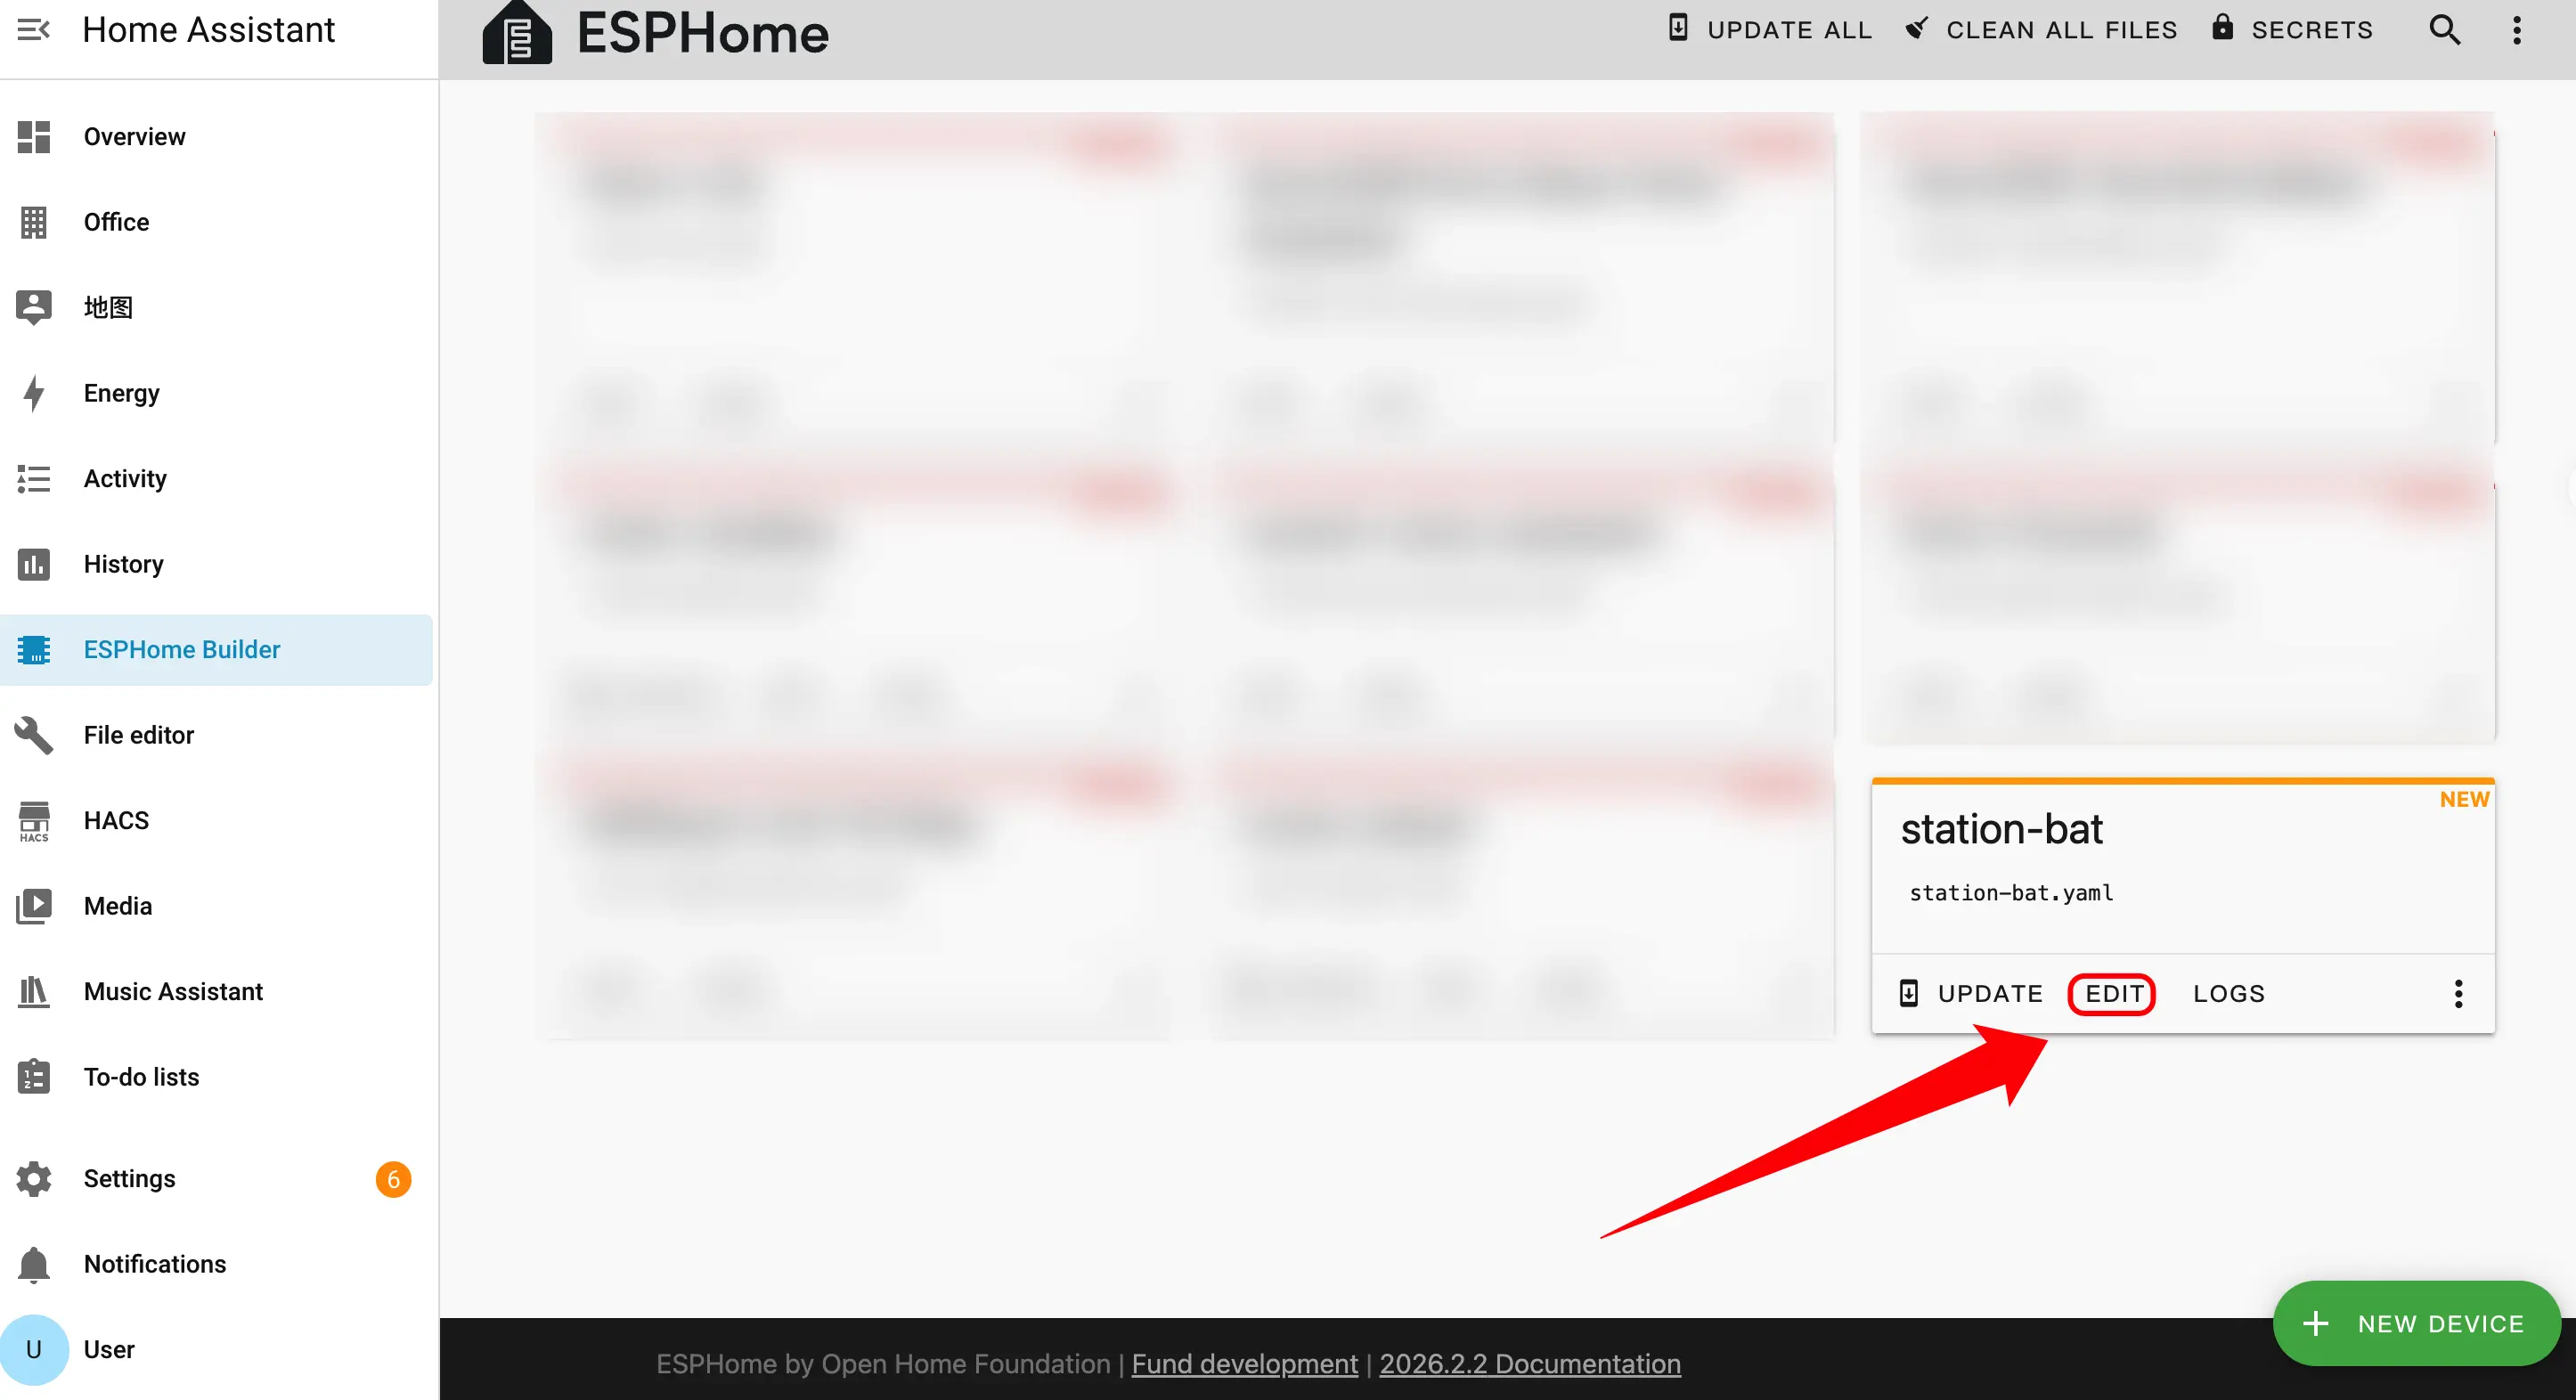
- Click
EDITto customize the device functionality via the YAML file.
Device Configuration
The following are the core parts of the configuration, accompanied by corresponding descriptions and reference links.
Boot Configuration
- Add boot initialization logic to ensure the time can be read from the RTC during startup.
esphome:
  name: station-bat
  friendly_name: station-bat
  on_boot:
    - priority: 600
      then:
- bm8563.read_time:External Components
- Add External Components configuration. The
m5station_axp192component provides power management and battery level detection support for Station-Bat.
external_components:
  - source: github://m5stack/esphome-yaml/components
    components: [m5station_axp192]
refresh: 0sI2C Bus Configuration
- Add I2C component. The I2C bus is shared by the IMU, power management chip, and current/voltage monitoring chips.
i2c:
  - id: i2c_bus
    sda: GPIO21
scl: GPIO22SPI Bus Configuration
- Add SPI component. The SPI bus is used to drive the ST7789V display screen.
spi:
  clk_pin: GPIO18
mosi_pin: GPIO23Sensor Configuration
- Add Sensor component.
- Add MPU6886 IMU sensor for accelerometer, gyroscope, and temperature data collection.
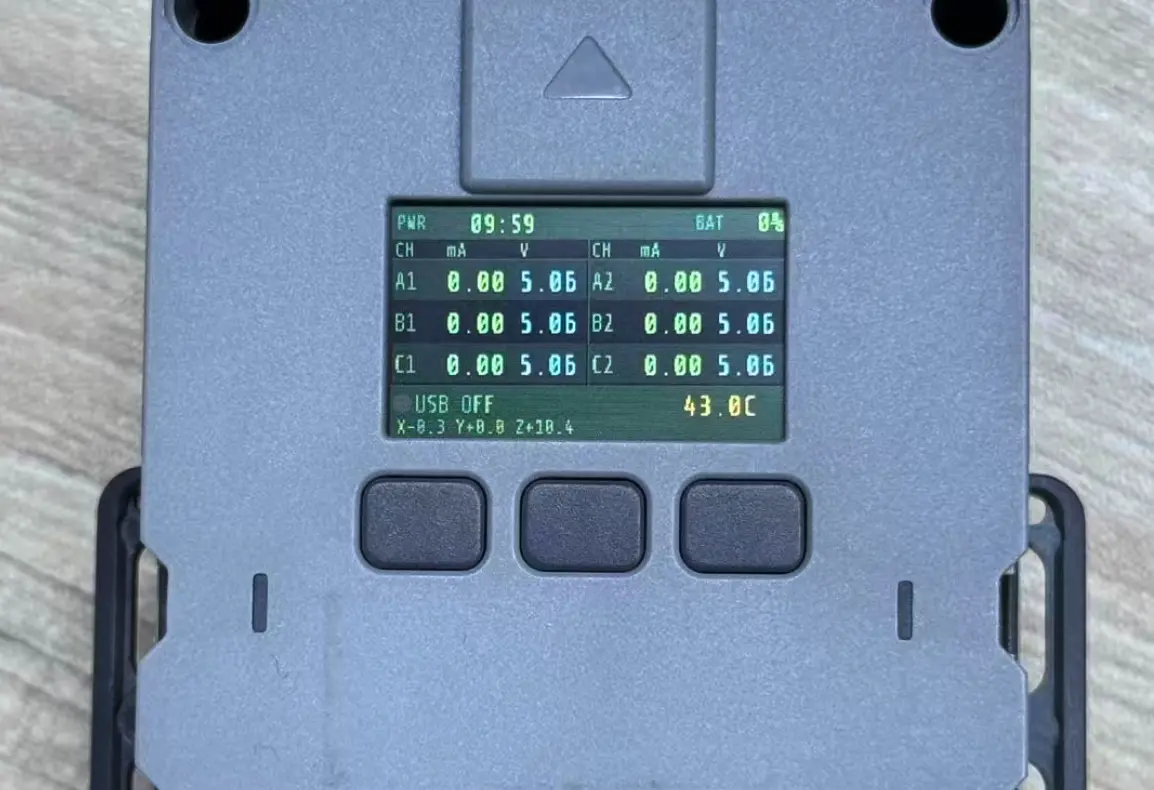
- Add two INA3221 current/voltage monitoring chips, covering a total of 6 channels (A1/A2, B1/B2, C1/C2).
- The
m5station_axp192sensor is provided by the external component introduced earlier, used for battery level and other power-related information.
sensor:
  - platform: mpu6886
    i2c_id: i2c_bus
    accel_x:
      name: "MPU6886 Accel X"
      id: imu_ax
    accel_y:
      name: "MPU6886 Accel Y"
      id: imu_ay
    accel_z:
      name: "MPU6886 Accel z"
      id: imu_az
    gyro_x:
      name: "MPU6886 Gyro X"
    gyro_y:
      name: "MPU6886 Gyro Y"
    gyro_z:
      name: "MPU6886 Gyro z"
    temperature:
      name: "MPU6886 Temperature"
      id: imu_temp
    update_interval: 5s

  - platform: m5station_axp192
    id: pmu
    i2c_id: i2c_bus
    battery_level:
      name: "M5Station Battery Level"
      id: bat_level
    update_interval: 60s
    brightness: 0.8

  - platform: ina3221
    id: ina1
    i2c_id: i2c_bus
    address: 0x40
    update_interval: 1s
    channel_1:
      shunt_resistance: 0.01
      bus_voltage:
        name: "P.A1 Bus Voltage"
        id: v_a1
      current:
        name: "P.A1 Current"
        id: i_a1
    channel_2:
      shunt_resistance: 0.01
      bus_voltage:
        name: "P.A2 Bus Voltage"
        id: v_a2
      current:
        name: "P.A2 Current"
        id: i_a2
    channel_3:
      shunt_resistance: 0.01
      bus_voltage:
        name: "P.B1 Bus Voltage"
        id: v_b1
      current:
        name: "P.B1 Current"
        id: i_b1

  - platform: ina3221
    id: ina2
    i2c_id: i2c_bus
    address: 0x41
    update_interval: 1s
    channel_1:
      shunt_resistance: 0.01
      bus_voltage:
        name: "P.B2 Bus Voltage"
        id: v_b2
      current:
        name: "P.B2 Current"
        id: i_b2
    channel_2:
      shunt_resistance: 0.01
      bus_voltage:
        name: "P.C1 Bus Voltage"
        id: v_c1
      current:
        name: "P.C1 Current"
        id: i_c1
    channel_3:
      shunt_resistance: 0.01
      bus_voltage:
        name: "P.C2 Bus Voltage"
        id: v_c2
      current:
        name: "P.C2 Current"
id: i_c2Binary Sensor Configuration
- Add Binary Sensor component. The three physical buttons on the panel are mapped to GPIO37, GPIO38, and GPIO39 respectively.
binary_sensor:
  - platform: gpio
    name: "Button1"
    pin:
      number: GPIO37
      inverted: true
  - platform: gpio
    name: "Button2"
    pin:
      number: GPIO38
      inverted: true
  - platform: gpio
    name: "Button3"
    pin:
      number: GPIO39
inverted: trueSwitch Configuration
- Add Switch component. The LCD backlight is controlled via the AXP192 power management chip, and the USB power output is controlled via GPIO12.
switch:
  - platform: template
    name: "LCD Backlight"
    id: lcd_backlight
    lambda: |-
      return true;
    restore_mode: ALWAYS_ON
    turn_on_action:
      - lambda: |-
          id(pmu).set_backlight(true);
    turn_off_action:
      - lambda: |-
          id(pmu).set_backlight(false);

  - platform: gpio
    name: "USB Power"
    id: usb_power
pin: GPIO12Time Configuration
- Add Time component.
- Add BM8563 RTC component. The BM8563 is responsible for keeping time when offline, synchronizes time from Home Assistant after connection, and restores to the RTC when the device restarts.
time:
  - platform: bm8563
    id: bm8563_time
    update_interval: never

  - platform: homeassistant
    id: ha_time
    on_time_sync:
      then:
- bm8563.write_time:Light Configuration
- Add Light component. Station-Bat features 7 onboard WS2812 RGB LEDs driven via GPIO4.
light:
  - platform: esp32_rmt_led_strip
    rgb_order: GRB
    pin: GPIO4
    num_leds: 7
    chipset: ws2812
name: "My Light"Display Configuration
- Add Display component.
- Add ST7789V driver for the 1.14-inch IPS screen display. The
lambdablock defines specific drawing content—refer to the configuration file in the link below for a full example.
display:
  - platform: st7789v
    model: CUSTOM
    width: 135
    height: 240
    offset_height: 52
    offset_width: 40
    cs_pin: GPIO5
    dc_pin: GPIO19
    reset_pin: GPIO15
    rotation: 90
    update_interval: 1s
    lambda: |-
      // Define your display content here
// See the complete example for a full implementationFirmware Build
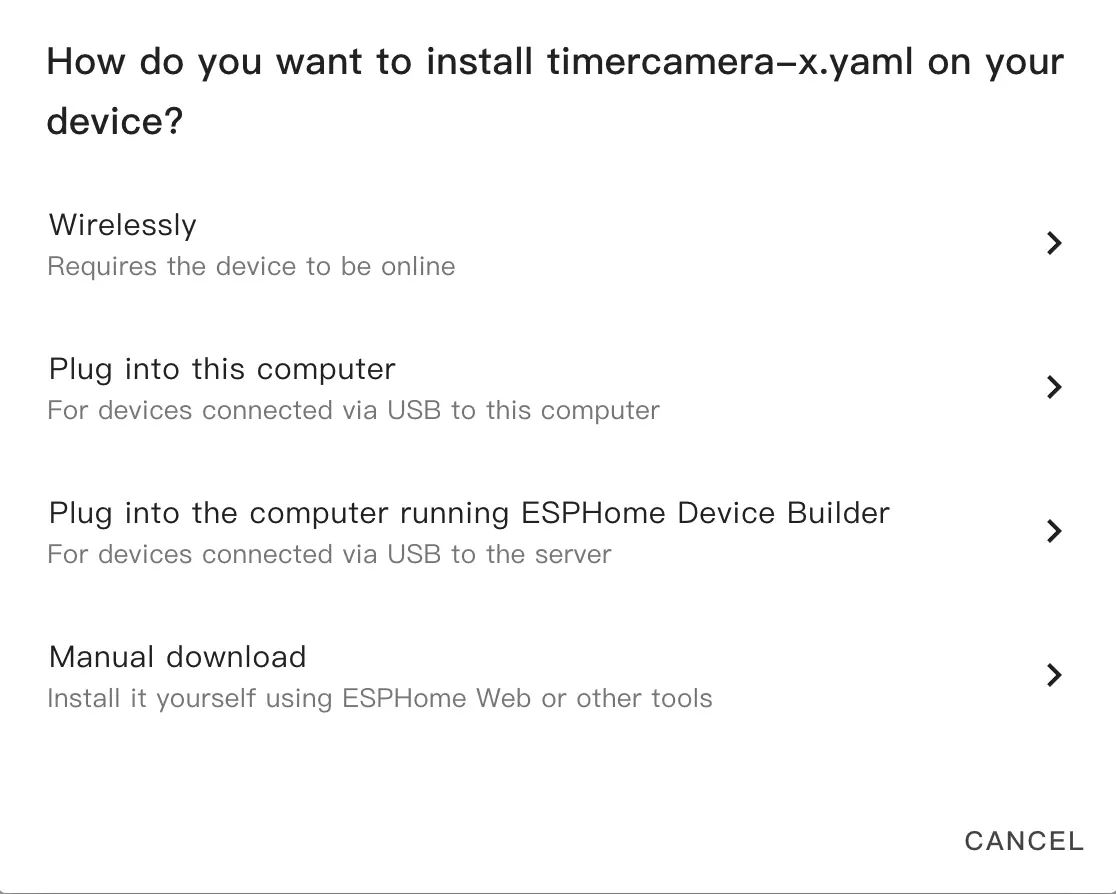
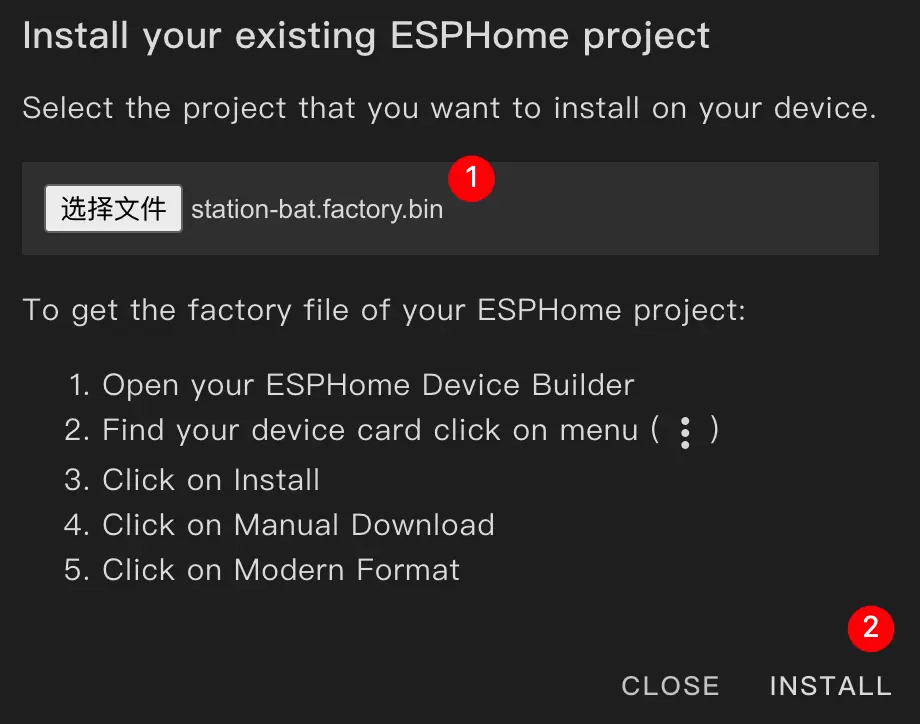
- After modifying, click
SAVEandINSTALLin the top right corner, then selectManual Downloadin the pop-up dialog to download manually.
- Click
INSTALLand wait for the firmware compilation to complete.
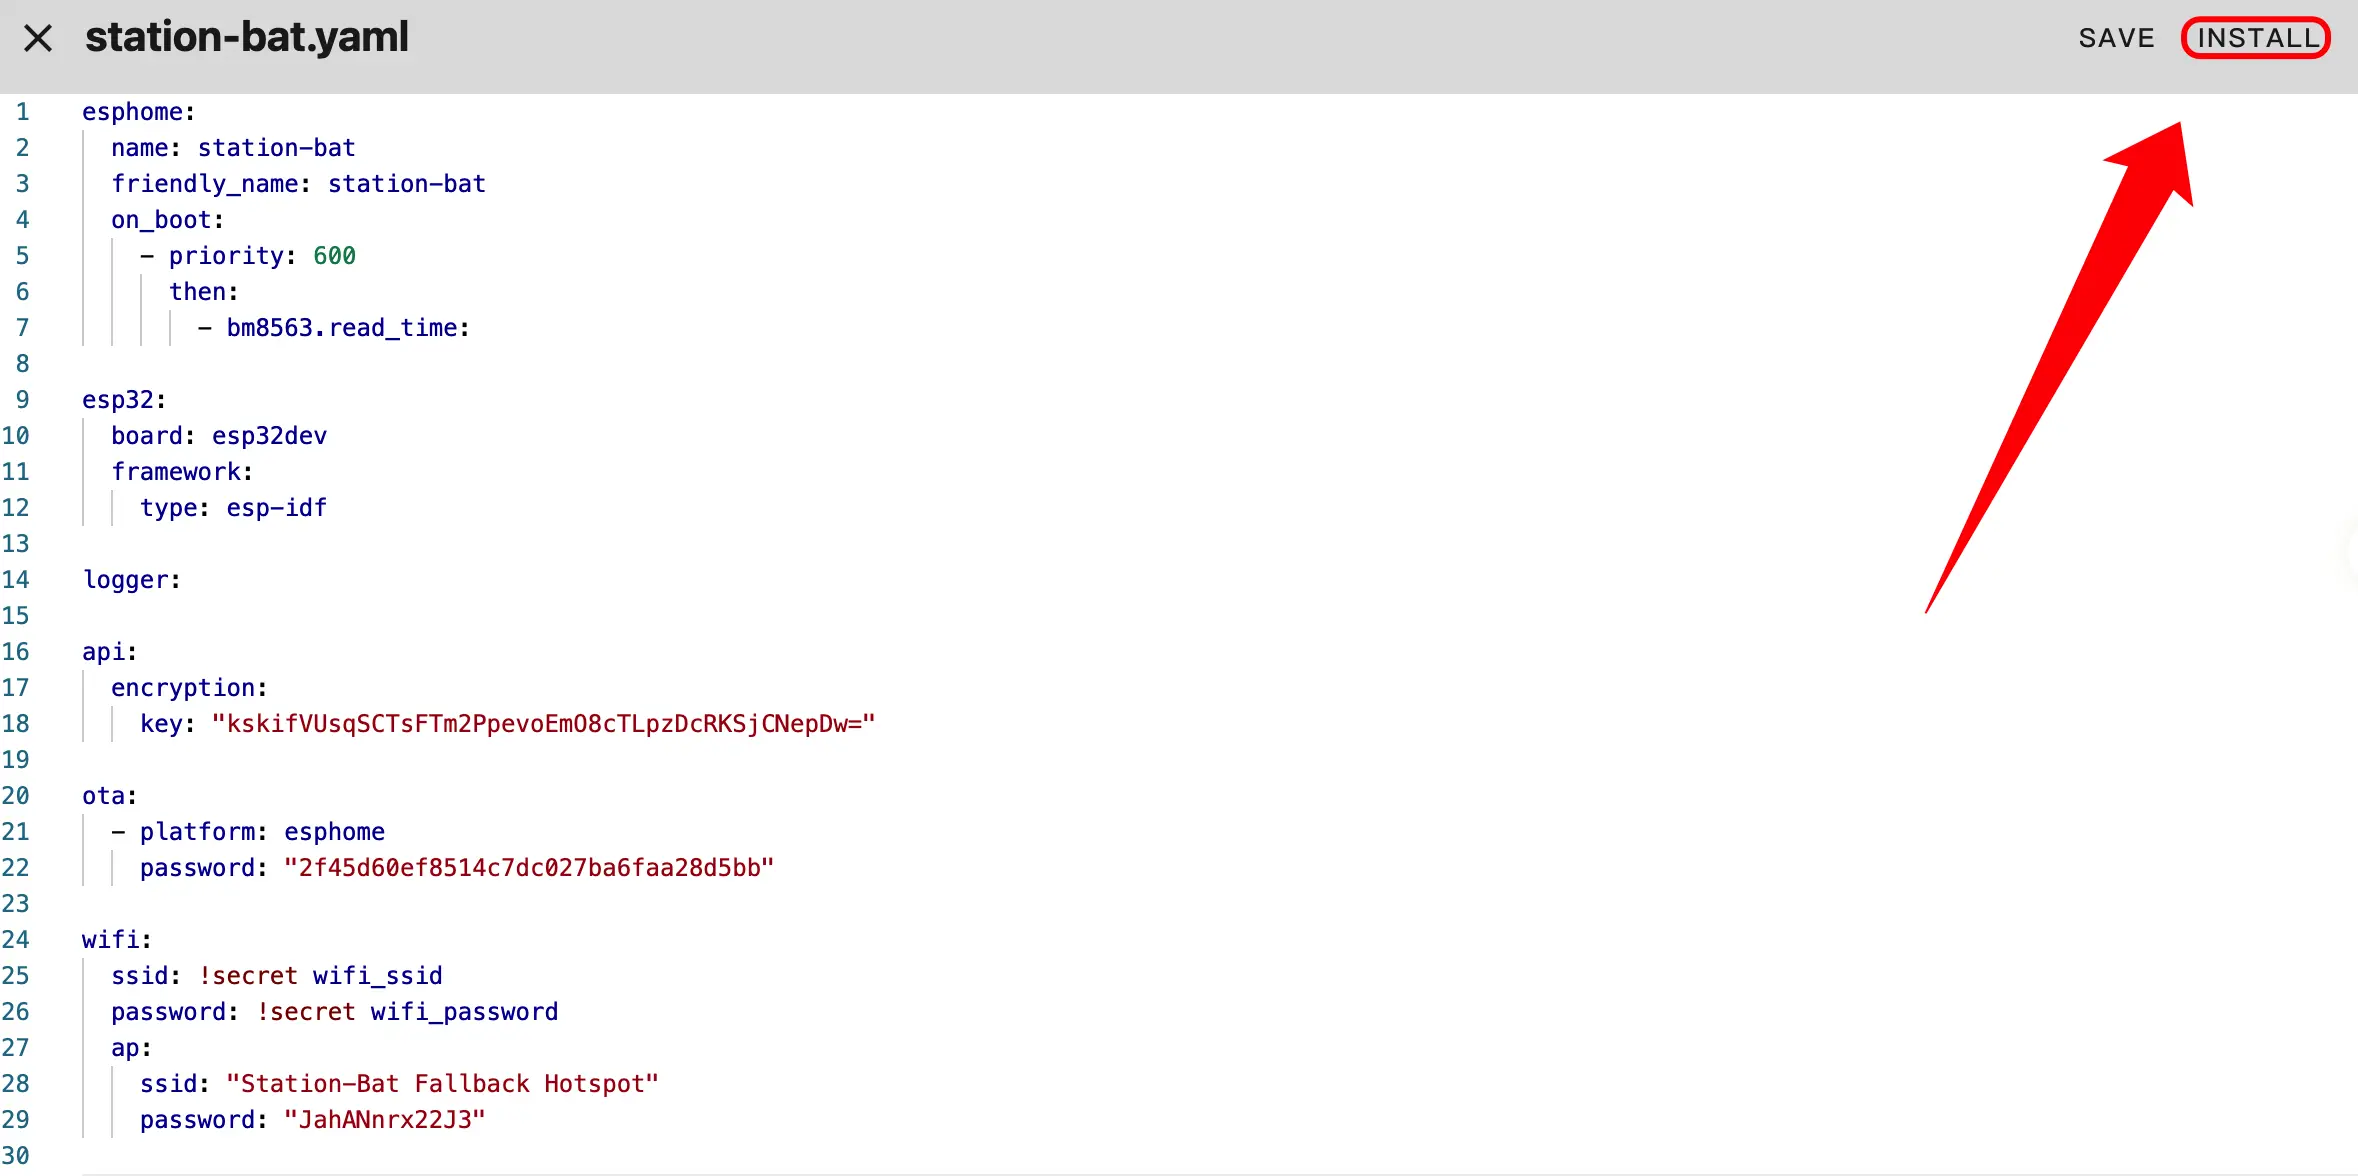
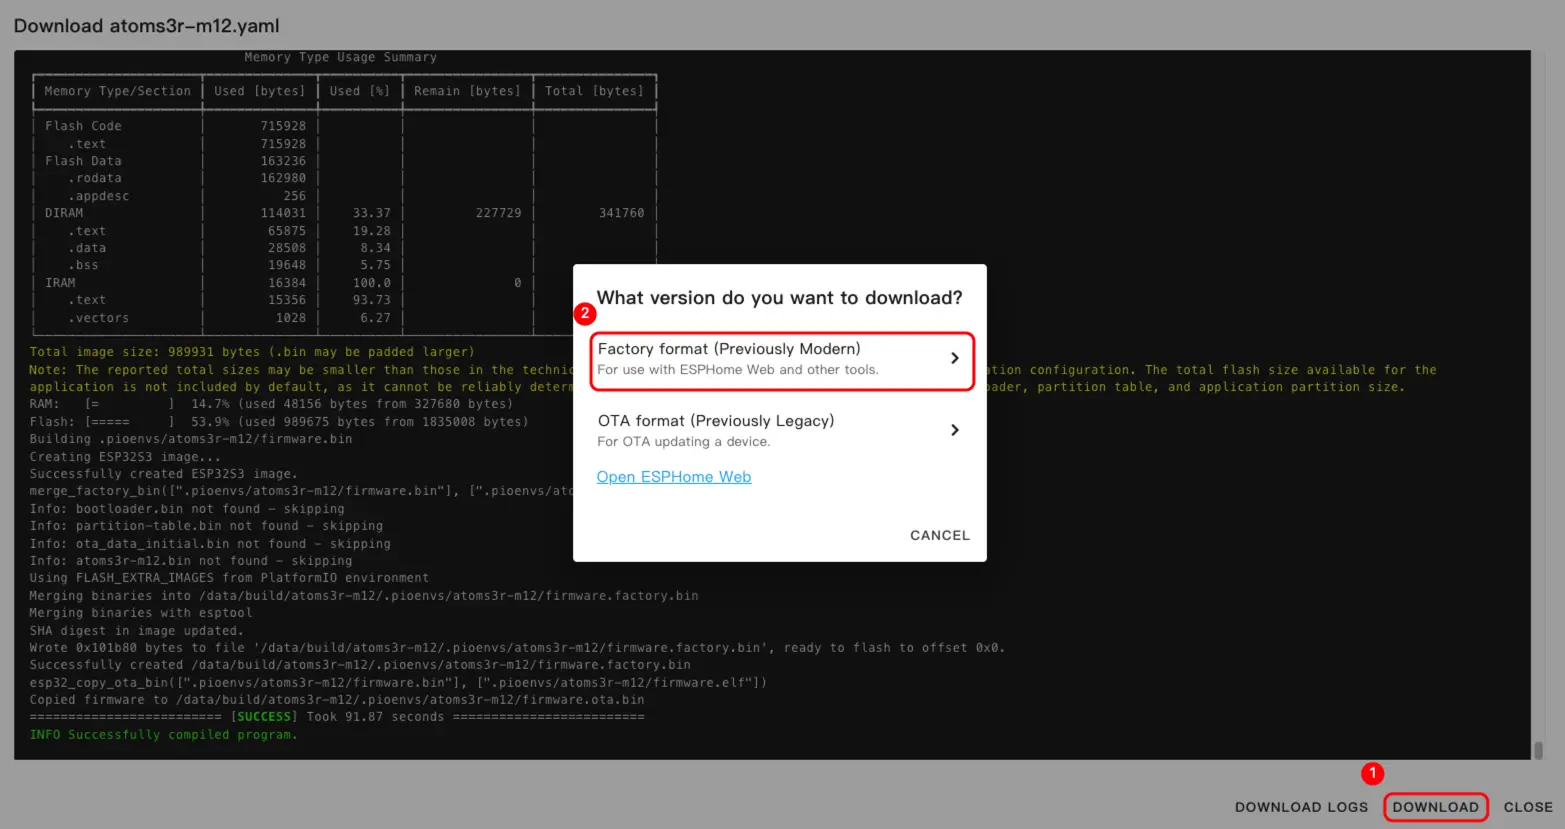
- Once compilation is complete, click Download and select the
Factory format (Previously Modern)format.
Tip
Click Station-Bat to view the complete example configuration. The first build may take a long time, depending on the performance of the Home Assistant host and network conditions.
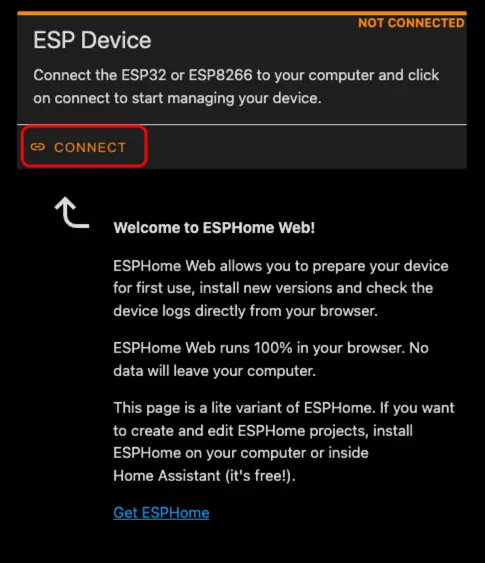
Firmware Upload
- Connect the device to the host using a USB Type-C cable, open ESPHome Web, and click
CONNECTto link the device.
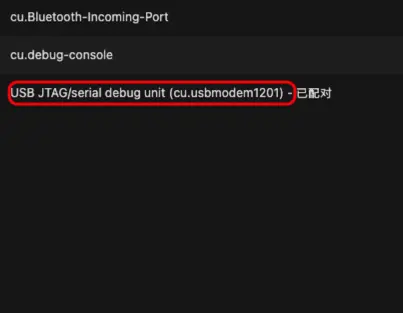
- Select the corresponding serial port number from the pop-up list.
- Click
INSTALL.
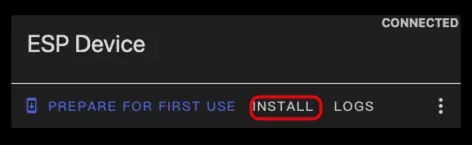
- Select the previously compiled firmware file for flashing.
Tip
After flashing is complete, please press the device's reset button to apply the new firmware.
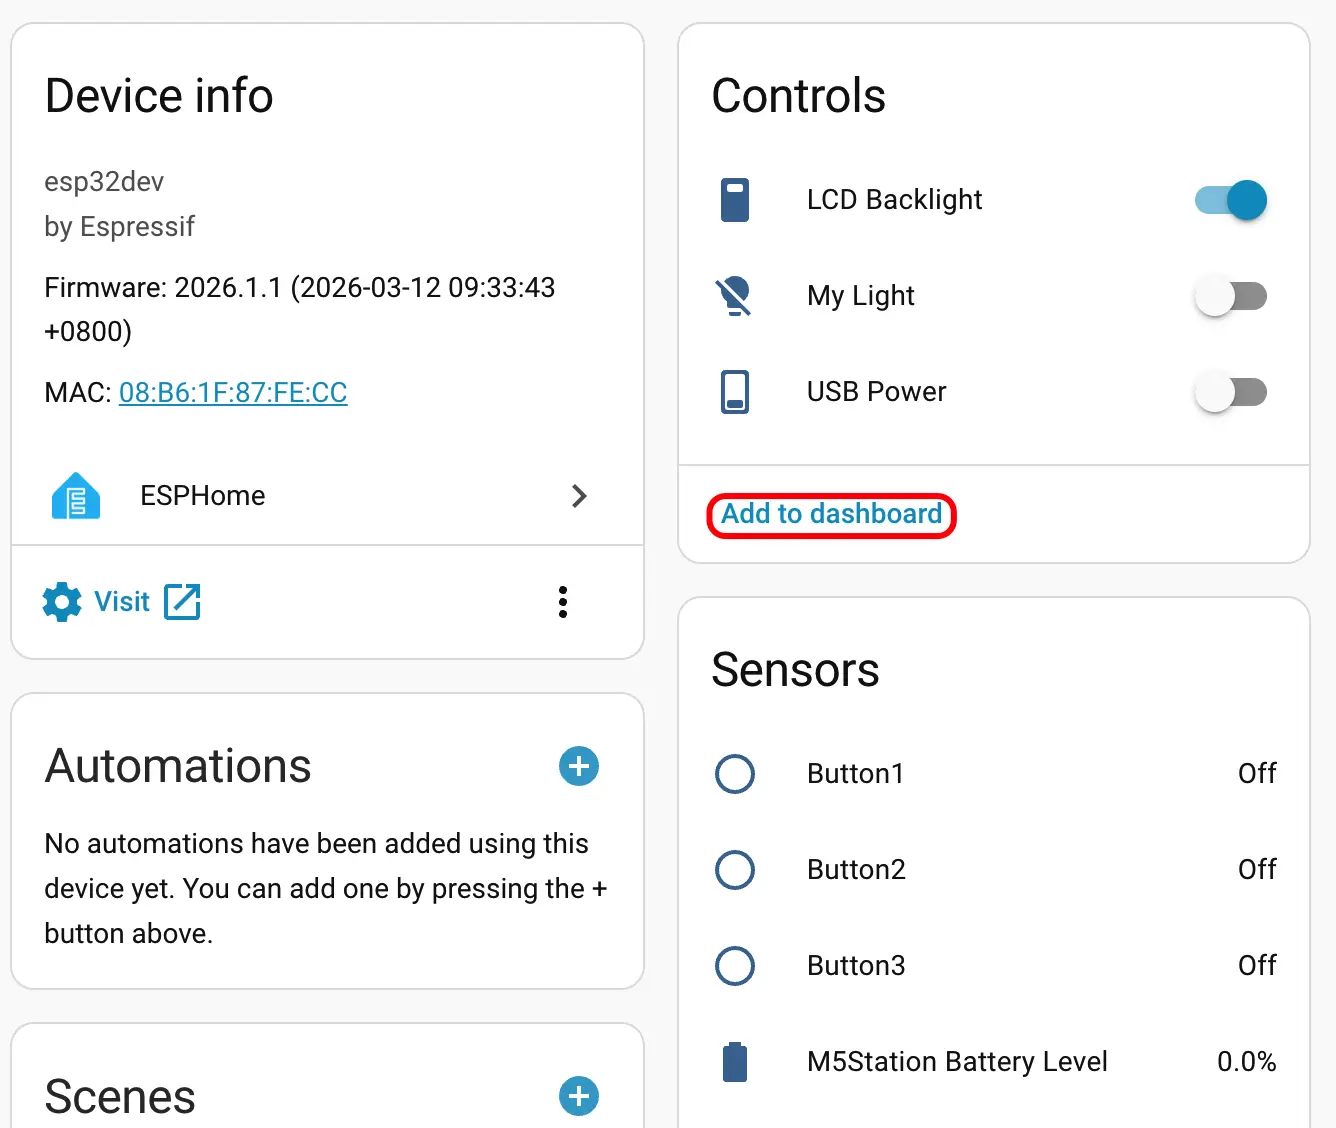
Getting Started
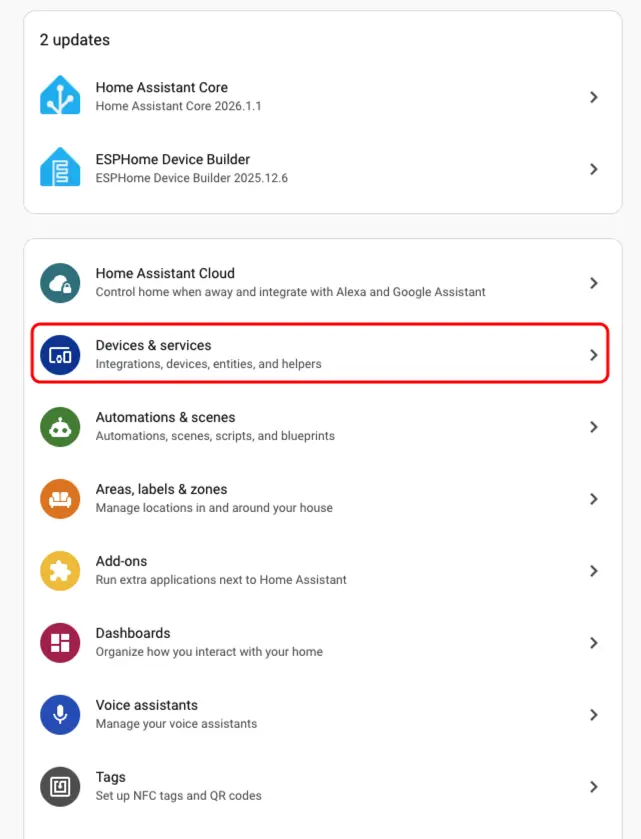
- In Home Assistant, click
Settings→Devices & Servicesto view the device list.
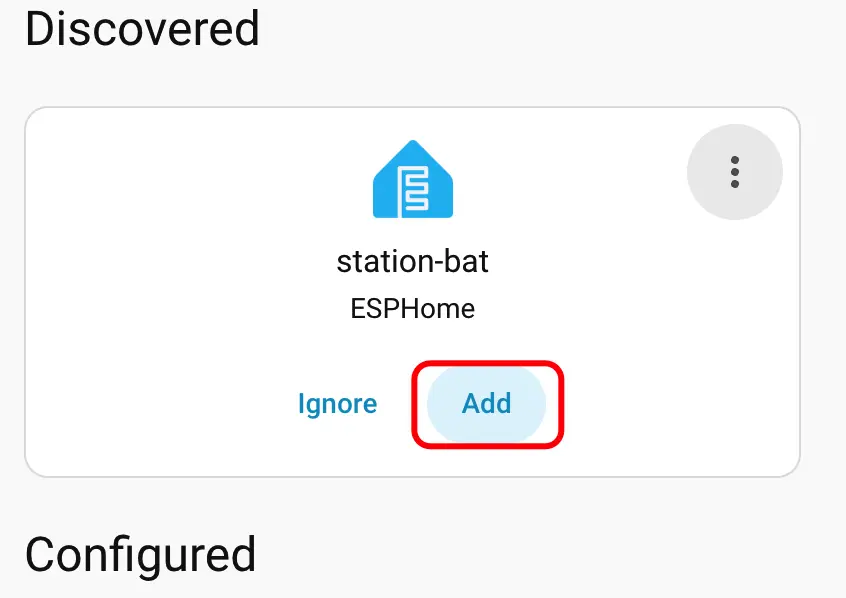
- The corresponding device can be seen in the
Discoveredarea; clickCONFIGUREto complete the addition.
- Once added, various sensor data will be correctly displayed.
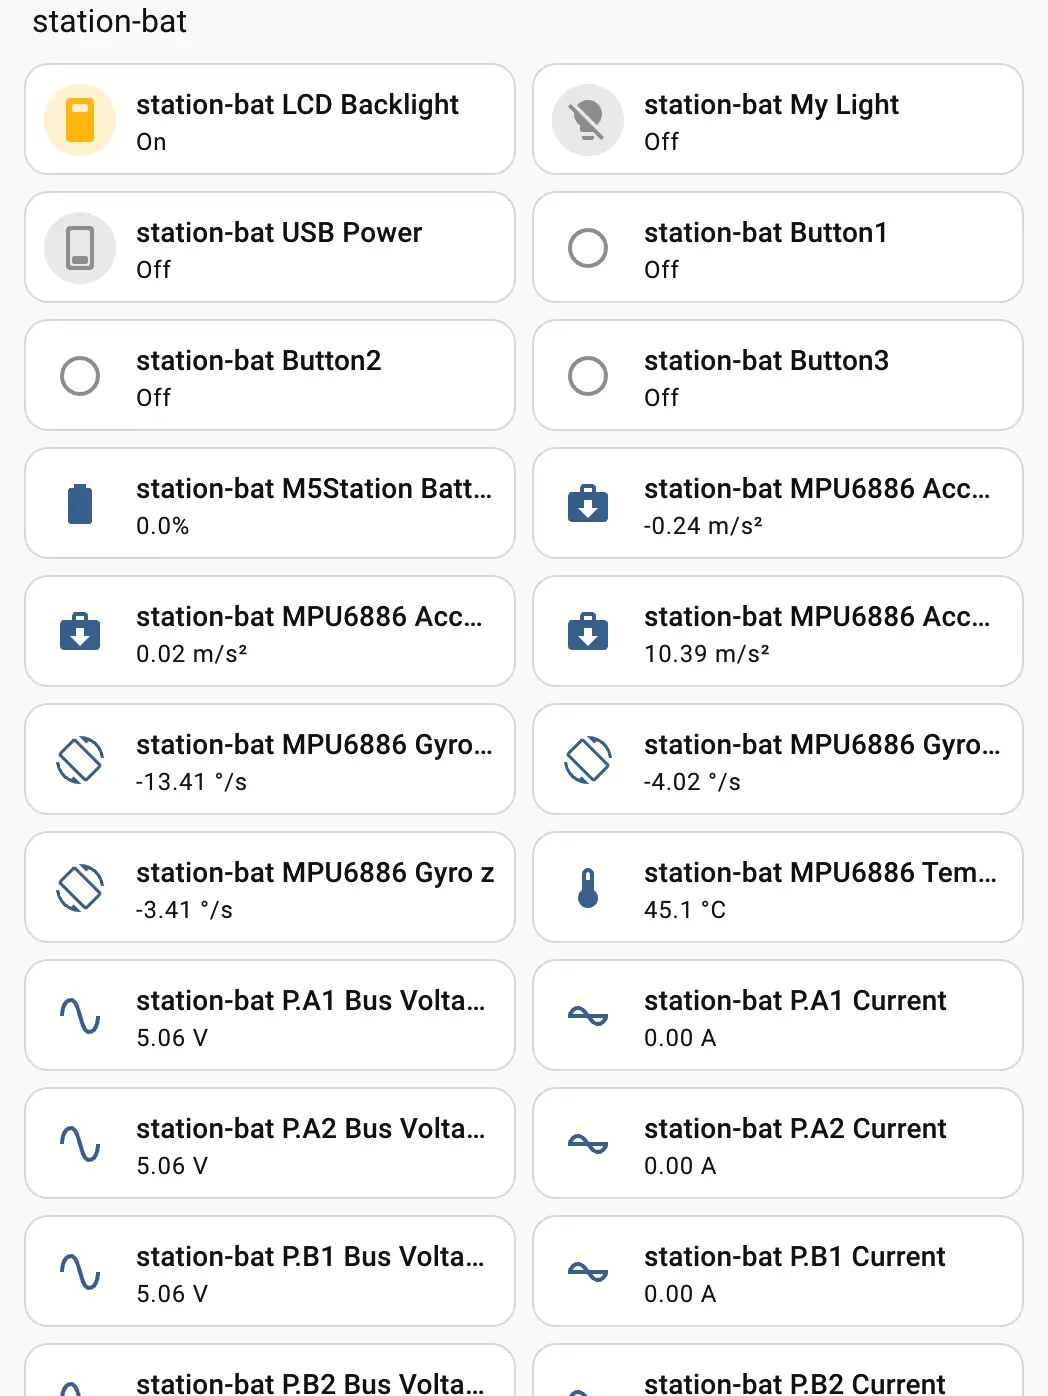
- Finally, add these entities to the Dashboard; the effect is shown in the image below.
Page Tools