Product Guide
Linux PC
CardputerZero
AI Accelerator Card
LLM-8850 Card
Large Language Models
AI & Agent
Real-Time AI Voice Assistant
XiaoZhi Voice Assistant
AtomS3R-M12 Volcengine Kit
Offline Voice Recognition
Industrial Control
IoT Measuring Instruments
Air Quality
PowerHub
Module13.2 PPS
VAMeter
T-Lite
Input & Output Devices
Ethernet Camera
PoECAM
Wi-Fi Camera
Unit CamS3/-5MP
AI Camera
LoRa & LoRaWAN
Motor Control
Restore Factory Firmware
DIP Switch Usage Guide
Immich
Immich is an open-source self-hosted photo and video management platform that supports automatic backup, intelligent search, and cross-device access.
- Manually download the program and upload it to raspberrypi5, or pull the model repository with the following command.
git clone https://huggingface.co/AXERA-TECH/immichFile Description:
m5stack@raspberrypi:~/rsp/immich $ ls -lh
total 421M
drwxrwxr-x 2 m5stack m5stack 4.0K Oct 10 09:12 asset
-rw-rw-r-- 1 m5stack m5stack 421M Oct 10 09:20 ax-immich-server-aarch64.tar.gz
-rw-rw-r-- 1 m5stack m5stack    0 Oct 10 09:12 config.json
-rw-rw-r-- 1 m5stack m5stack 7.6K Oct 10 09:12 docker-deploy.zip
-rw-rw-r-- 1 m5stack m5stack 104K Oct 10 09:12 immich_ml-1.129.0-py3-none-any.whl
-rw-rw-r-- 1 m5stack m5stack 9.4K Oct 10 09:12 README.md
-rw-rw-r-- 1 m5stack m5stack 177 Oct 10 09:12 requirements.txt- Import the docker image
cd immich
docker load -i ax-immich-server-aarch64.tar.gz- Prepare the working directory
unzip docker-deploy.zip
cp example.env .env- Start the container
docker compose -f docker-compose.yml -f docker-compose.override.yml up -dIf started successfully, the information is as follows:
m5stack@raspberrypi:~/rsp/immich $ docker compose -f docker-compose.yml -f docker-compose.override.yml up -d
WARN[0000] /home/m5stack/rsp/immich/docker-compose.override.yml: the attribute `version` is obsolete, it will be ignored, please remove it to avoid potential confusion
[+] Running 3/3
 ✔ Container immich_postgres  Started                                      1.0s
 ✔ Container immich_redis     Started                                      0.9s
✔ Container immich_server Started 0.9s - Create a virtual environment
python -m venv mich- Activate the virtual environment
source mich/bin/activate- Install dependency packages
pip install https://github.com/AXERA-TECH/pyaxengine/releases/download/0.1.3.rc2/axengine-0.1.3-py3-none-any.whl
pip install -r requirements.txt
pip install immich_ml-1.129.0-py3-none-any.whl # Precompiled package may be upgraded; use the actual file name.- Start the immich_ml service
python -m immich_mlAfter running, you should see:
(mich) m5stack@raspberrypi:~/rsp/immich $ python -m immich_ml
[10/10/25 09:50:12] INFO     Starting gunicorn 23.0.0
[10/10/25 09:50:12] INFO     Listening at: http://[::]:3003 (8698)
[10/10/25 09:50:12] INFO     Using worker: immich_ml.config.CustomUvicornWorker
[10/10/25 09:50:12] INFO     Booting worker with pid: 8699
2025-10-10 09:50:13.589360675 [W:onnxruntime:Default, device_discovery.cc:164 DiscoverDevicesForPlatform] GPU device discovery failed: device_discovery.cc:89 ReadFileContents Failed to open file: "/sys/class/drm/card1/device/vendor"
[INFO] Available providers:  ['AXCLRTExecutionProvider']
/home/m5stack/rsp/immich/mich/lib/python3.11/site-packages/immich_ml/models/clip/cn_vocab.txt
[10/10/25 09:50:16] INFO     Started server process [8699]
[10/10/25 09:50:16] INFO     Waiting for application startup.
[10/10/25 09:50:16] INFO     Created in-memory cache with unloading after 300s
                             of inactivity.
[10/10/25 09:50:16] INFO     Initialized request thread pool with 4 threads.
[10/10/25 09:50:16] INFO Application startup complete. In your browser, enter the Raspberry Pi IP address and port 3003, for example: 192.168.20.27:3003
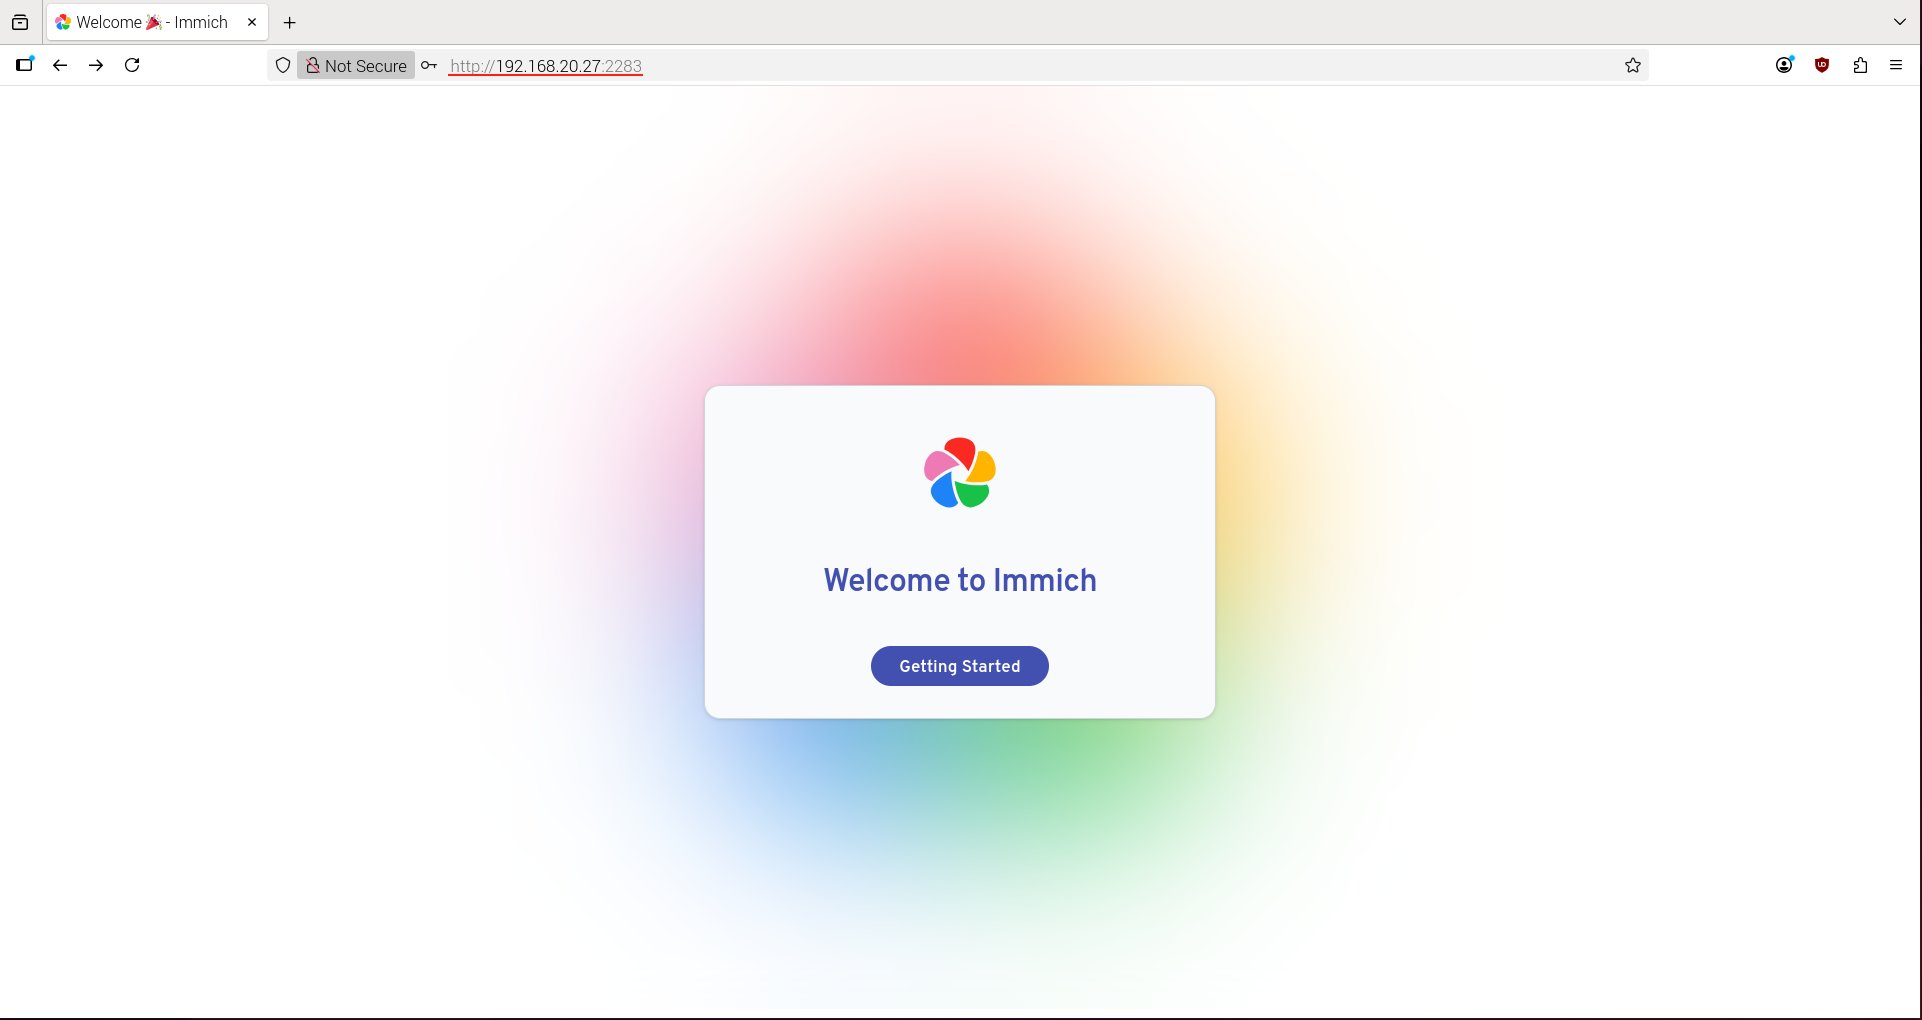
Note: The first visit requires registering an administrator account; the account and password are saved locally.
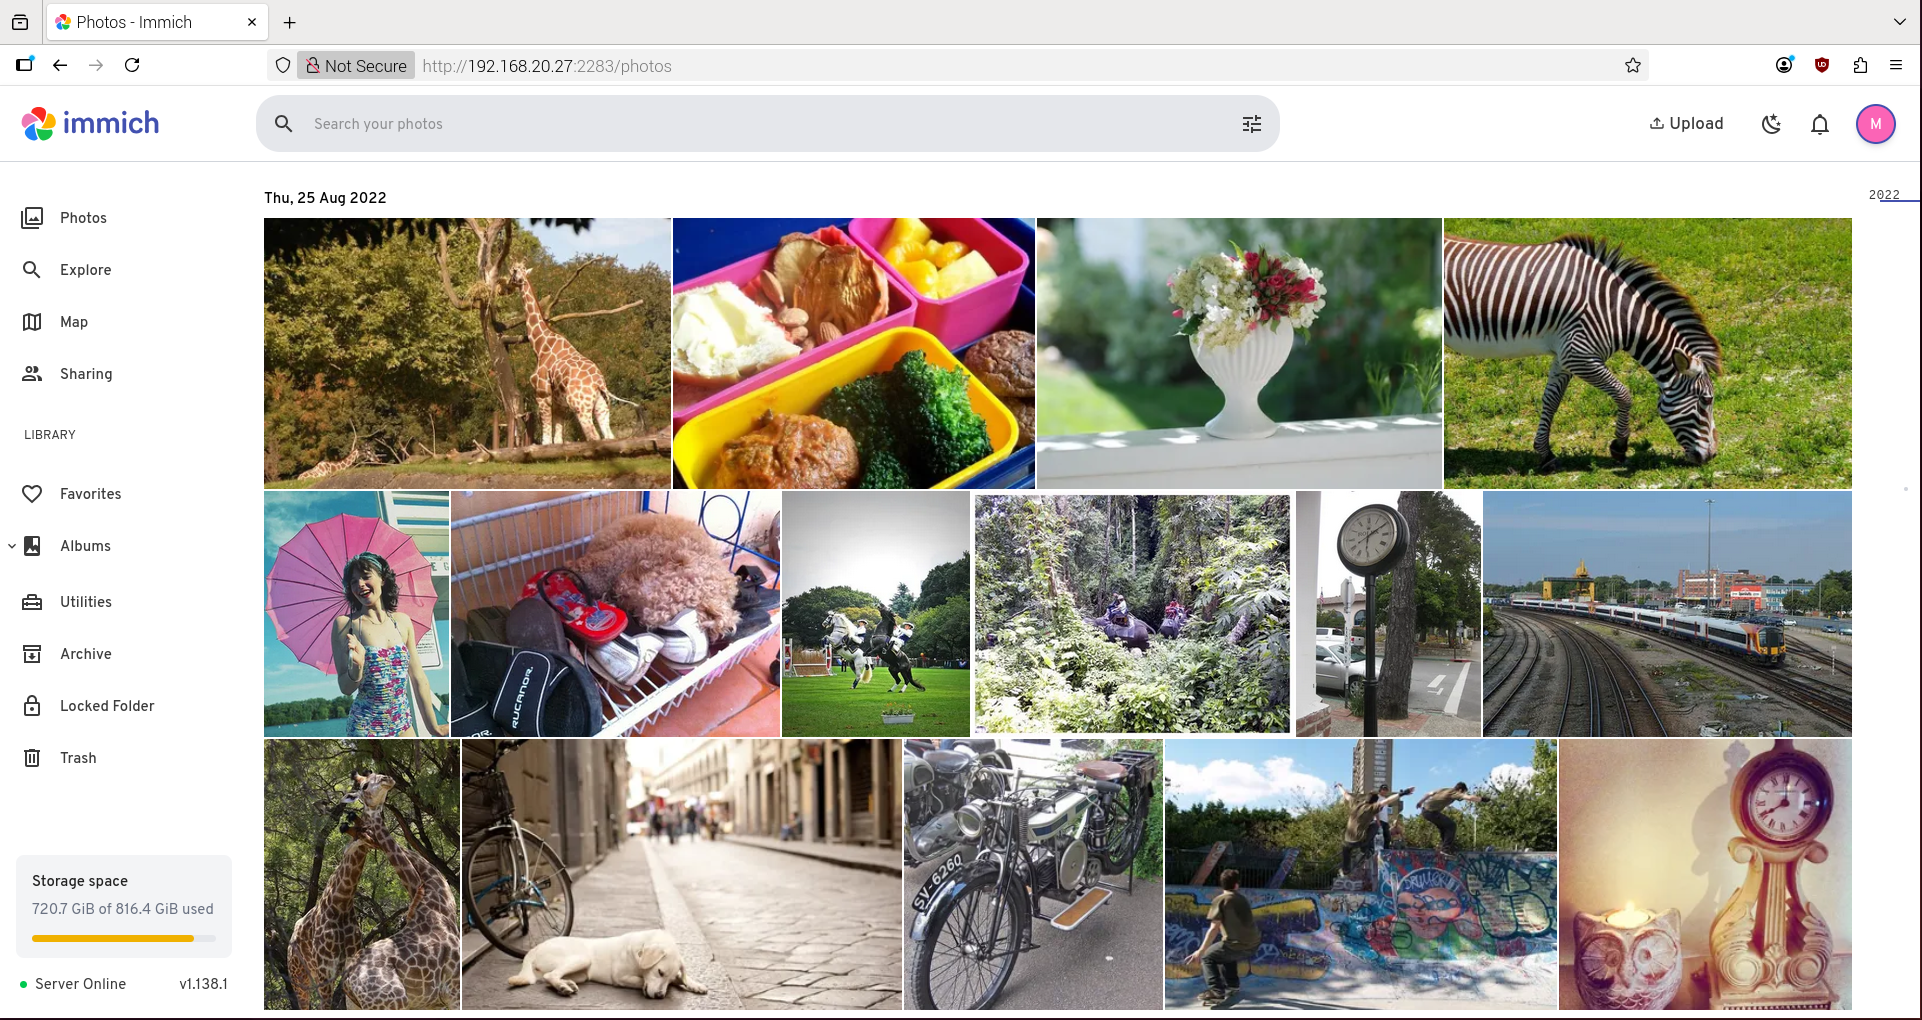
Once configured, you can upload images.
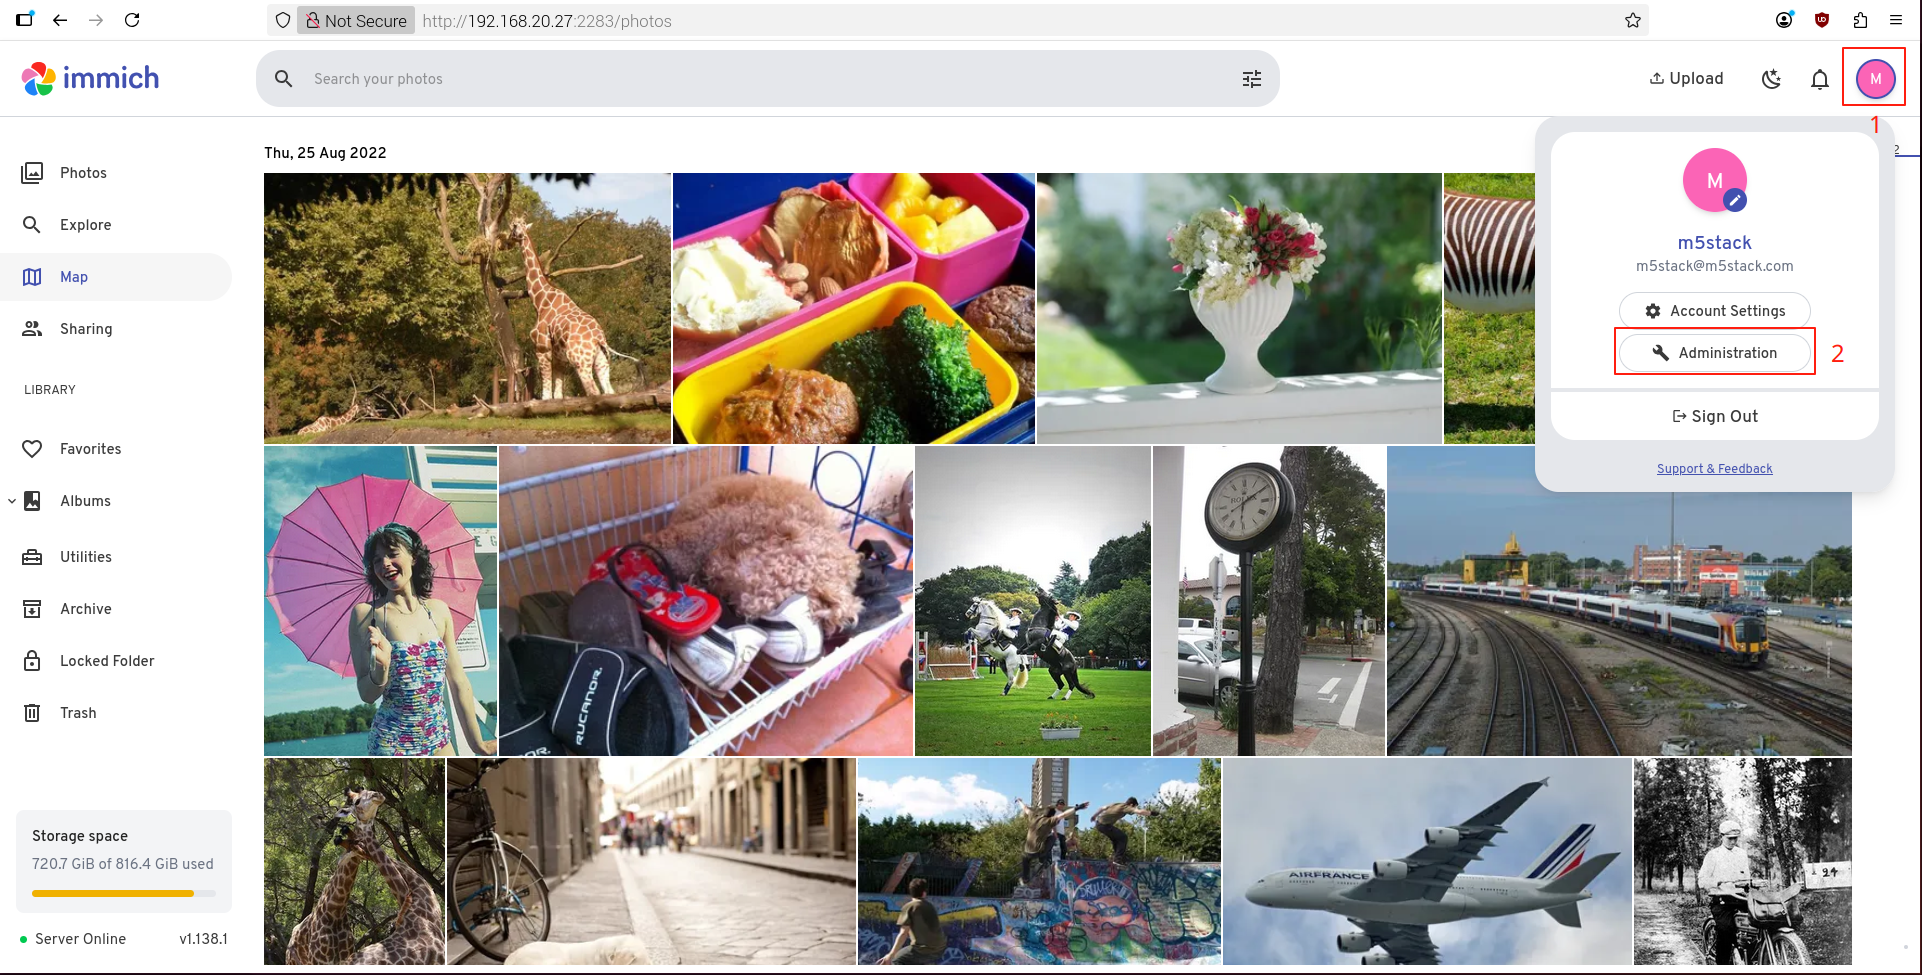
The first time, you need to configure the machine learning server. Refer to the diagram below to enter the configuration.
Set the URL to the Raspberry Pi IP address and port 3003, e.g., 192.168.20.27:3003.
If using Chinese search for the CLIP model, set it to ViT-L-14-336-CN__axera; for English search, set it to ViT-L-14-336__axera.
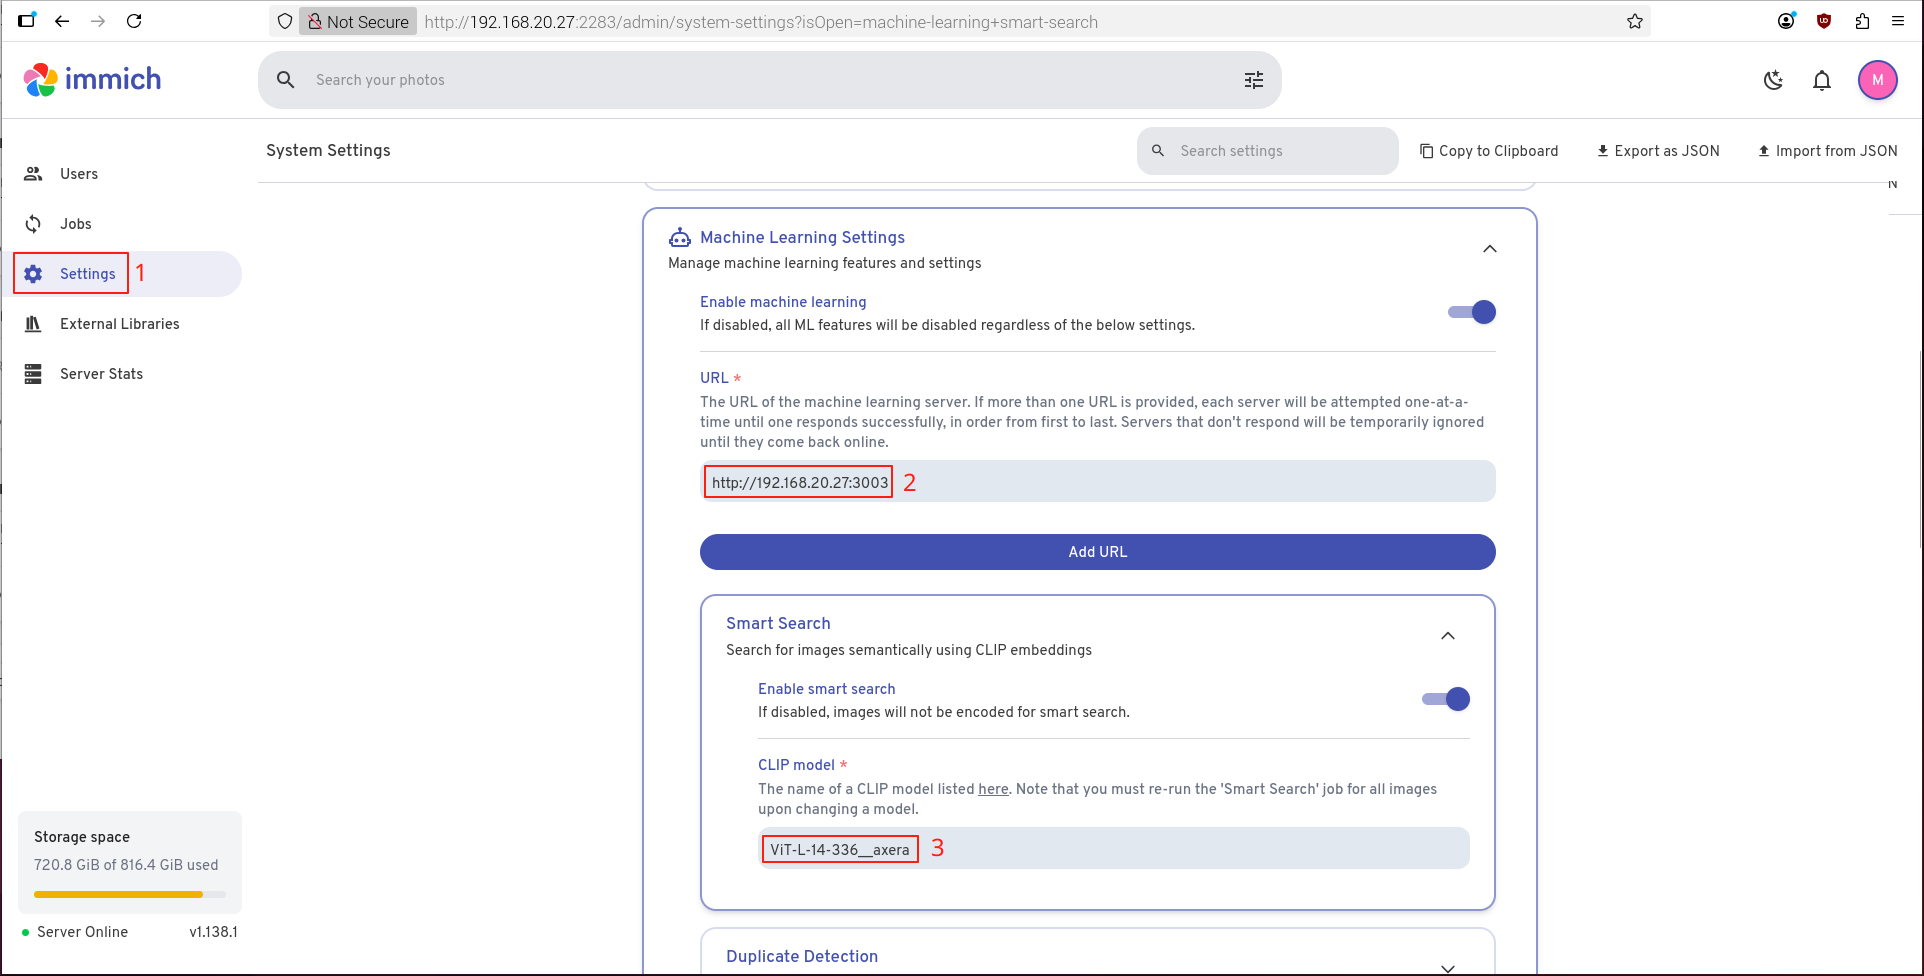
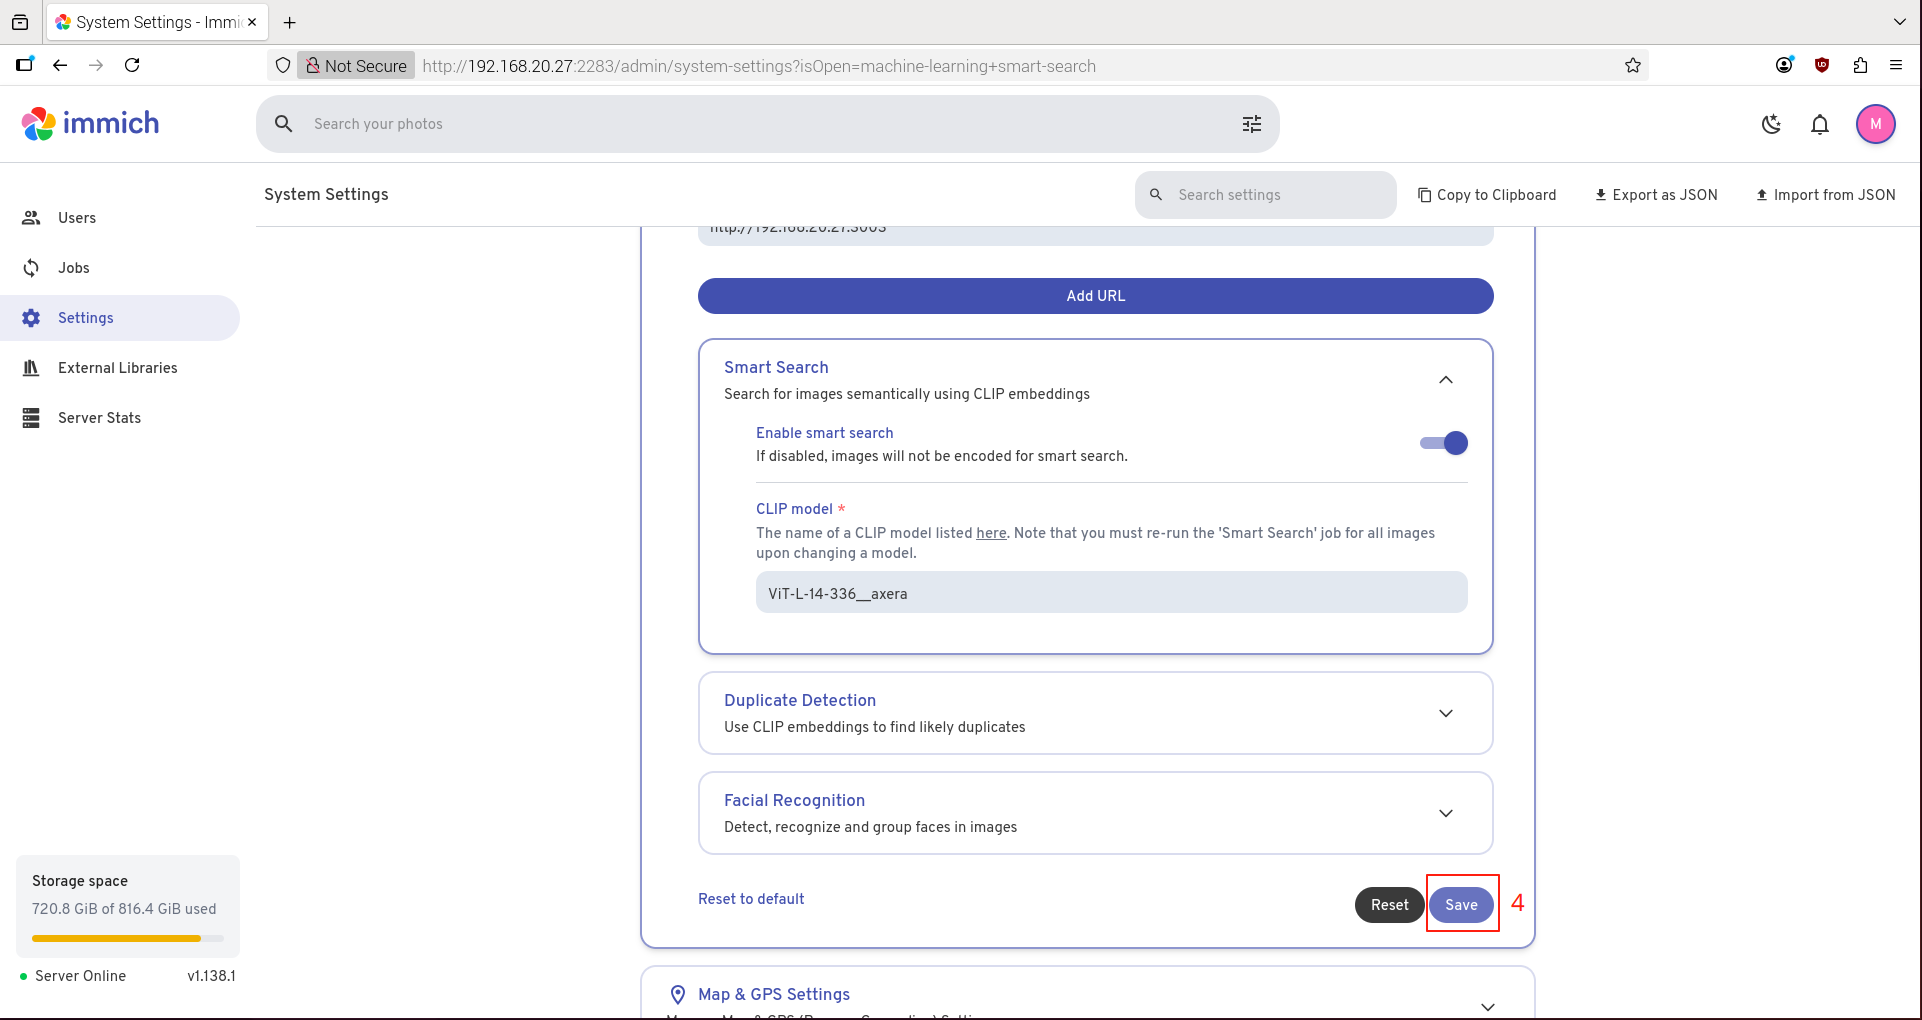
After setup, save the configuration.
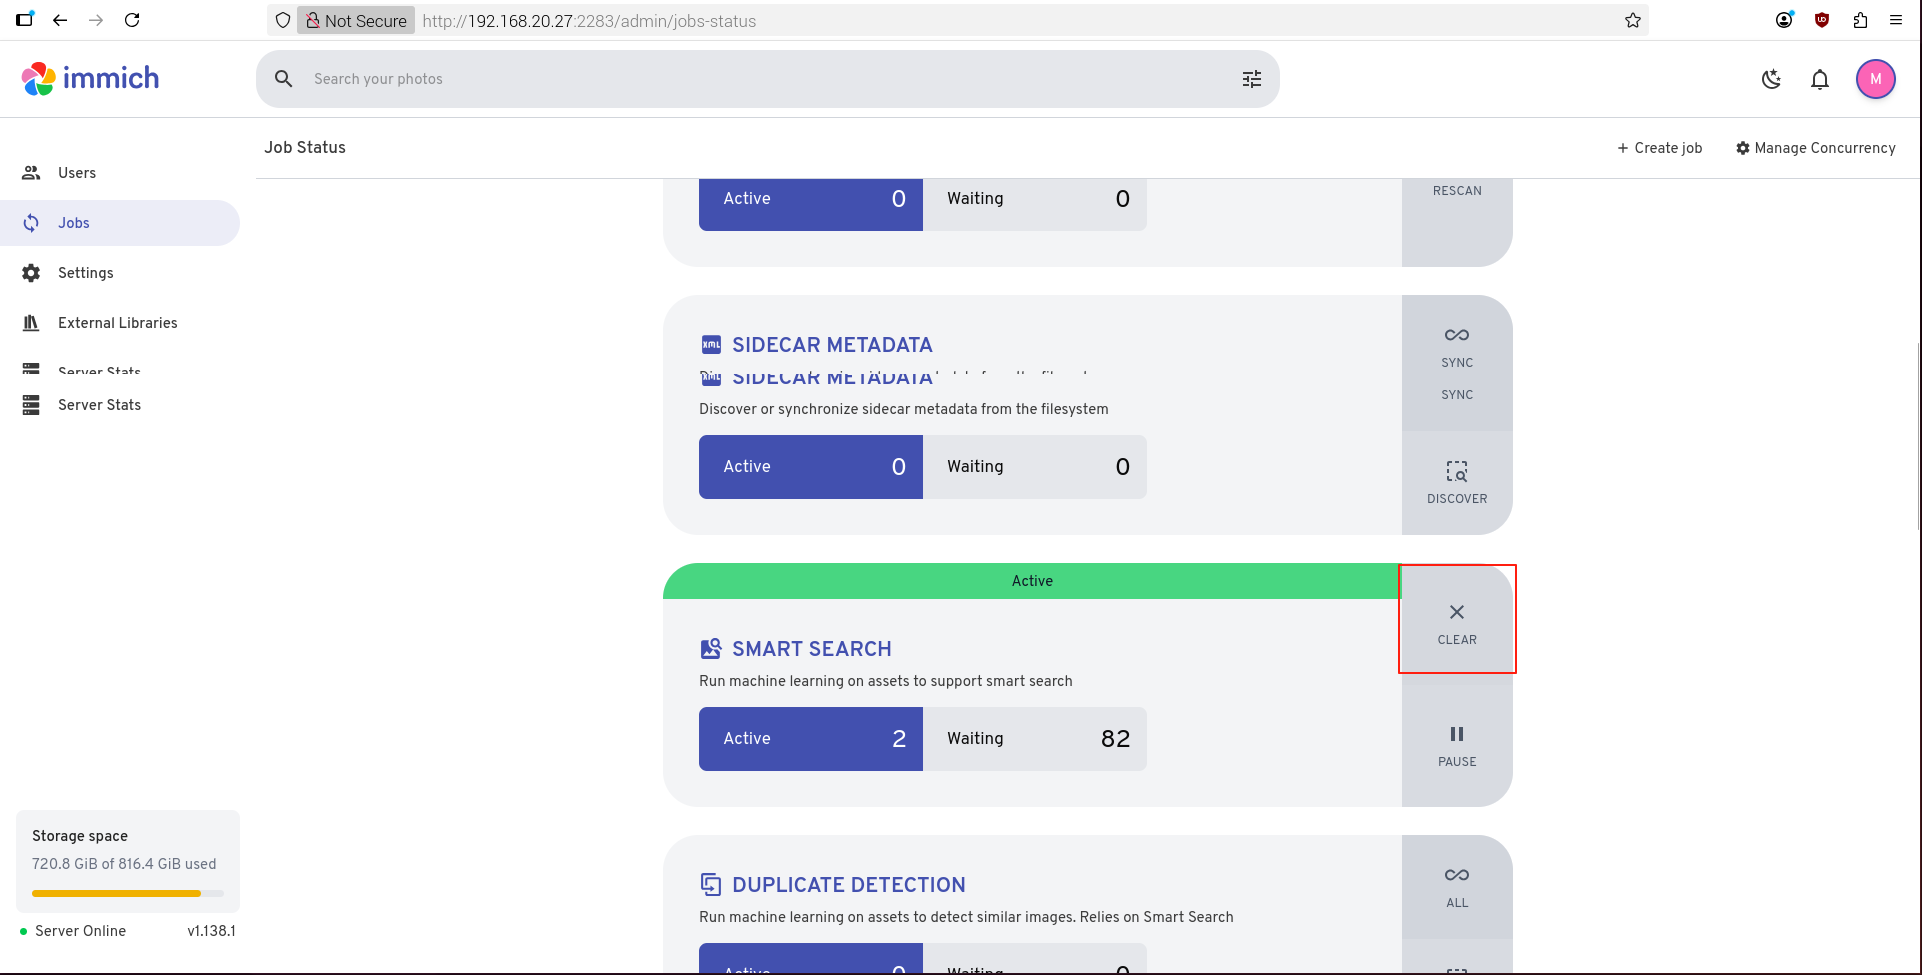
The first time, you need to manually go to the Jobs tab and trigger SMART SEARCH.
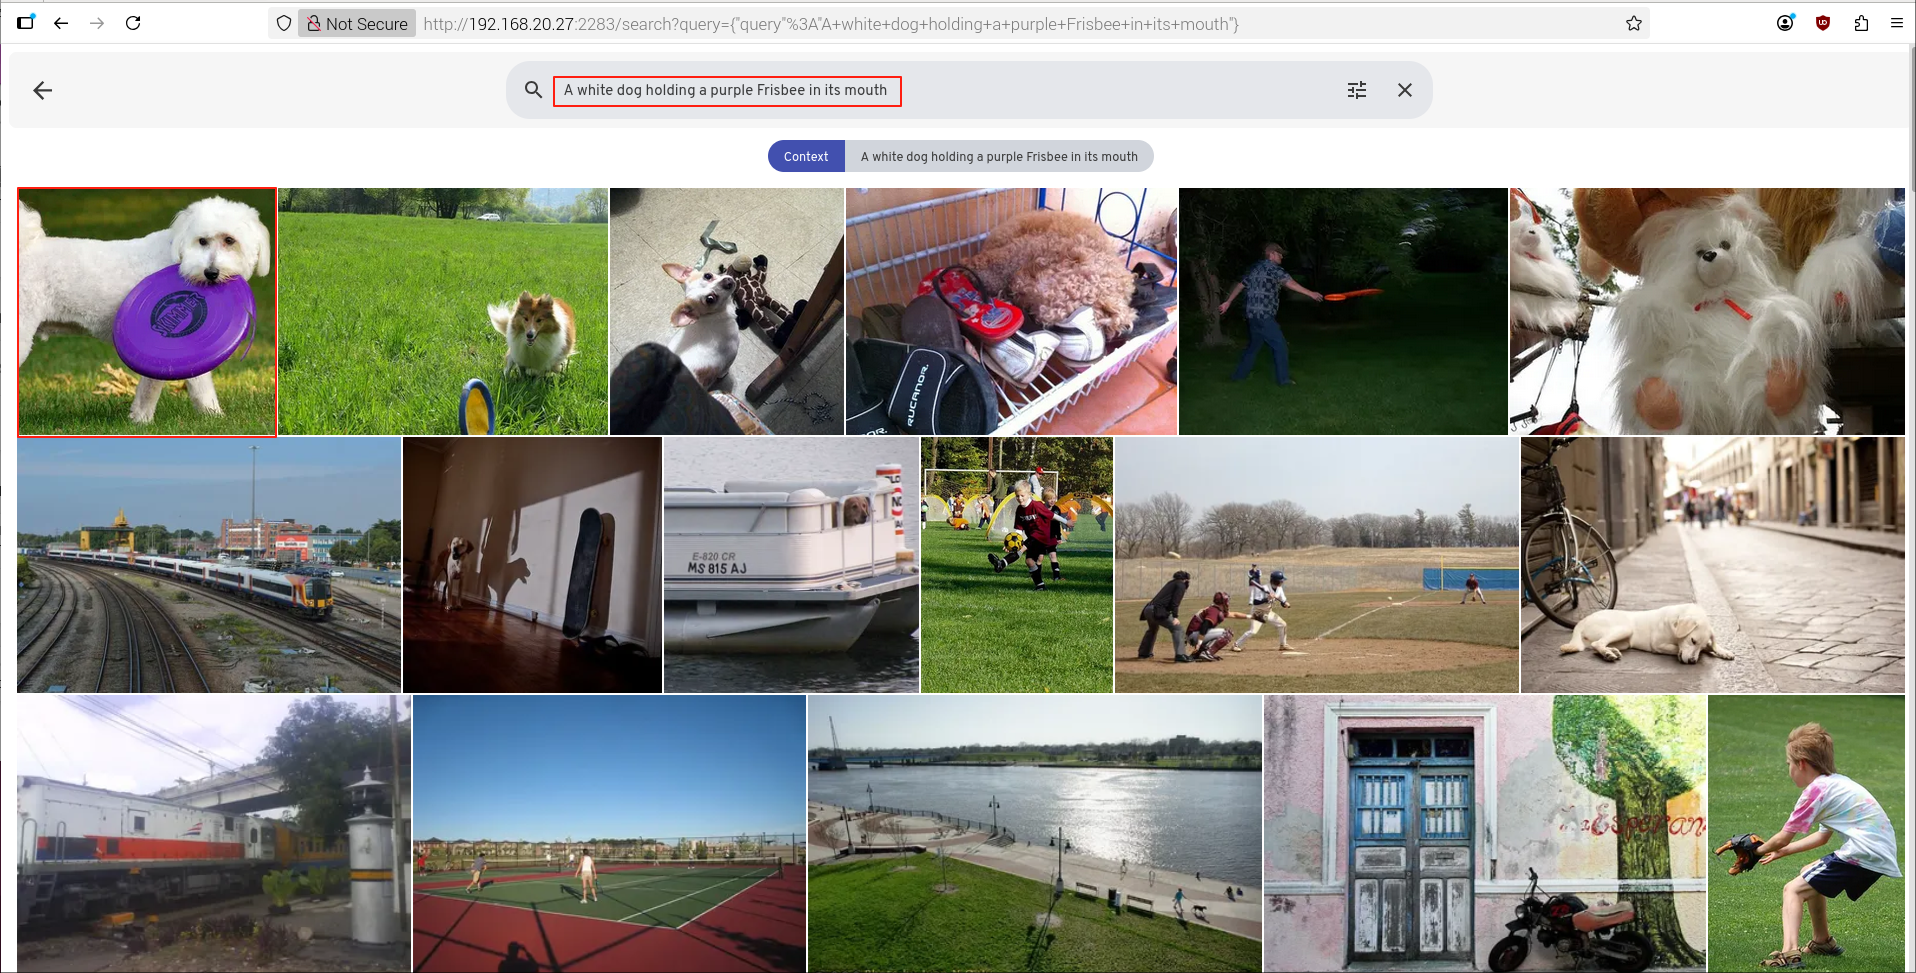
Enter the description of the image in the search bar to retrieve relevant images.