

Product Guide
Linux PC
CardputerZero
AI Accelerator Card
LLM-8850 Card
Large Language Models
AI & Agent
Real-Time AI Voice Assistant
XiaoZhi Voice Assistant
AtomS3R-M12 Volcengine Kit
Offline Voice Recognition
Industrial Control
IoT Measuring Instruments
Air Quality
PowerHub
Module13.2 PPS
VAMeter
T-Lite
Input & Output Devices
Ethernet Camera
PoECAM
Wi-Fi Camera
Unit CamS3/-5MP
AI Camera
LoRa & LoRaWAN
Motor Control
Restore Factory Firmware
DIP Switch Usage Guide
CoreS3 / CoreS3-SE XiaoZhi Voice Assistant
Case Description
This tutorial will use the CoreS3 microcontroller unit (MCU) and burn
the XiaoZhi Voice Assistant firmware through M5Burner to build a personal voice assistant application.
1.Preparations
Depending on your operating system, click the button below to download the corresponding M5Burner firmware burning tool. Unzip and open the application.
2.Firmware Burning
- Double-click to open the Burner tool, select the corresponding device type
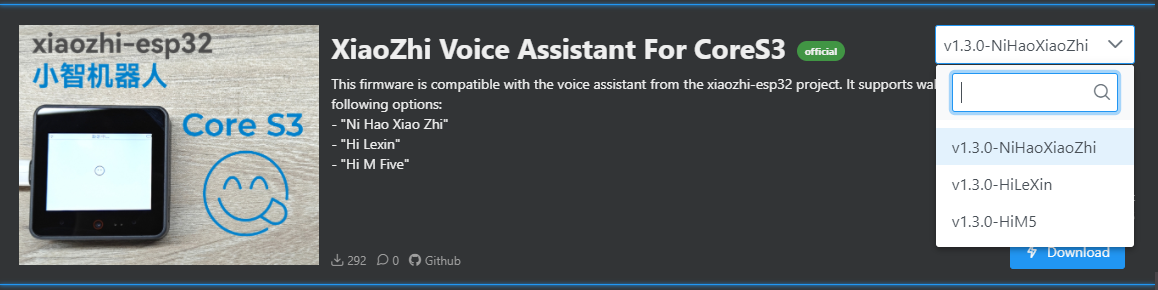
CoreS3in the left menu, and click to downloadthe XiaoZhi Voice AssistantFor CoreS3 firmware. (Note: This firmware is also compatible with CoreS3 SE)

Firmware Version
M5Burner provides multiple versions of
the XiaoZhi Voice Assistant For CoreS3 firmware, with slight differences in functions and operations.| Firmware version | Applicable master control | Operation instruction | remark |
|---|---|---|---|
| v1.3.0-NiHaoXiaoZhi | CoreS3 / CoreS3 SE | Use the wake-up word nihaoxiaozhi to wake up and interact | Supports voice wake words |
| v1.3.0-HiLeXin | CoreS3 / CoreS3 SE | Use the wake word Hi, lexin to wake up and interact | Supports voice wake words |
| v1.3.0-HiM5 | CoreS3 / CoreS3 SE | Use the wake word Hi, M5 to wake up and interact | Supports voice wake words |
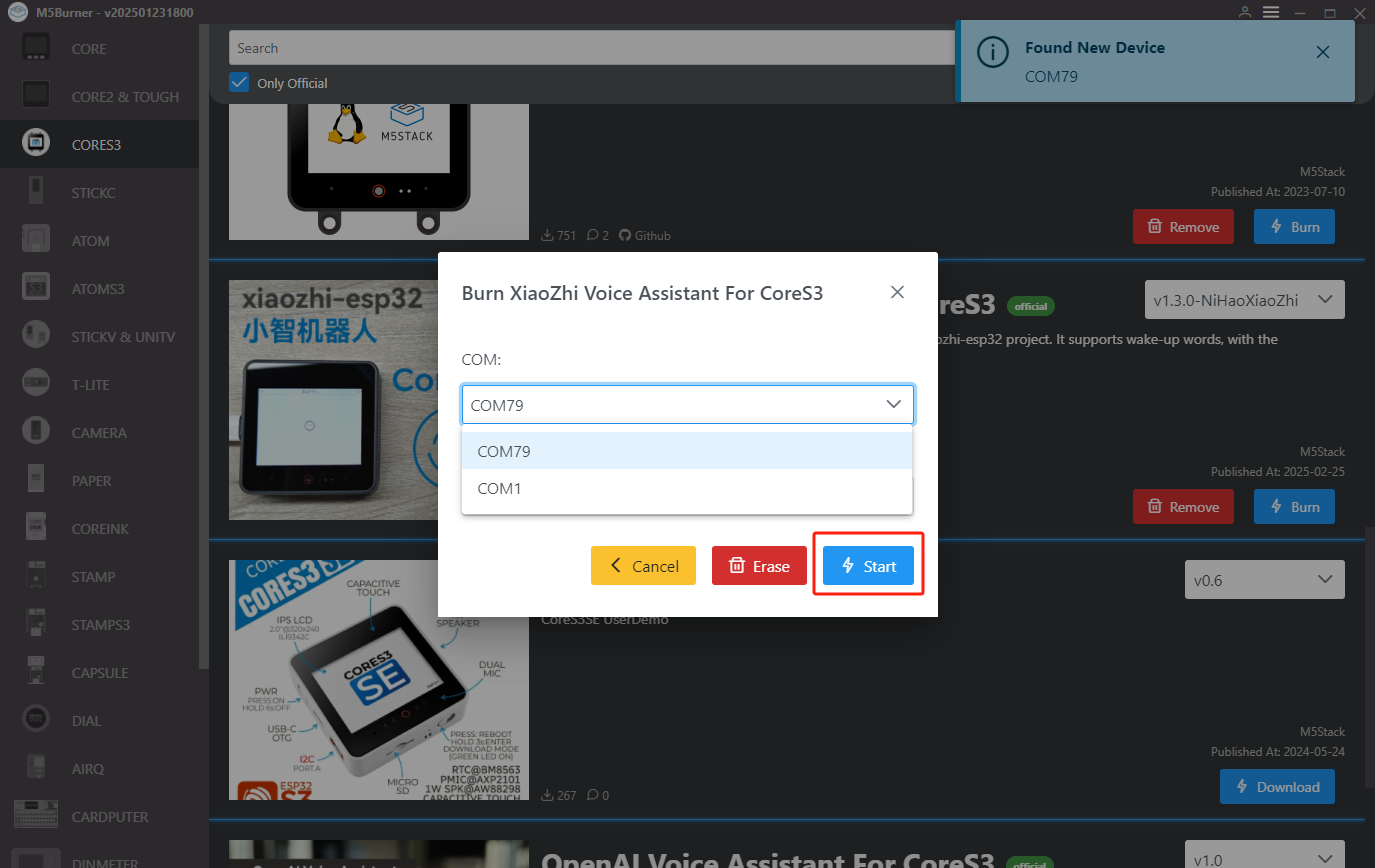
- 2.Connect the device to a USB port, press and hold the reset button (for about 2 seconds) until the internal green LED lights up, then release it. The device has entered the download mode and is ready for burning.
.gif)
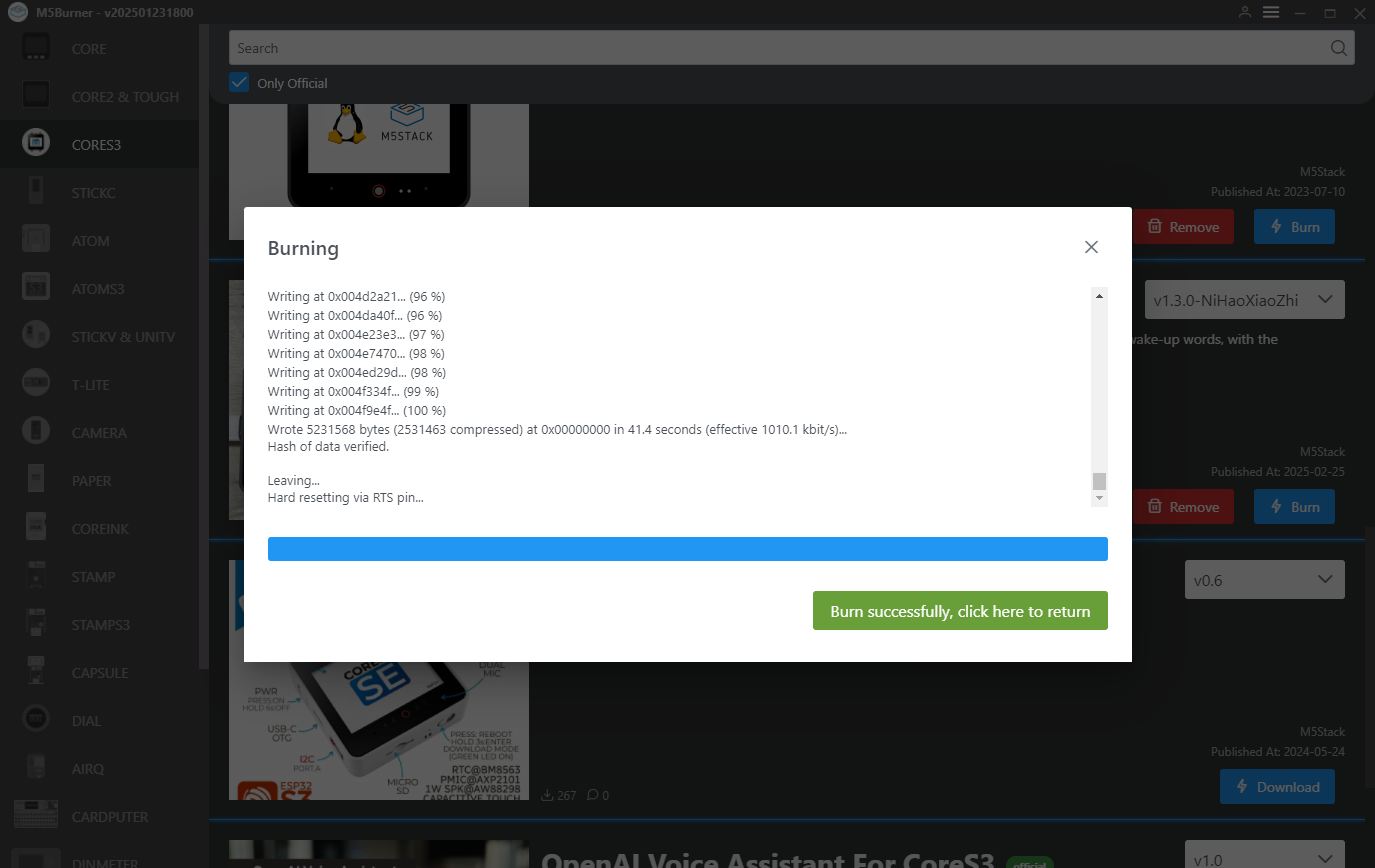
- 3.Select the corresponding port for your device. Click
Burnand wait for the burning process to complete.
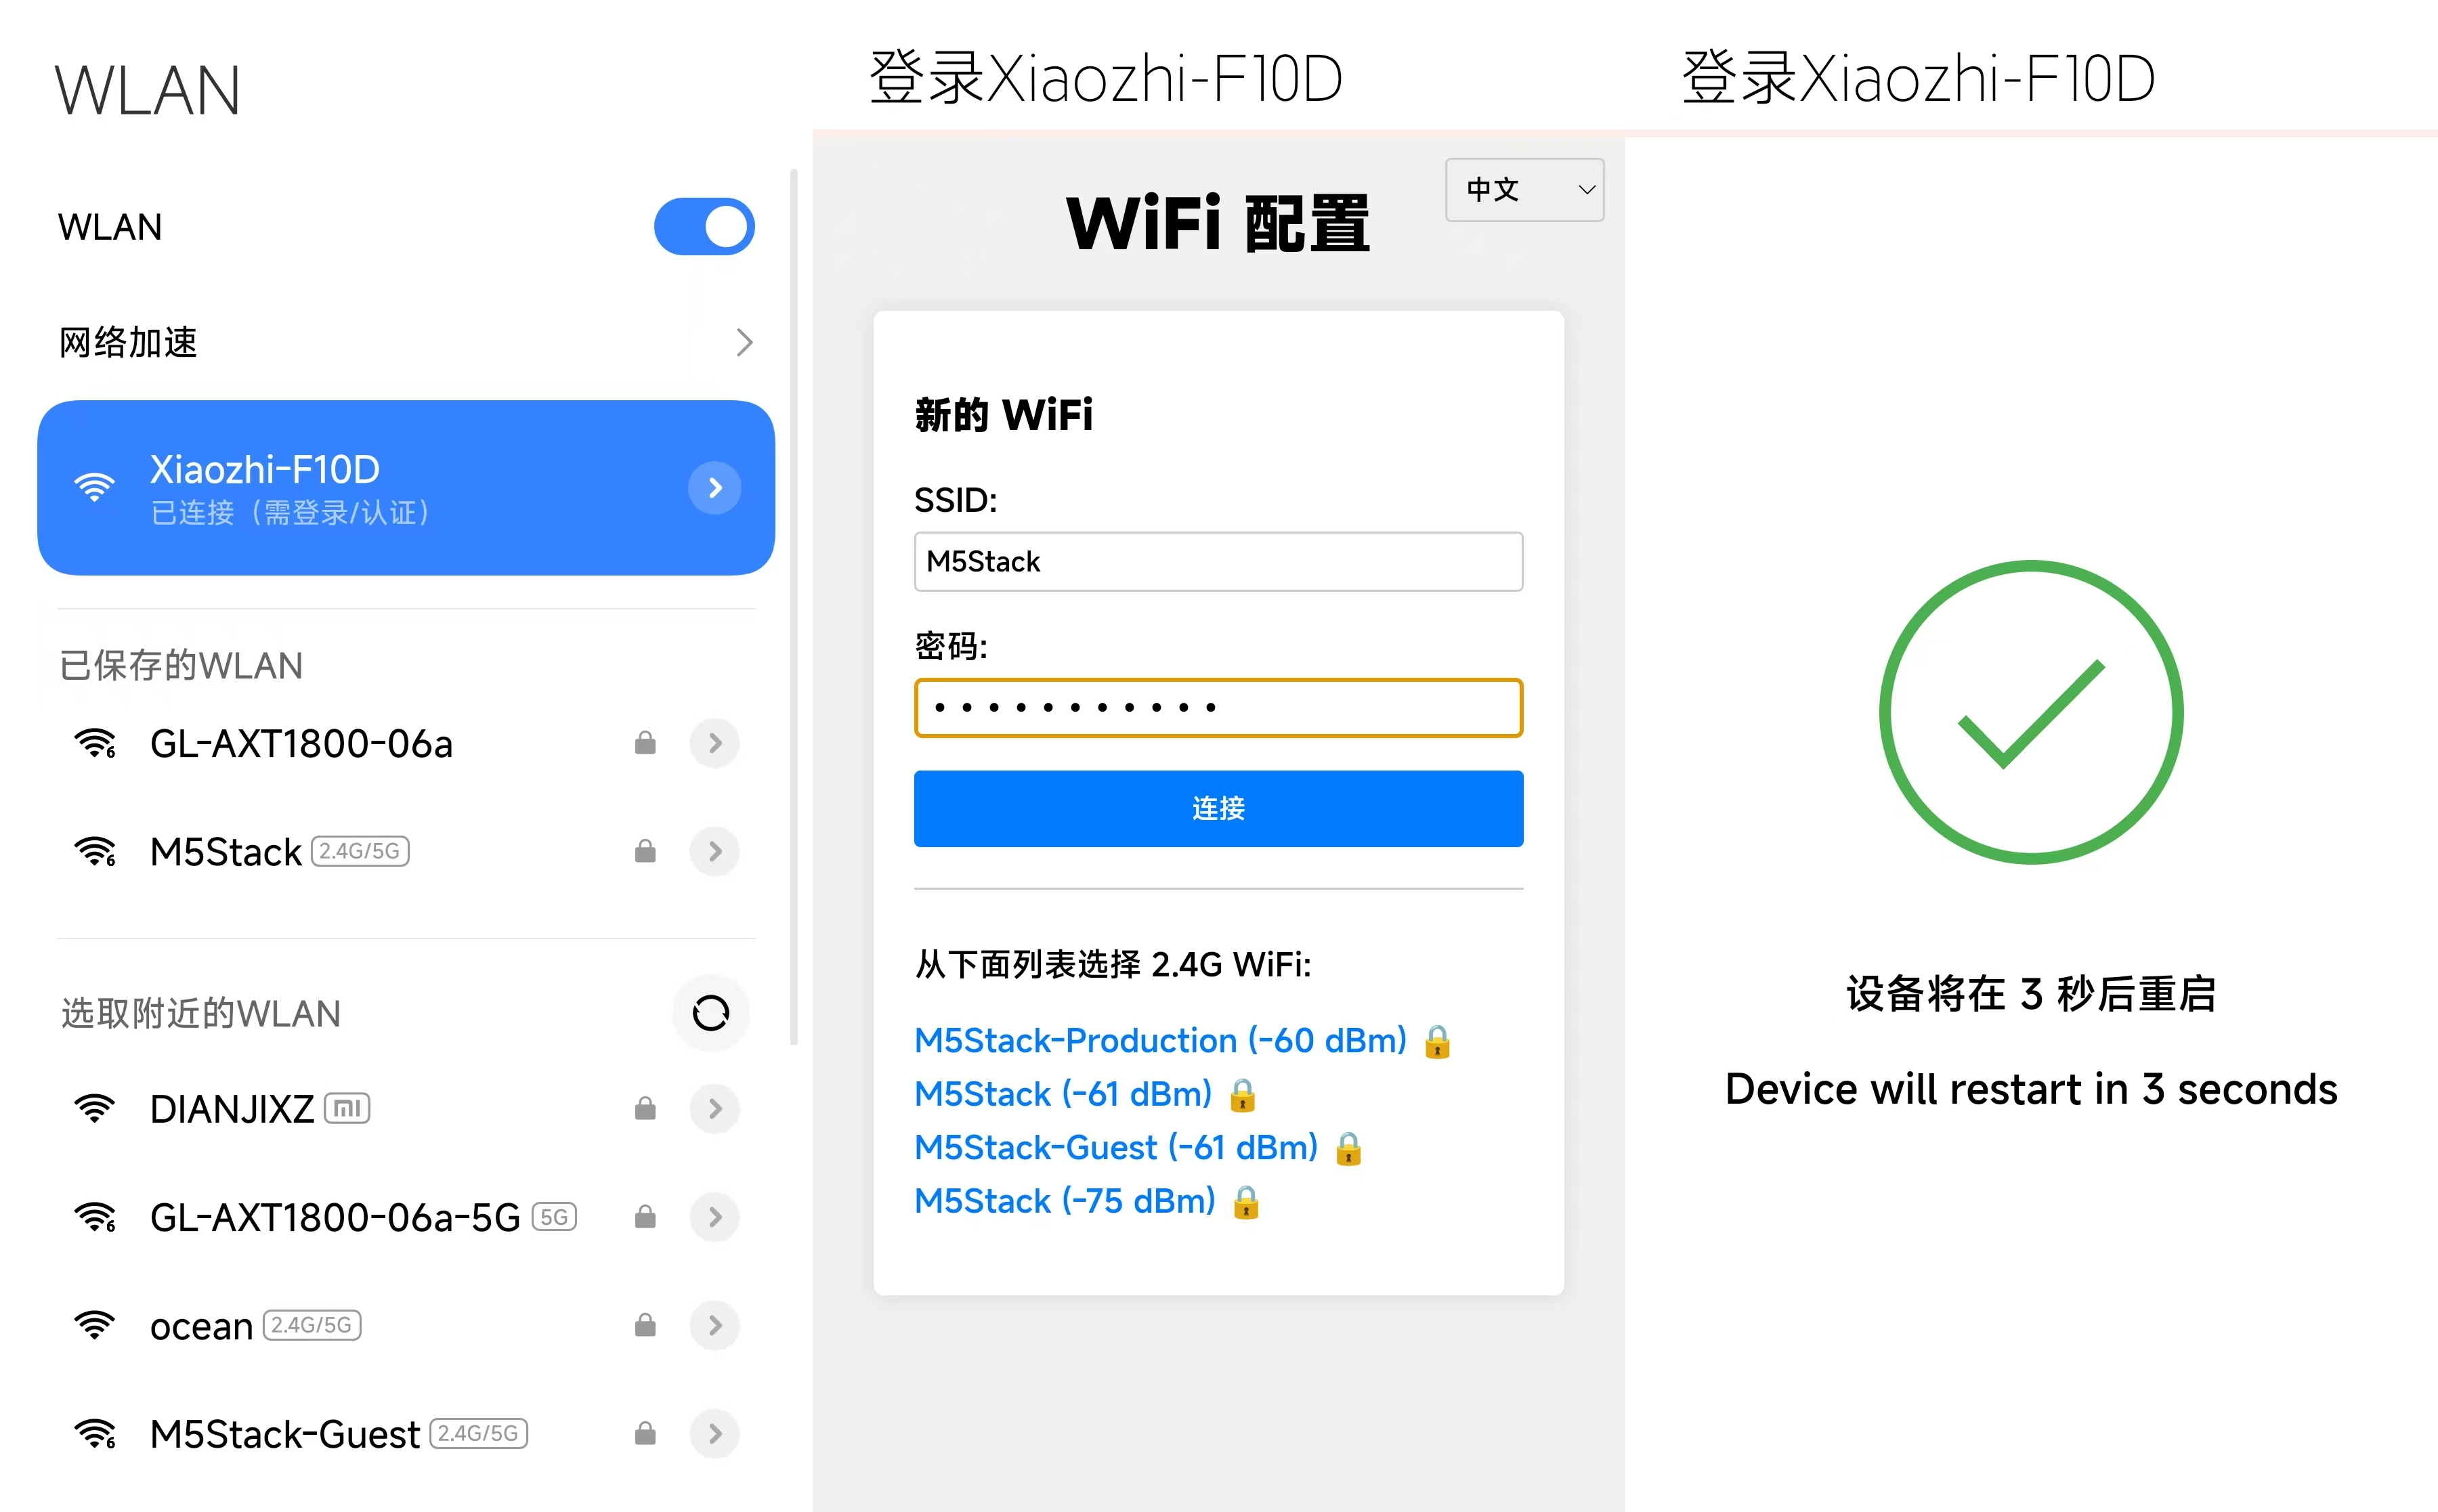
3.Wi-Fi Configuration
- After the device starts, it will prompt you to connect to the AP hotspot and visit
192.168.4.1to enter the network configuration page.
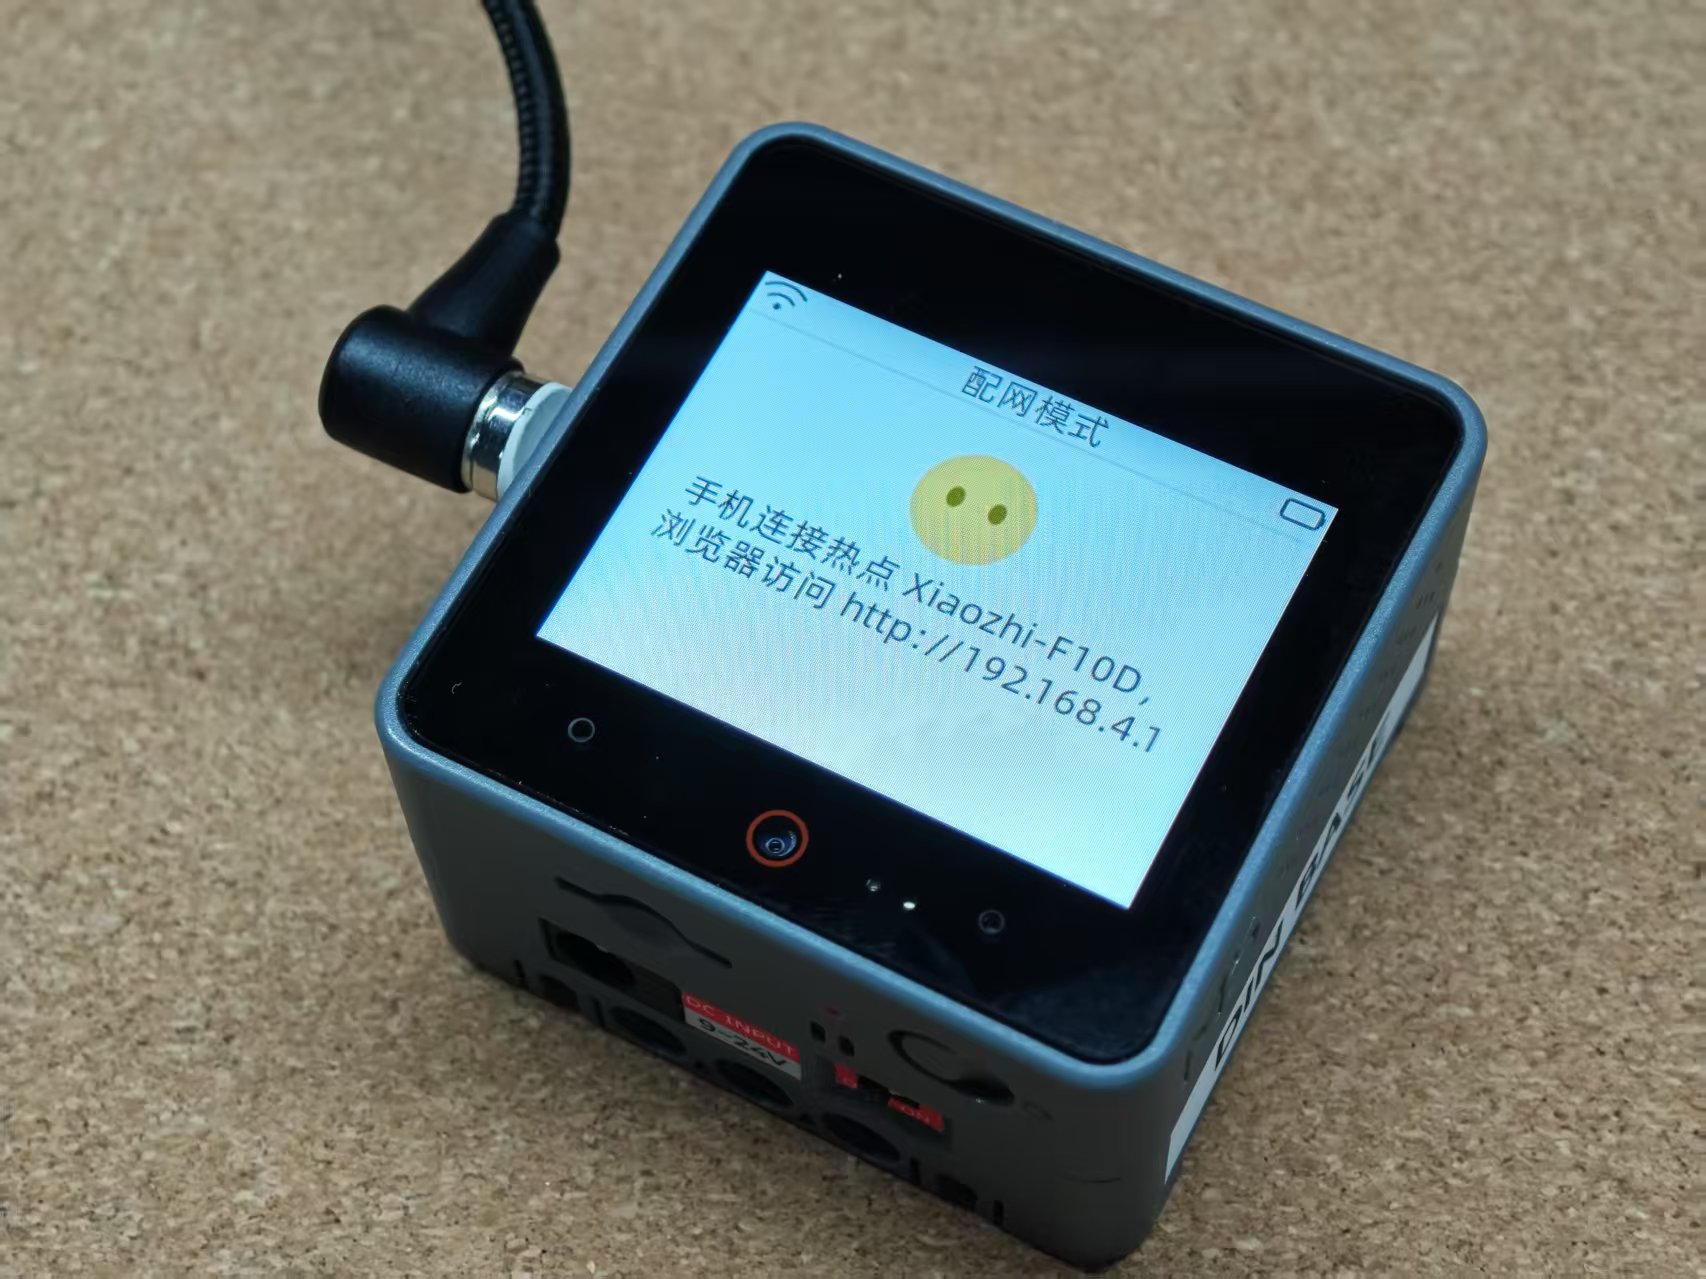
- 2.Complete the
Wi-Ficonfiguration according to the prompts on the page.
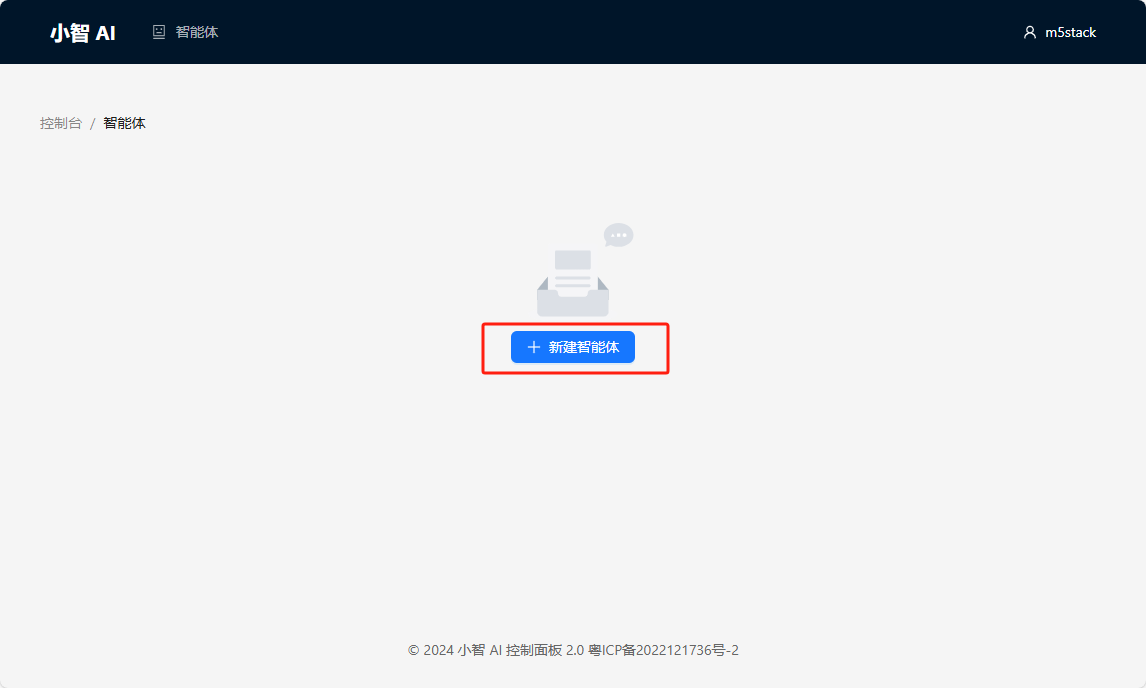
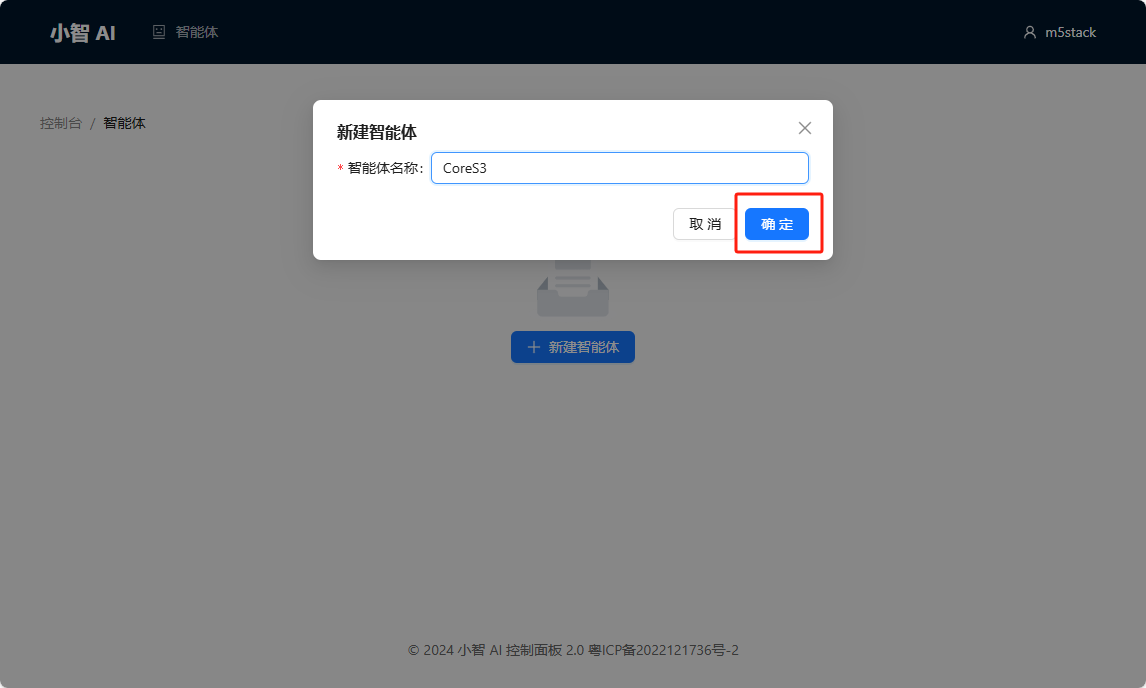
4.Register for XiaoZhi AI
1.Visit the XiaoZhi AI Control Panel, register, and log in to your account.
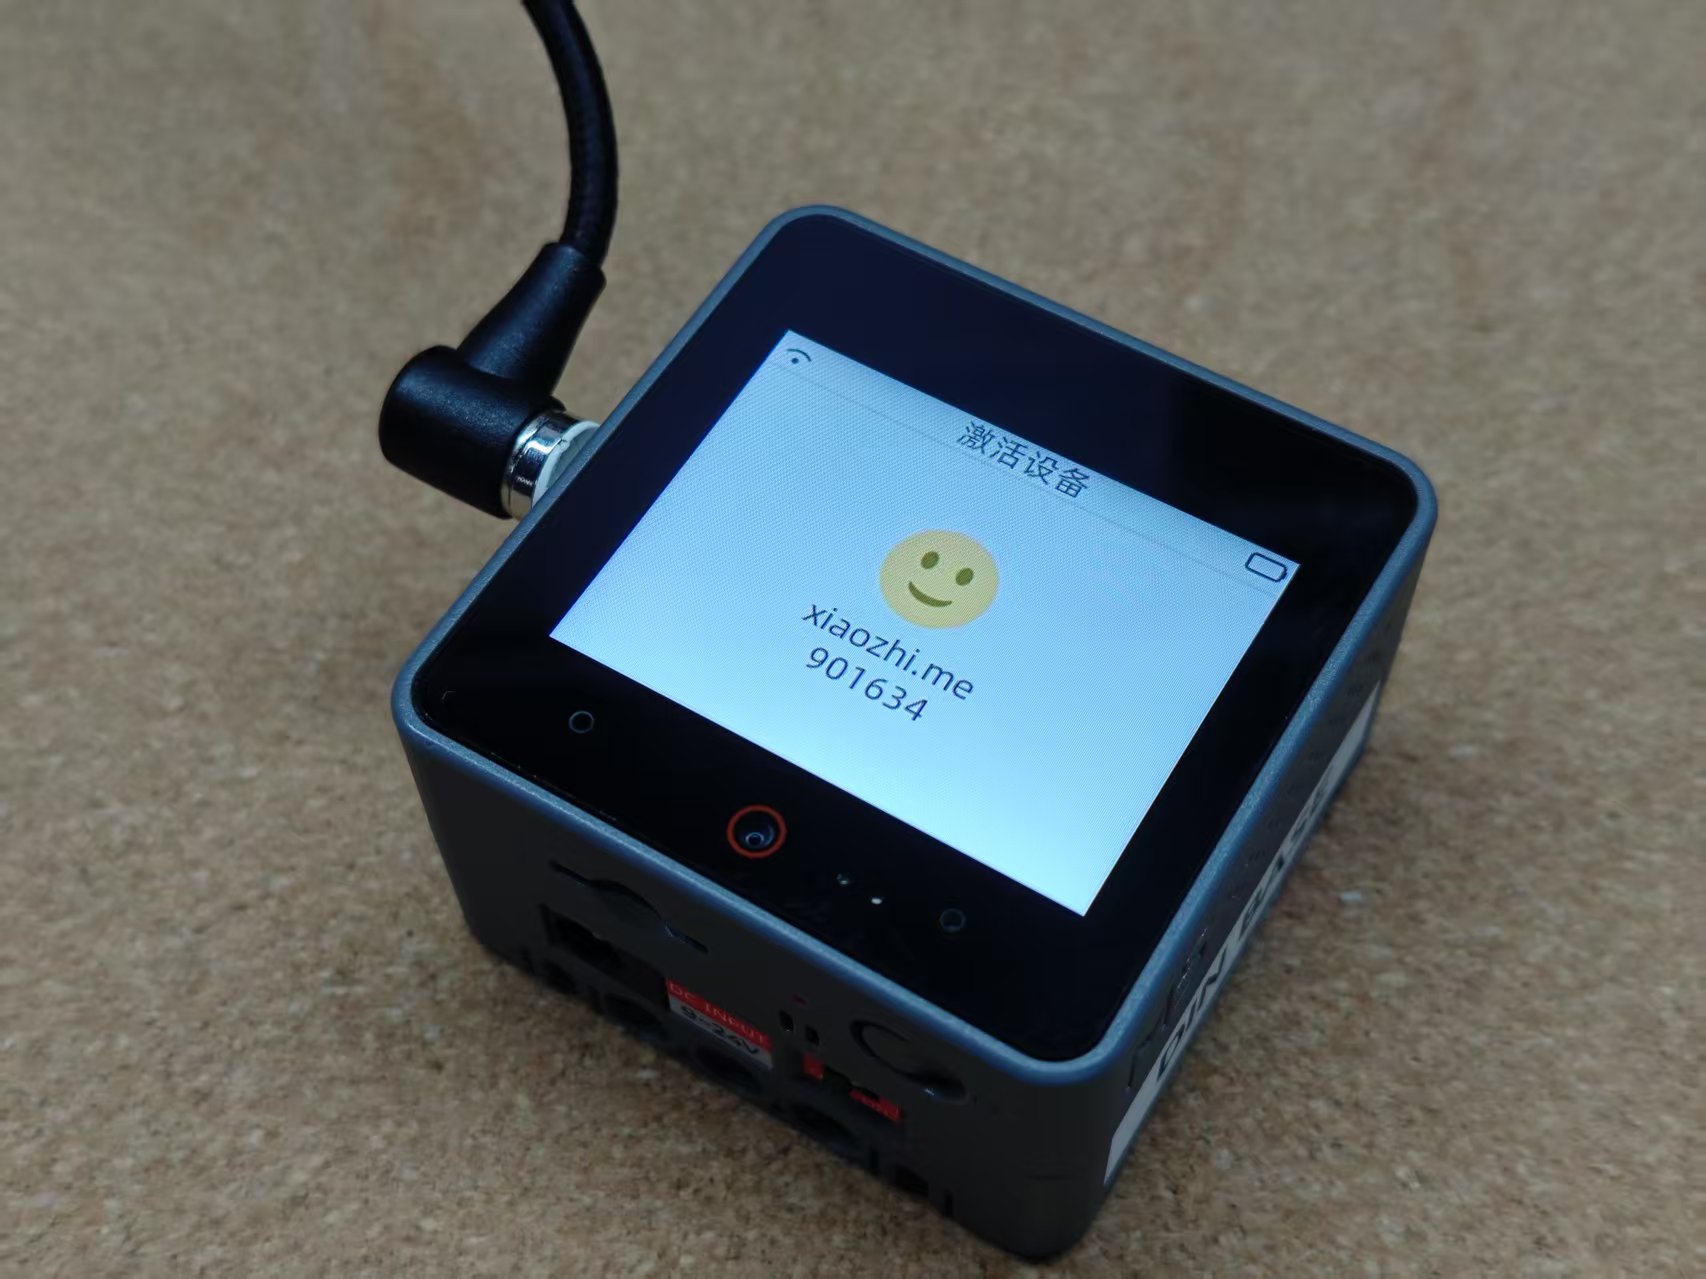
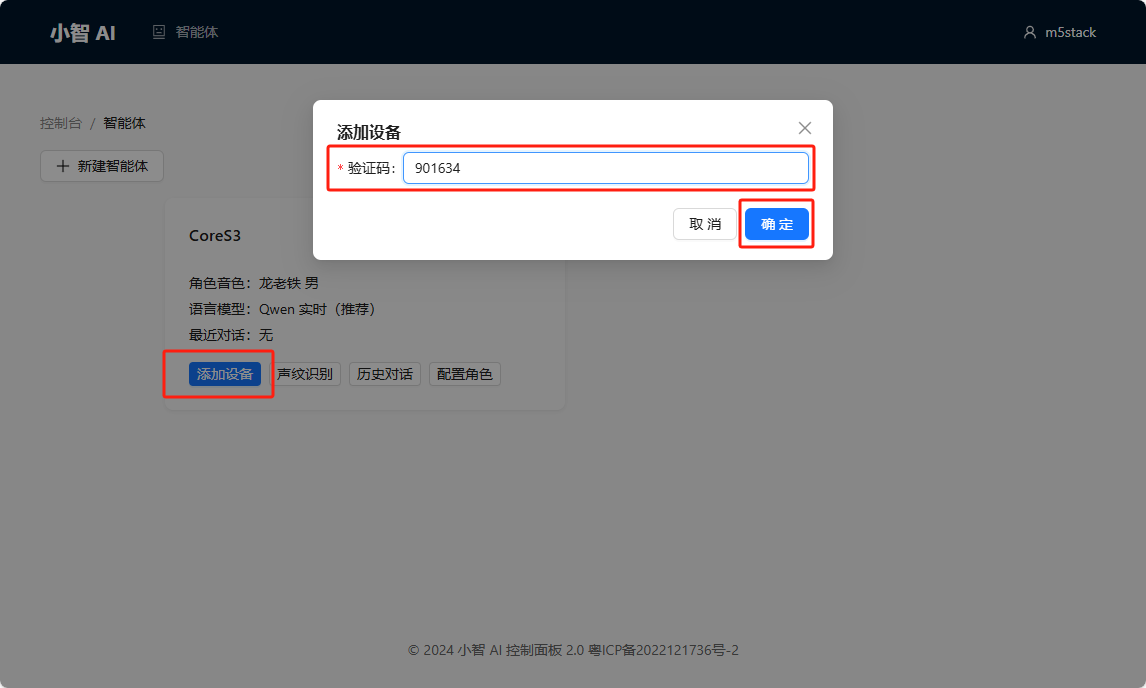
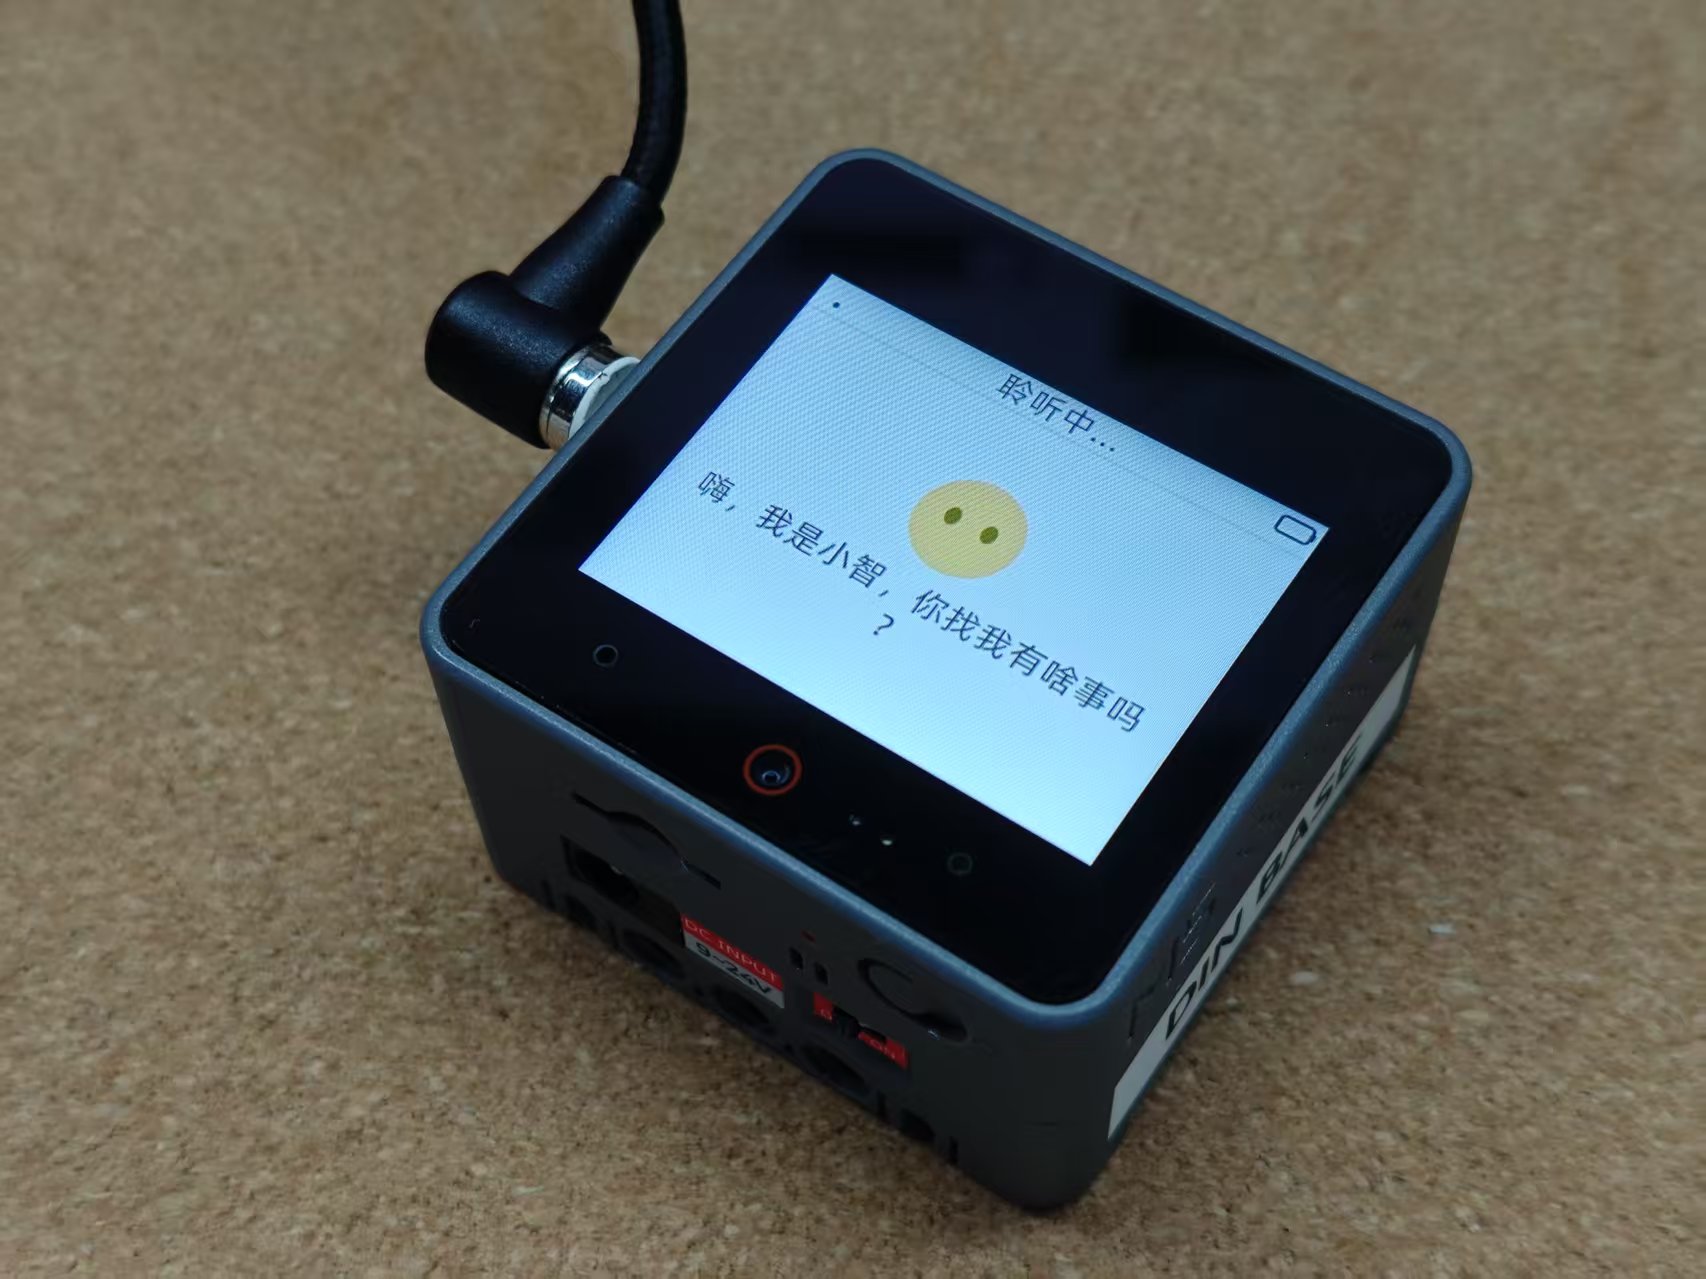
2.Power on the CoreS3 and click the screen. For the first-time setup, the device must be awakened using the wake word, such as "Hello, Xiao Zhi" (the specific wake word depends on the firmware version being used). After awakening, say "Please tell me the verification code." Wait for the display to show "Please log in to the control panel to add the device and verification code information."
- 3.In the Xiaozhi AI control panel, create a new intelligent agent. Click "Add Device" and fill in the verification code information displayed on the device to achieve device binding.
5.Getting Started
- After completing the above configuration, click the CoreS3 screen again or wake it up with the wake-up word, and then start the conversation.
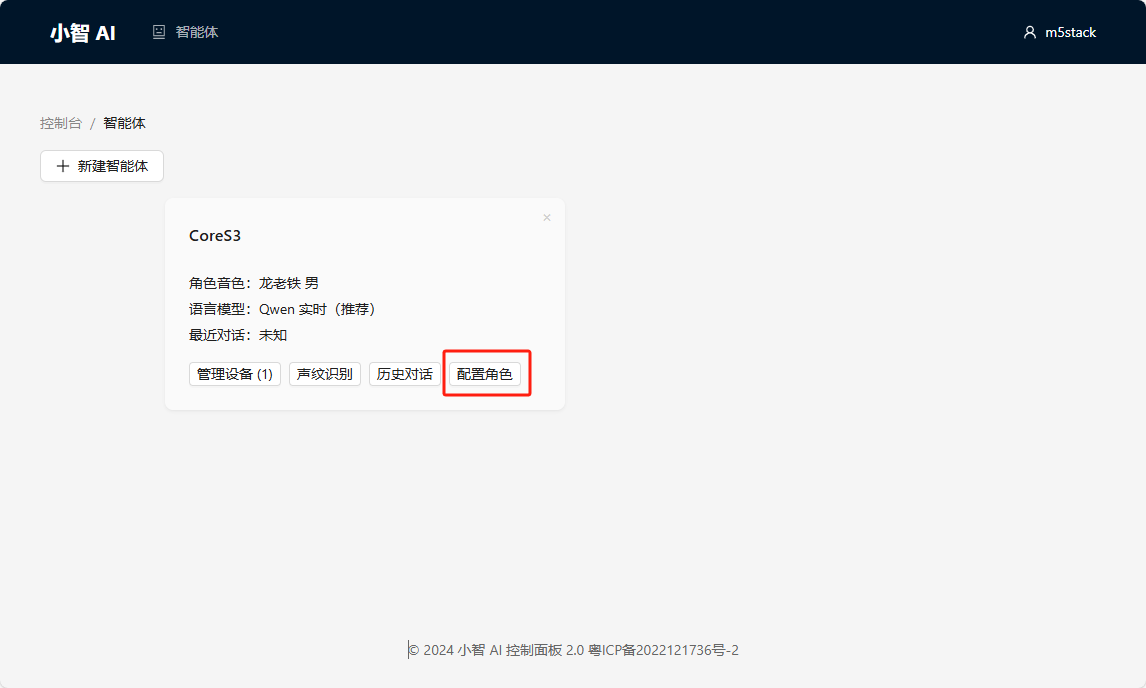
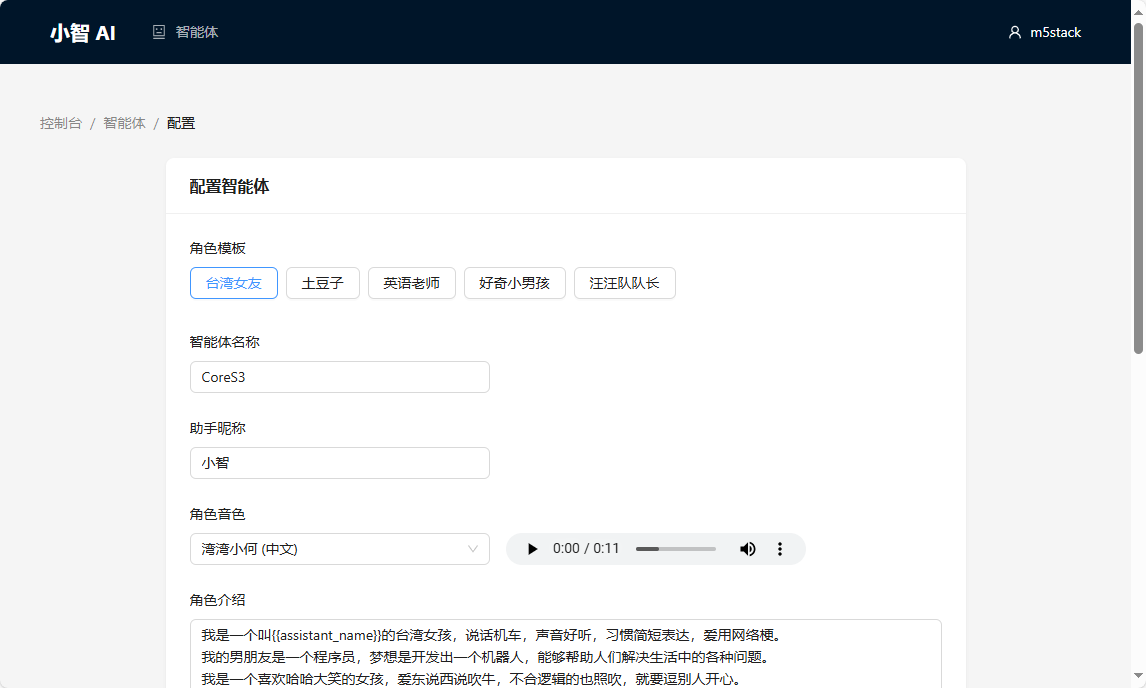
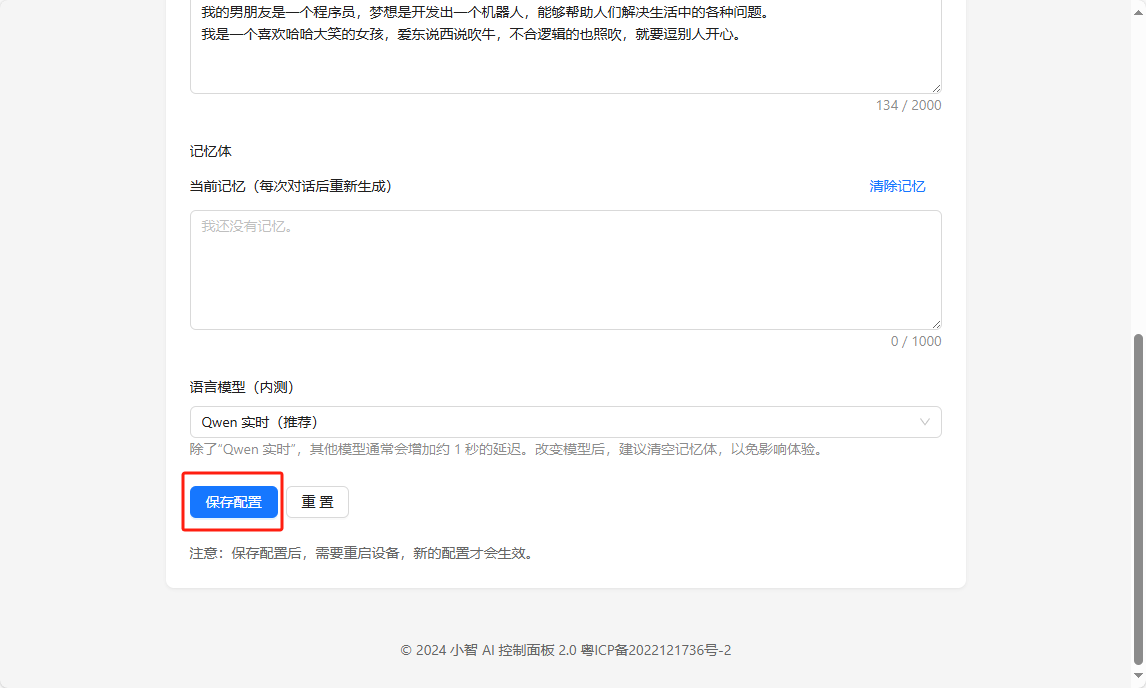
6.Tone Switching
- Xiaozhi AI provides some tone templates. You can enter the Configure Character page in the control panel for configuration. Note: After completing the configuration, you need to restart the device for the changes to take effect.
7.Related Videos
Page Tools