UiFlow Tutorial
UiFlow1 Quick Start
2. Firmware & Program 1.0
UiFlow1 Development Guide
Project Management
Use LTE network
UiFlow1 Blockly
Event
UI
Unit
Module
Hat
UiFlow2 Quick Start
2. Firmware & Program 2.0
UiFlow2 Development Guide
UI Editor
Device Security & Sharing
UiFlow2 Video Column
Atom EchoS3R: Flash Firmware & Run Code
1. Preparation
- Refer to UIFlow2 Web IDE Tutorial to understand the basic process of using UiFlow2, and complete the installation of the M5Burner firmware burning tool.
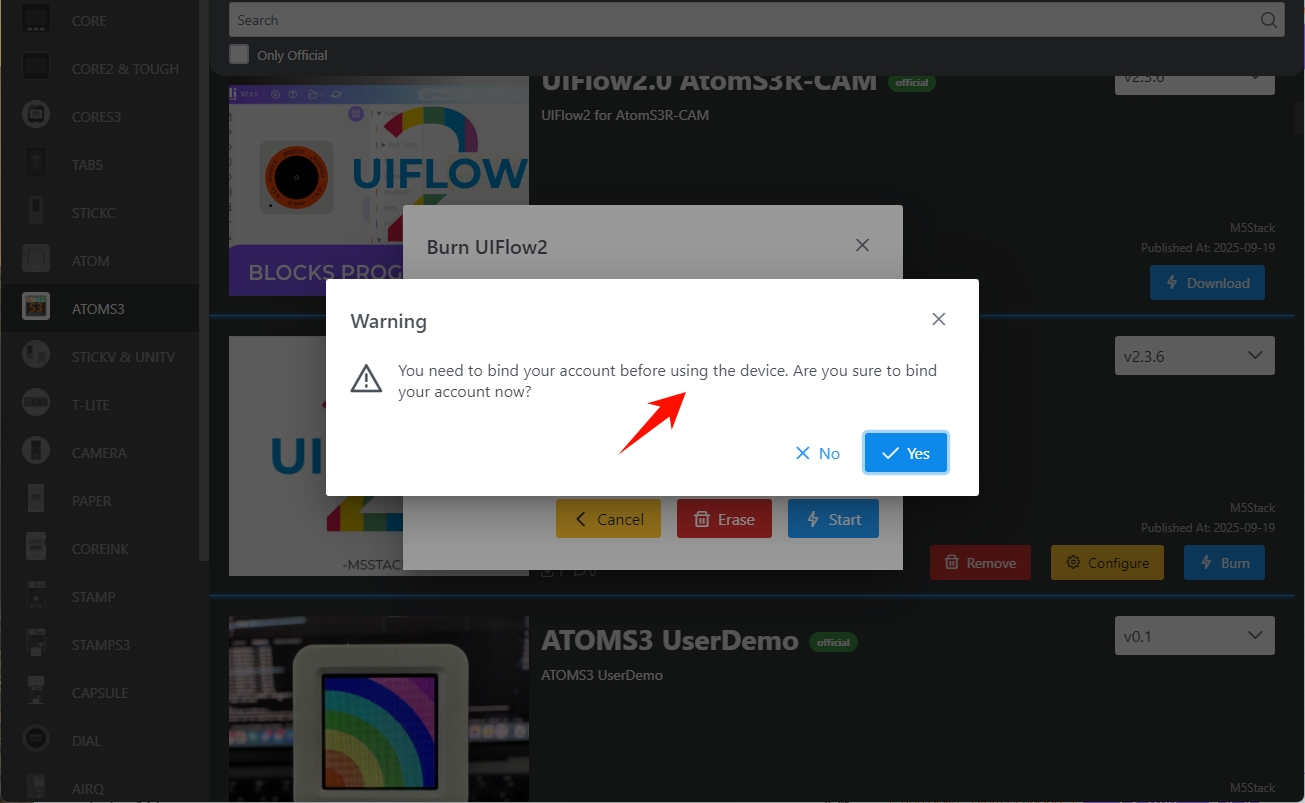
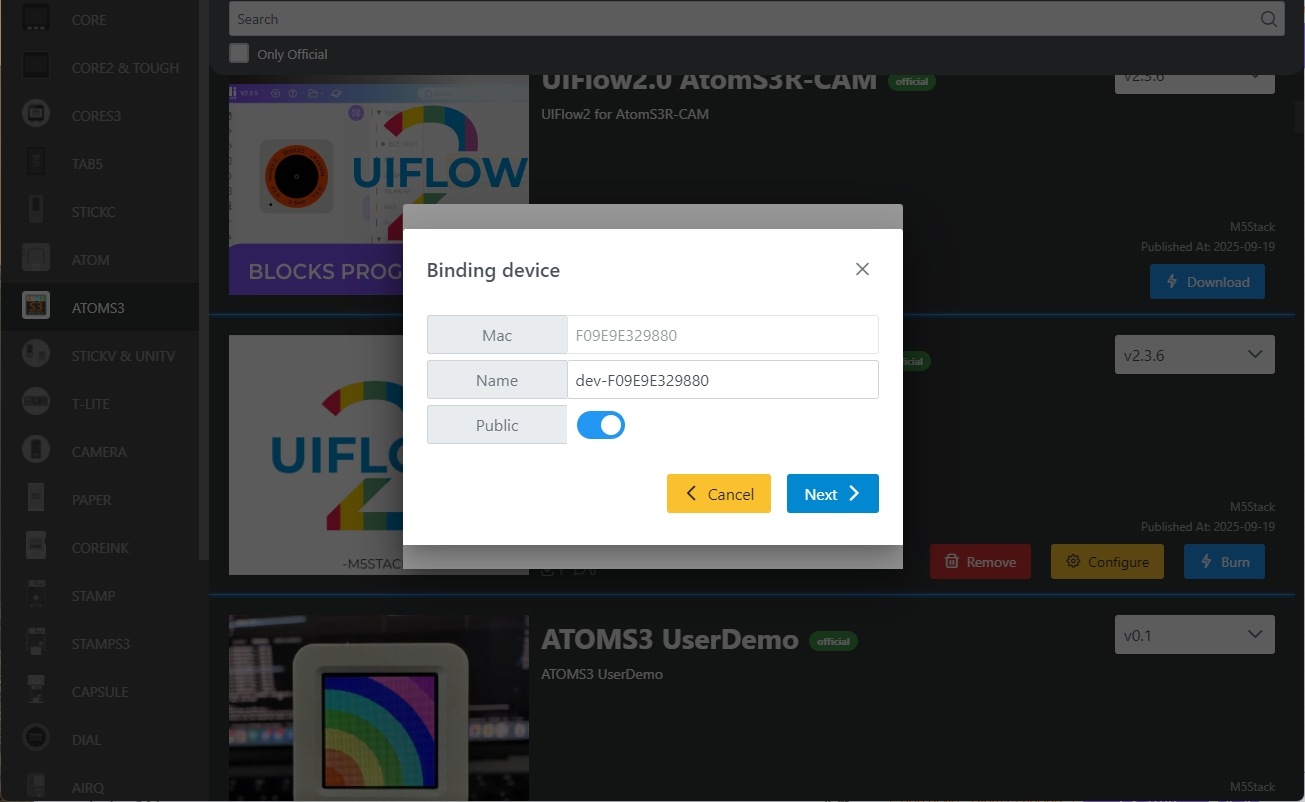
- Log in or register in M5Burner. Once the device is successfully burned, the device information will be bound to that account.

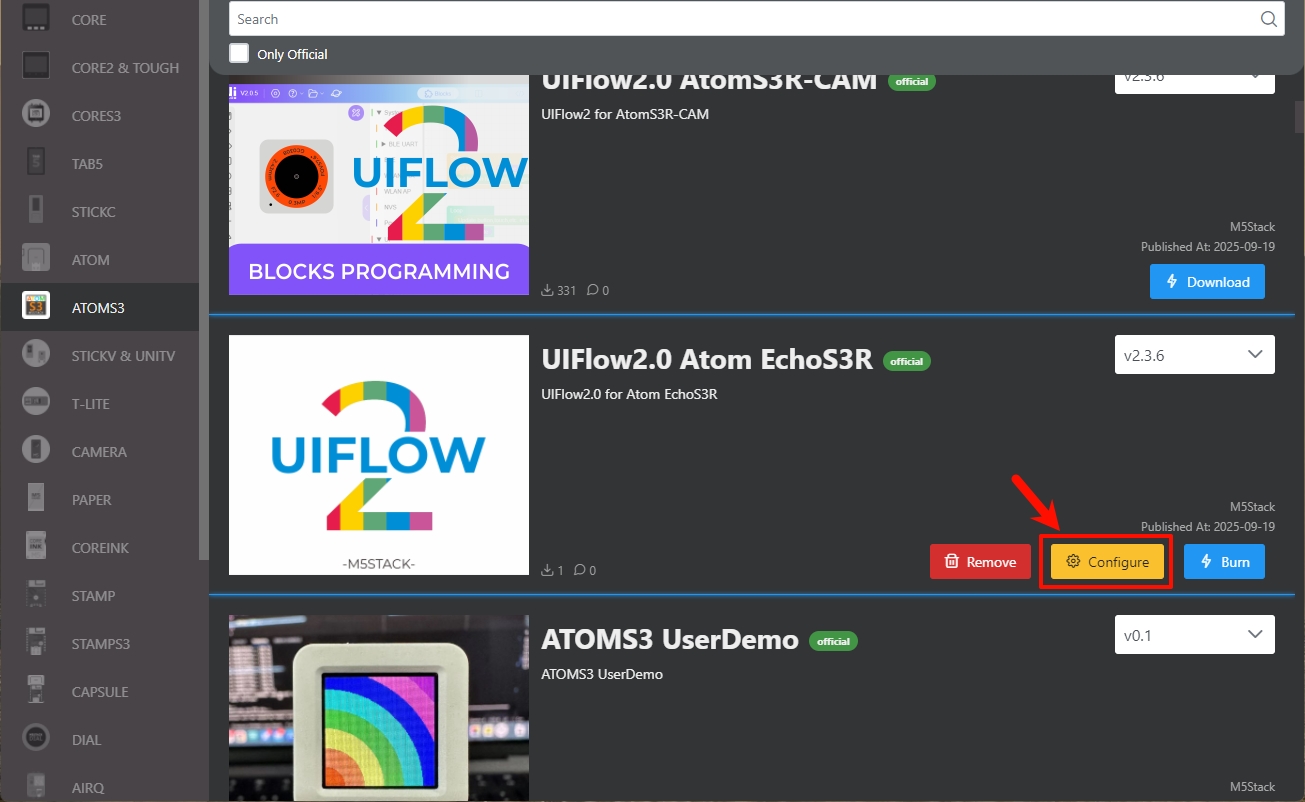
2. Firmware Burning
- Press and hold the reset button (about 2 seconds) until the internal green LED lights up, then release. The device is now in download mode, waiting for burning.
- In M5Burner, download the firmware compatible with
Atom EchoS3R, as shown below.
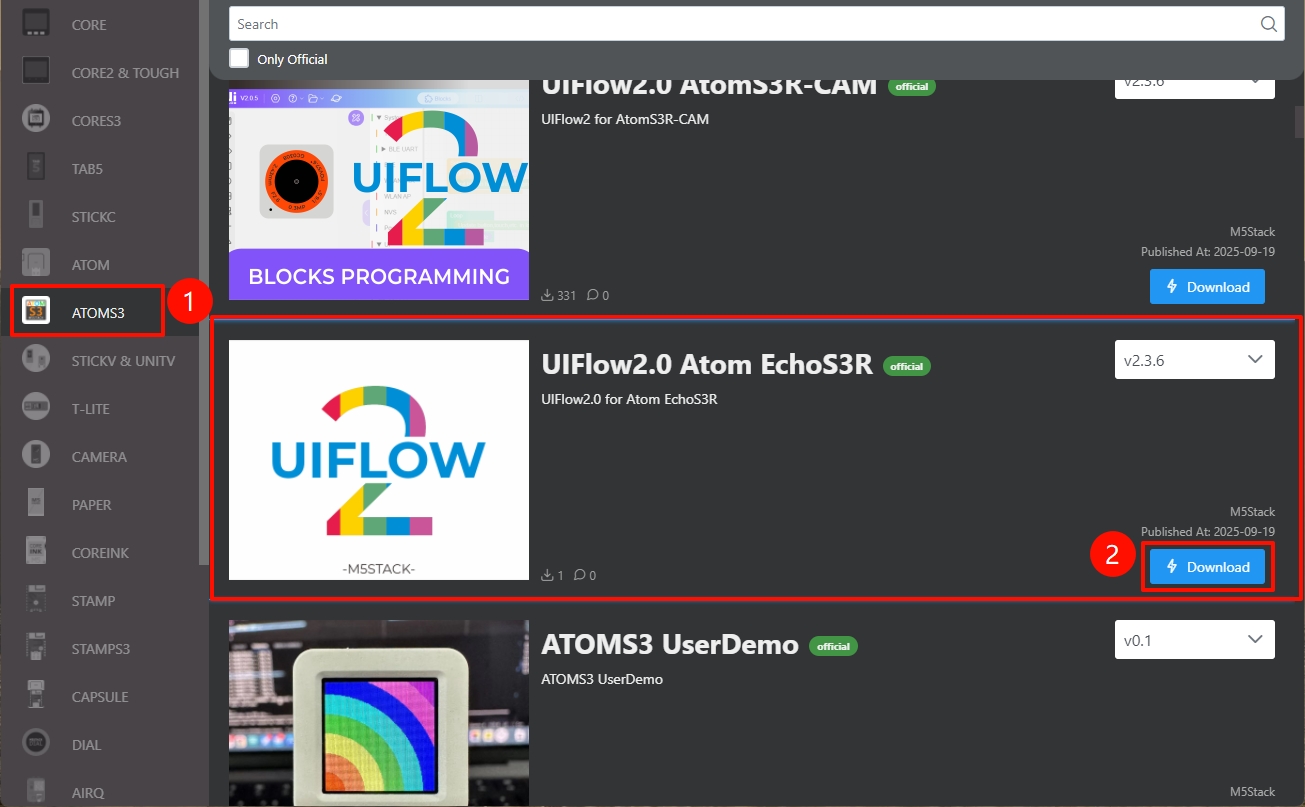
- Select the port. Connect the device to the computer via a USB cable. In M5Burner, click the
Burnbutton for the corresponding firmware, select the corresponding device port, and clickStart.

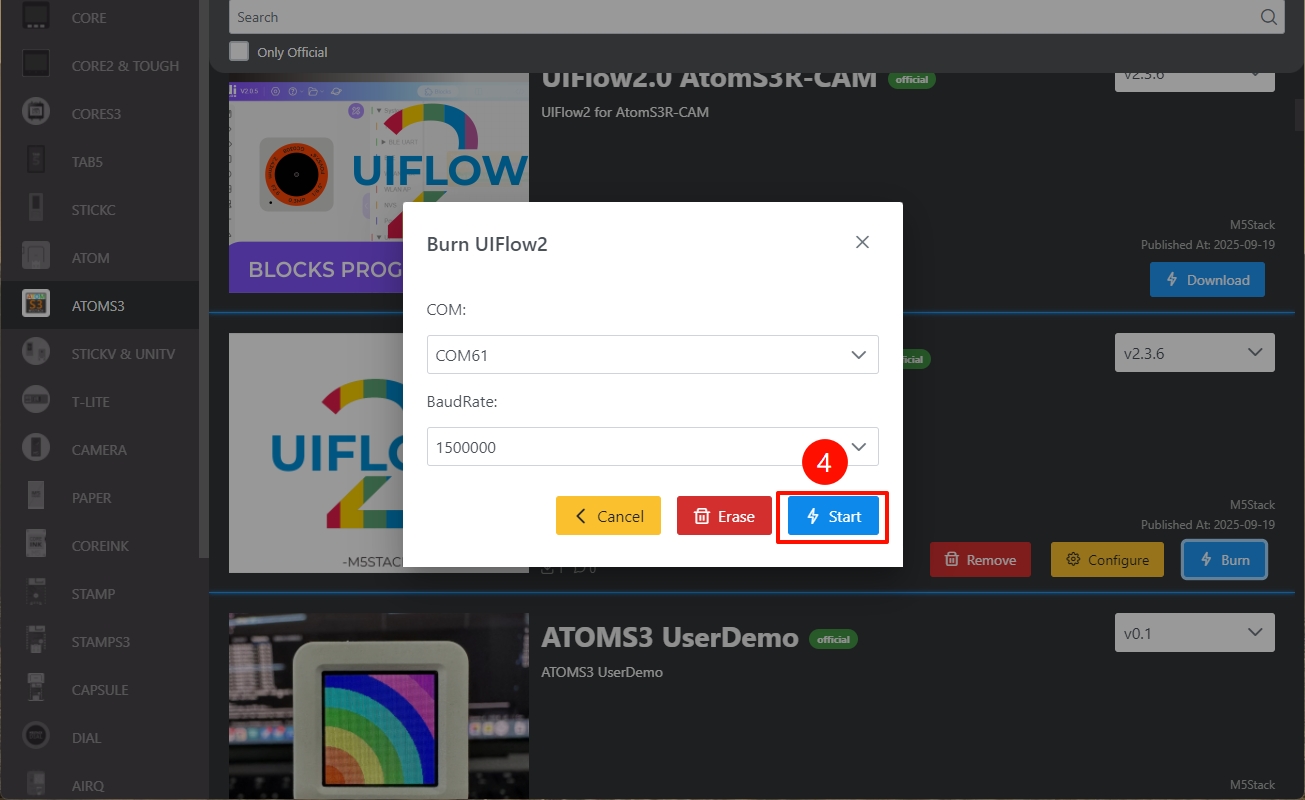
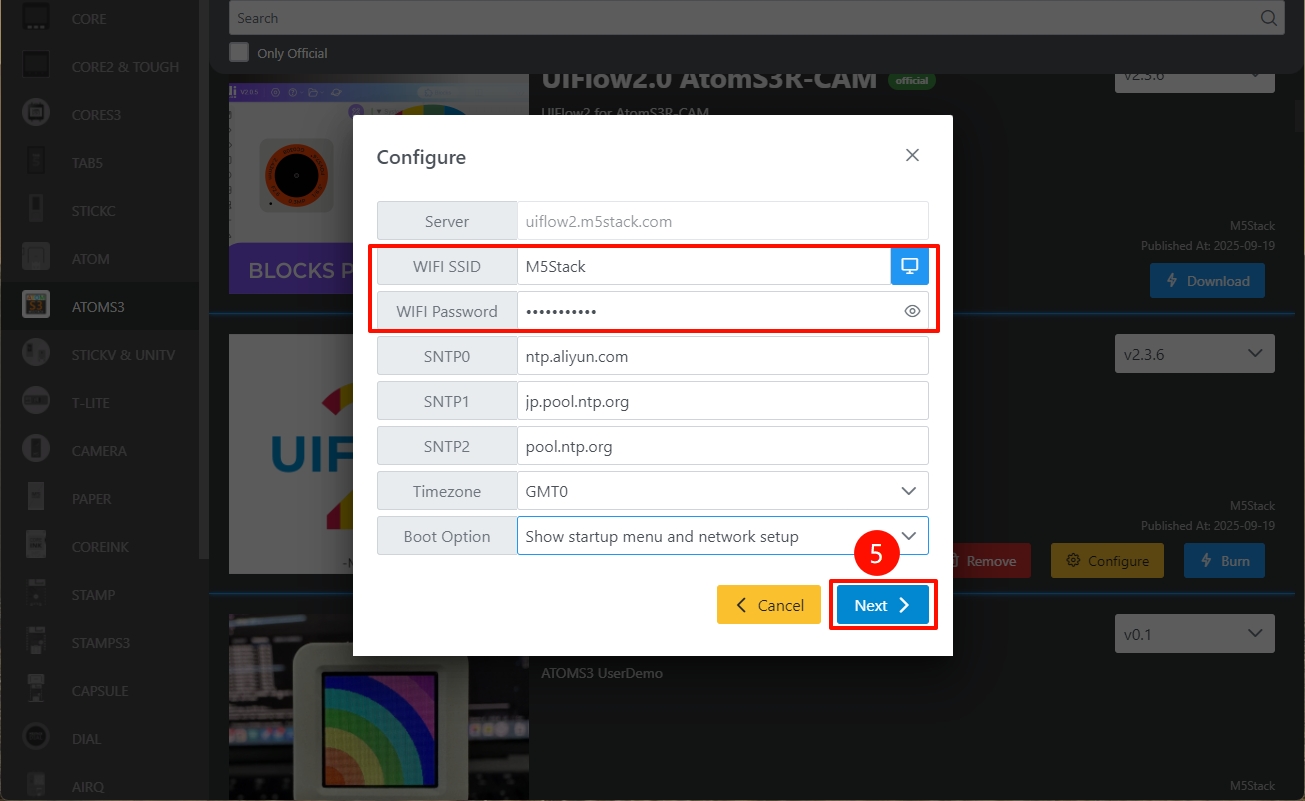
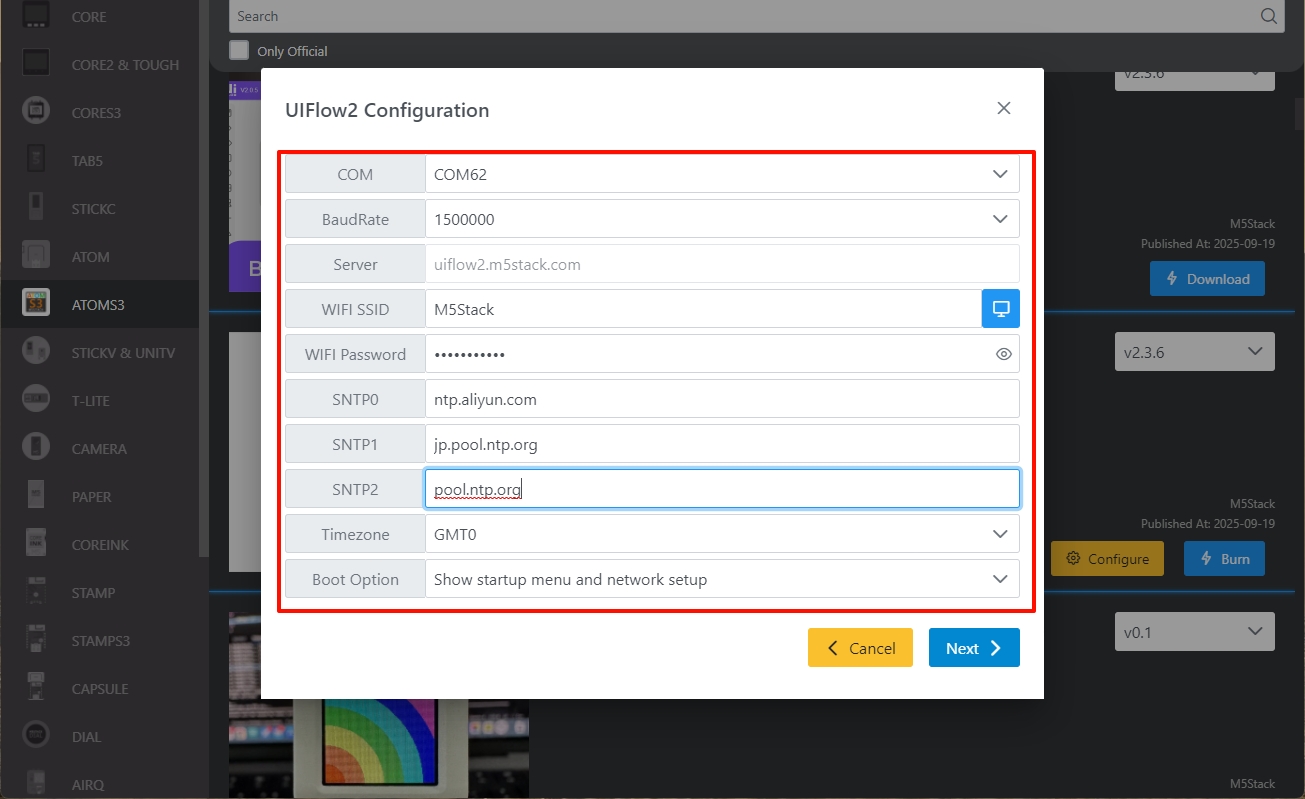
- Fill in the Wi-Fi configuration that the device needs to connect to, including Wi-Fi SSID and Wi-Fi Password, as well as any other configurations you need to add or modify. Then click
Nextto start burning.
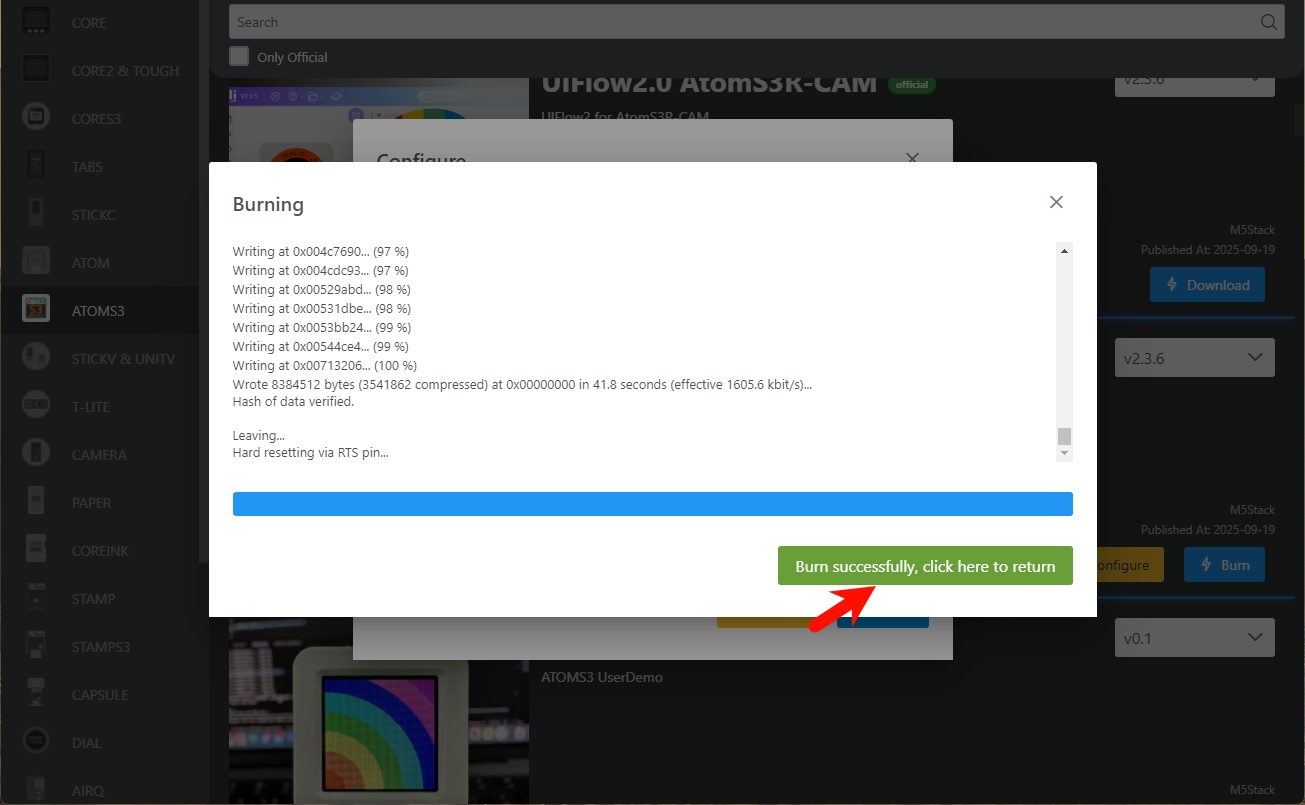
- When the prompt
Burn successfully, click here to returnappears, it means the burning is successful. You need to restart the device to activate the burned information.
Configuration Information Description
- COM: Serial port
- BaudRate: Baud rate of serial communication
- Server: Server address the device connects to
- WIFI SSID/WIFI Password: Wi-Fi name and password the device connects to
- SNTP Server
- SNTP0: Aliyun NTP server (China)
- SNTP1: Japan NTP server pool
- SNTP2: Global public NTP server pool
- Timezone: Timezone settings
- Boot Option
- run main.py directly: Run main.py directly
- show startup nemu and network setup: Show startup interface (NEMU) and network setup
- only network setup: Network setup only
3. Modify Device Configuration
After completing firmware burning, if you need to modify the device configuration, keep the USB connected, restart the device, use M5Burner to click the Configure option, modify the configuration in the pop-up interface, and click Next to re-burn the configuration information.
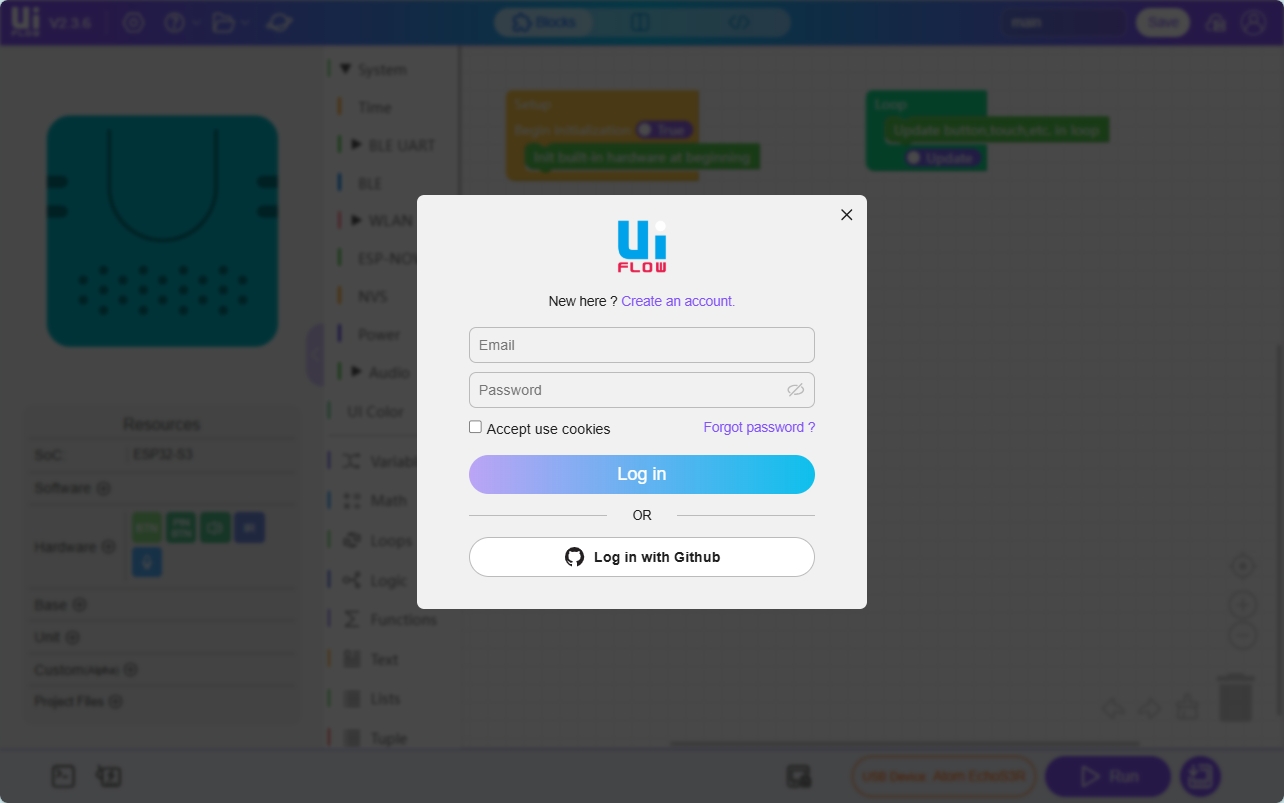
4. Log in to UiFlow2
Go to the UiFlow2 page, and click the user icon in the upper right corner to log in to the UiFlow2 system account.

Select Device. If you need to change the device owner, you must unbind the device from the account.5. Enter the Programming Page
You can connect the device to UiFlow2 via Wi-Fi or USB to enter the programming page. The specific methods are as follows:
Wi-Fi Method
Configure option in M5Burner.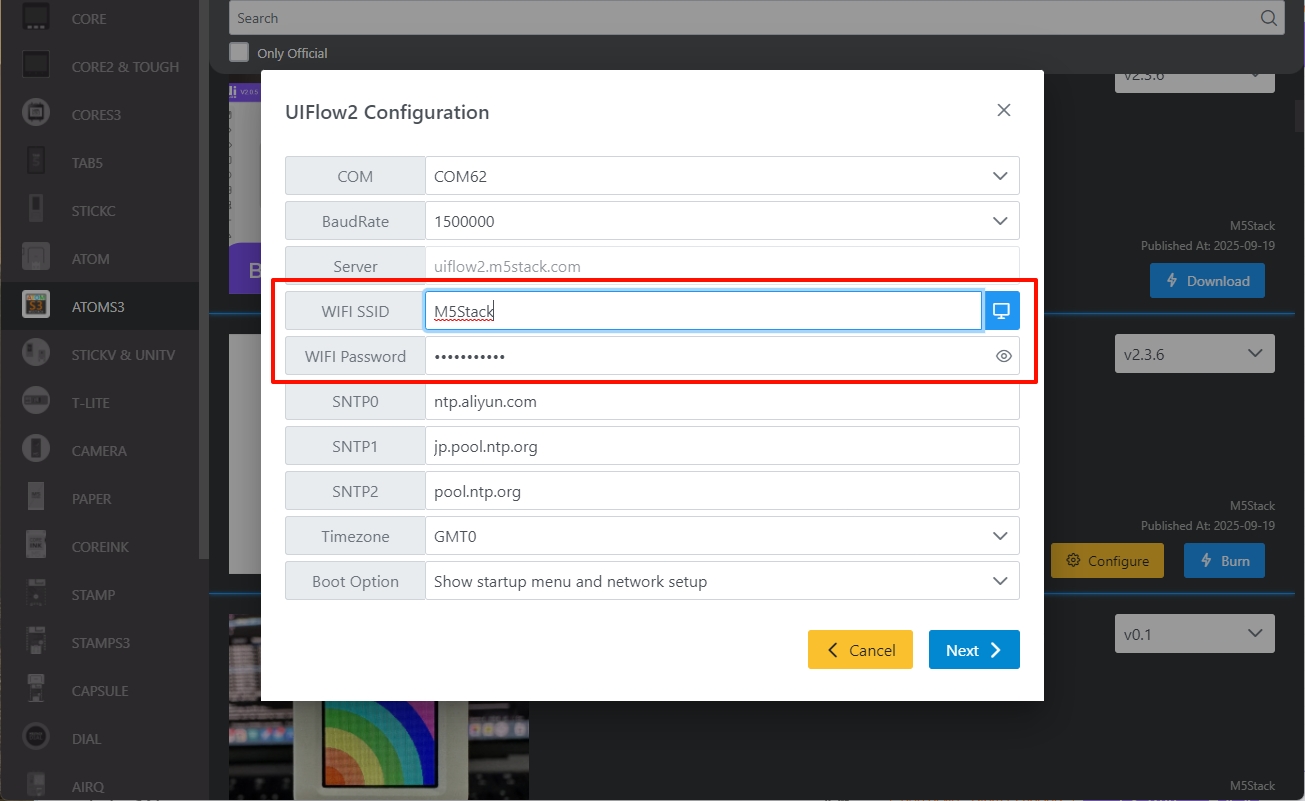
Enter the device list.
Select the online device and click Confirm.
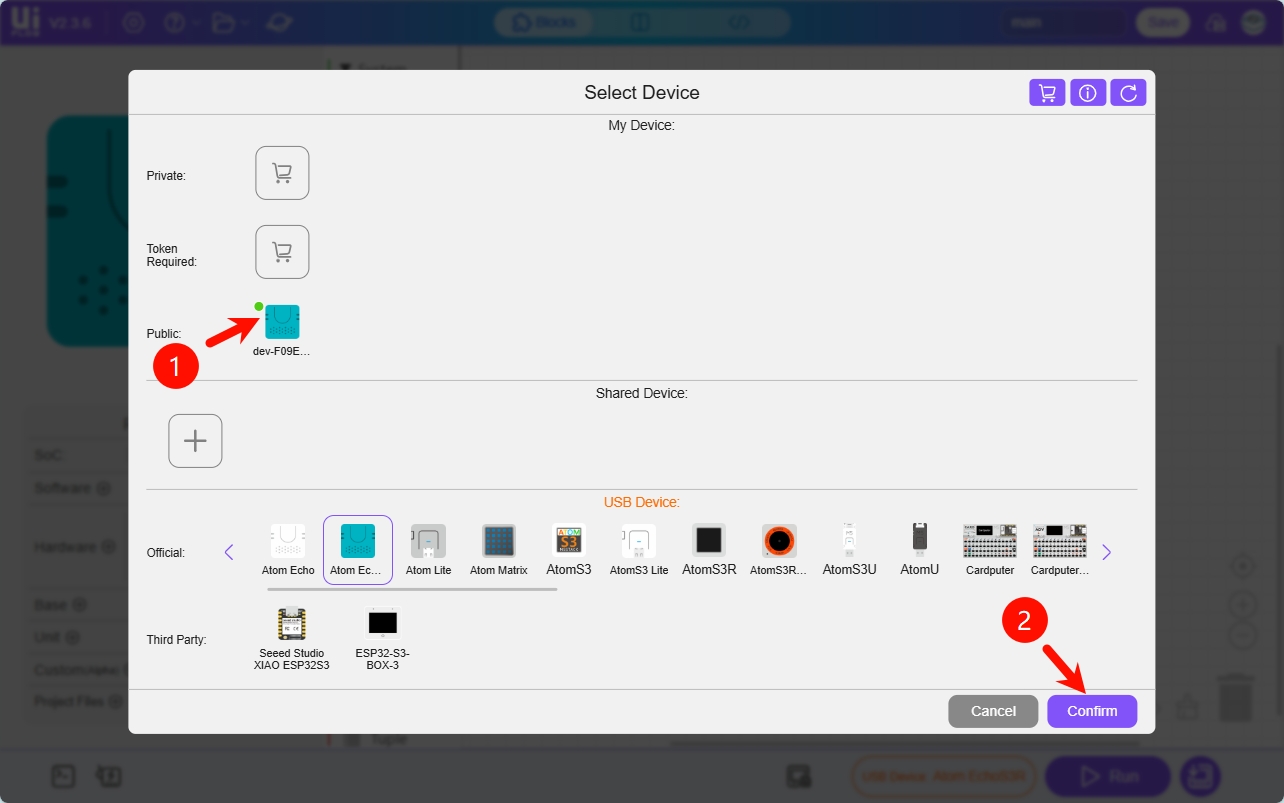
Successfully enter the device's UiFlow2 programming page.
USB Method
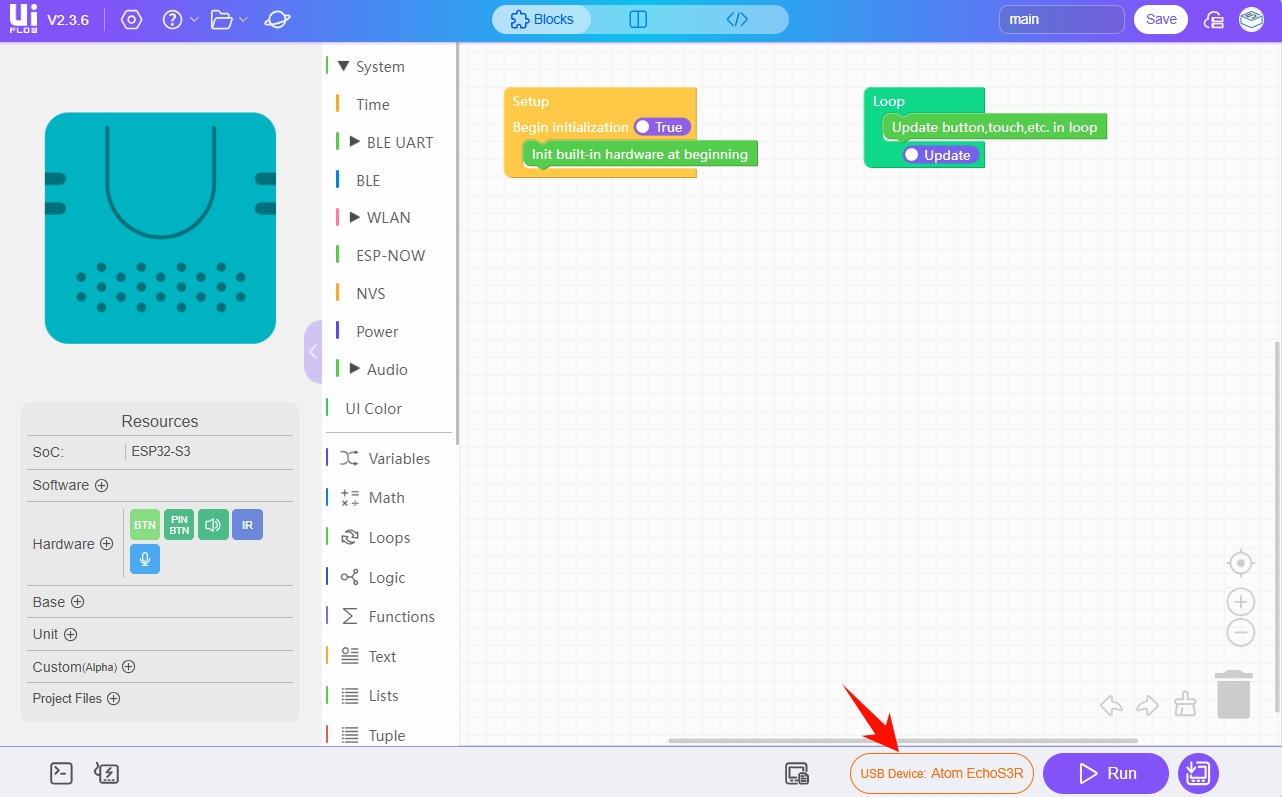
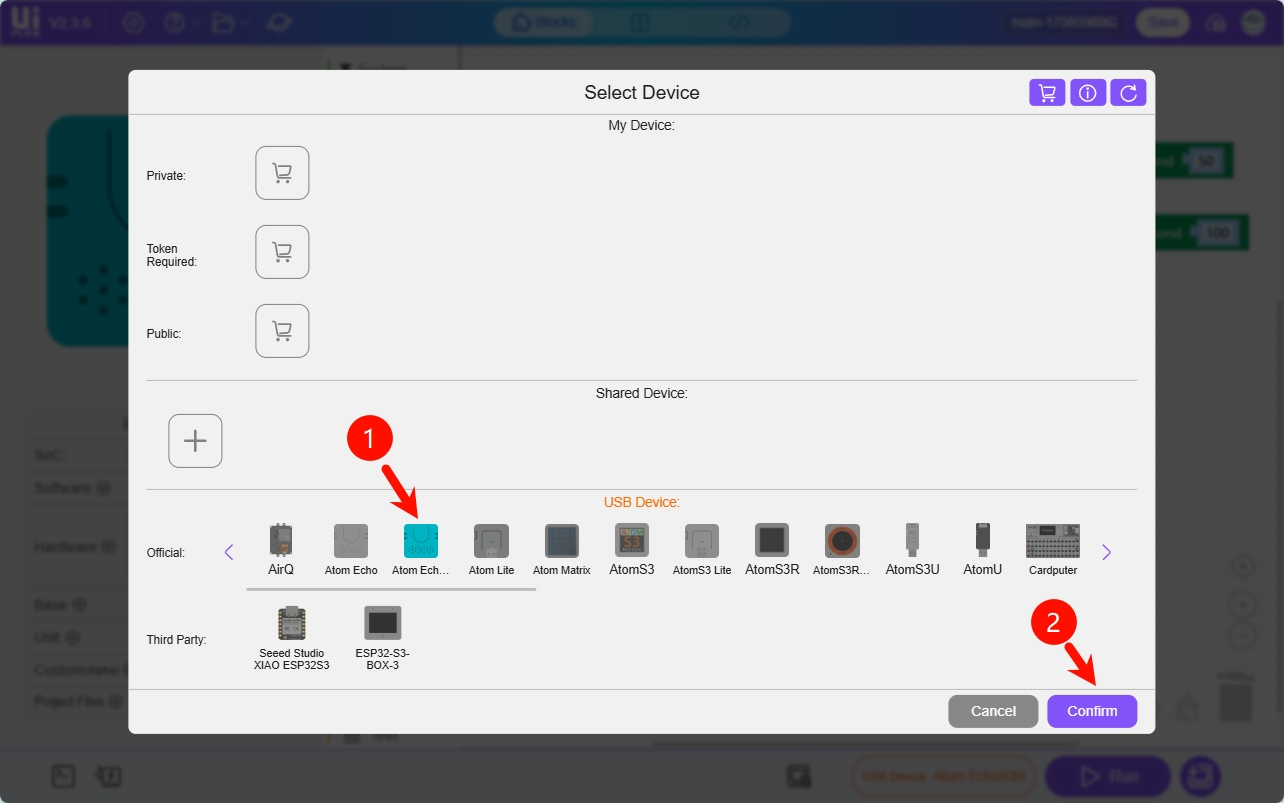
- Connect Atom EchoS3R to the computer via USB cable, select the Atom EchoS3R module in the device list, and click
Confirm.
- Click the
WebTerminalbutton.
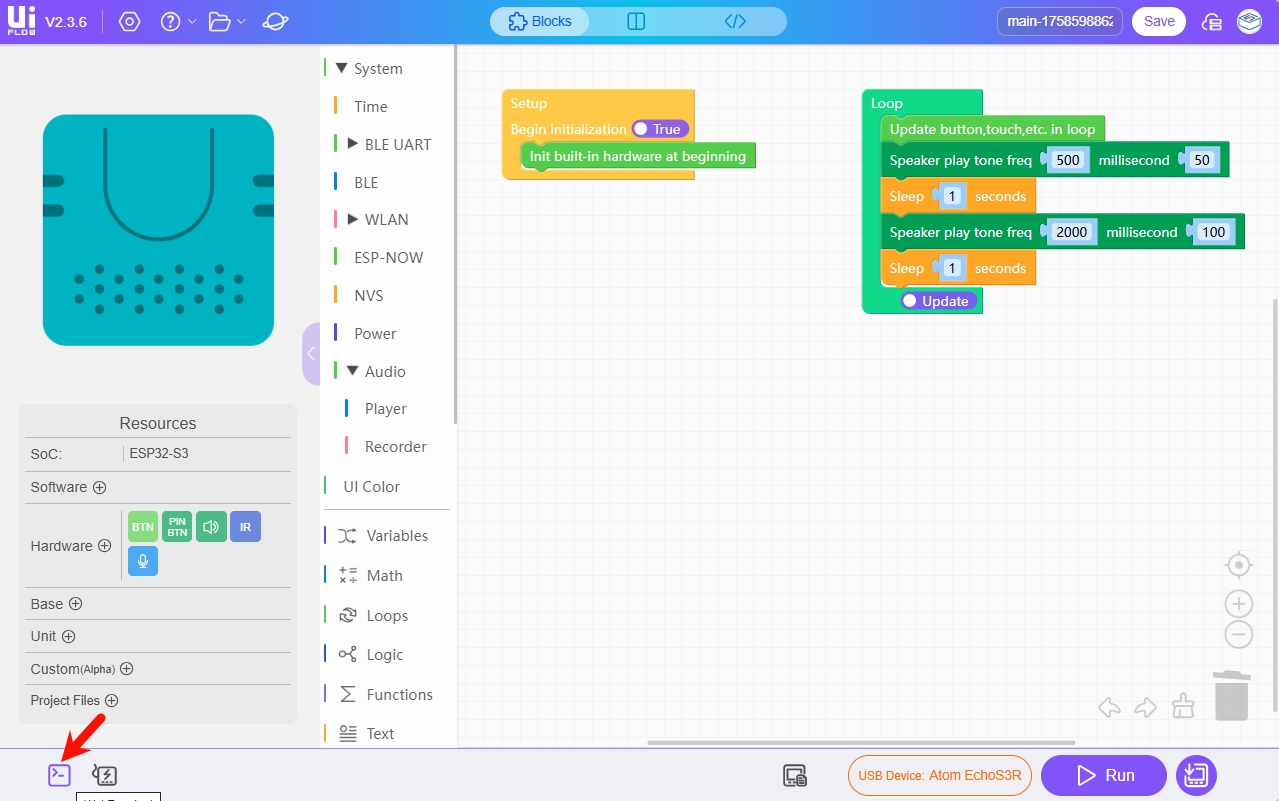
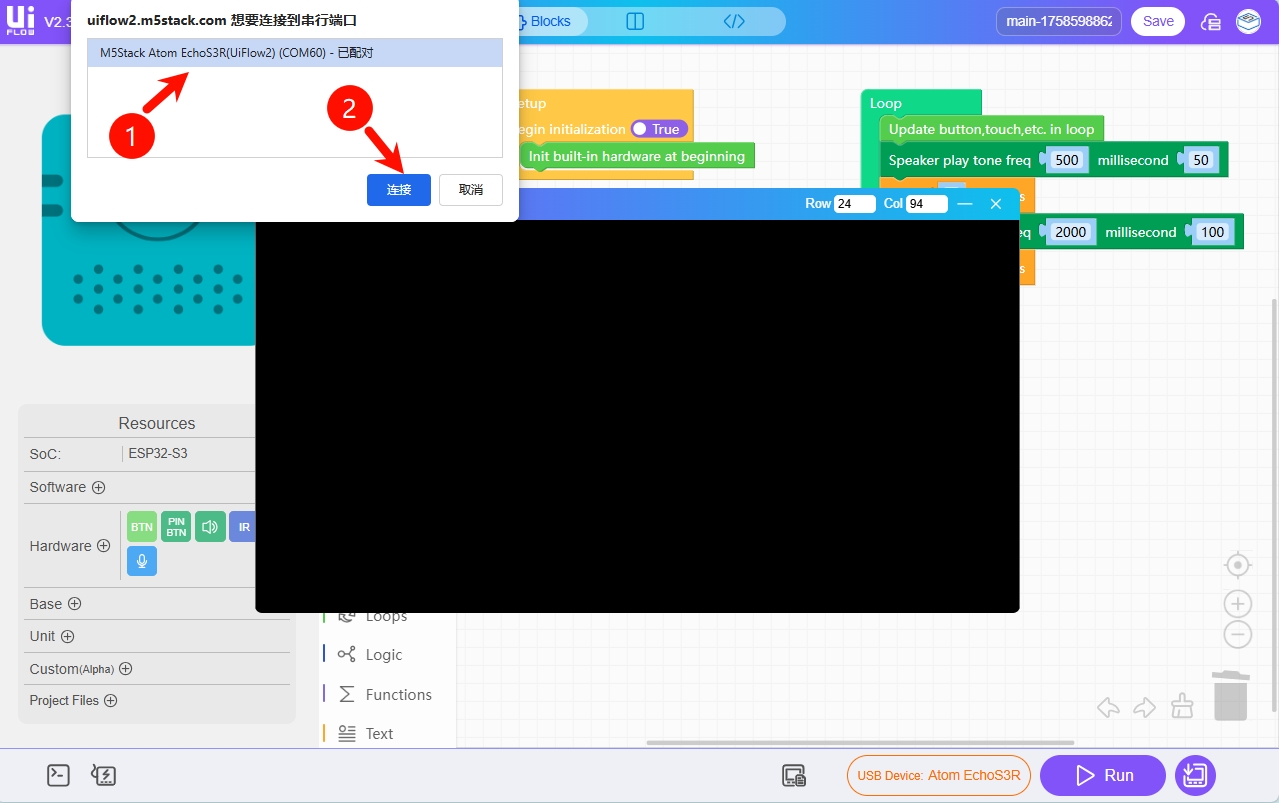
- In the pop-up window, select the serial port of
Atom EchoS3Rand clickConnect.
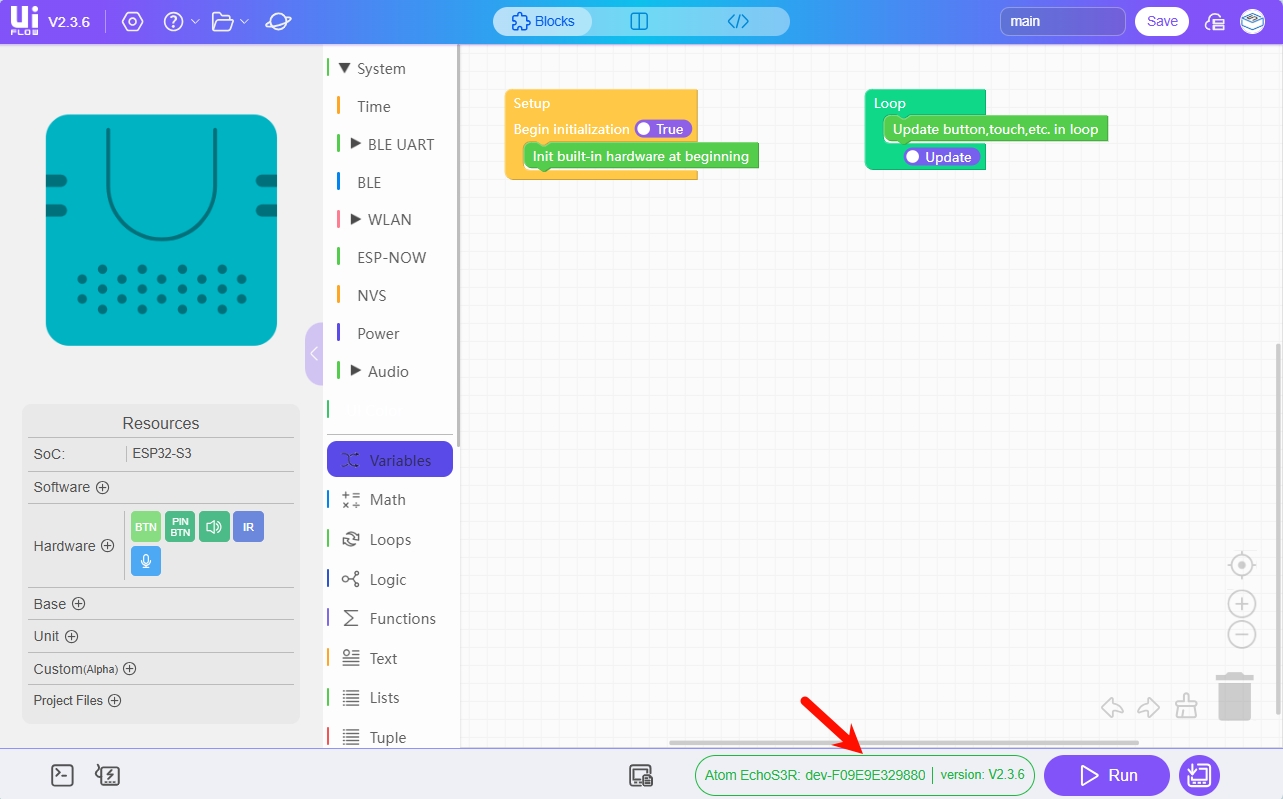
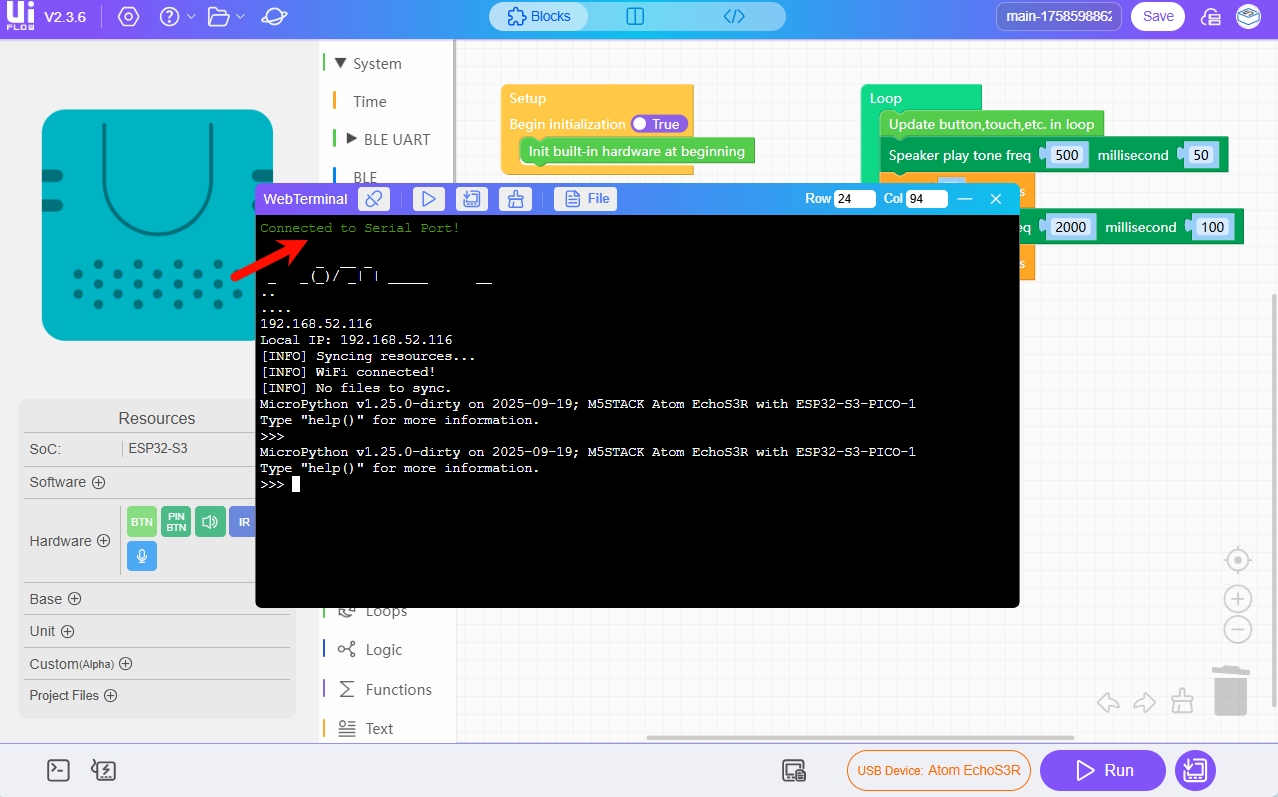
When the WebTerminal screen shows Connected to Serial Port!, it means the USB connection is successful and you can enter the device's UiFlow2 programming page.
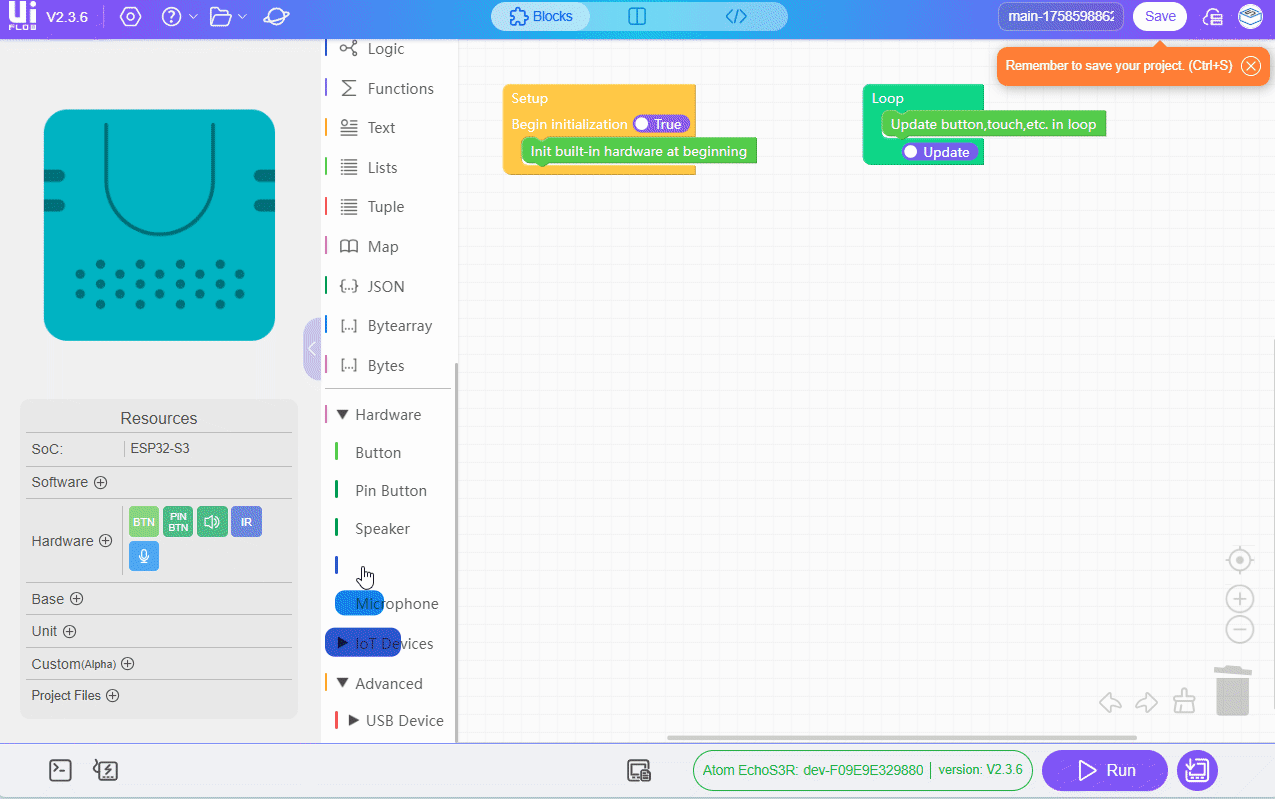
6. RUN
After completing the above steps, you can start programming with UiFlow2.