

Arduino Quick Start
2. Devices & Examples
3. M5Unified
4. M5GFX
5. Extensions
Unit
Atomic
Tab5
IoT
Accessories
Unit PoE CAM Arduino Program Compilation & Upload
1. Preparations
- Arduino IDE Installation: Refer to the Arduino IDE Installation Tutorial to complete the IDE installation.
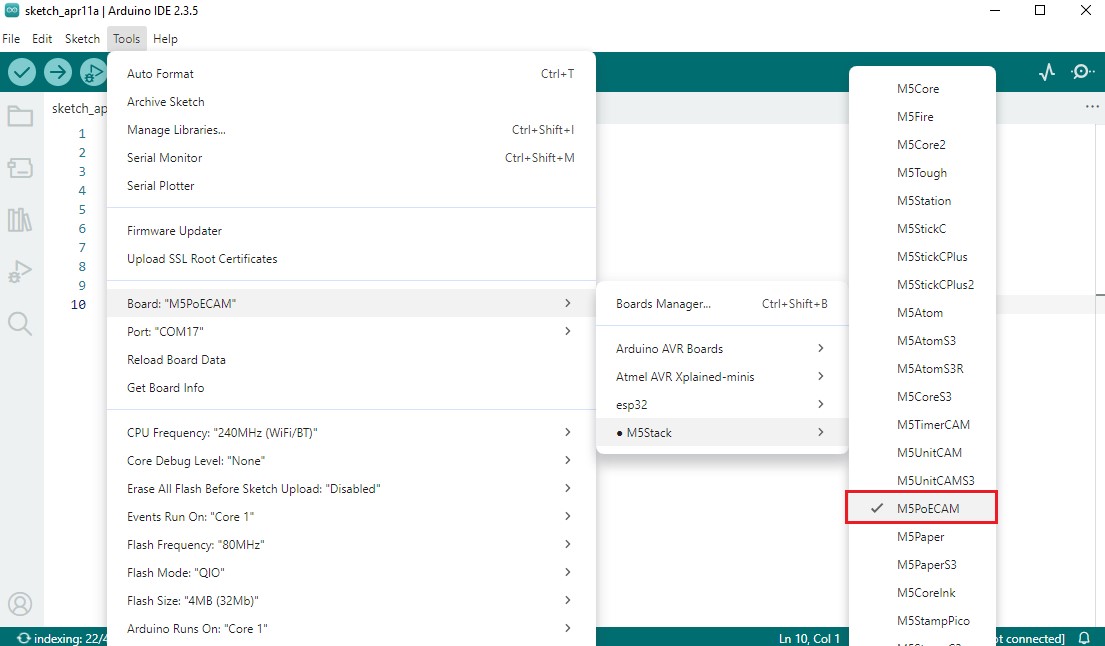
- Board Manager Installation: Refer to the Basic Environment Setup Tutorial to complete the M5Stack board manager installation and select the development board
M5PoECAM.
- Board Manager Installation: Refer to the Basic Environment Setup Tutorial to complete the M5Stack board manager installation and select the development board
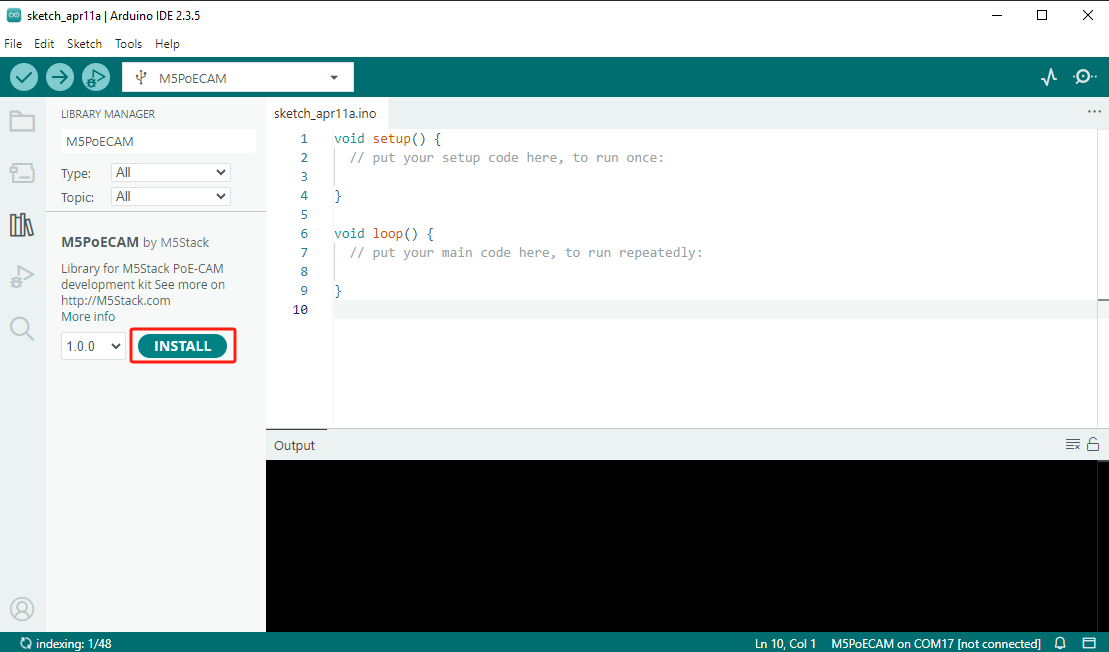
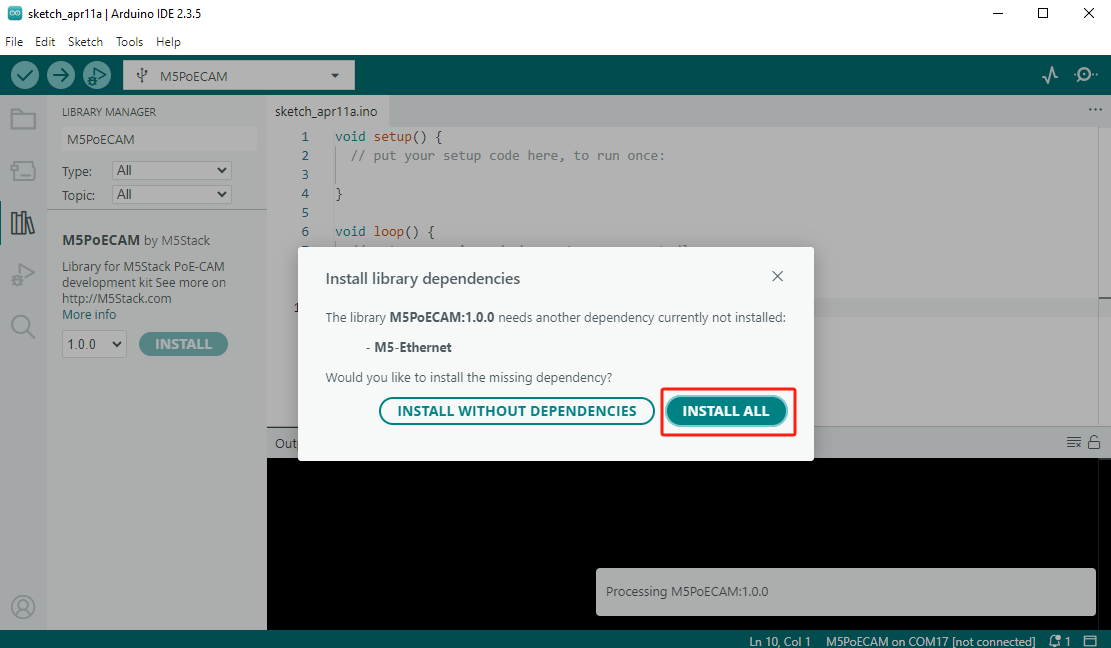
- Dependency Library Installation: Refer to the Library Manager Installation Tutorial to complete the installation of the
M5PoECAMdriver library.
- Dependency Library Installation: Refer to the Library Manager Installation Tutorial to complete the installation of the
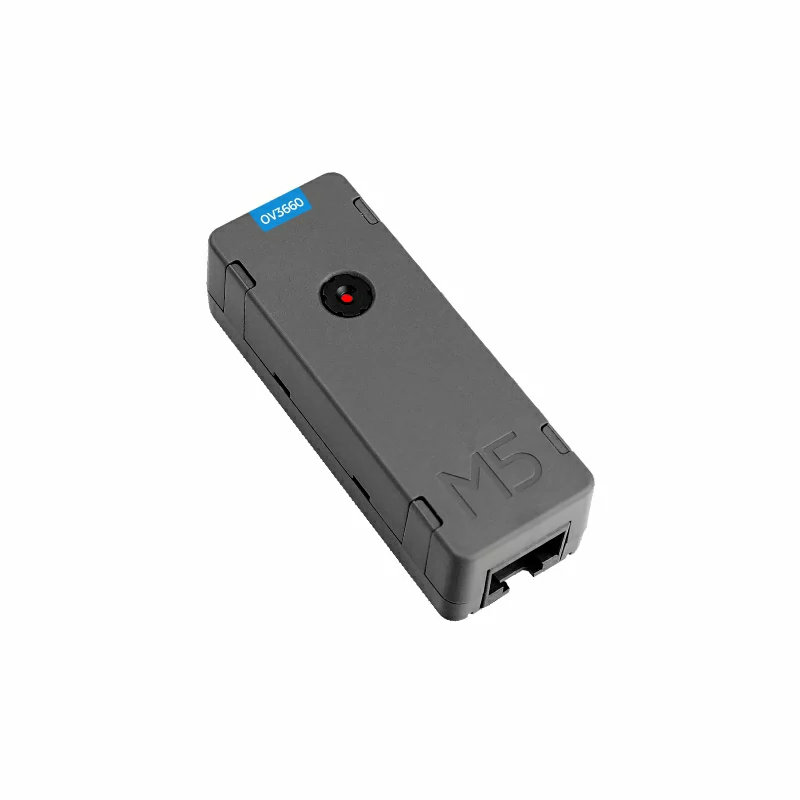
- Hardware products used:
This tutorial is applicable to Unit PoE CAM / Unit PoE CAM-W / Unit PoE CAM-W v1.1 devices.
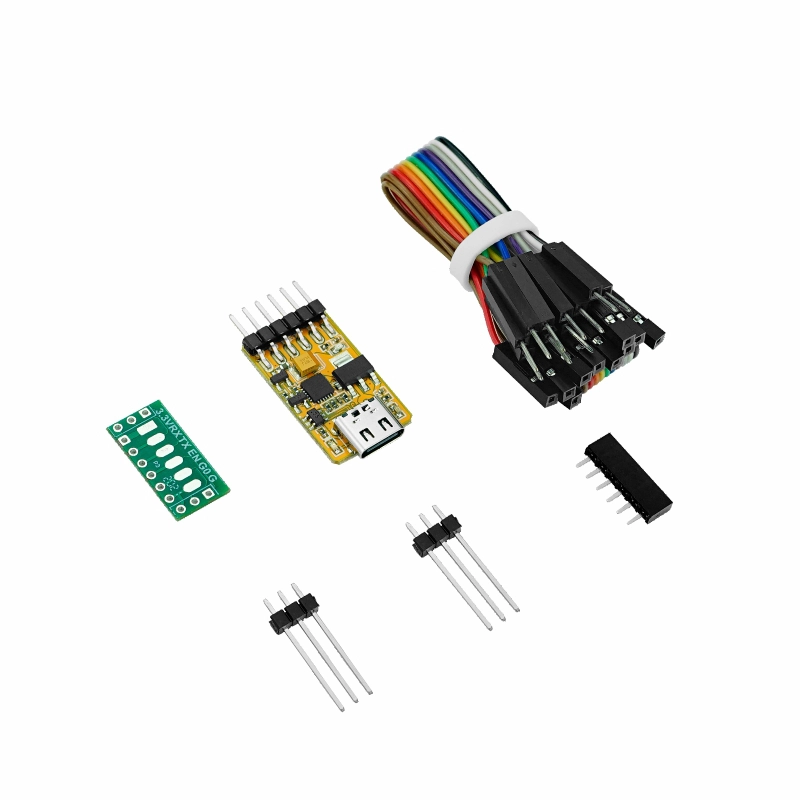
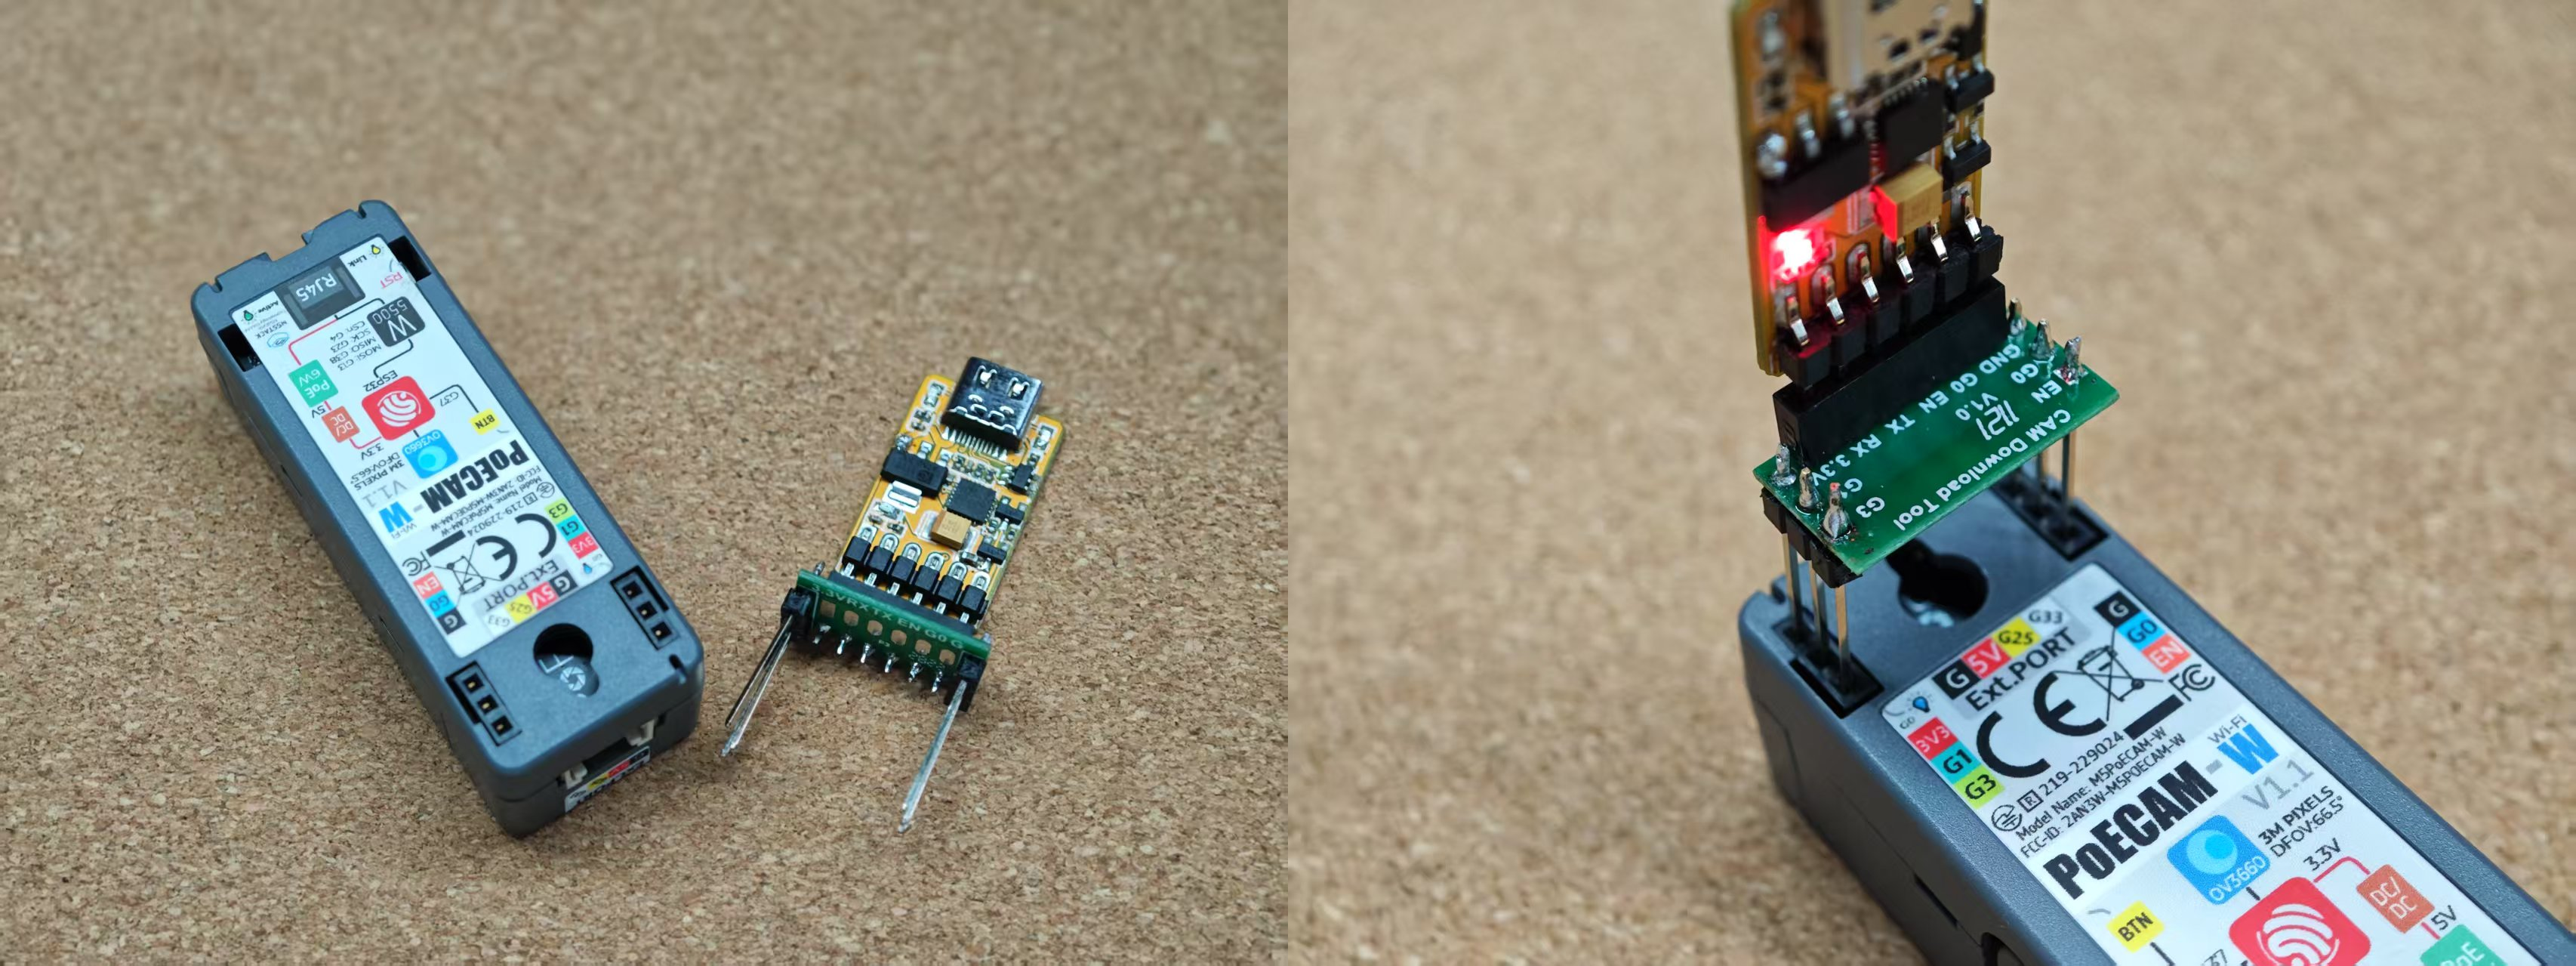
2. Flashing Tool
Use the adapter board provided with the ESP32 Downloader to connect to the reserved program download interface on the Unit PoE CAM-W v1.1. Follow the steps below to flash the firmware.
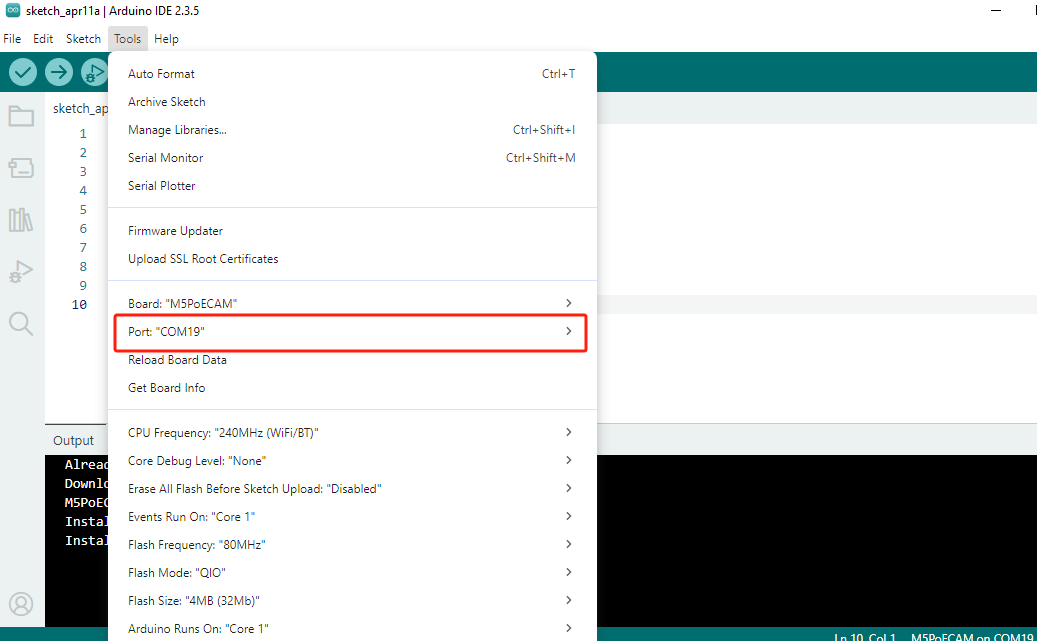
3. Port Selection
- Connect the device to the computer via a USB cable, and select the corresponding device port in the Arduino IDE.
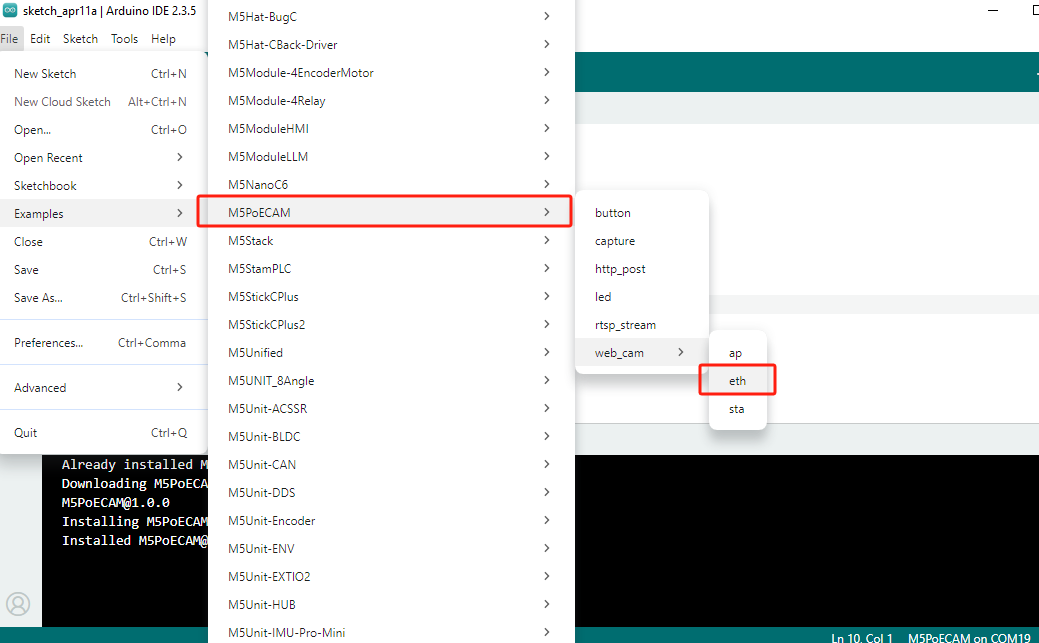
4. Program Compilation & Flashing
- Open the example program "web_cam - eth" in the driver library, click the Upload button, and the program will automatically compile and flash.
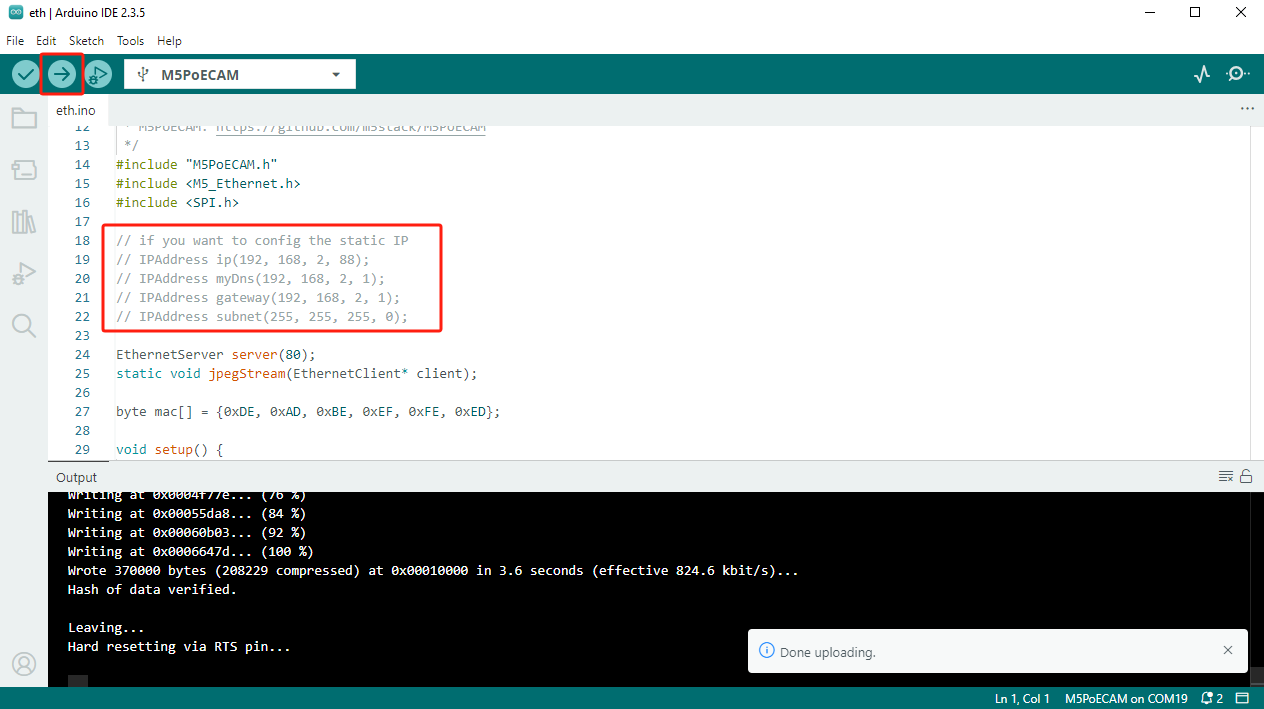
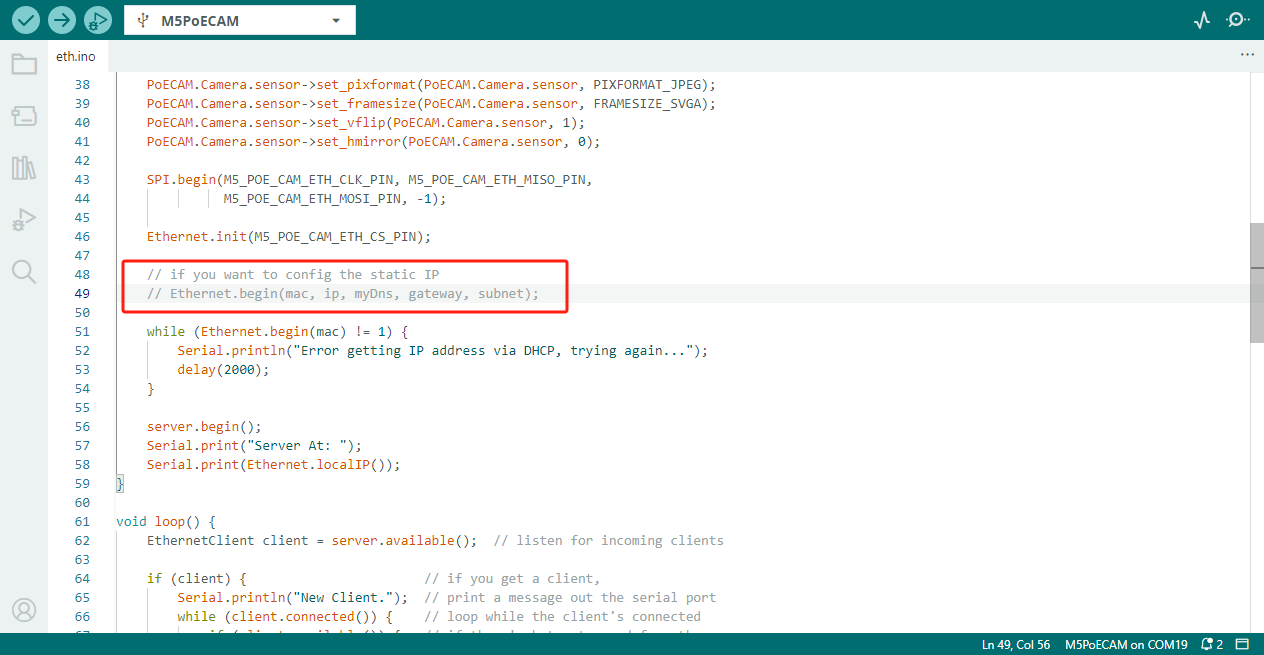
Static IP
If you need to set a static IP, please refer to the comments for configuration.
Camera Configuration
Due to differences in camera models, the image orientation and the maximum supported resolution may vary. Refer to the code below, and after executing PoECAM.Camera.begin(), configure the image rotation and mirror display according to your needs.
cpp
1 2 3 4 5 6 7 8
// for CAMERA_OV2640 ( Unit PoE CAM / Unit PoE CAM-W )
PoECAM.Camera.sensor->set_vflip(PoECAM.Camera.sensor, 0);
PoECAM.Camera.sensor->set_hmirror(PoECAM.Camera.sensor, 0);
PoECAM.Camera.sensor->set_framesize(PoECAM.Camera.sensor, FRAMESIZE_UXGA); //1600x1200
// for CAMERA_OV3660 ( Unit PoE CAM-W v1.1 )
PoECAM.Camera.sensor->set_vflip(PoECAM.Camera.sensor, 0);
PoECAM.Camera.sensor->set_hmirror(PoECAM.Camera.sensor, 1);
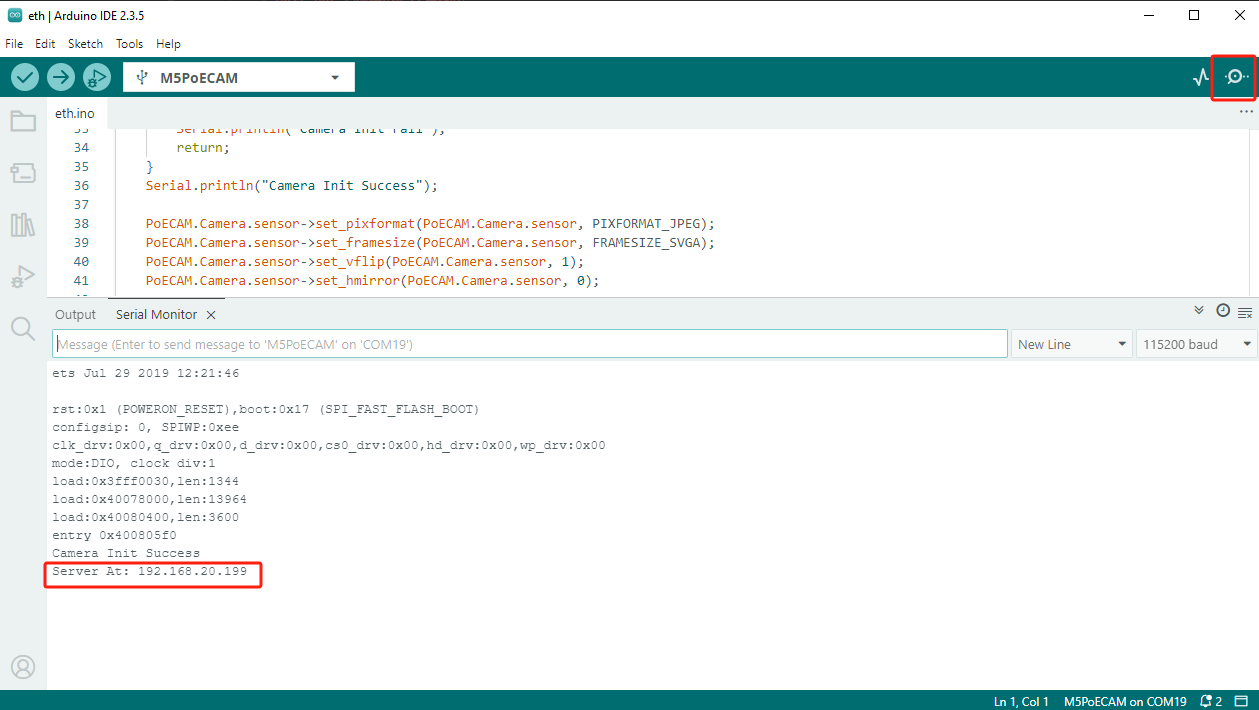
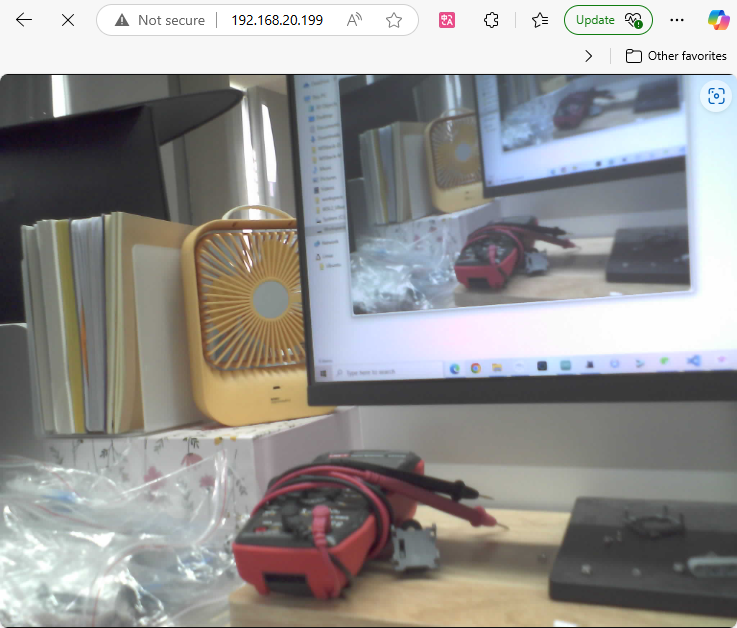
PoECAM.Camera.sensor->set_framesize(PoECAM.Camera.sensor, FRAMESIZE_QXGA); //2048x1536After connecting a serial tool, reset the device or power it on again, then check the device IP. Access the IP via a browser to preview the image in real time.
5. Related Resources
- Github
Page Tools