

Arduino 上手教程
2. 设备开发 & 案例程序
3. M5Unified
4. M5GFX
5. 拓展模块
Unit
Atomic
Tab5
IoT
NanoC6 Arduino 示例程序编译与烧录
1. 准备工作
- 1.Arduino IDE 安装: 参考Arduino IDE安装教程,完成 IDE 安装。
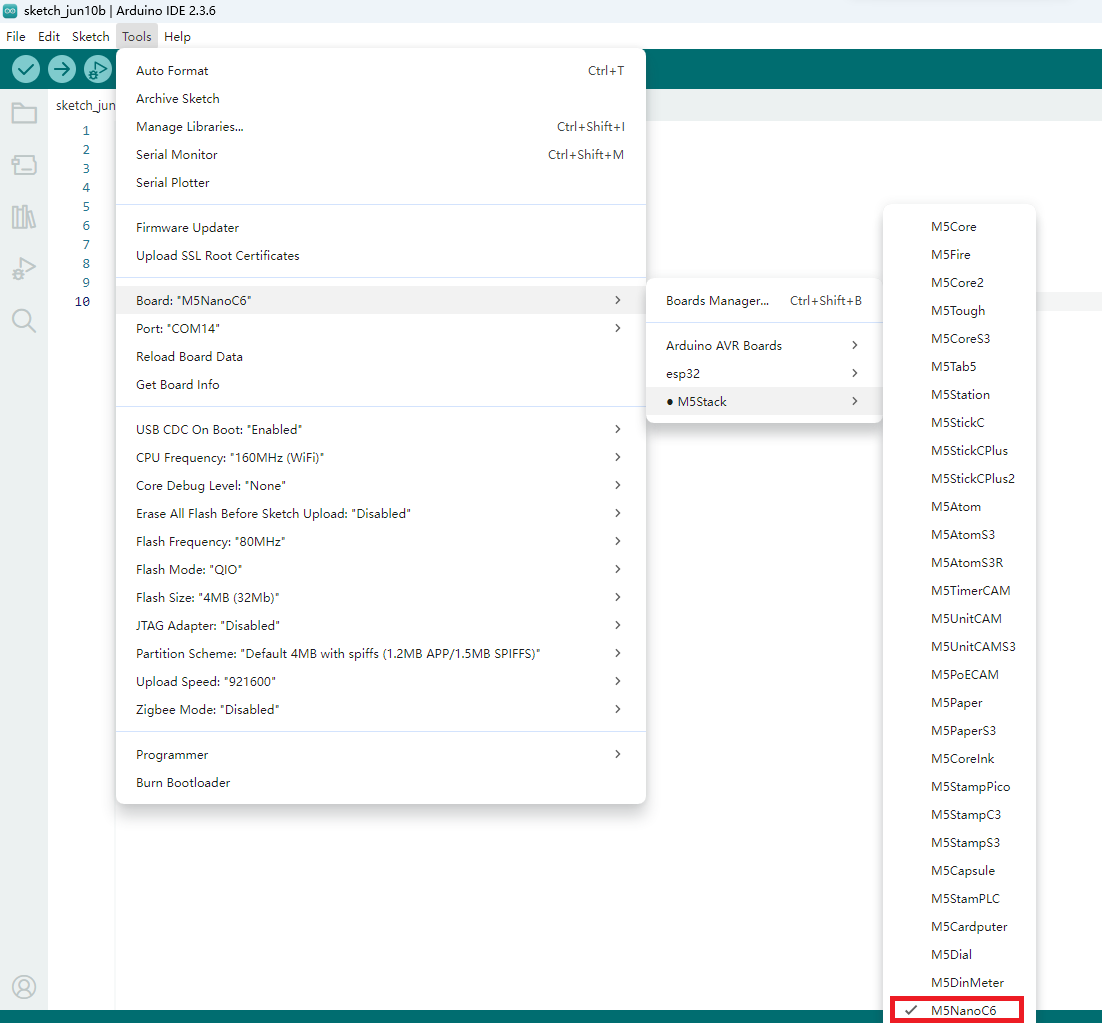
- 2. 板管理安装:参考基本环境搭建教程,完成 M5Stack 板管理安装并选择开发板
M5NanoC6。
2. 下载模式
按住按键 GPIO9,然后接上数据线即可进入下载模式。
.gif)
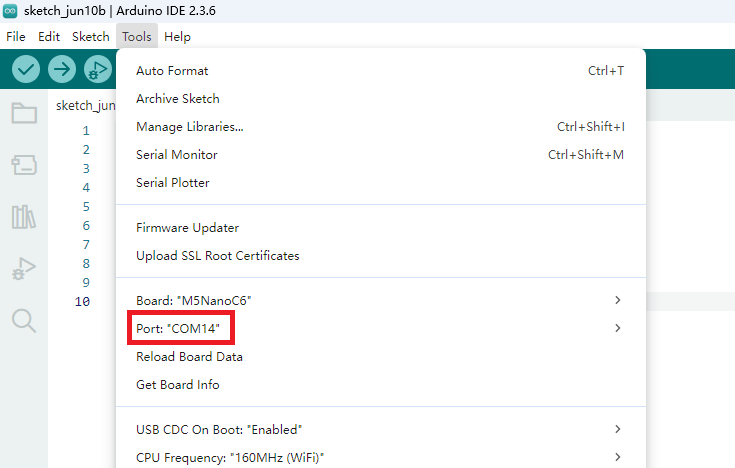
3. 端口选择
将设备通过 USB 线连接至电脑,在 Arduino IDE 中可选中对应设备的端口。
4. 程序编译 & 烧录
在 Arduino IDE 工作区输入下方代码,点击上传按钮,将自动进行程序编译与烧录。
说明:
1. 本案例基于Adafruit NeoPixel库实现,使用前请通过库管理安装Adafruit NeoPixel依赖库。
2. 为了控制待机功耗,M5NanoC6 RGB LED 需要使能灯珠,即需要高电平控制下方代码中的
ENABLE_PIN 。cpp
1 2 3 4 5 6 7 8 9 10 11 12 13 14 15 16 17 18 19 20 21 22 23 24 25 26 27 28 29 30 31
#include <Adafruit_NeoPixel.h>

#define LED_PIN    20
#define ENABLE_PIN 19
#define NUM_LEDS   1

Adafruit_NeoPixel strip(NUM_LEDS, LED_PIN, NEO_GRB + NEO_KHZ800);

void setup() {
  pinMode(ENABLE_PIN, OUTPUT);
  digitalWrite(ENABLE_PIN, HIGH);
  strip.begin();
  strip.show();
}

void loop() {
    //RED
    strip.setPixelColor(0, strip.Color(255, 0, 0));
    strip.show();
    delay(100);

    //GREEN
    strip.setPixelColor(0, strip.Color(0, 255, 0));
    strip.show();
    delay(100);

    //BLUE
    strip.setPixelColor(0, strip.Color(0, 0, 255));
    strip.show();
    delay(100);
}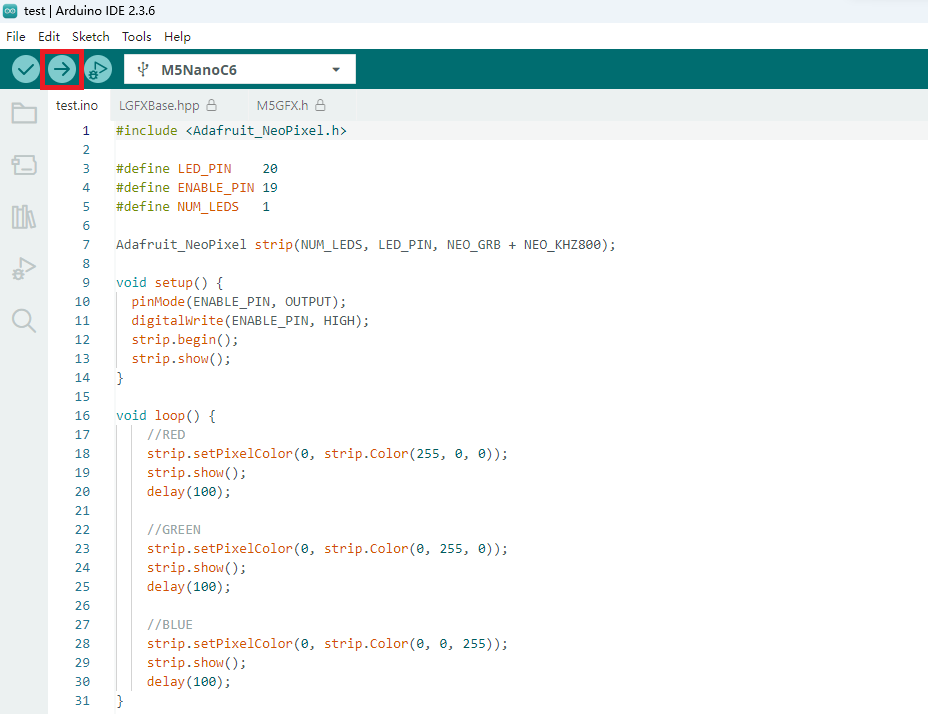
上传代码后即可看到 M5NanoC6 设备上的 RGB LED 灯循环亮起红绿蓝三色。
5. 相关资源
Page Tools