Arduino Quick Start
2. Devices & Examples
3. M5Unified
4. M5GFX
5. Extensions
Unit
Base
IoT
Accessories
Hat Finger Arduino Tutorial
1. Preparation
- Environment Setup: Refer to Arduino IDE Getting Started Tutorial to complete IDE installation, and install the corresponding board manager and required driver libraries according to the development board being used.
- Required Driver Libraries:
Note
You need to download the latest library version from GitHub: M5-FPC1020A - M5Stack GitHub. Do not download from Arduino Library. (For any questions, please refer to this tutorial)
- Required Hardware Products:

2. Important Notes
Pin Compatibility
Since pin configurations vary across host devices, please refer to the Pin Compatibility Table in the product documentation before use, and modify the sample program according to actual pin connections.
3. Example Program
- The main controller used in this tutorial is StickC-Plus2 paired with Hat Finger module. This fingerprint recognition module communicates via serial port. Modify the pin definitions in the program according to the actual circuit connections. The corresponding serial port IOs after device stacking are
G26 (RX)andG0 (TX).
cpp
1 2 3 4 5 6 7 8 9 10 11 12 13 14 15 16 17 18 19 20 21 22 23 24 25 26 27 28 29 30 31 32 33 34 35 36 37 38 39 40 41 42 43 44 45 46 47 48 49 50 51 52 53 54 55 56 57 58 59 60 61 62 63 64 65 66 67 68 69 70 71 72 73 74 75 76 77 78 79 80 81 82 83 84 85 86 87 88 89 90 91 92 93 94 95 96 97 98 99 100 101 102 103 104 105 106 107 108 109 110 111 112 113 114 115 116 117 118
/**
* @file Unit_Finger_M5StickCPlus.ino
* @author Zovey (liangzhuowei@m5stack.com)
* @brief
* @version 0.1
* @date 2025-07-04
*
* @Hardwares: StickC-Plus2 + Hat Finger
* @Dependent Library:
* M5_FPC1020A: https://github.com/m5stack/M5-FPC1020A
*/
#include <M5Unified.h>
#include "M5_FPC1020A.h"
M5_FPC1020A finger;
uint8_t user_id = 0;
bool add_user_process(uint8_t id, uint8_t permission) ;
bool user_check(void);
void setup() {
M5.begin();
Serial.begin(115200);
M5.Display.setRotation(1);
M5.Display.setTextColor(BLACK);
M5.Display.setTextSize(1);
M5.Display.setFont(&fonts::FreeMonoBold9pt7b);
M5.Display.setCursor(0, 0);
M5.Display.println("Finger Unit init...");
if (!finger.begin(&Serial2, 26, 0, 19200)) {
Serial.println("FPC1020A not found");
while (1) delay(1);
}
M5.Display.fillRect(0, 0, 240, 135, WHITE);
M5.Display.setCursor(0, 0);
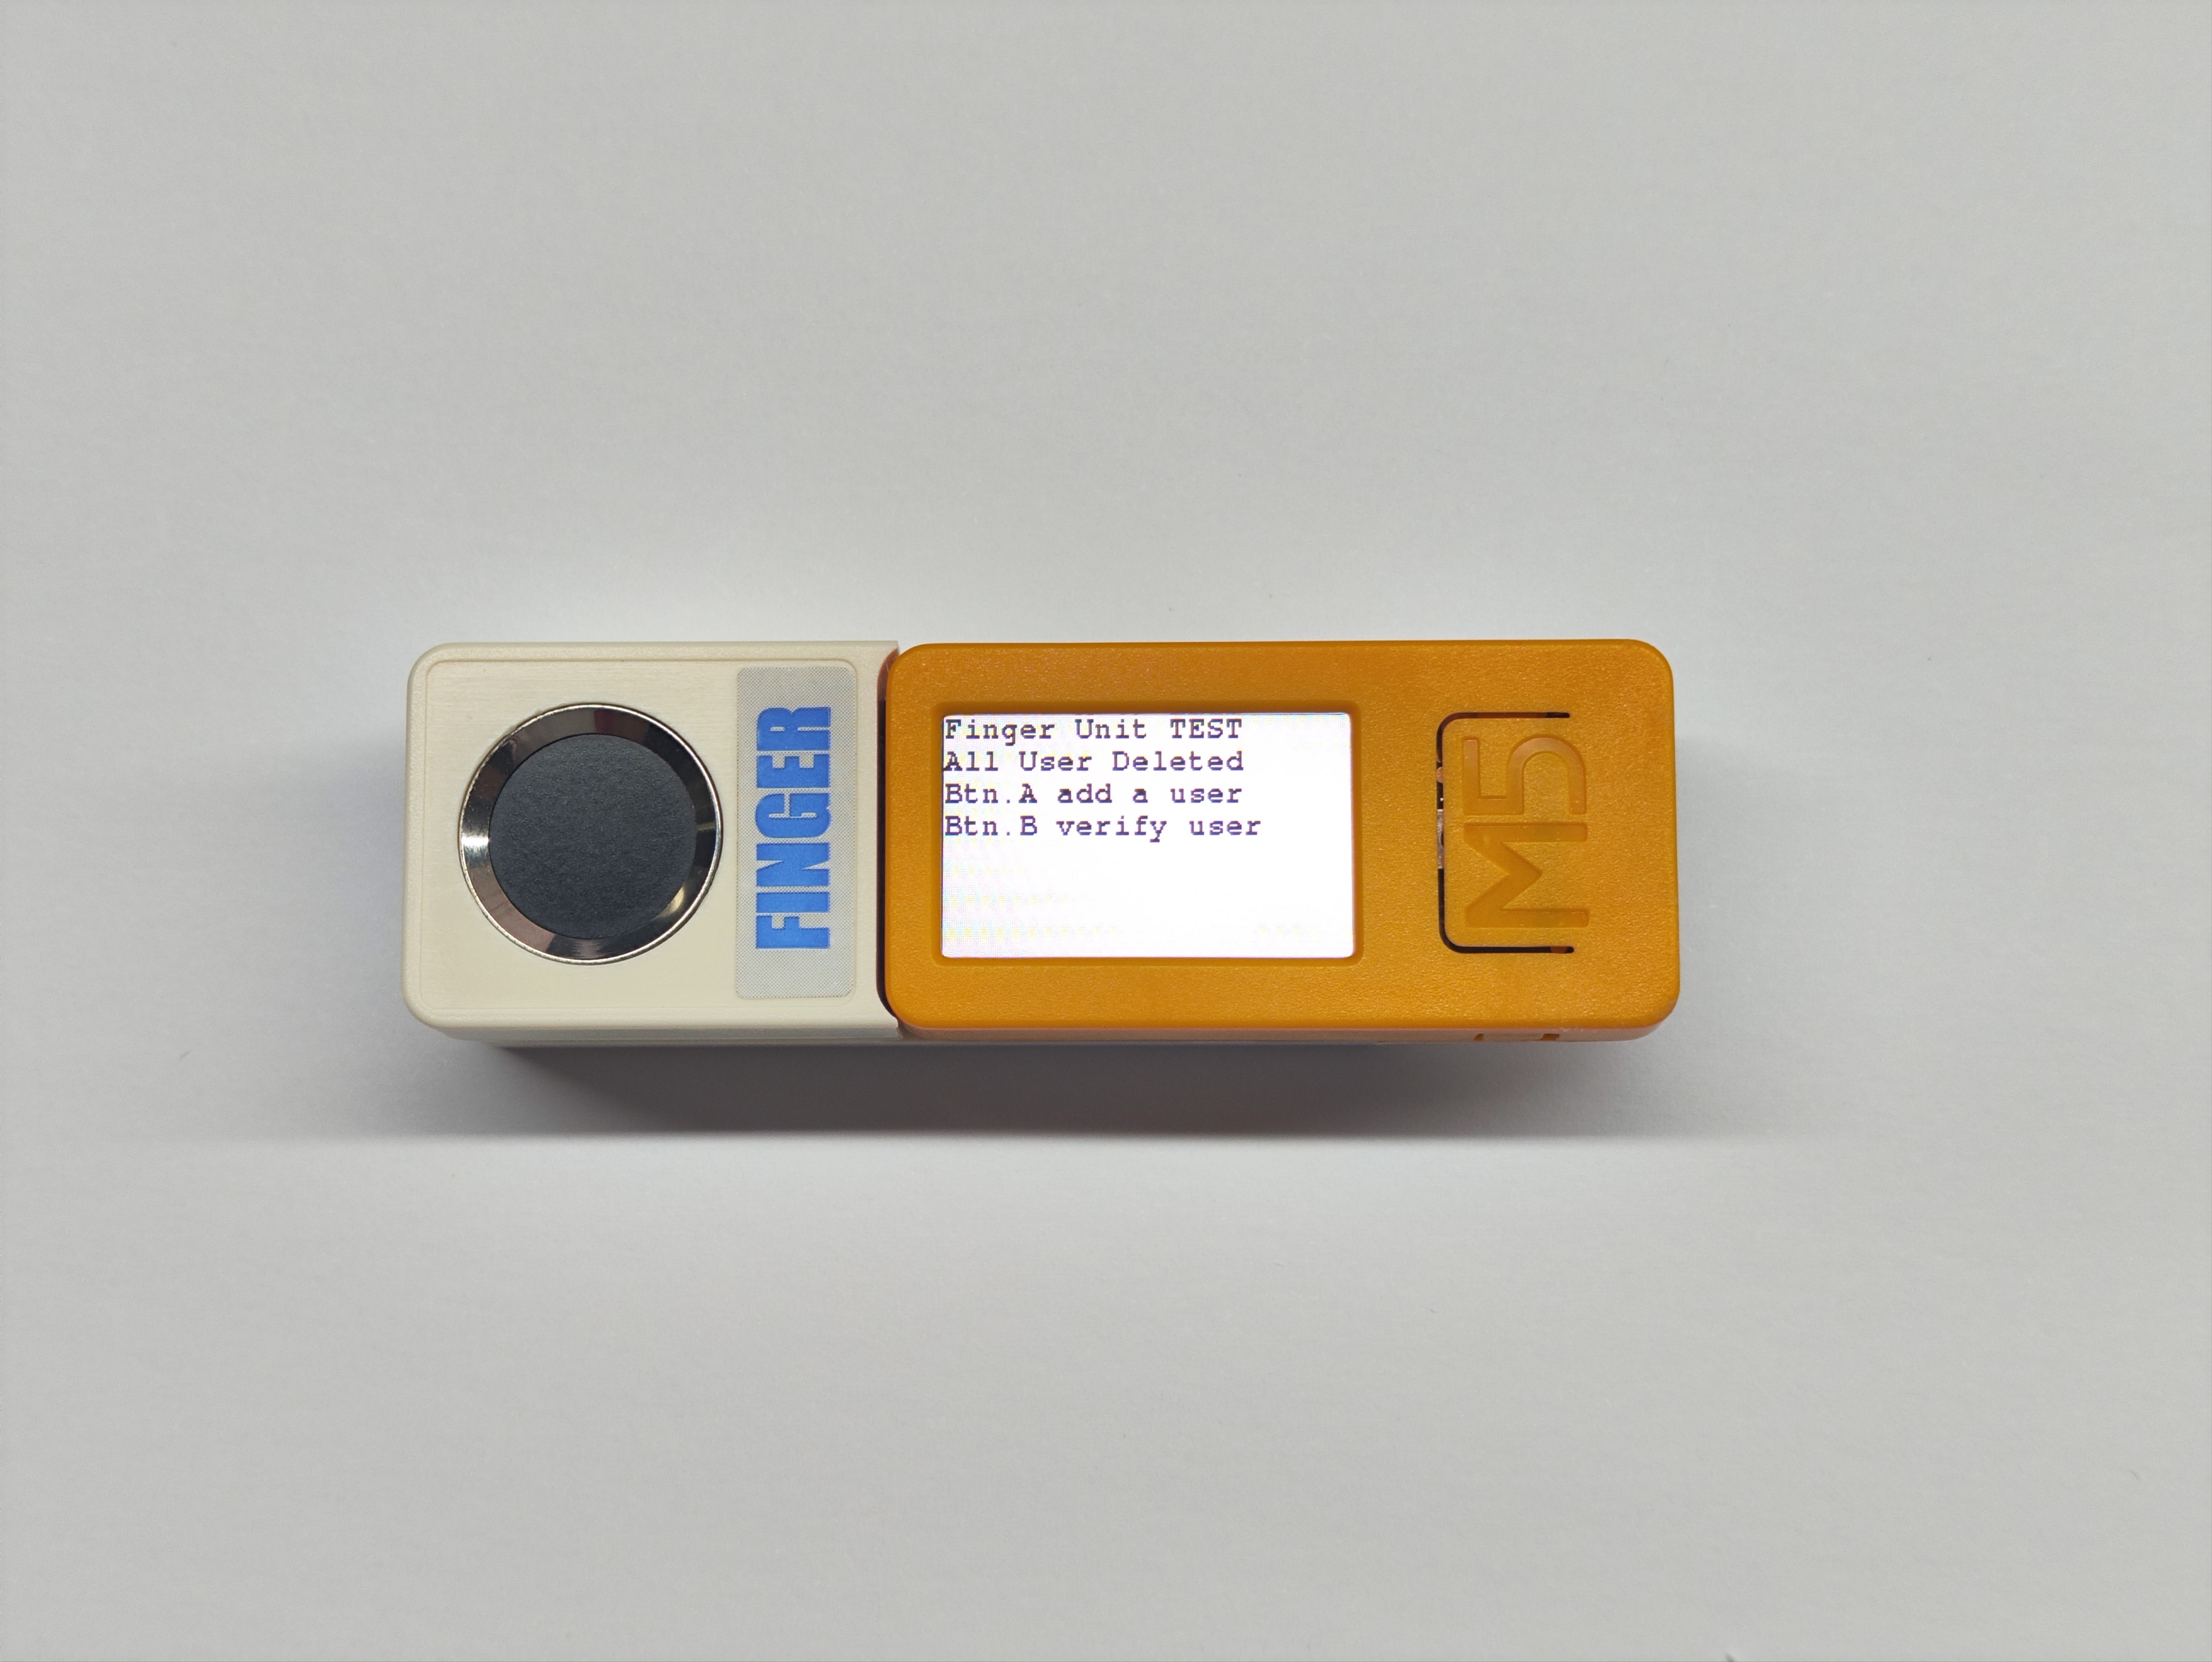
M5.Display.println("Finger Unit TEST");
uint8_t userNum = finger.getUserCount();
Serial.print("userNum:");
Serial.println(userNum);
finger.delAllFinger();
M5.Display.println("All User Deleted");
M5.Display.println("Btn.A add a user");
M5.Display.println("Btn.B verify user");
}
uint8_t new_user_id = 1;
void loop() {
M5.update();
if (M5.BtnA.wasPressed()) {
// user id: 1 ~ 0xfff
if (add_user_process(new_user_id, 1)) {
Serial.println("add user success");
M5.Display.println("add user success");
new_user_id++;
}
}
if (M5.BtnB.wasPressed()) {
M5.Display.fillRect(0, 0, 240, 135, WHITE);
M5.Display.setCursor(0, 0);
if(new_user_id == 1) M5.Display.printf("There is no id. Please add the user first!\r\n");
user_check();
}
}
bool add_user_process(uint8_t id, uint8_t permission) {
uint8_t a = 40;
M5.Display.fillRect(0, 0, 240, 135, WHITE);
M5.Display.setCursor(0, 0);
M5.Display.println("add finger process:");
M5.Display.println("put your finger on the sensor");
for (uint8_t i = 0; i < 6; i++) {
while (!finger.addFinger(id, permission, i)) {
Serial.printf("Finger ID: %d Finger Record:%d error\r\n", id, i);
Serial.println("Retry...");
delay(1000);
};
a += 9;
M5.Display.scroll(0, -9);
M5.Display.fillRect(0, a, 240, 135, WHITE);
M5.Display.setCursor(0, a);
M5.Display.printf("add finger count:%d/6\r\n", i + 1);
Serial.printf("Finger ID: %d Finger Record:%d ok\r\n", id, i);
}
M5.Display.printf("Finger ID: %d added\r\n", id);
return true;
}
bool user_check(void){
while((new_user_id > 1)){
uint8_t res = finger.available();
if (res == ACK_SUCCESS) {
M5.Display.println("Success");
Serial.println("Success");
M5.Display.print("User ID: ");
Serial.print("User ID: ");
M5.Display.println(finger.getFingerID());
Serial.println(finger.getFingerID());
M5.Display.print("User Permission: ");
Serial.print("User Permission: ");
M5.Display.println(finger.getFingerPermission());
Serial.println(finger.getFingerPermission());
return true;
} else {
M5.Display.fillRect(0, 0, 240, 135, WHITE);
M5.Display.setCursor(0, 0);
Serial.println("Please put your ID Finger on the sensor");
M5.Display.println("Please put your ID Finger on the sensor");
delay(1000);
}
}
return false;
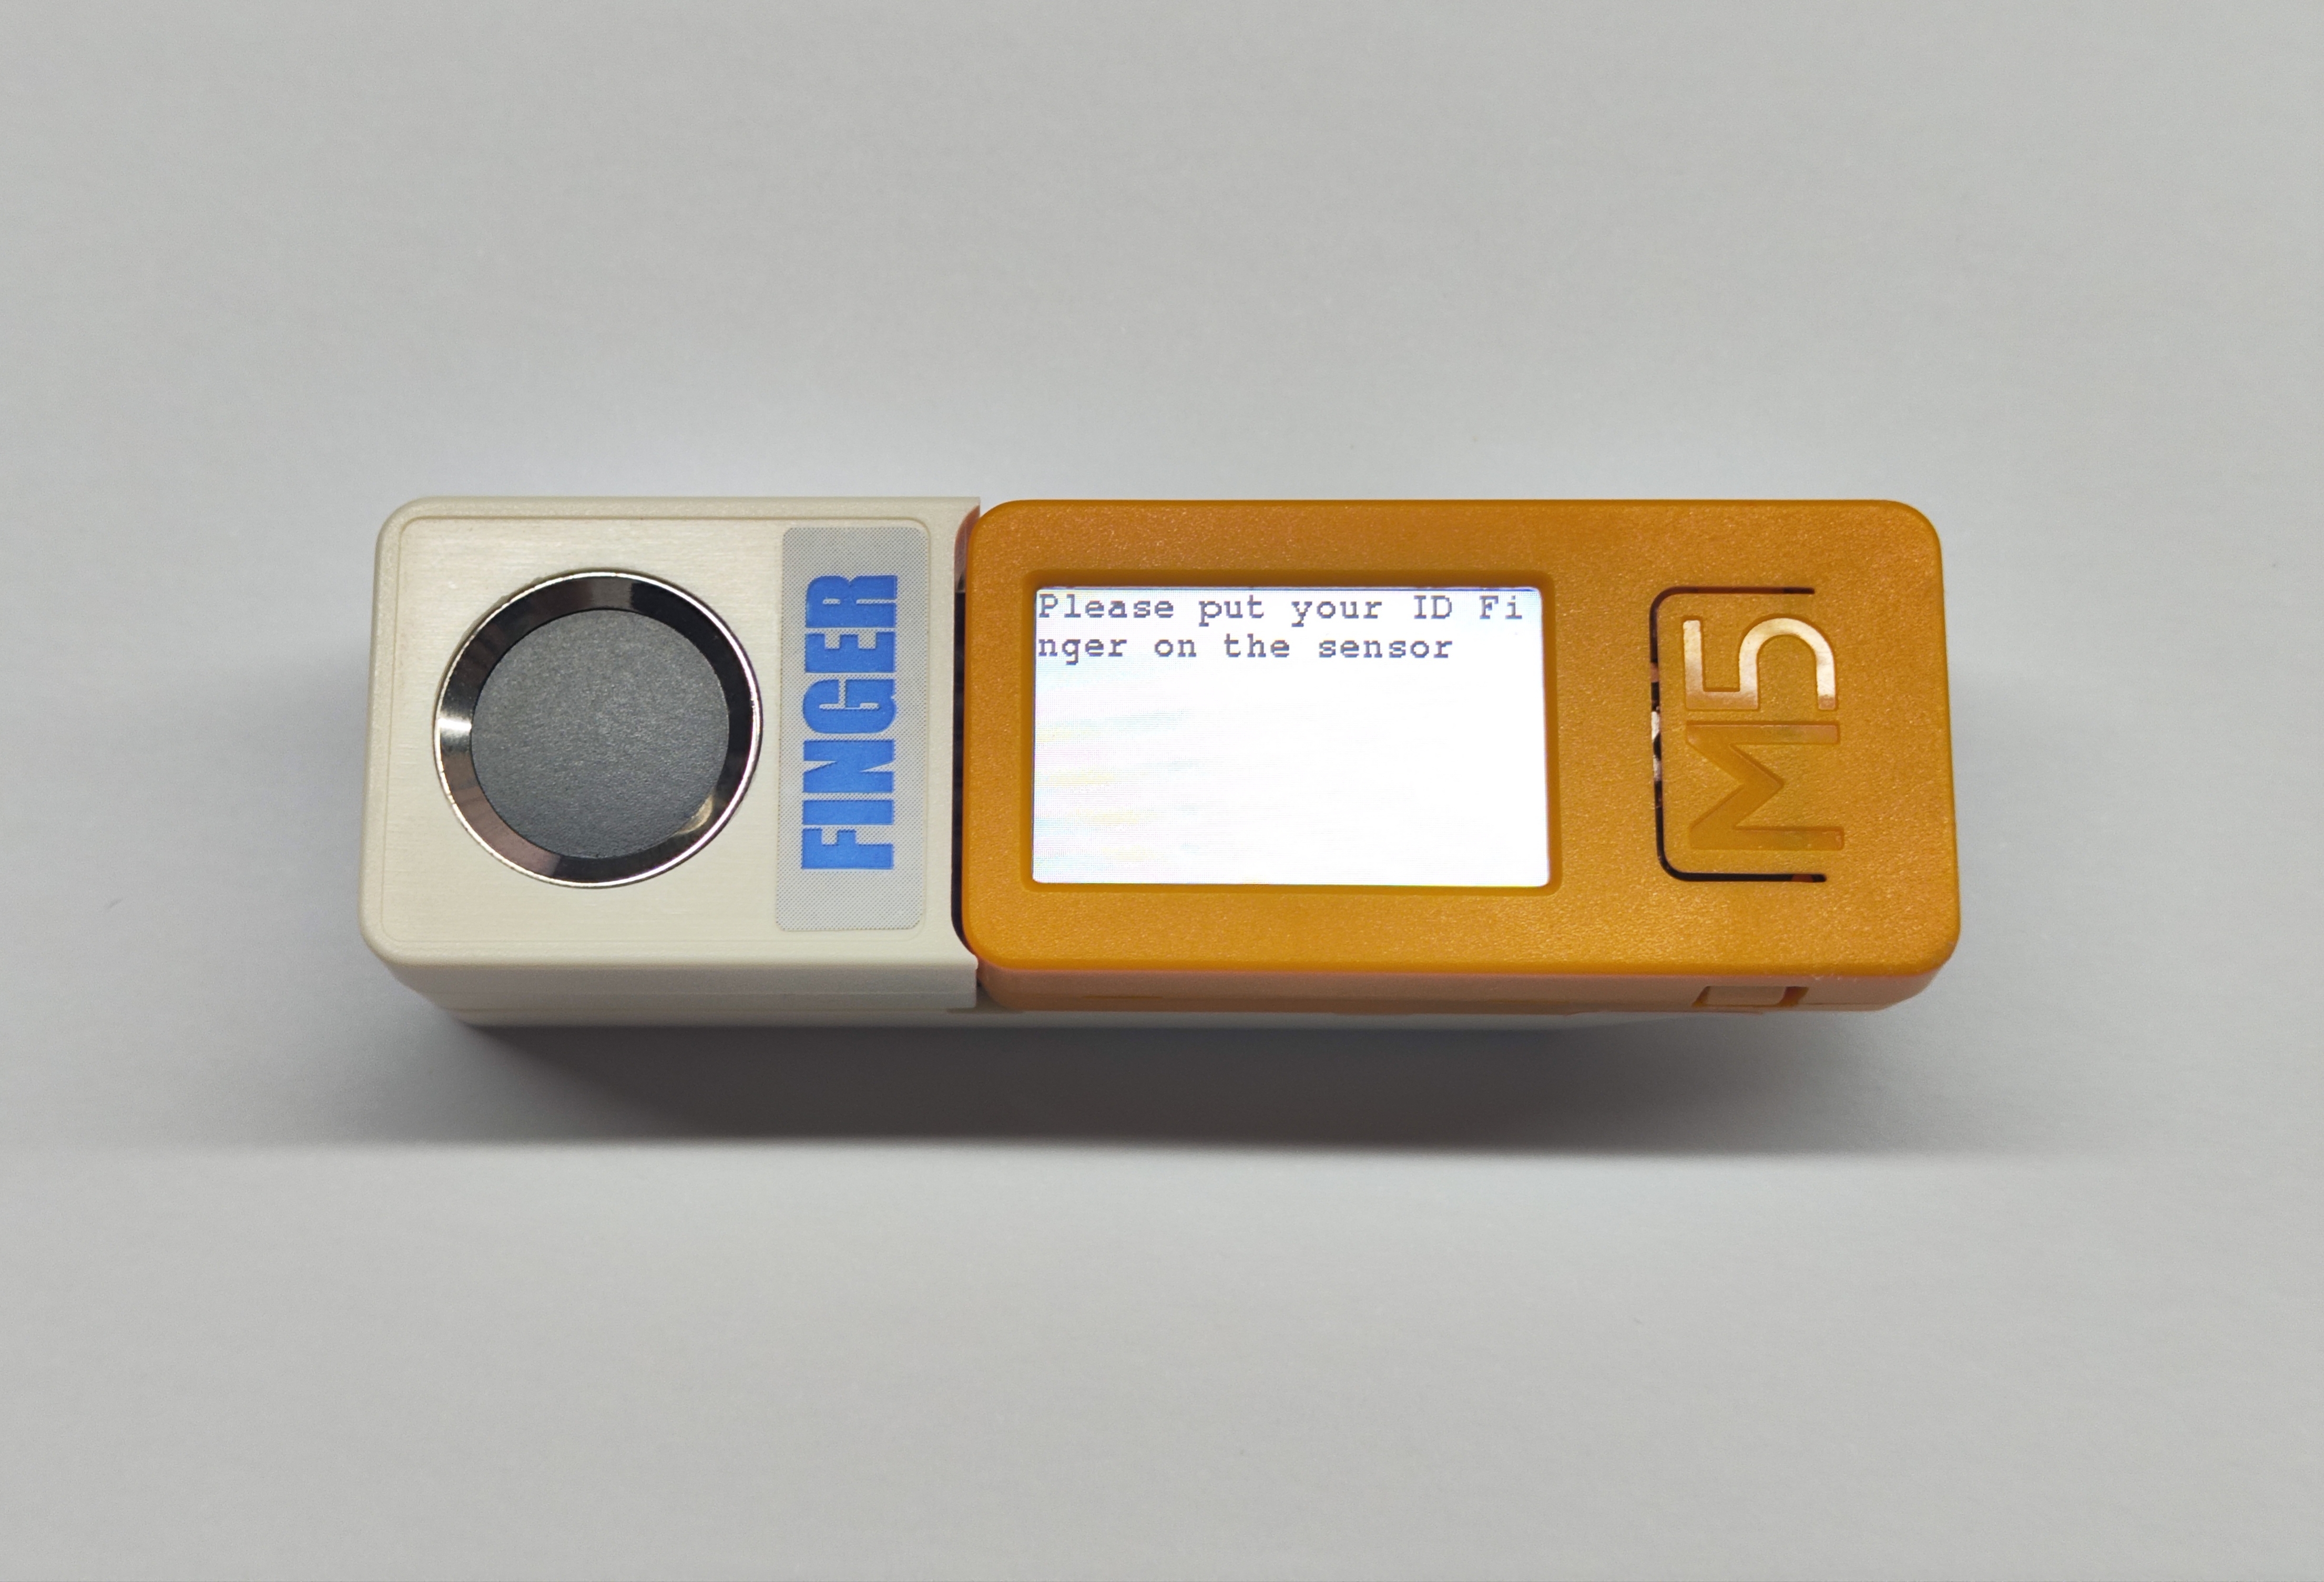
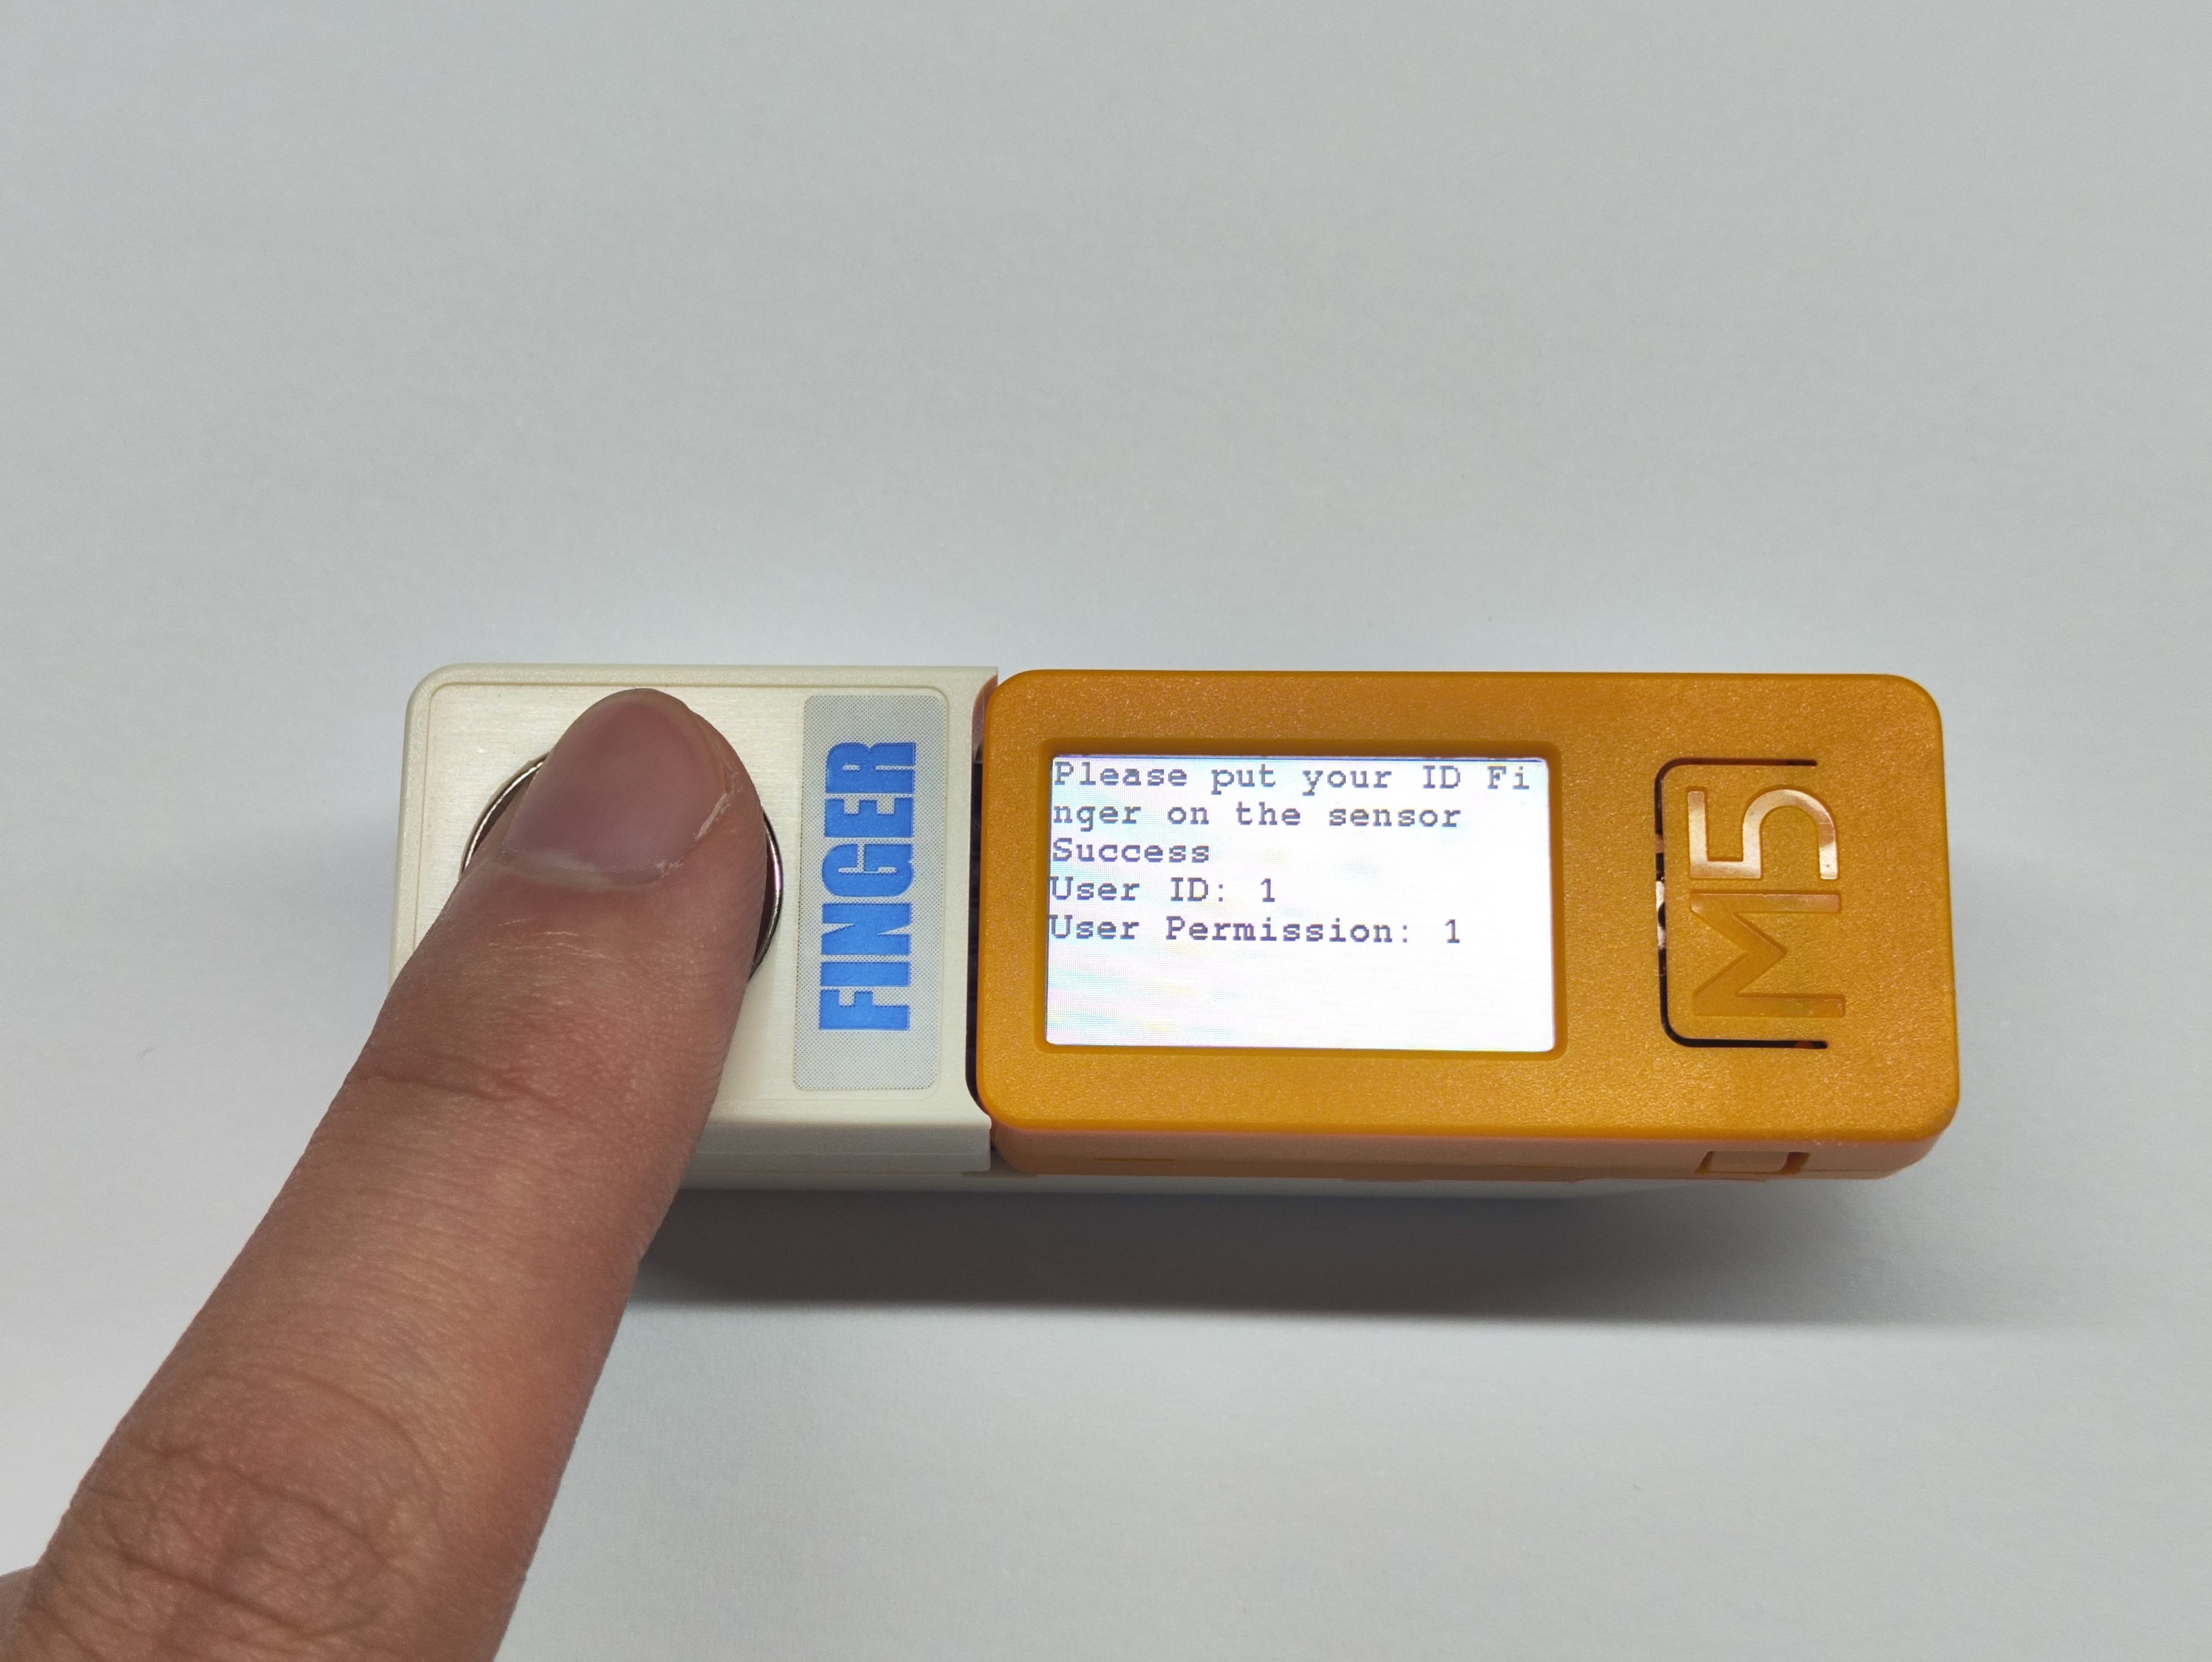
}4. Fingerprint Recognition
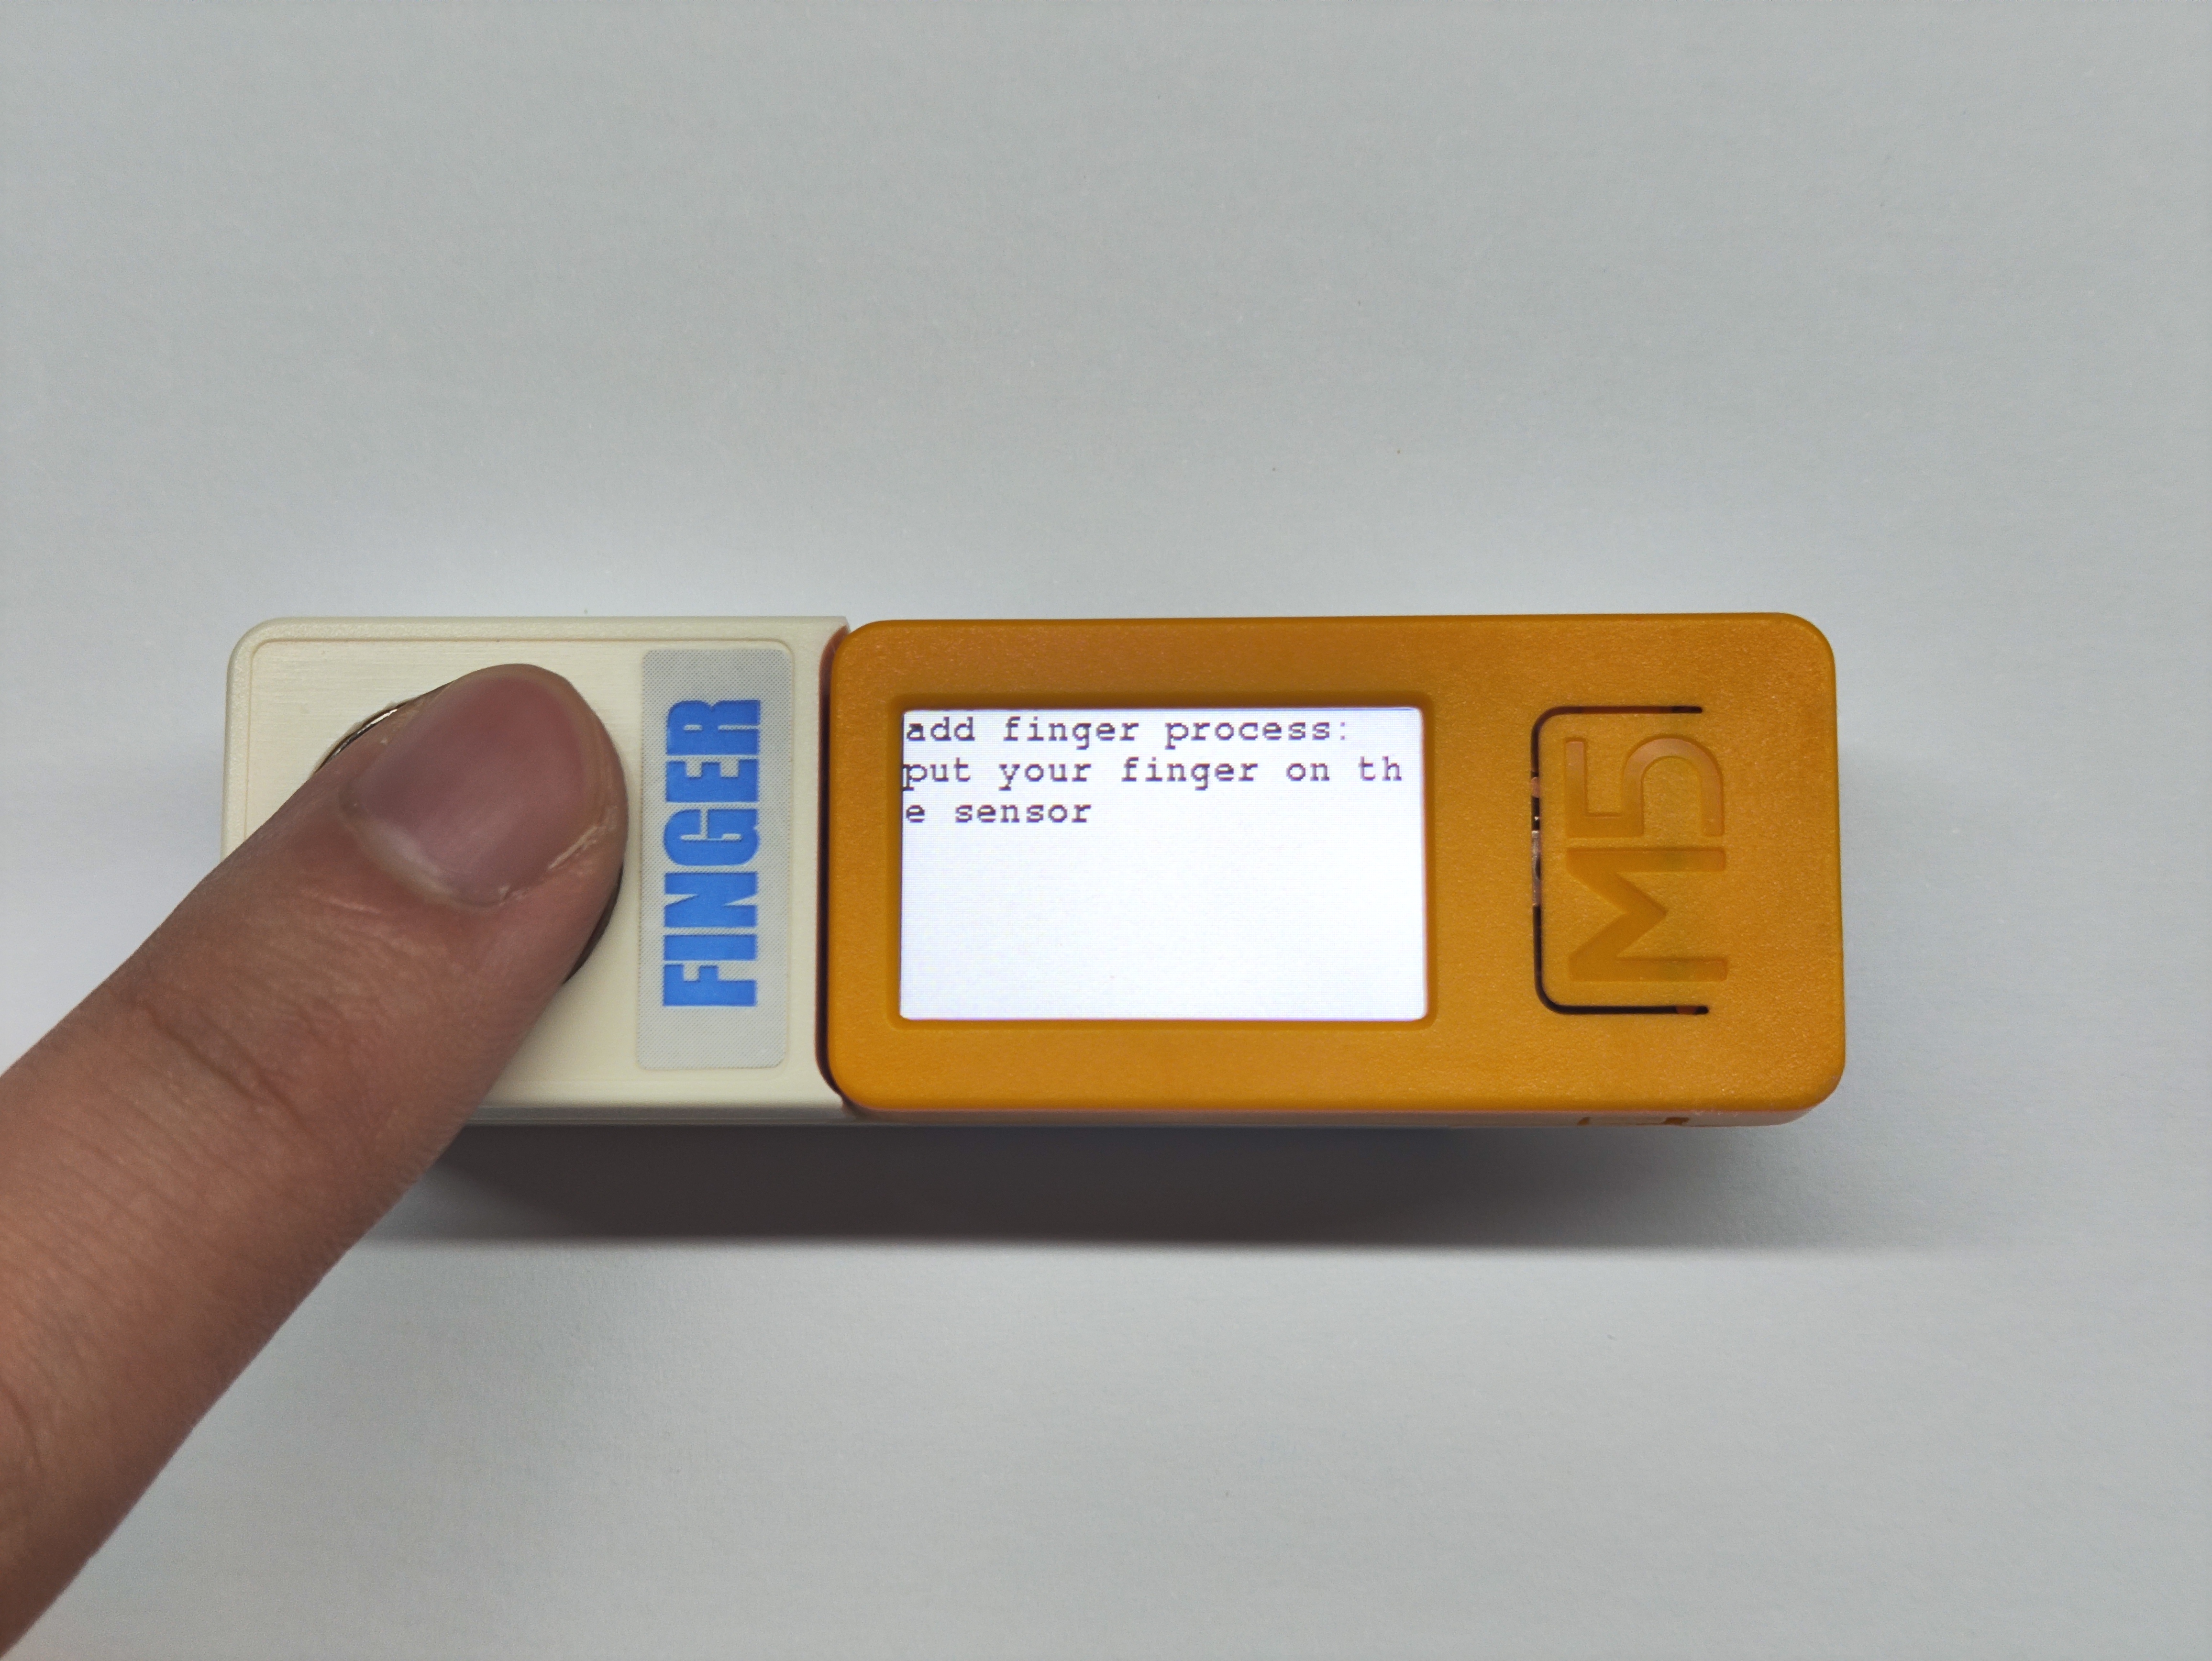
- The initial page displays the function of this routine. Press the
Btn.Abutton to enter the fingerprint enrollment page, and press theBtn.Bbutton to enter the fingerprint recognition page.
- After entering the fingerprint enrollment page, place the finger to be enrolled on the sensor and wait for the enrollment to complete.
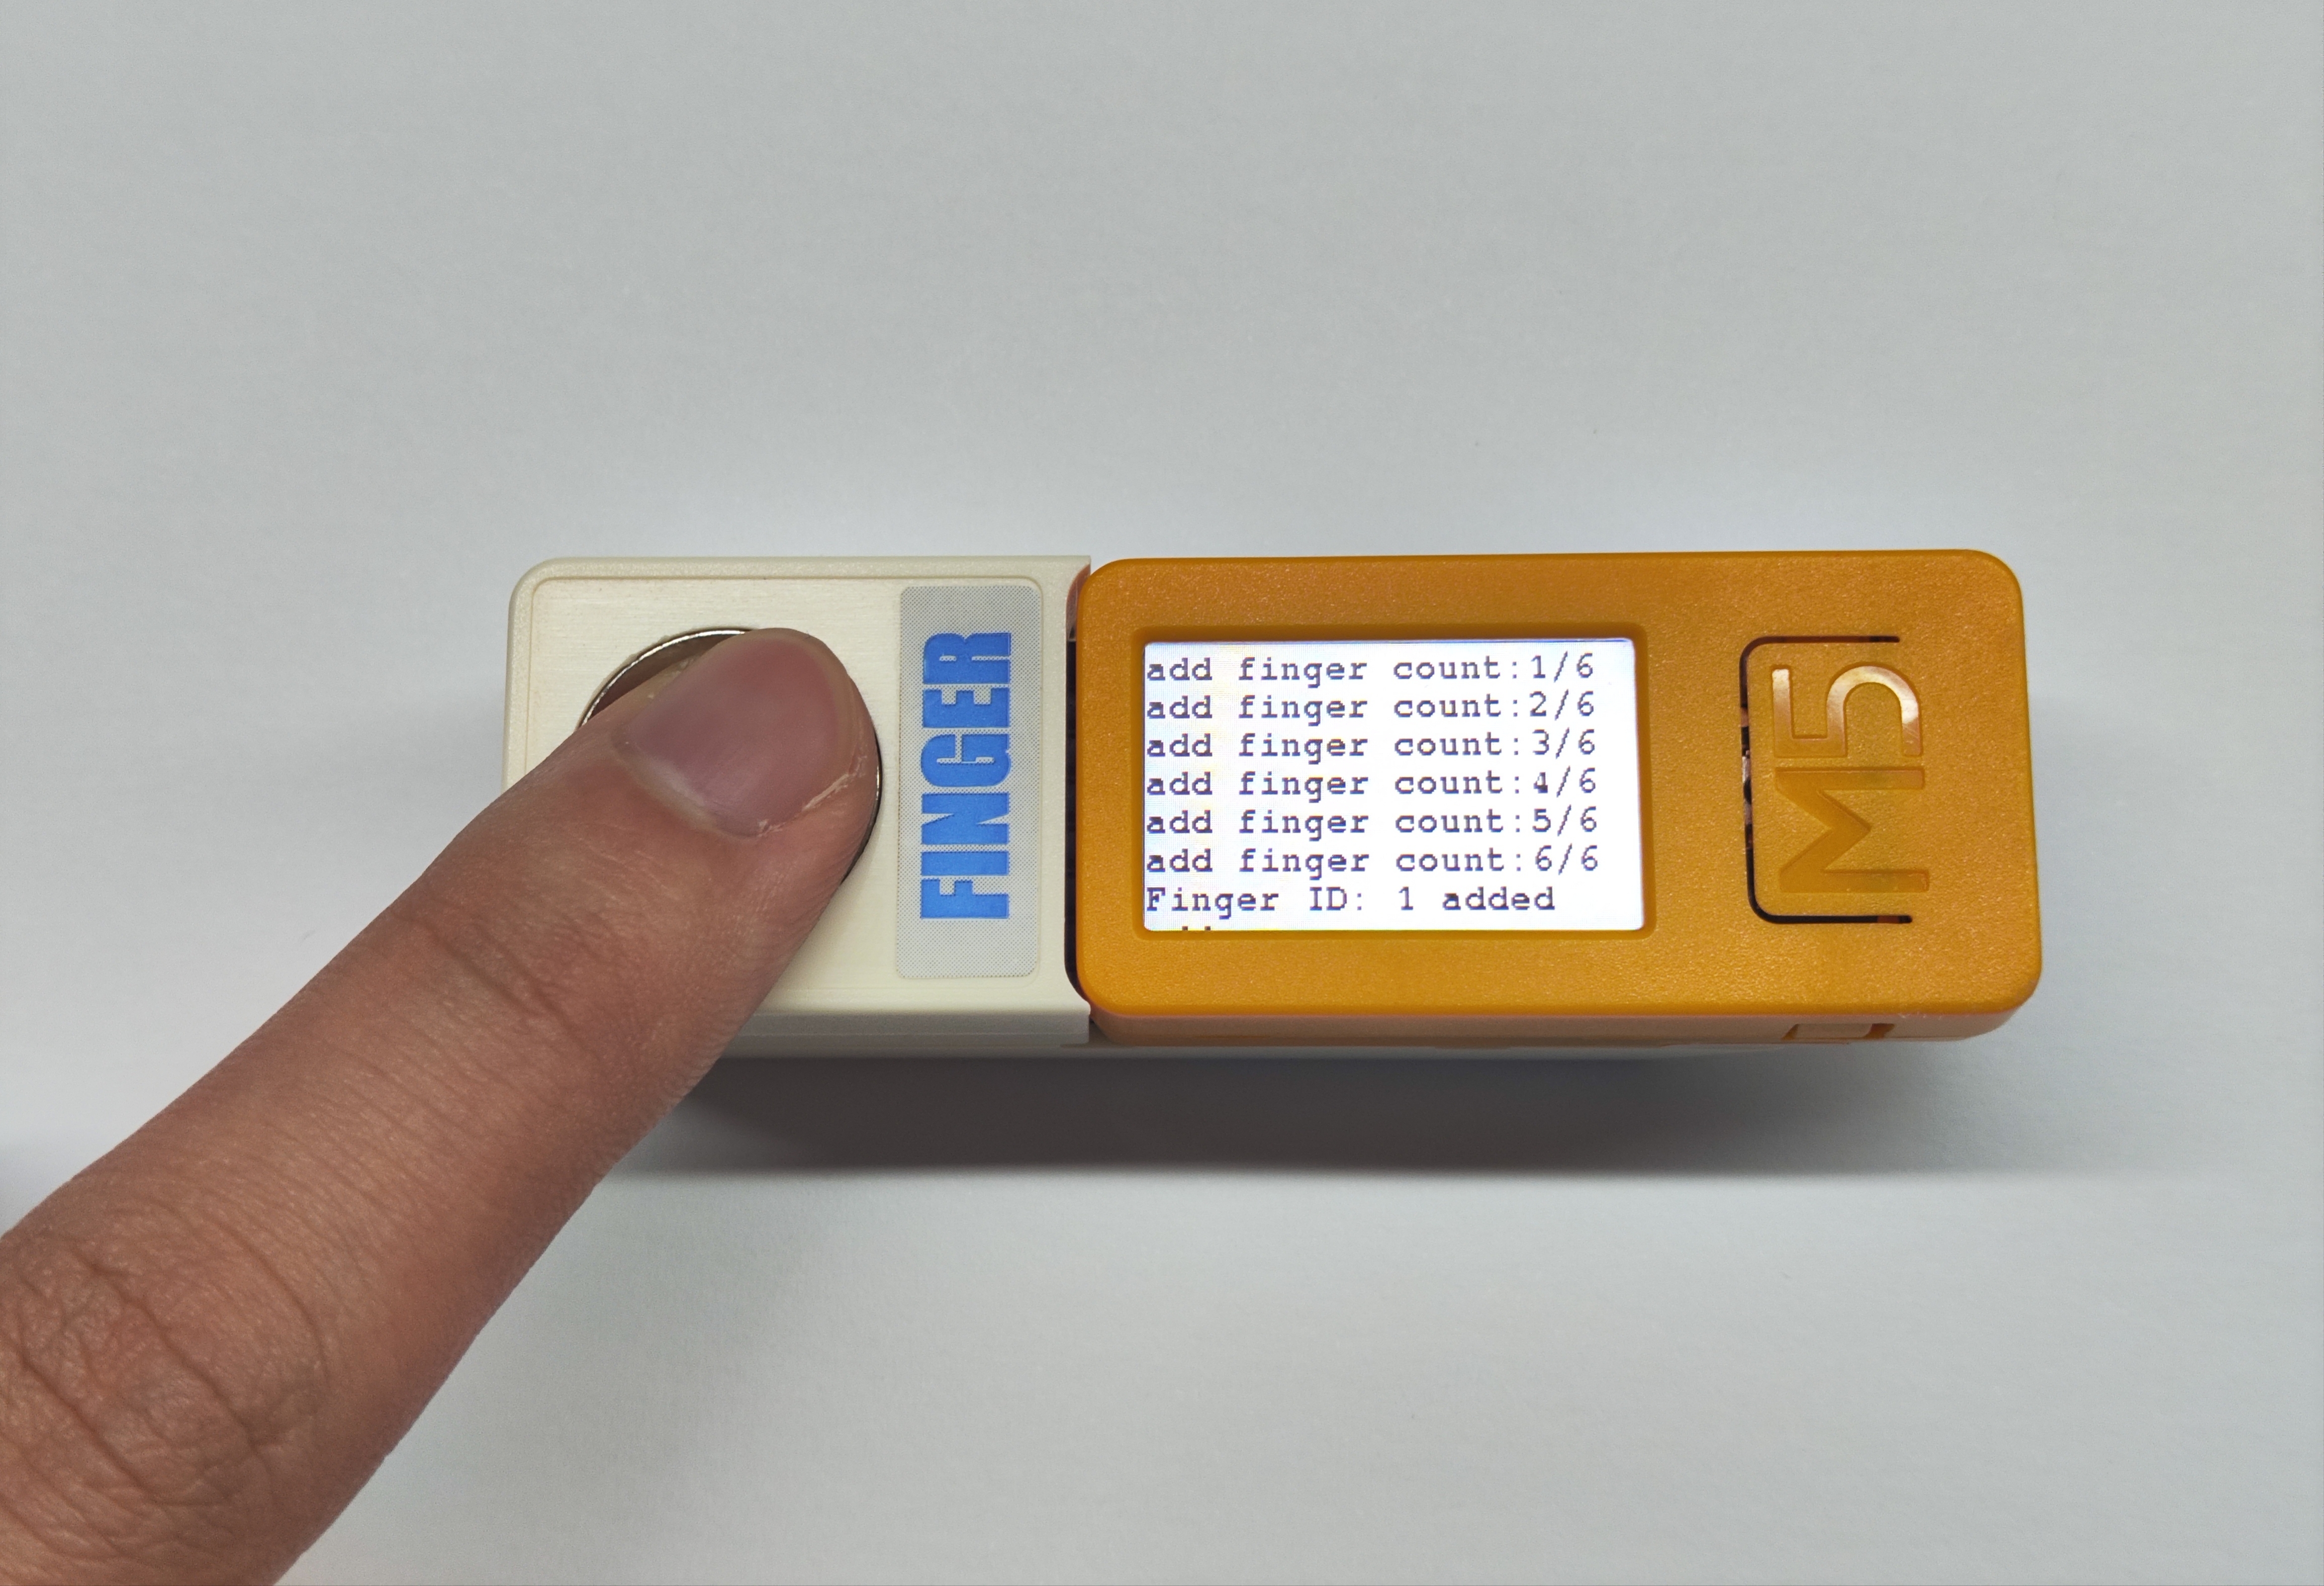
- You can then perform fingerprint recognition testing. Press the
Btn.Bbutton, place your finger on the sensor, and wait for the recognition to complete. When the wordSuccessappears, it indicates successful recognition (this interface will only switch upon successful recognition).