Atom DTU NBIoT2 シリーズ Arduino チュートリアル
1. 準備作業
環境設定: Arduino IDE入門チュートリアルを参照し、IDE のインストールを完了し、使用する開発ボードに応じたボード管理と必要なドライバライブラリをインストールしてください。
使用するドライバライブラリ:
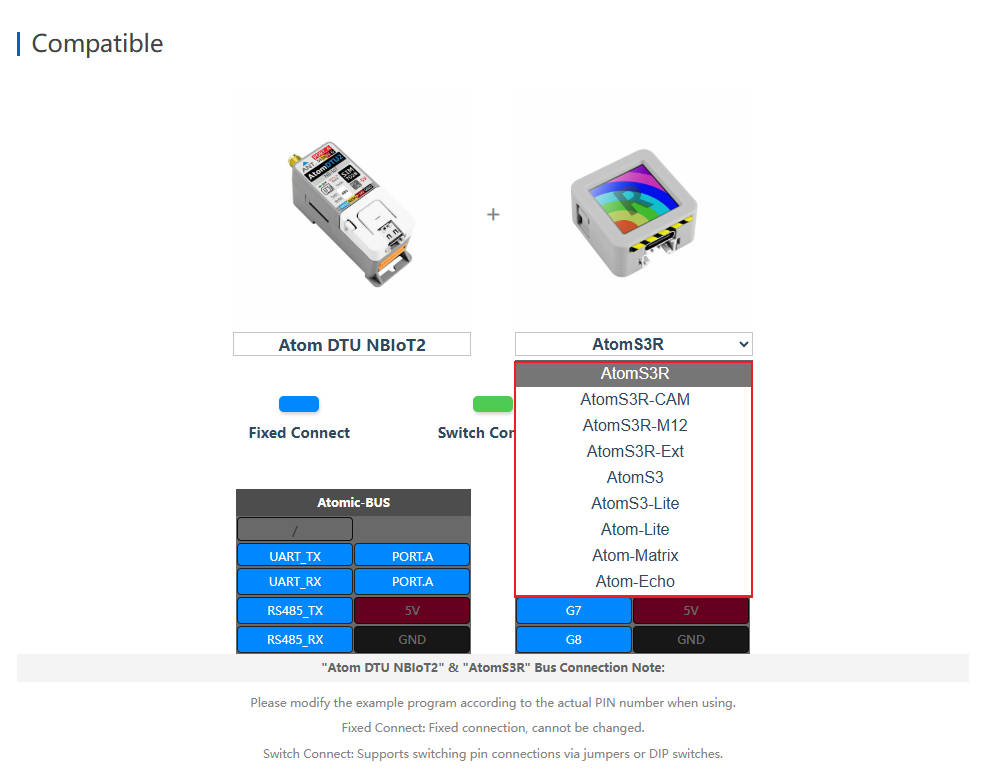
- 使用するハードウェア製品:


2. 注意事項

3. HTTP サービス
デフォルトでは SIM カードの CAT モードを使用します。NB-IoT モードに切り替えるには、TinyGsmClientSIM7028.h ファイル内の MODE_NB_IOT マクロ定義のコメントを解除してください。デバッグが必要な場合、TinyGsmClientSIM7028.h ファイル内の DUMP_AT_COMMANDS マクロ定義のコメントを解除できます。
#include "ATOM_DTU_NB.h"
#include <TinyGsmClient.h>
#include <M5AtomS3.h>
#include <sys/time.h>
#include <time.h>
#include <ArduinoHttpClient.h>

//#define MODE_NB_IOT     // By default, CAT mode is used. If using NB-IOT
// mode, open this macro definition or TinyGsmClientSIM7028.h line 32 //#define
// MODE_NB_IOT
//#define DUMP_AT_COMMANDS  // If you need to debug, you can open this macro
                          // definition and TinyGsmClientSIM7028.h line 13
                          // //#define TINY_GSM_DEBUG Serial
#ifdef DUMP_AT_COMMANDS
#include <StreamDebugger.h>
StreamDebugger debugger(SerialAT, SerialMon);
TinyGsm modem(debugger, ATOM_DTU_SIM7028_RESET);
#else
TinyGsm modem(SerialAT, ATOM_DTU_SIM7028_RESET);
#endif
// Server details
const char server[] = "api.m5stack.com";
const char resource[] = "/v1";
const int  port = 80;
TinyGsmClient client(modem);
HttpClient    http(client, server, port);

void modemConnect(void);

// Your GPRS credentials, if any
const char apn[] = "YourAPN";
const char gprsUser[] = "";
const char gprsPass[] = "";

struct tm now;
char s_time[50];

void log(String info) { SerialMon.println(info); }

void setup() {
  AtomS3.begin(true);  // Init M5AtomS3Lite.
  AtomS3.dis.setBrightness(100);
  AtomS3.dis.drawpix(0x0000ff);
  Serial.println(">>ATOM DTU NB MQTT TEST");
  SerialAT.begin(SIM7028_BAUDRATE, SERIAL_8N1, ATOM_DTU_SIM7028_RX,
                 ATOM_DTU_SIM7028_TX);

  modemConnect();
}

void loop() {
   AtomS3.update();
   SerialMon.print(F("Performing HTTP GET request... "));
  int err = http.get(resource);
  if (err != 0) {
    SerialMon.println(F("failed to connect"));
    delay(10000);
    return;
  }

  int status = http.responseStatusCode();
  SerialMon.print(F("Response status code: "));
  SerialMon.println(status);
  if (!status) {
    delay(10000);
    return;
  }

  SerialMon.println(F("Response Headers:"));
  while (http.headerAvailable()) {
    String headerName  = http.readHeaderName();
    String headerValue = http.readHeaderValue();
    SerialMon.println("    " + headerName + " : " + headerValue);
  }

  int length = http.contentLength();
  if (length >= 0) {
    SerialMon.print(F("Content length is: "));
    SerialMon.println(length);
  }
  if (http.isResponseChunked()) {
    SerialMon.println(F("The response is chunked"));
  }

  String body = http.responseBody();
  SerialMon.println(F("Response:"));
  SerialMon.println(body);

  SerialMon.print(F("Body length is: "));
  SerialMon.println(body.length());

  // Shutdown

  http.stop();
  SerialMon.println(F("Server disconnected"));
}


void modemConnect(void) {
  // Get card number
  String ccid = modem.getSimCCID();
  Serial.println("CCID: " + ccid);
  // Acquire signal strength
  int csq = modem.getSignalQuality();
  Serial.println("Signal quality: " + String(csq));
  unsigned long start = millis();
  log("Initializing modem...");
  while (!modem.init()) {
    log("waiting...." + String((millis() - start) / 1000) + "s");
  };

  start = millis();
  log("Waiting for network...");
  while (!modem.waitForNetwork()) {
    log("waiting...." + String((millis() - start) / 1000) + "s");
  }
  log("success");
#ifdef MODE_NB_IOT
#else
  SerialMon.println("Waiting for GPRS connect...");
  if (!modem.gprsConnect(apn, gprsUser, gprsPass)) {
    SerialMon.println("waiting...." + String((millis() - start) / 1000) + "s");
  }
  SerialMon.println("success");
#endif

  // Example Query the IP address of a device
  String ip = modem.getLocalIP();

  log("Device IP address: " + ip);

  log("success");
}
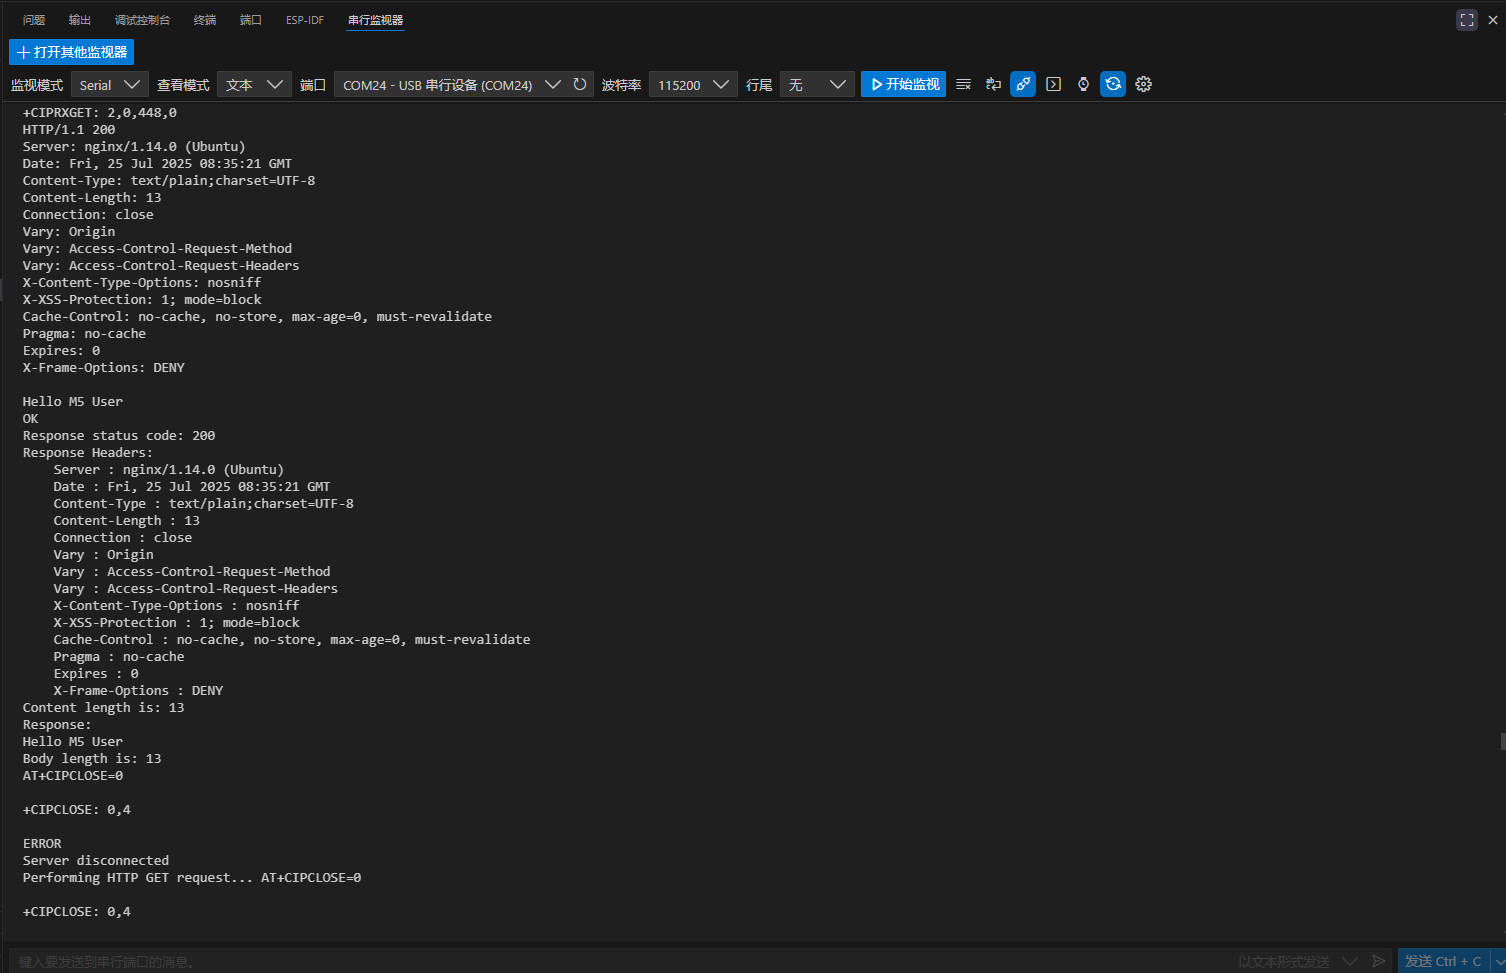
HTTP リクエストが成功すると、サーバーからの一連の情報が返され、シリアルポートを通じて出力されます。

4. MQTT サービス
本モジュールは MQTT プロトコル通信もサポートしています。サンプルでは、Baidu Cloud 、 OneNET 、 ThingsCloud の 3 つの MQTT サービスプラットフォームに対応しています。このチュートリアルは Baidu Cloud IoT Platform を基にしています。他のプラットフォームを使用する場合は、 example フォルダ内の他のサンプルを参照してください。
SIM カードとデバッグモードの選択は HTTP と同じです。
MQTT_BROKER 、 mqtt_devid 、 mqtt_pubid 、 mqtt_password を個人の MQTT アカウント情報に置き換えてください。質問がある場合は、このチュートリアルを参照してください。
#include <M5AtomS3.h>
#include "ATOM_DTU_NB.h"
#include <PubSubClient.h>
#include <TinyGsmClient.h>
#include <time.h>
#include <sys/time.h>
#define MQTT_BROKER   "*********"  //Baidu Cloud address
#define MQTT_PORT     1883        //Port number

#define UPLOAD_INTERVAL   2000
#define mqtt_devid        "*******"                      //Device ID
#define mqtt_pubid        "*************"        //username
#define mqtt_password     "*************"          //password
int postMsgId = 0;  //Keep track of how many posts have been made
// This is the template used by post to upload data
#define ONENET_POST_BODY_FORMAT "{\"id\":%d,\"dp\":%s}"
// Receiving and sending properties set the subject
// Receive device properties to get the command topic
#define ONENET_TOPIC_GET "$iot/" mqtt_devid "/msg"
// Send data subject on the device
#define ONENET_TOPIC_POST  "$iot/" mqtt_devid "/events"
int num=0;
uint32_t lastReconnectAttempt = 0;

#define DUMP_AT_COMMANDS    //If you need to debug, you can open this macro definition and TinyGsmClientSIM7028.h line 13 //#define TINY_GSM_DEBUG Serial
#ifdef DUMP_AT_COMMANDS
#include <StreamDebugger.h>
    StreamDebugger debugger(SerialAT, SerialMon);
    TinyGsm modem(debugger, ATOM_DTU_SIM7028_RESET);
#else
    TinyGsm modem(SerialAT, ATOM_DTU_SIM7028_RESET);
#endif

TinyGsmClient tcpClient(modem);
PubSubClient mqttClient(MQTT_BROKER, MQTT_PORT, tcpClient);

void mqttCallback(char *topic, byte *payload, unsigned int len);
bool mqttConnect(void);
void nbConnect(void);

void log(String info) {
    SerialMon.println(info);
}

void setup() {
    AtomS3.begin(true);
    Serial.println(">>ATOM DTU NB MQTT TEST");
    SerialAT.begin(SIM7028_BAUDRATE, SERIAL_8N1, ATOM_DTU_SIM7028_RX,
                   ATOM_DTU_SIM7028_TX);
    AtomS3.dis.drawpix(0x0000ff);
    nbConnect();
    mqttClient.setServer(MQTT_BROKER, MQTT_PORT);
    mqttClient.setCallback(mqttCallback);
}

void loop() {
    static unsigned long timer = 0;

    if (!mqttClient.connected()) {
        log(">>MQTT NOT CONNECTED");
        log(mqttClient.state());
        AtomS3.dis.drawpix(0xff0000);
        uint32_t t = millis();
        if (t - lastReconnectAttempt > 10000L) {
            lastReconnectAttempt = t;
            if (mqttConnect()) {
                lastReconnectAttempt = 0;
            }
        }
        delay(100);
    }
    if (millis() >= timer) {
        timer = millis() + UPLOAD_INTERVAL;
        if (mqttClient.connected())
        {
          // First concatenate the json string
          char param[120];
          char jsonBuf[178];
          sprintf(param, "{\"num\":[{\"v\":%d}]}",num); // We write the data to be uploaded in the param

          postMsgId += 1;
          num+=1;
          if(num>256){
            num=0;
          }
          sprintf(jsonBuf, ONENET_POST_BODY_FORMAT, postMsgId, param);

          log("public the data:");
          log(jsonBuf);
          log("\n");

          mqttClient.publish(ONENET_TOPIC_POST, jsonBuf);
          //Send data to the topic
          delay(100);

        }
    }
    AtomS3.dis.drawpix(0x00ff00);
    mqttClient.loop();
}

void mqttCallback(char *topic, byte *payload, unsigned int len) {
    char info[len + 1];
    memcpy(info, payload, len);
    info[len] = '\0';
    log("Message arrived:"+String(info));
    log("Topic received: " + String(topic));
}

bool mqttConnect(void) {
    log("Connecting to ");
    log(MQTT_BROKER);
    bool status =mqttClient.connect(mqtt_devid, mqtt_pubid, mqtt_password);
    if (status == false) {
        int errorCode = mqttClient.state();
        log("MQTT Connection failed with error code: " + String(errorCode));
        return false;
    }
    log("MQTT CONNECTED!");
    mqttClient.subscribe(ONENET_TOPIC_GET);
    return mqttClient.connected();
}

void nbConnect(void) {
    unsigned long start = millis();
    log("Initializing modem...");
    while (!modem.init()) {
        log("waiting...." + String((millis() - start) / 1000) + "s");
    };

    start = millis();
    log("Waiting for network...");
    while (!modem.waitForNetwork()) {
        log("waiting...." + String((millis() - start) / 1000) + "s");
    }
    log("success");
    String ccid = modem.getSimCCID();
    Serial.println("CCID: " + ccid);
    int csq = modem.getSignalQuality();
    Serial.println("Signal quality: " + String(csq));
}
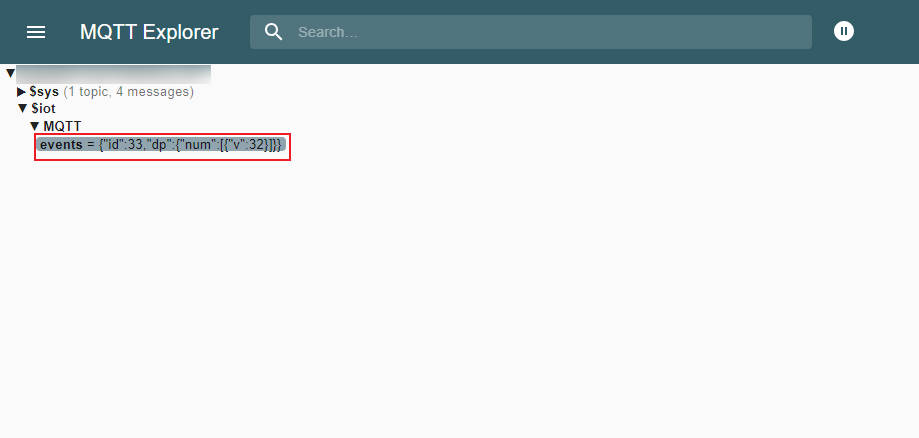
MQTT サービスが正常に接続されると、MQTT Explorer を使用してサブスクリプショントピックを追加し、データを確認できます。(質問がある場合は、このインターフェースを参照してください)

