

Arduino Quick Start
2. Devices & Examples
3. M5Unified
4. M5GFX
5. Extensions
Unit
Atomic
Tab5
IoT
Accessories
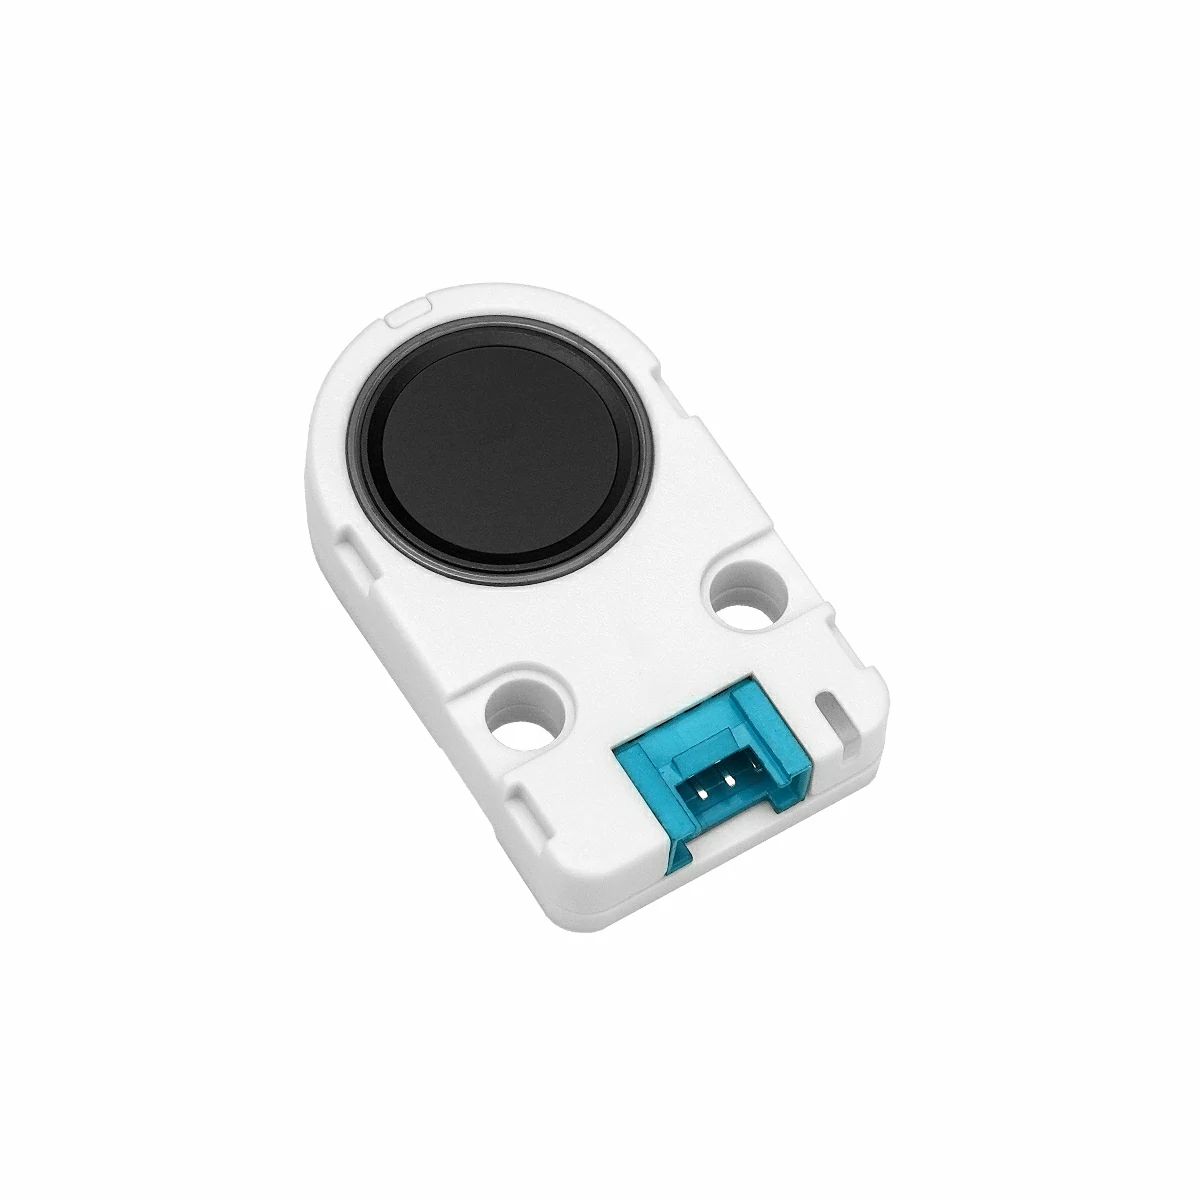
Unit Fingerprint2 Arduino Tutorial
1. Preparation
Environment setup: Refer to the Arduino IDE Getting Started Guide to complete IDE installation, and install the corresponding board package and required libraries according to your development board.
Required libraries:
Required hardware:

2. Notes
3. Example
- The main controller used in this tutorial is CoreS3, paired with Unit Fingerprint2. This fingerprint module communicates via UART. Modify the pin definitions in the program according to your actual wiring. The corresponding UART IOs after device connection are
G17 (RX)andG18 (TX).
3.1 LED Control
The fingerprint sensor has a built-in RGB LED, which can be set for color and mode using the PS_ControlBLN function. You can use the following definitions as needed.
PS_ControlBLN
Function Prototype:
fingerprint_status_t PS_ControlBLN(
    fingerprint_led_control_mode_t mode,
    fingerprint_led_color_t startColor,
    fingerprint_led_color_t endColor,
    uint8_t loopCount = 0
) const;Parameters:
mode: LED mode, seefingerprint_led_control_mode_tbelow.startColor: Start color, seefingerprint_led_color_tbelow. Only valid in normal breathing mode.endColor: End color, seefingerprint_led_color_tbelow.loopCount: Number of cycles. 0 means infinite loop, N means loop N times. Only valid in breathing and flashing modes.
Return Value:
FINGERPRINT_OK: Success- Other values indicate failure. See the library definition
fingerprint_status_tfor details.
Related Definitions:
fingerprint_led_control_mode_t
typedef enum {
  FINGERPRINT_LED_BREATHING = 1,  // 普通呼吸灯 / Normal breathing light
  FINGERPRINT_LED_FLASHING  = 2,  // 闪烁灯 / Flashing light
  FINGERPRINT_LED_ON        = 3,  // 常开灯 / Always on
  FINGERPRINT_LED_OFF       = 4,  // 常闭灯 / Always off
  FINGERPRINT_LED_FADE_IN   = 5,  // 渐开灯 / Fade in
  FINGERPRINT_LED_FADE_OUT  = 6   // 渐闭灯 / Fade out
} fingerprint_led_control_mode_t;fingerprint_led_color_t
typedef enum {
  FINGERPRINT_LED_COLOR_OFF    = 0x00,  // 全灭 / All off
  FINGERPRINT_LED_COLOR_BLUE   = 0x01,  // 蓝灯 / Blue
  FINGERPRINT_LED_COLOR_GREEN  = 0x02,  // 绿灯 / Green
  FINGERPRINT_LED_COLOR_CYAN   = 0x03,  // 青色灯 (蓝+绿) / Cyan (Blue + Green)
  FINGERPRINT_LED_COLOR_RED    = 0x04,  // 红灯 / Red
  FINGERPRINT_LED_COLOR_PURPLE = 0x05,  // 紫色灯 (蓝+红) / Purple (Blue + Red)
  FINGERPRINT_LED_COLOR_YELLOW = 0x06,  // 黄色灯 (绿+红) / Yellow (Green + Red)
  FINGERPRINT_LED_COLOR_WHITE  = 0x07   // 白色灯 (蓝+绿+红) / White (Blue + Green + Red)
} fingerprint_led_color_t;PS_ControlBLN is not saved after power-off.#include <Arduino.h>
#include <M5UnitFingerprint2.hpp>
#include <M5Unified.hpp>
M5Canvas canvas(&M5.Lcd);
M5UnitFingerprint2 fp2(&Serial1, 17, 18); // Initialize fingerprint sensor
void setup() {
Serial.begin(115200);
M5.begin();
fp2.begin();// Hardware Interface Init
canvas.createSprite(320, 240);
canvas.fillScreen(TFT_BLACK);
canvas.setTextColor(TFT_WHITE);
canvas.setFont(&fonts::FreeMonoBold9pt7b);
// Activate the fingerprint module (prepares it to accept commands; must required)
if (fp2.PS_ActivateFingerprintModule() == FINGERPRINT_OK) { // Software-based activation, ready to receive commands
canvas.drawString("Fingerprint2 Ready", 2, 45);
Serial.printf("Fingerprint2 Ready\n");
} else {
canvas.drawString("Fingerprint2 Init Failed", 2, 45);
Serial.printf("Fingerprint2 Init Failed\n");
}
canvas.pushSprite(0, 0);
}
void loop() {
fp2.PS_ControlBLN(FINGERPRINT_LED_BREATHING, FINGERPRINT_LED_COLOR_GREEN, FINGERPRINT_LED_COLOR_BLUE, 0); /// 0-endless loop, N-loop N times
delay(2000);
fp2.PS_ControlBLN(FINGERPRINT_LED_FLASHING, FINGERPRINT_LED_COLOR_RED, FINGERPRINT_LED_COLOR_RED, 0); /// 0-endless loop, N-loop N times
delay(2000);
fp2.PS_ControlBLN(FINGERPRINT_LED_FADE_IN, FINGERPRINT_LED_COLOR_CYAN, FINGERPRINT_LED_COLOR_CYAN, 0);
delay(2000);
fp2.PS_ControlBLN(FINGERPRINT_LED_FADE_OUT, FINGERPRINT_LED_COLOR_YELLOW, FINGERPRINT_LED_COLOR_YELLOW, 0);
delay(2000);
fp2.PS_ControlBLN(FINGERPRINT_LED_ON, FINGERPRINT_LED_COLOR_PURPLE, FINGERPRINT_LED_COLOR_PURPLE, 0);
delay(2000);
} 3.2 Fingerprint Image Acquisition and Display
#include <Arduino.h>
#include <M5UnitFingerprint2.hpp>
#include <M5Unified.hpp>
M5Canvas canvas(&M5.Lcd);
int fingerPresentCount = 0; // Counter for consecutive finger detection
M5UnitFingerprint2 fp2(&Serial1, 17, 18); // Fingerprint sensor
bool displayFingerprintImage(M5UnitFingerprint2& fp2, uint32_t maxBufferSize, M5Canvas& canvas,
int displayX, int displayY, uint8_t rotation);
void setup() {
Serial.begin(115200);
M5.begin();
fp2.begin();
canvas.createSprite(320, 240);
canvas.fillScreen(TFT_BLACK);
canvas.setTextColor(TFT_WHITE, TFT_BLACK);
canvas.setFont(&fonts::FreeMonoBold9pt7b);
canvas.drawString("Unit Fingerprint2 Image", 2, 0);
Serial.println("<-------Unit Fingerprint2 Image------->");
canvas.drawLine(0, 20, 320, 20, TFT_WHITE);
// Activate fingerprint sensor module
if (fp2.PS_ActivateFingerprintModule() == FINGERPRINT_OK) {
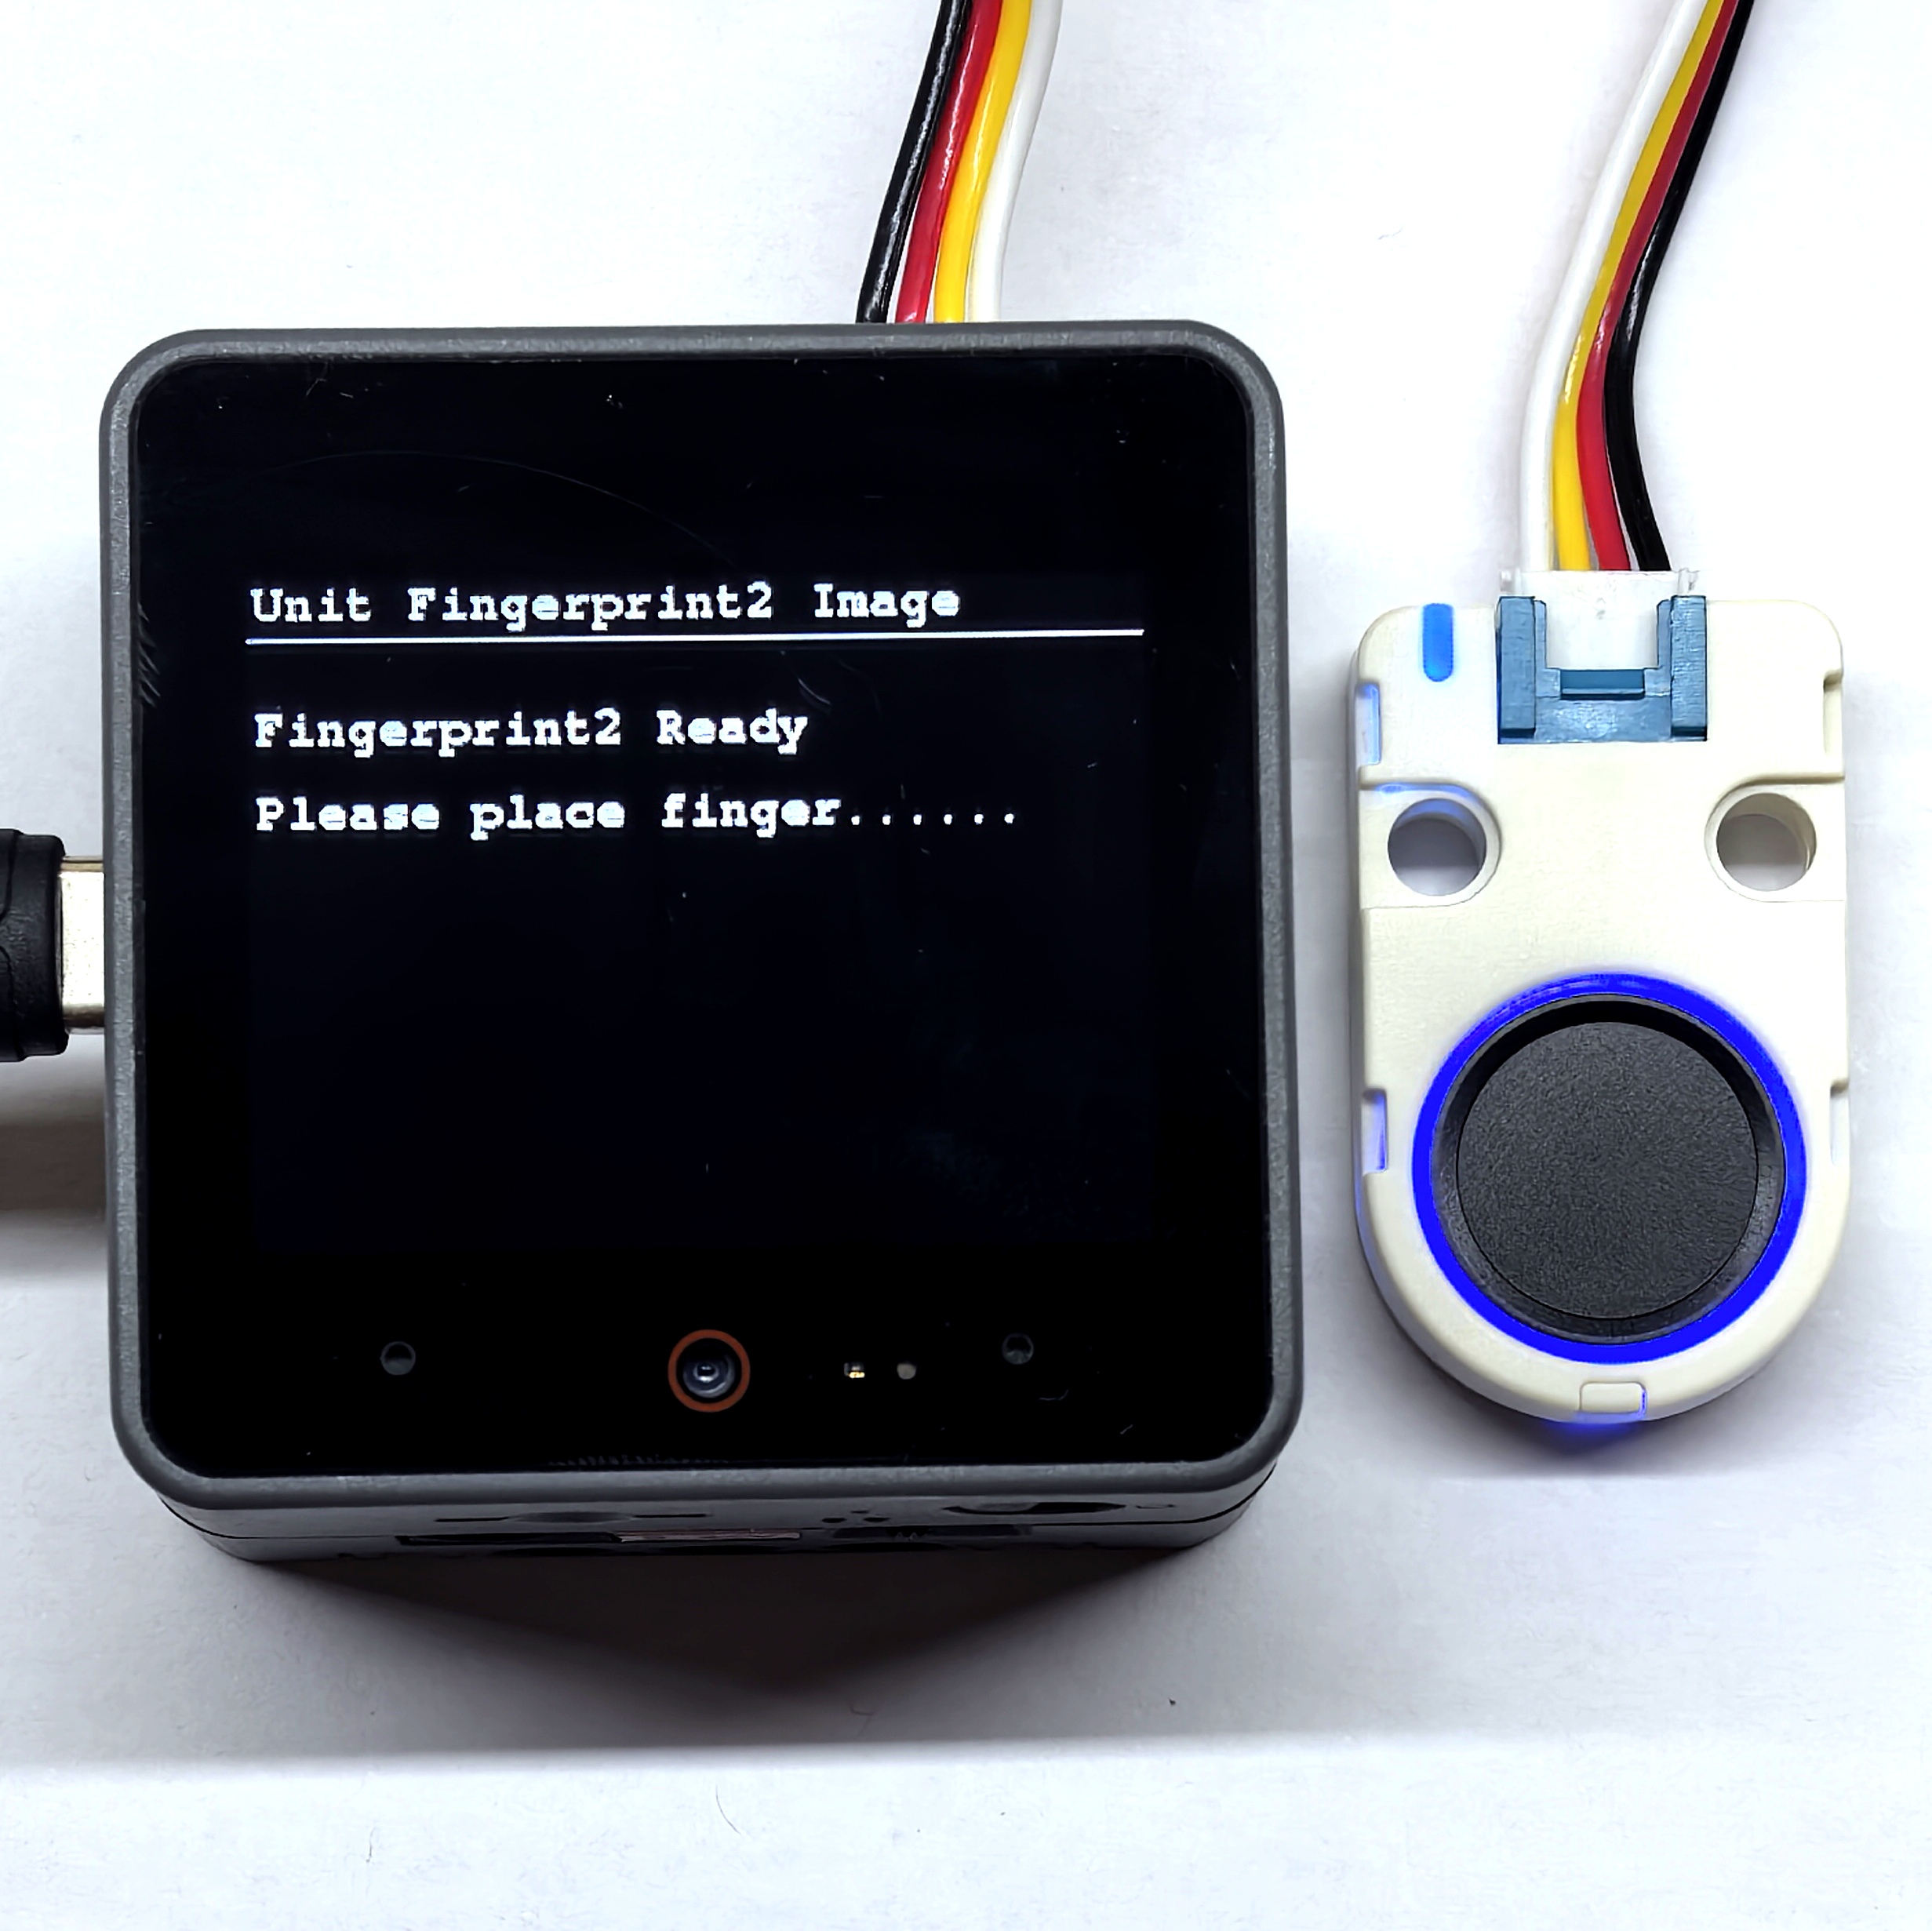
canvas.drawString("Fingerprint2 Ready", 2, 45);
canvas.drawString("Please place finger......", 2, 75);
Serial.printf("Fingerprint2 Ready\n");
} else {
canvas.drawString("Fingerprint2 Init Failed", 2, 45);
Serial.printf("Fingerprint2 Init Failed\n");
}
canvas.pushSprite(0, 0);
}
void loop() {
M5.update();
delay(200); // Light delay to reduce CPU usage
fingerprint_status_t result = fp2.PS_GetImage();
// PS_GetImage can be replaced by PS_GetImageInfo to further verify the quality of the fingerprint image.
if (result == FINGERPRINT_OK) {
fingerPresentCount++;
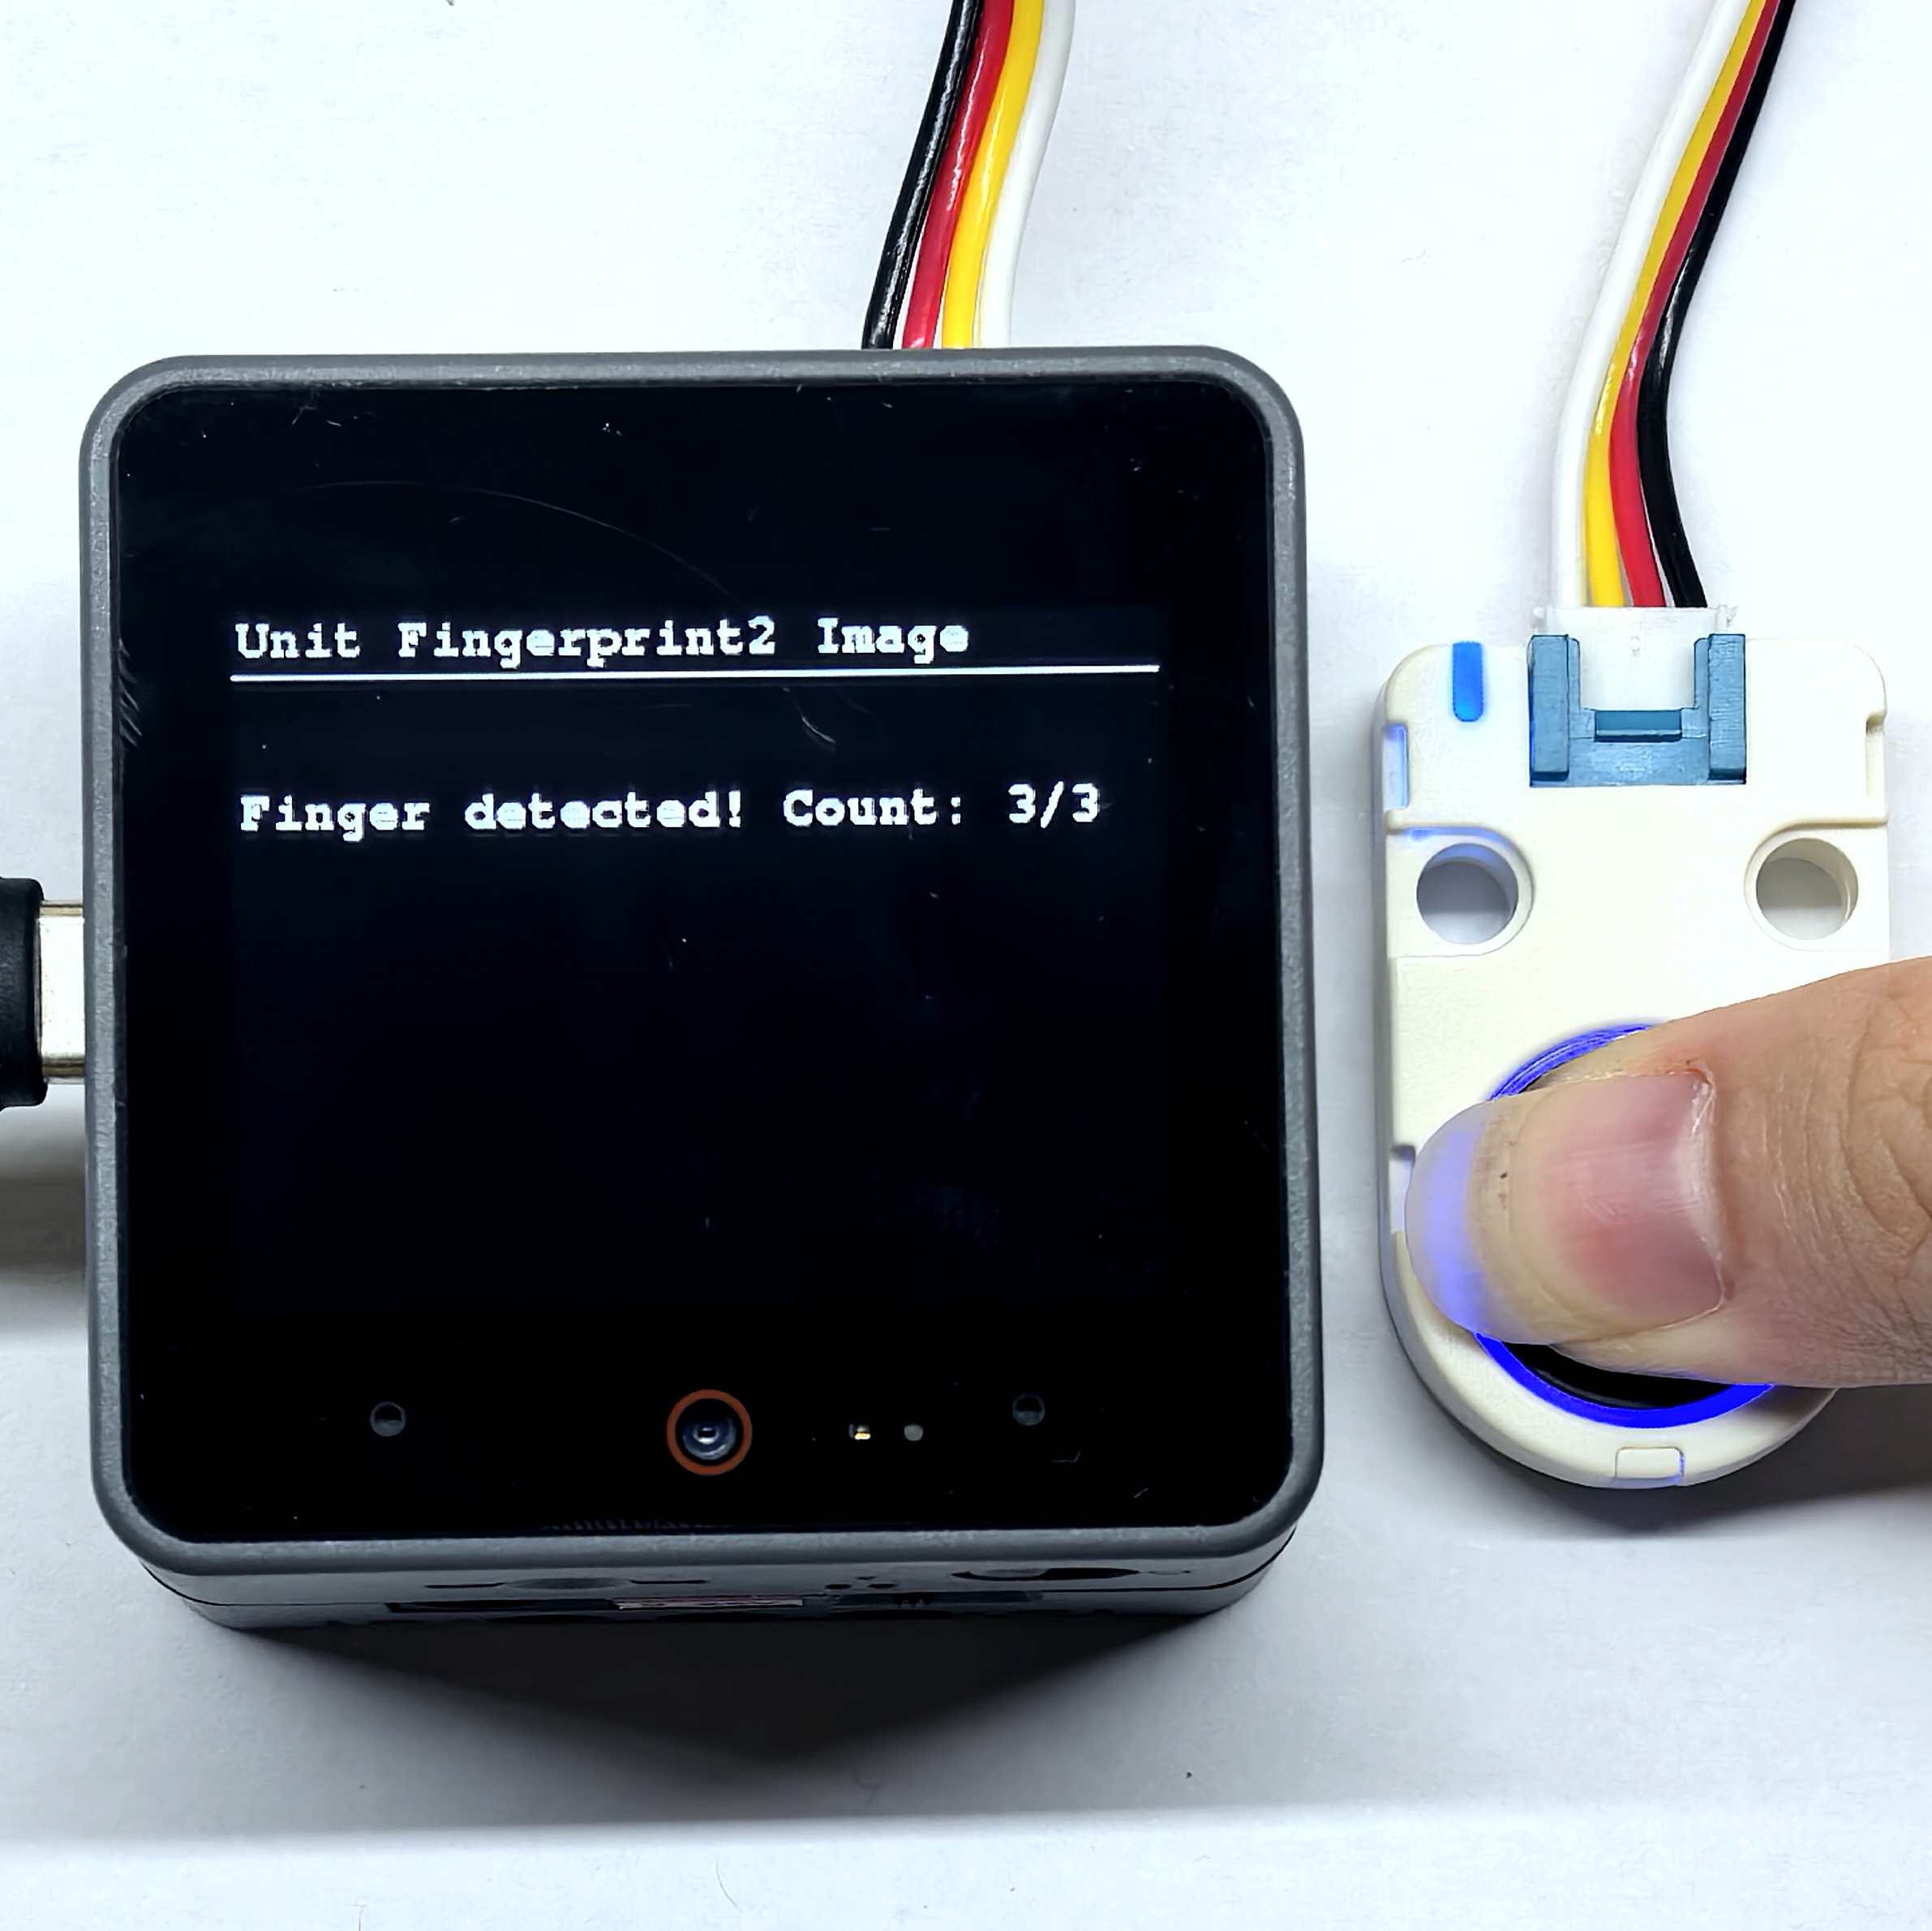
Serial.printf("Finger detected! Count: %d/3\n", fingerPresentCount);
canvas.fillRect(0, 41, 320, 240, TFT_BLACK);
canvas.setCursor(2, 60);
canvas.printf("Finger detected! Count: %d/3\n", fingerPresentCount);
canvas.pushSprite(0, 0);
// Show fingerprint image after 3 consecutive detections
if (fingerPresentCount >= 3) {
Serial.println("Entering displayFingerprintImage.");
if (displayFingerprintImage(fp2, 1024 * 16, canvas, 56, 100, 1)) {
Serial.println("Fingerprint image displayed successfully.");
delay(1000);
} else {
Serial.println("Failed to display fingerprint image.");
}
canvas.pushSprite(0, 0);
fingerPresentCount = 0; // Reset count
}
} else {
// No finger detected, reset count
if (fingerPresentCount > 0) {
Serial.println("Finger removed, resetting count.");
fingerPresentCount = 0;
}
}
}
bool displayFingerprintImage(M5UnitFingerprint2& fp2, uint32_t maxBufferSize, M5Canvas& canvas,
int displayX, int displayY, uint8_t rotation) {
// Allocate buffer for image
uint8_t* imageBuffer = (uint8_t*)malloc(maxBufferSize);
if (imageBuffer == nullptr) {
Serial.println("Failed to allocate memory for image buffer.");
canvas.setCursor(2, 60);
canvas.printf("Memory allocation failed");
return false;
}
// Upload image data from sensor
uint32_t actualImageSize = 0;
fingerprint_status_t result = fp2.PS_UpImage(imageBuffer, maxBufferSize, actualImageSize);
if (result == FINGERPRINT_OK) {
Serial.printf("Image uploaded successfully, size: %d bytes\r\n", actualImageSize);
// Display image info on canvas
canvas.fillRect(0, 41, 320, 240, TFT_BLACK);
canvas.setCursor(2, 60);
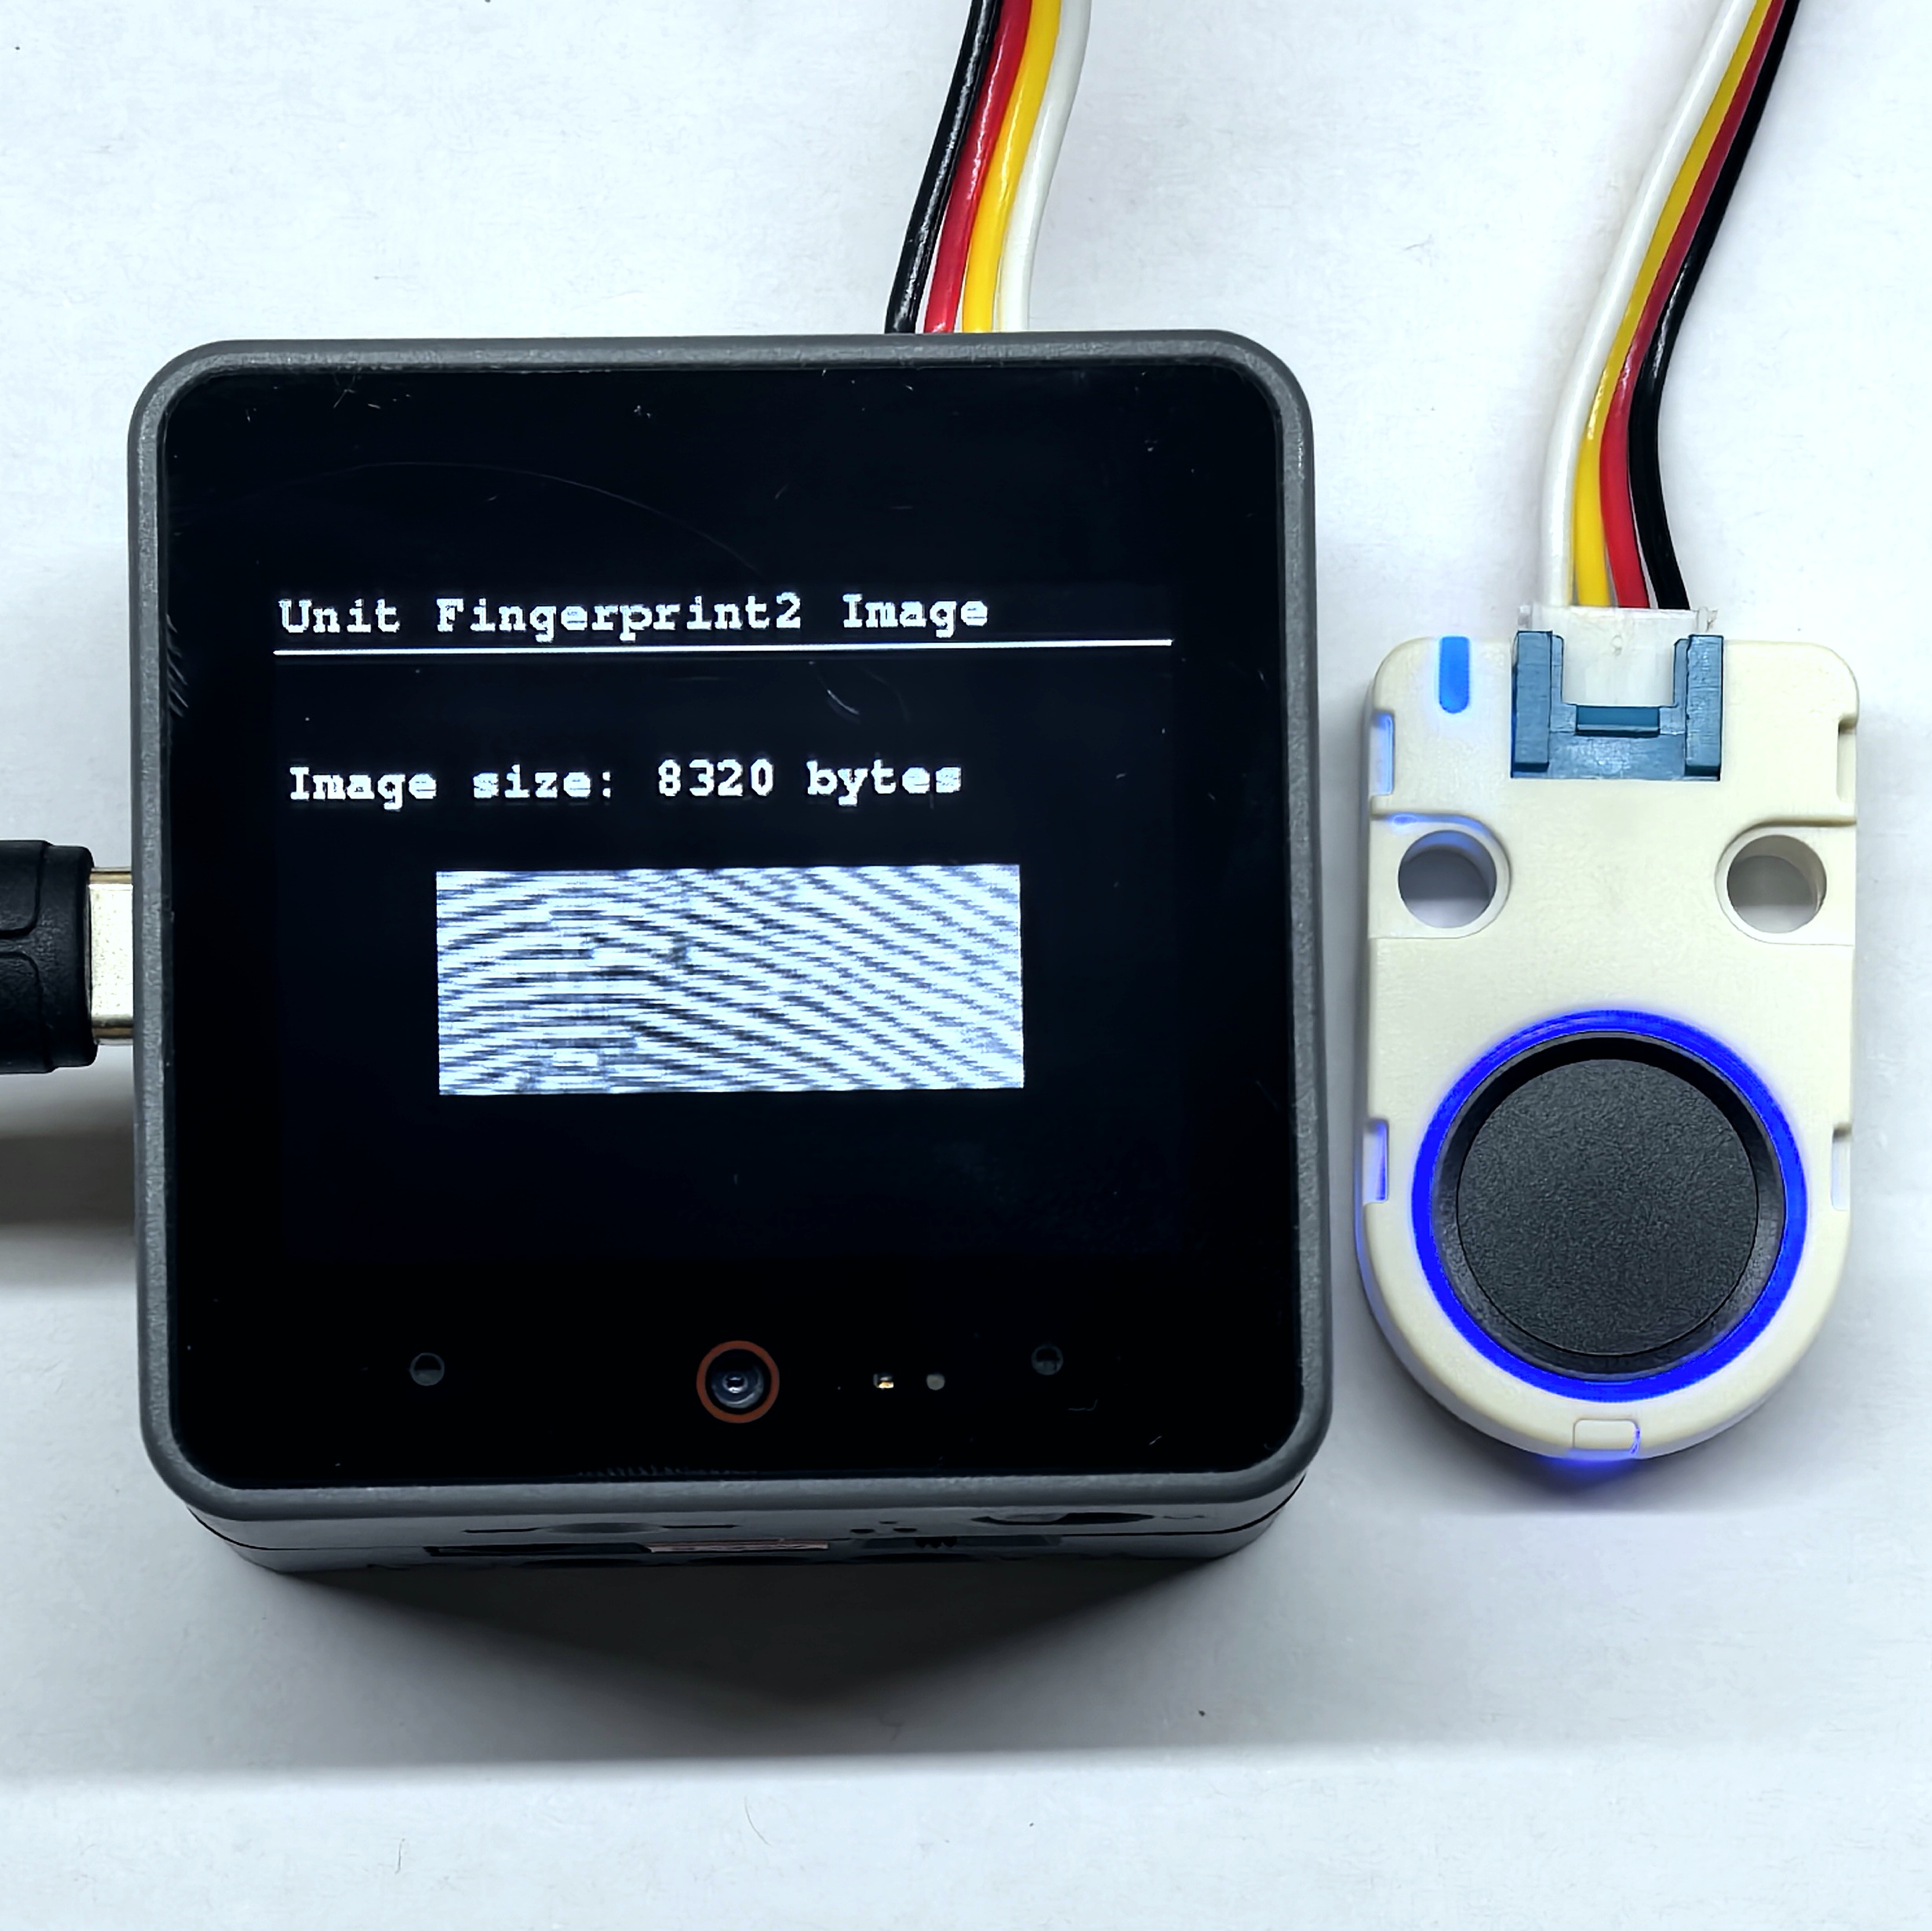
canvas.printf("Image size: %d bytes", actualImageSize);
if (actualImageSize > 0) {
const int imageWidth = 80;
const int imageHeight = 208;
for (int y = 0; y < imageHeight && y < 220; y++) { // Limit height
for (int x = 0; x < imageWidth && x < 200; x++) { // Limit width
int byteIndex = (y * imageWidth + x) / 2;
if (byteIndex < actualImageSize) {
// Extract 4-bit pixel value
uint8_t pixelValue;
if ((y * imageWidth + x) % 2 == 0) {
pixelValue = imageBuffer[byteIndex] & 0x0F;
} else {
pixelValue = (imageBuffer[byteIndex] & 0xF0) >> 4;
}
// Map 4-bit to grayscale RGB565
uint8_t grayValue = pixelValue * 17; // Scale to 0-255
uint16_t rgb565 = ((grayValue >> 3) << 11) | ((grayValue >> 2) << 5) | (grayValue >> 3);
// Compute rotated pixel position
int drawX, drawY;
switch (rotation) {
case 0: // No rotation
drawX = displayX + x; drawY = displayY + y; break;
case 1: // 90 degrees clockwise
drawX = displayX + imageHeight - 1 - y; drawY = displayY + x; break;
case 2: // 180 degrees
drawX = displayX + imageWidth - 1 - x; drawY = displayY + imageHeight - 1 - y; break;
case 3: // 270 degrees (counterclockwise)
drawX = displayX + y; drawY = displayY + imageWidth - 1 - x; break;
default: // Default: 90 degrees clockwise
drawX = displayX + imageHeight - 1 - y; drawY = displayY + x; break;
}
canvas.drawPixel(drawX, drawY, rgb565);
}
}
}
}
free(imageBuffer);
return true;
} else {
Serial.println("Failed to upload image.");
canvas.setCursor(2, 60);
canvas.printf("Failed to upload image");
free(imageBuffer);
return false;
}
}3.3 Fingerprint Enrollment
This example uses the automatic enrollment method (using the PS_AutoEnroll function). The user only needs to place their finger on the sensor, and the system will automatically complete image acquisition, feature extraction, and template synthesis, finally generating a fingerprint template and storing it in the module's database. If you want to perform enrollment step by step, refer to the Fingerprint2 Serial Communication Protocol and use functions such as PS_GetImage, PS_GenChar, PS_RegModel, and PS_StoreChar.
PS_AutoEnroll
Function Prototype:
fingerprint_status_t PS_AutoEnroll(
    uint16_t ID,
    uint8_t enrollCount,
    fingerprint_auto_enroll_flags_t flags,
    uint8_t* param1 = nullptr,
    uint8_t* param2= nullptr,
    PS_AutoEnrollCallback_t callback = nullptr
) const; Parameters:
ID: Unique fingerprint ID, range 0~99.enrollCount: Number of fingerprint samples required for enrollment, valid values 1-6. The larger the value, the more reliable the template, but the longer the enrollment time.flags: Enrollment options, can be combined by bitwise OR, seefingerprint_auto_enroll_flags_tfor details.param1,param2: Optional output parameters.param1-- stage code,param2-- status/error code. Seeps_auto_enroll_param1_t/fingerprint_auto_enroll_stage_tandps_auto_enroll_param2_tbelow for details.callback: Callback function (optional), which will be called after each stage is completed (i.e., will be called multiple times when usingPS_AutoEnroll). For details, see the definition ofPS_AutoEnrollin the library.
Return Value:
FINGERPRINT_OK: Success- Other values indicate failure. See the library definition
fingerprint_status_tfor details.
PS_AutoEnroll_callback
Function Prototype:
bool PS_AutoEnroll_callback(
    uint16_t ID,
    fingerprint_status_t confirmationCode,
    uint8_t param1,
    uint8_t param2,
    int packetCount
) const;Parameters:
ID: The fingerprint ID currently being enrolled.confirmationCode: Status code of the current stage,FINGERPRINT_OKmeans success. See the library definitionfingerprint_status_tfor details.param1: Current stage code, seeps_auto_enroll_param1_tfor details.param2: Current status/error code, seeps_auto_enroll_param2_tfor details.packetCount: Number of times the callback function has been called (number of data packets processed so far), starting from 0.
Related Definitions:
fingerprint_auto_enroll_flags_ttypedef enum { FINGERPRINT_AUTO_ENROLL_DEFAULT = 0x0000, // 默认设置 / Default setting FINGERPRINT_AUTO_ENROLL_NO_STATUS_RETURN = (1 << 2), // 注册过程中不返回当前状态 / Don't return current status during enrollment FINGERPRINT_AUTO_ENROLL_ALLOW_OVERWRITE_ID = (1 << 3), // 允许覆盖已存在的ID号 / Allow overwriting existing ID FINGERPRINT_AUTO_ENROLL_FORBID_DUPLICATES = (1 << 4), // 禁止指纹重复注册 / Forbid duplicate fingerprint enrollment FINGERPRINT_AUTO_ENROLL_NO_LIFT_REQUIRED = (1 << 5), // 采集间不要求手指离开 / No finger lift required between captures } fingerprint_auto_enroll_flags_t;ps_auto_enroll_param1_ttypedef enum : uint8_t { PS_AUTO_ENROLL_PARAM1_LEGAL_CHECK = 0x00, // 指纹合法性检测 / Fingerprint legality check PS_AUTO_ENROLL_PARAM1_GET_IMAGE = 0x01, // 获取图像 / Get image PS_AUTO_ENROLL_PARAM1_GEN_CHAR = 0x02, // 生成特征 / Generate characteristics PS_AUTO_ENROLL_PARAM1_LIFT_FINGER = 0x03, // 判断手指离开 / Check finger lift PS_AUTO_ENROLL_PARAM1_MERGE_TEMPLATE= 0x04, // 合并模板 / Merge template PS_AUTO_ENROLL_PARAM1_VERIFY = 0x05, // 注册验证 / Enrollment verification PS_AUTO_ENROLL_PARAM1_STORE = 0x06 // 存储模板 / Store template } ps_auto_enroll_param1_t;ps_auto_enroll_param2_t
typedef enum : uint8_t {
    PS_AUTO_ENROLL_PARAM2_OK                = 0x00, // 指纹合法性检测 / Fingerprint legality check
    PS_AUTO_ENROLL_PARAM2_MERGE_TEMPLATE    = 0xF0, // 合并模板 / Merge template
    PS_AUTO_ENROLL_PARAM2_FINGER_DUPLICATED = 0xF1, // 检验该手指是否已注册 / Check if finger is already registered
    PS_AUTO_ENROLL_PARAM2_STORE_TEMPLATE    = 0xF2, // 存储模板 / Store template
} ps_auto_enroll_param2_t;The following example uses a callback function to obtain the current enrollment process status and provide feedback.
#include <Arduino.h>
#include <M5UnitFingerprint2.hpp>
#include <M5Unified.hpp>
M5Canvas canvas(&M5.Lcd);
M5UnitFingerprint2 fp2(&Serial1, 17, 18); // Initialize fingerprint sensor
uint16_t enrollID = 0; // Unique ID for the fingerprint being enrolled (range: 0~99, cycles after 99)
const uint8_t enrollCount = 3; // Number of fingerprint samples needed to create a reliable template (3 = standard)
bool waitingForTouch = true; // Flag to track if the system is waiting for a screen touch to start enrollment
void setup() {
Serial.begin(115200);
M5.begin();
fp2.begin();
canvas.createSprite(320, 240);
canvas.fillScreen(TFT_BLACK);
canvas.setTextColor(TFT_WHITE);
canvas.setFont(&fonts::FreeMonoBold9pt7b);
canvas.drawString("Unit Fingerprint2 Enroll", 2, 0);
Serial.println("<-------Unit Fingerprint2 Enroll------->");
canvas.drawLine(0, 20, 320, 20, TFT_WHITE);
// Activate the fingerprint module (prepares it to accept commands; required before enrollment/verification)
if (fp2.PS_ActivateFingerprintModule() == FINGERPRINT_OK) { // Software-based activation
canvas.drawString("Fingerprint2 Ready", 2, 45);
Serial.printf("Fingerprint2 Ready\n");
} else {
canvas.drawString("Fingerprint2 Init Failed", 2, 45);
Serial.printf("Fingerprint2 Init Failed\n");
}
// Set sensor work mode: 1 = Always-on (sensor stays active), 0 = Timed sleep (auto-sleeps to save power)
fp2.PS_SetWorkMode(1);
fp2.PS_Empty();// Clear all fingerprint database
// Prompt user to touch the screen to start fingerprint enrollment
canvas.drawString("Touch screen to enroll", 2, 70);
canvas.pushSprite(0, 0); // Update LCD with all canvas content (renders drawn elements)
Serial.println("Waiting for touch to start enrollment..."); // Debug message for user action
}
void loop() {
M5.update();
if (waitingForTouch) {
if (M5.Touch.getCount() && M5.Touch.getDetail().wasPressed()) {
waitingForTouch = false;
canvas.fillRect(0, 70, 320, 170, TFT_BLACK);
canvas.setCursor(2, 70);
canvas.printf("Enrolling Fingerprint ID: %d", enrollID);
canvas.drawString("Place finger to enroll...", 10, 90);
canvas.pushSprite(0, 0);
Serial.printf("Start enrolling fingerprint, ID=%d. Please place your finger...\n", enrollID);
uint8_t param1 = 0, param2 = 0;
// Start automatic enrollment:
// Parameters: ID, sample count, flags (overwrite existing ID + no finger lift needed), output params, callback
fingerprint_status_t result = fp2.PS_AutoEnroll(
enrollID, enrollCount,
(fingerprint_auto_enroll_flags_t)(FINGERPRINT_AUTO_ENROLL_ALLOW_OVERWRITE_ID |
FINGERPRINT_AUTO_ENROLL_NO_LIFT_REQUIRED),
¶m1, ¶m2, PS_AutoEnroll_callback);
canvas.fillRect(0, 90, 320, 150, TFT_BLACK);
if (result == FINGERPRINT_OK) {
canvas.setCursor(2, 100);
canvas.printf("ID:%d Enroll Success!", enrollID);
Serial.printf("Fingerprint enrolled successfully! ID=%d\n", enrollID);
enrollID = (enrollID + 1) % 100;
} else {
canvas.drawString("Enroll Failed!", 2, 100);
Serial.println("Fingerprint enrollment failed!");
}
canvas.drawString("Touch screen to enroll next", 10, 130);
canvas.pushSprite(0, 0);
waitingForTouch = true;
delay(200);
}
}
delay(20);
}
// Callback function for PS_AutoEnroll: updates status during each enrollment stage (runs automatically)
// Returns true to continue enrollment, false to abort (based on success of current stage)
bool PS_AutoEnroll_callback(uint16_t ID, fingerprint_status_t confirmationCode, uint8_t param1, uint8_t param2, int packetCount) {
static int enrollStep = 0; // Static variable: tracks current sample step (persists between callback calls)
switch (param1) {
// Stage 1: Capture fingerprint image from sensor
case FINGERPRINT_AUTO_ENROLL_GET_IMAGE:
if (confirmationCode == FINGERPRINT_OK) {
enrollStep++; // Increment step after successful image capture
canvas.setCursor(10, 90);
canvas.fillRect(0, 90, 320, 150, TFT_BLACK); // Clear previous status
canvas.printf("#%d:Image acquired success", enrollStep); // Show step success
Serial.printf("#%d:Image acquired success\n", enrollStep); // Debug step success
}
break;
// Stage 2: Extract fingerprint features (converts image to digital template data)
case FINGERPRINT_AUTO_ENROLL_GEN_CHAR:
if (confirmationCode == FINGERPRINT_OK) {
canvas.setCursor(10, 110);
canvas.printf("#%d:Feature generated success", enrollStep); // Show feature success
Serial.printf("#%d:Feature generated success\n", enrollStep); // Debug feature success
}
break;
// Stage 3: Merge multiple feature samples into a single, reliable template
case FINGERPRINT_AUTO_ENROLL_MERGE_TEMPLATE:
if (confirmationCode == FINGERPRINT_OK) {
canvas.setCursor(10, 130);
canvas.printf("Template merged success"); // Show merge success
Serial.println("Template merged success"); // Debug merge success
}
break;
// Stage 4: Verify merged template (ensures template is valid for future recognition)
case FINGERPRINT_AUTO_ENROLL_VERIFY:
if (confirmationCode == FINGERPRINT_OK) {
canvas.setCursor(10, 150);
canvas.printf("Template verified success"); // Show verification success
Serial.println("Template verified success"); // Debug verification success
}
break;
// Stage 5: Save verified template to sensor memory (links to enrollment ID)
case FINGERPRINT_AUTO_ENROLL_STORE_TEMPLATE:
if (confirmationCode == FINGERPRINT_OK) {
canvas.setCursor(10, 170);
canvas.printf("Template stored success,ID=%d", ID); // Show storage success + ID
Serial.printf("Template stored success,ID=%d\n", ID); // Debug storage success
enrollStep = 0; // Reset step counter for next enrollment
}
break;
default:
break; // Ignore unrecognized stages
}
canvas.pushSprite(0, 0);
return (confirmationCode == FINGERPRINT_OK); // Continue enrollment only if current stage succeeded
} 3.4 Fingerprint Identification
This example uses the automatic identification method (using the PS_AutoIdentify function). The user only needs to place their finger on the sensor, and the system will automatically complete image acquisition, feature extraction, and template matching, and finally return the matching result. If you want to perform identification step by step, refer to the Fingerprint2 Serial Communication Protocol and use functions such as PS_GetImage, PS_GenChar, and PS_Search.
PS_AutoIdentify
Function Prototype:
fingerprint_status_t PS_AutoIdentify(
    uint8_t securityLevel,
    uint16_t ID,
    fingerprint_auto_verify_flags_t flags,
    uint16_t& matchedID,
    PS_AutoIdentifyCallback_t callback = nullptr
) const;Parameters:
securityLevel: Security level, 0 or 1. The higher the value, the stricter the matching.ID: The range of fingerprint IDs to be identified. 0xFFFF means to identify all enrolled fingerprints, other values only compare with the specified ID.flags: Identification options, can be combined by bitwise OR, seefingerprint_auto_verify_flags_tbelow for details.matchedID: Output parameter, returns the matched fingerprint ID.callback: Callback function (optional), which will be called multiple times after each stage is completed, and can be used to provide real-time feedback on the identification progress.
Return Value:
FINGERPRINT_OK: Identification successful- Other values indicate failure. See the library definition
fingerprint_status_tfor details.
PS_AutoIdentify_callback
bool PS_AutoIdentify_callback(
    uint8_t securityLevel,
    fingerprint_status_t confirmationCode,
    uint8_t param,
    uint16_t matchedID,
    uint16_t matchScore,
    int packetCount
);Parameters:
securityLevel: Same as the parameter passed toPS_AutoIdentify.confirmationCode: Status code of the current stage,FINGERPRINT_OKmeans success. See the library definitionfingerprint_status_tfor details.param: Current stage code, seeps_auto_identify_param_tbelow for details.matchedID: Output parameter, returns the matched fingerprint ID.matchScore: Output parameter, returns the matching score. The higher the value, the higher the degree of match.packetCount: Number of times the callback function has been called (number of data packets processed so far), starting from 0.
Related Definitions:
fingerprint_auto_verify_flags_t
typedef enum {
    FINGERPRINT_AUTO_VERIFY_DEFAULT          = 0x0000, // 默认设置 / Default setting
    FINGERPRINT_AUTO_VERIFY_NO_STATUS_RETURN = (1 << 2), // 验证过程中不返回当前状态 / Don't return current status during verification
} fingerprint_auto_verify_flags_t;ps_auto_identify_param_t
typedef enum {
    PS_AUTO_IDENTIFY_PARAM_LEGAL_CHECK   = 0x00, // 指纹合法性检测 / Fingerprint legality check
    PS_AUTO_IDENTIFY_PARAM_GET_IMAGE     = 0x01, // 获取图像 / Get image
    PS_AUTO_IDENTIFY_PARAM_VERIFY        = 0x05, // 已注册指纹比对 / Registered fingerprint matching
} ps_auto_identify_param_t;The following example uses a callback function to obtain the current identification status and provide feedback.
#include <Arduino.h>
#include <M5UnitFingerprint2.hpp>
#include <M5Unified.hpp>

M5Canvas canvas(&M5.Lcd);
M5UnitFingerprint2 fp2(&Serial1, 17, 18);  // Initialize fingerprint sensor

void setup() {
    Serial.begin(115200);
    M5.begin();
    fp2.begin();
    canvas.createSprite(320, 240);
    canvas.fillScreen(TFT_BLACK);
    canvas.setTextColor(TFT_WHITE);
    canvas.setFont(&fonts::FreeMonoBold9pt7b);
    canvas.drawString("Unit Fingerprint2 Identify", 2, 0);
    Serial.println("<-------Unit Fingerprint2 Identify------->");
    canvas.drawLine(0, 20, 320, 20, TFT_WHITE);

    if (fp2.PS_ActivateFingerprintModule() == FINGERPRINT_OK) {
        canvas.drawString("Fingerprint2 Ready", 2, 45);
        Serial.printf("Fingerprint2 Ready\n");
    } else {
        canvas.drawString("Fingerprint2 Init Failed", 2, 45);
        Serial.printf("Fingerprint2 Init Failed\n");
    }

    fp2.PS_SetWorkMode(1);
    canvas.pushSprite(0, 0);
}

void loop() {
    M5.update();

    canvas.fillRect(0, 70, 320, 170, TFT_BLACK);
    canvas.setCursor(2, 70);
    canvas.drawString("Place finger to identify...", 10, 90);
    canvas.pushSprite(0, 0);
    Serial.println("Start identifying fingerprint. Please place your finger...");

    uint16_t matchedID = 0;
    // Start automatic identification:
    // Parameters: security level(0 or 1), ID, flags, output matchedID, callback
    fingerprint_status_t result = fp2.PS_AutoIdentify(
        0, 0xFFFF, FINGERPRINT_AUTO_VERIFY_DEFAULT,
        matchedID, PS_AutoIdentify_callback);

    canvas.fillRect(0, 90, 320, 150, TFT_BLACK);
    if (result == FINGERPRINT_OK) {
        canvas.setCursor(2, 100);
        canvas.printf("Identify Success! ID:%d", matchedID);
        Serial.printf("Fingerprint identified! ID=%d\n", matchedID);
        delay(1000);
    } else {
        canvas.drawString("Identify Failed!", 2, 100);
        Serial.println("Fingerprint identification failed!");
    }
    canvas.pushSprite(0, 0);
    delay(20);
}

// Callback function for PS_AutoIdentify: updates status during each identification stage
bool PS_AutoIdentify_callback(uint8_t securityLevel, fingerprint_status_t confirmationCode, uint8_t param, uint16_t matchedID, uint16_t matchScore, int packetCount) {
    switch (param) {
        // Stage 1: Capture fingerprint image
        case PS_AUTO_IDENTIFY_PARAM_GET_IMAGE:
        if (confirmationCode == FINGERPRINT_OK) {
            canvas.setCursor(10, 90);
            canvas.fillRect(0, 90, 320, 150, TFT_BLACK);
            canvas.printf("Image acquired success");
            Serial.println("Image acquired success");
        }
        break;
        // Stage 2: Matching fingerprint
        case PS_AUTO_IDENTIFY_PARAM_VERIFY:
        if (confirmationCode == FINGERPRINT_OK) {
            canvas.setCursor(10, 110);
            canvas.printf("Match ID:%d Score:%d", matchedID, matchScore);
            Serial.printf("Match ID:%d Score:%d\n", matchedID, matchScore);
        } else {
            canvas.setCursor(10, 110);
            canvas.printf("No Fingerprint Matched");
            Serial.println("No Fingerprint Matched");
        }
        break;
        default:
        break;
    }
    canvas.pushSprite(0, 0);
    delay(500);
    return (confirmationCode == FINGERPRINT_OK);
} 3.5 Delete a Registered Fingerprint
This fingerprint module only supports deleting a specified fingerprint template by ID, so you need to identify and obtain the ID before deleting. If you want to clear all fingerprint templates, please use the PS_Empty function.
#include <Arduino.h>
#include <M5UnitFingerprint2.hpp>
#include <M5Unified.hpp>

M5Canvas canvas(&M5.Lcd);
M5UnitFingerprint2 fp2(&Serial1, 17, 18);  // Initialize fingerprint sensor

void setup() {
    Serial.begin(115200);
    M5.begin();
    fp2.begin();
    canvas.createSprite(320, 240);
    canvas.fillScreen(TFT_BLACK);
    canvas.setTextColor(TFT_WHITE);
    canvas.setFont(&fonts::FreeMonoBold9pt7b);
    canvas.drawString("Unit Fingerprint2 Delete", 2, 0);
    Serial.println("<-------Unit Fingerprint2 Delete------->");
    canvas.drawLine(0, 20, 320, 20, TFT_WHITE);

    if (fp2.PS_ActivateFingerprintModule() == FINGERPRINT_OK) {
        canvas.drawString("Fingerprint2 Ready", 2, 45);
        Serial.printf("Fingerprint2 Ready\n");
    } else {
        canvas.drawString("Fingerprint2 Init Failed", 2, 45);
        Serial.printf("Fingerprint2 Init Failed\n");
    }

    fp2.PS_SetWorkMode(1);
    fp2.PS_ControlBLN(FINGERPRINT_LED_BREATHING, FINGERPRINT_LED_COLOR_BLUE, FINGERPRINT_LED_COLOR_PURPLE, 0); /// 0-endless loop, N-loop N times
    canvas.pushSprite(0, 0);
}

void loop() {
    M5.update();

    canvas.fillRect(0, 70, 320, 170, TFT_BLACK);
    canvas.setCursor(2, 70);
    canvas.drawString("Place finger to delete...", 10, 90);
    canvas.pushSprite(0, 0);
    Serial.println("Please place your finger...");

    uint16_t matchedID = 0;
    // Start automatic identification:
    // Parameters: security level(0 or 1), ID, flags, output matchedID
    fingerprint_status_t result = fp2.PS_AutoIdentify(
        0, 0xFFFF, FINGERPRINT_AUTO_VERIFY_DEFAULT,
        matchedID);

    canvas.fillRect(0, 90, 320, 150, TFT_BLACK);
    if (result == FINGERPRINT_OK) {
        canvas.setCursor(2, 100);
        canvas.printf("Identified ID:%d", matchedID);
        Serial.printf("Identified ID:%d", matchedID);
        // Delete the matched fingerprint
        fingerprint_status_t delResult = fp2.PS_DeletChar(matchedID, 1);
        if (delResult == FINGERPRINT_OK) {
            canvas.setCursor(2, 120);
            canvas.printf("Deleted ID:%d Success!", matchedID);
            Serial.printf("Deleted fingerprint ID=%d Success!\n", matchedID);
        } else {
            canvas.setCursor(2, 120);
            canvas.printf("Delete ID:%d Failed!", matchedID);
            Serial.printf("Delete fingerprint ID=%d Failed!\n", matchedID);
        }
    } else {
        canvas.drawString("Identify Failed!", 2, 100);
        Serial.println("Fingerprint identification failed!");
    }
    canvas.pushSprite(0, 0);
    delay(2000);
} 4. Compile and Upload
Download mode: Before programming, different devices need to enter download mode. This step may vary depending on the main controller. For details, please refer to the device programming download tutorial list at the bottom of the Arduino IDE Getting Started Guide page.
For CoreS3, press and hold the reset button (about 2 seconds) until the internal green LED lights up, then release it. The device has now entered download mode and is waiting for programming.
.gif)
- Select the device port, click the compile and upload button in the upper left corner of the Arduino IDE, and wait for the program to finish compiling and uploading to the device.

5. Example Results
- LED control: The LED effects cycle through green-blue breathing, red flashing, cyan fade-in, yellow fade-out, and purple always-on.
- Fingerprint image acquisition and display: Place your finger on the fingerprint sensor, and after 3 successful acquisitions, the fingerprint image will be displayed.
- Fingerprint enrollment: Tap the screen and follow the prompts to place your finger on the fingerprint sensor for enrollment. After successful enrollment, the LED turns green and the screen displays messages such as
Enroll Success.
- Fingerprint identification: Follow the prompts to place your finger on the fingerprint sensor for identification. After successful identification, the LED turns green and the screen displays messages such as
Identify Success.
- Delete a registered fingerprint: Follow the prompts to place your finger on the fingerprint sensor for deletion. The screen displays messages such as
Deleted ID:X Success.