

Arduino入門
2. デバイス&サンプル
3. M5Unified
4. M5GFX
5. 拡張モジュール&サンプル
Unit
Atomic
Tab5
IoT
アクセサリー
Core2 Button
Core2のボタン入力に関するAPIとサンプルプログラム。
注意事項:
使用する際には、状態の更新を読み取るためにメインループ内に
M5.update() 関数を含め、可能な限りブロッキングを減らす必要があります。そうしないと、ボタンの状態変化をタイムリーに取得できない可能性があります。サンプルプログラム
cpp
1 2 3 4 5 6 7 8 9 10 11 12 13 14 15 16 17 18 19 20 21 22 23 24 25 26 27 28 29 30 31 32 33 34 35 36 37 38 39 40 41 42 43 44 45 46 47 48
#include "M5Unified.h"
#include "M5GFX.h"
static int32_t w;
static int32_t h;
static bool drawed = false;
void setup()
{
auto cfg = M5.config();
M5.begin(cfg);
w = M5.Lcd.width();
h = M5.Lcd.height();
M5.Lcd.fillScreen(WHITE);
M5.Display.setRotation(1);
M5.Display.setTextColor(TFT_BLACK);
M5.Display.setTextDatum(top_center);
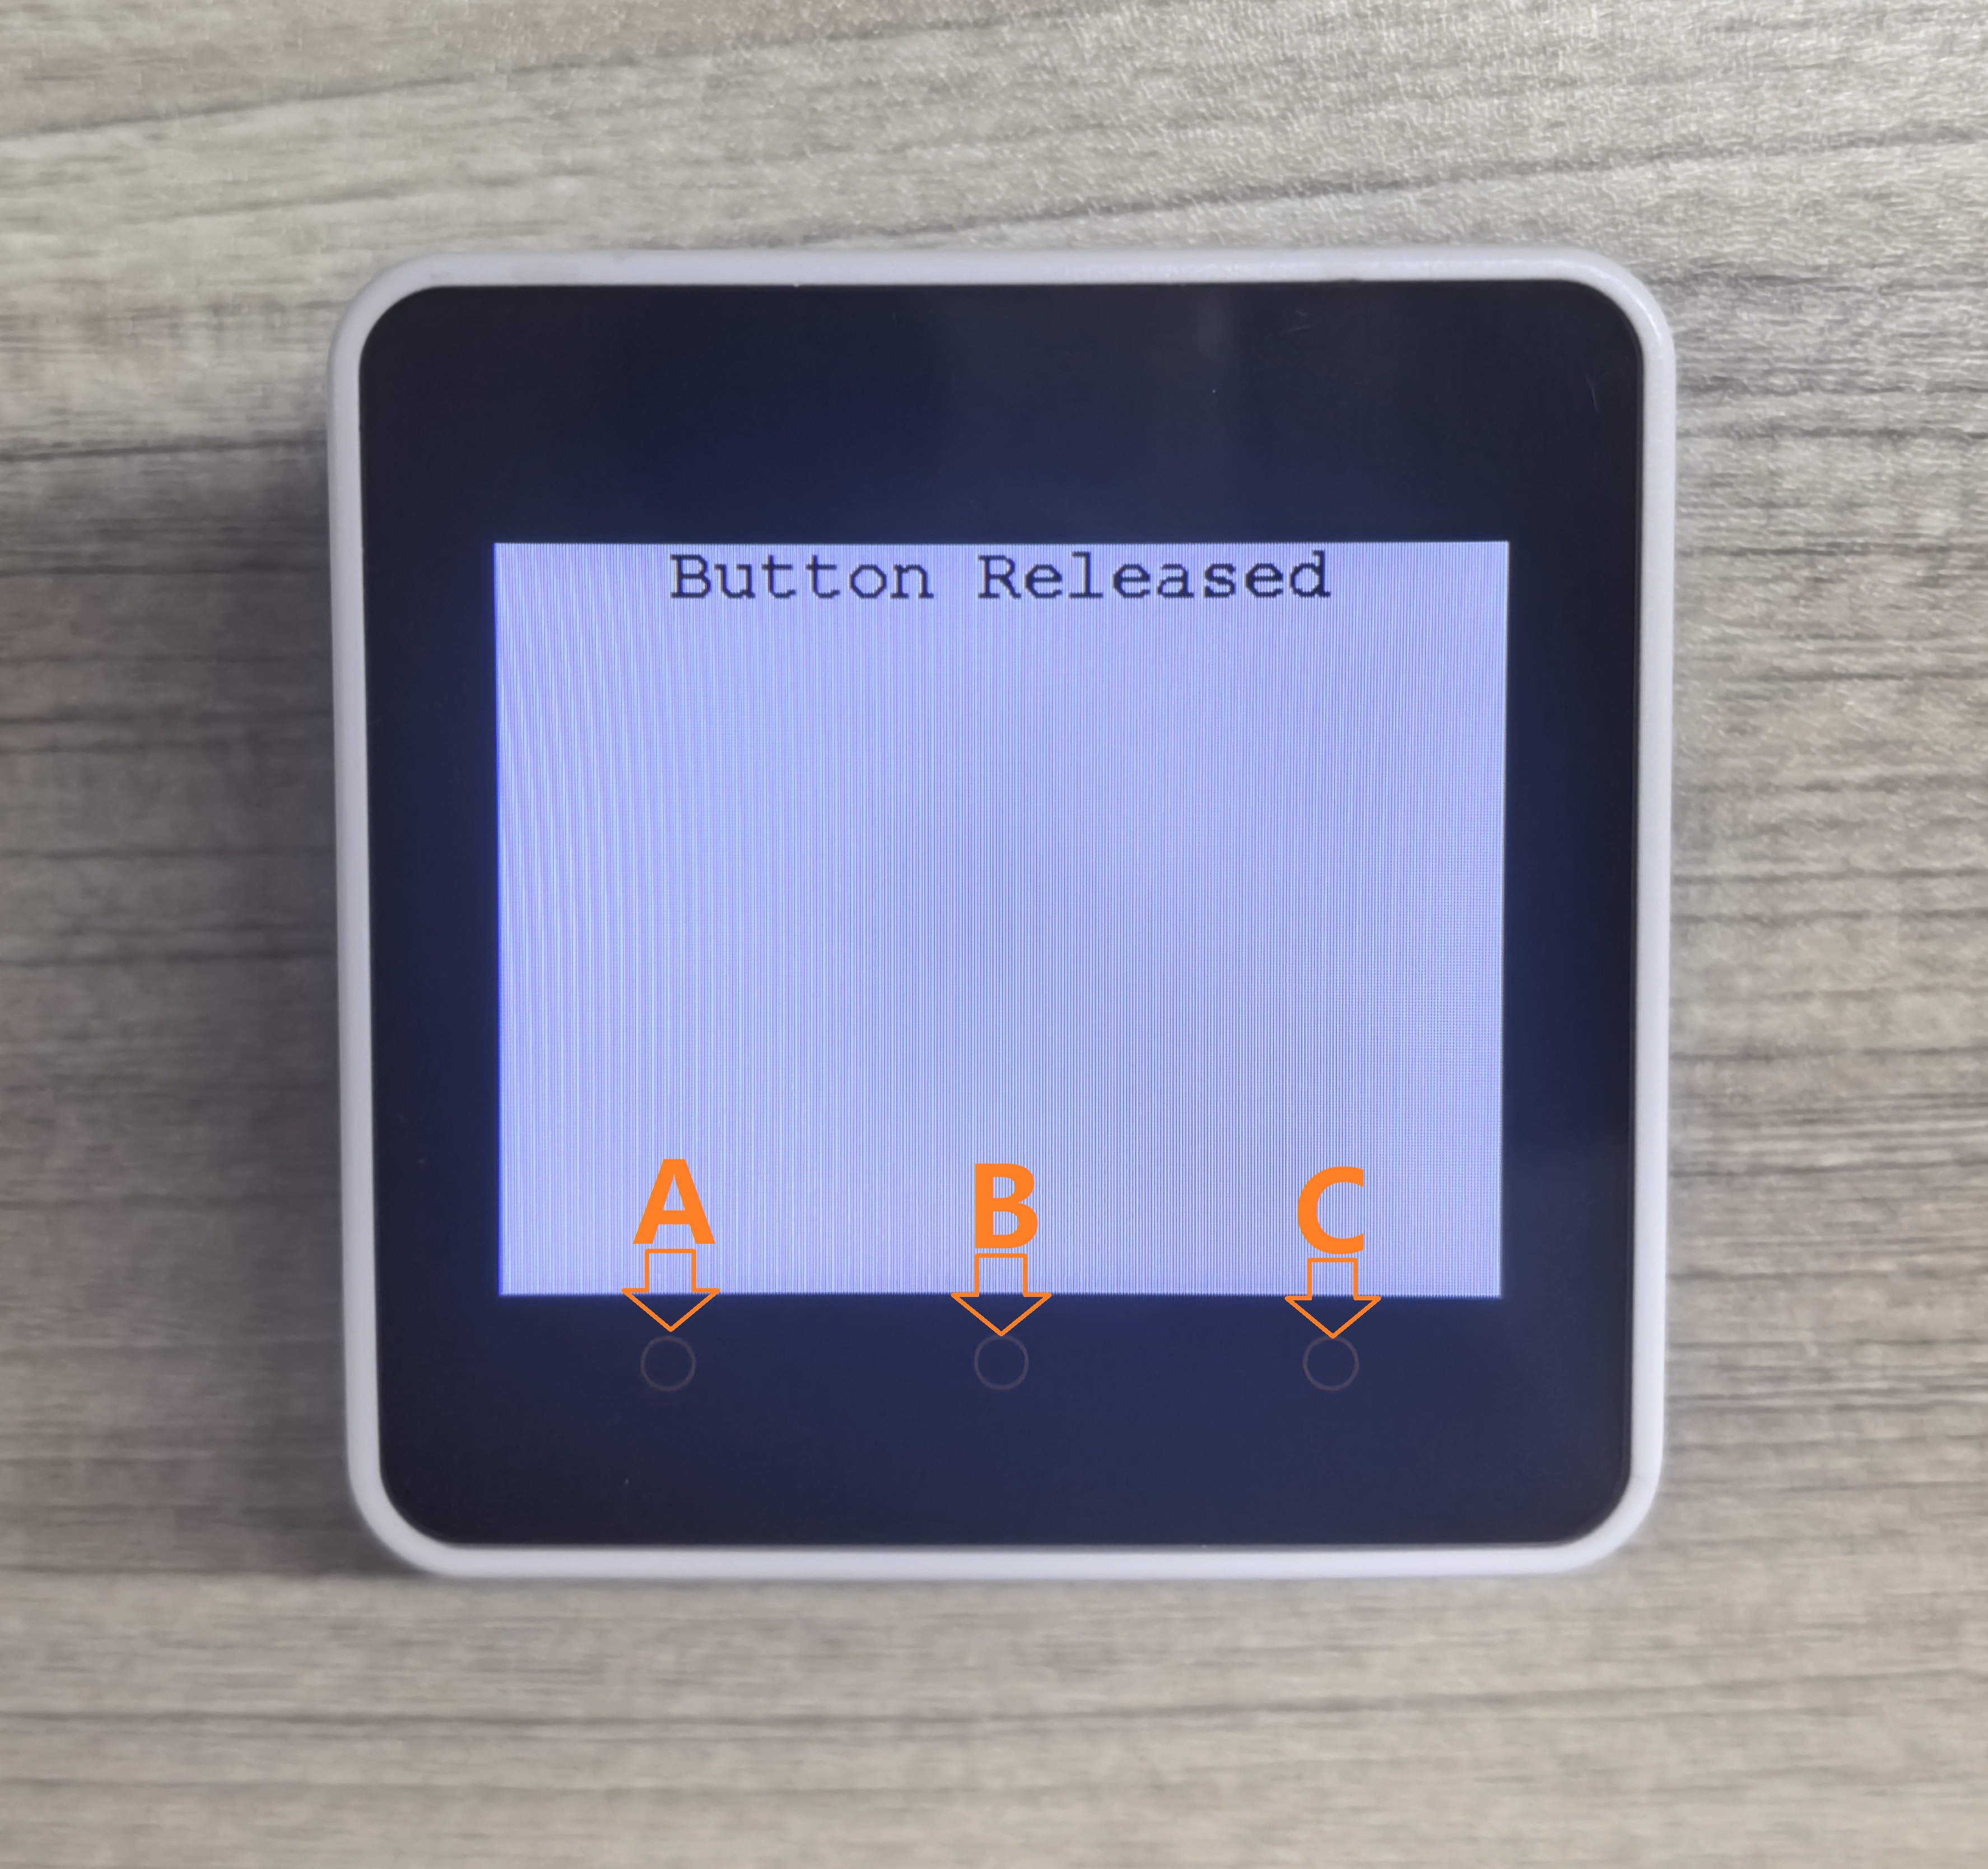
M5.Display.drawString("Button Released", w / 2, 0, &fonts::FreeMonoBold12pt7b);
}
void loop()
{
M5.update();
if(M5.BtnA.isPressed() || M5.BtnB.isPressed() || M5.BtnC.isPressed())
{
if (!drawed){
M5.Lcd.fillScreen(WHITE);
}
M5.Display.drawString("Button Detail:", w / 2, 0, &fonts::FreeMonoBold12pt7b);
if (M5.BtnA.isPressed()) {
M5.Display.drawString("ButtonA Pressed", w / 2, 30, &fonts::FreeMonoBold12pt7b);
}
else if (M5.BtnB.isPressed()) {
M5.Display.drawString("ButtonB Pressed", w / 2, 60, &fonts::FreeMonoBold12pt7b);
}
else if (M5.BtnC.isPressed()) {
M5.Display.drawString("ButtonC Pressed", w / 2, 90, &fonts::FreeMonoBold12pt7b);
}
drawed = true;
}
else if (drawed){
drawed = false;
M5.Display.clear(WHITE);
M5.Display.drawString("Button Released", w / 2, 0, &fonts::FreeMonoBold12pt7b);
}
vTaskDelay(1);
} このプログラムは、ボタンが押されたときに画面上に具体的なボタンの状態を表示します。
API
Core2 ボタン部分はM5UnifiedライブラリのButton_Classを使用しています。ボタン関連のAPIについては以下のドキュメントを参照してください:
Page Tools