

Arduino 上手教程
2. 设备开发 & 案例程序
3. M5Unified
4. M5GFX
5. 拓展模块
Unit
Atomic
Tab5
IoT
Chain Encoder 使用教程
1.准备工作
- 环境配置:参考 Arduino IDE 上手教程 完成 IDE 安装,并根据实际使用的开发板安装对应的板管理与需要的驱动库。
- 使用到的驱动库:
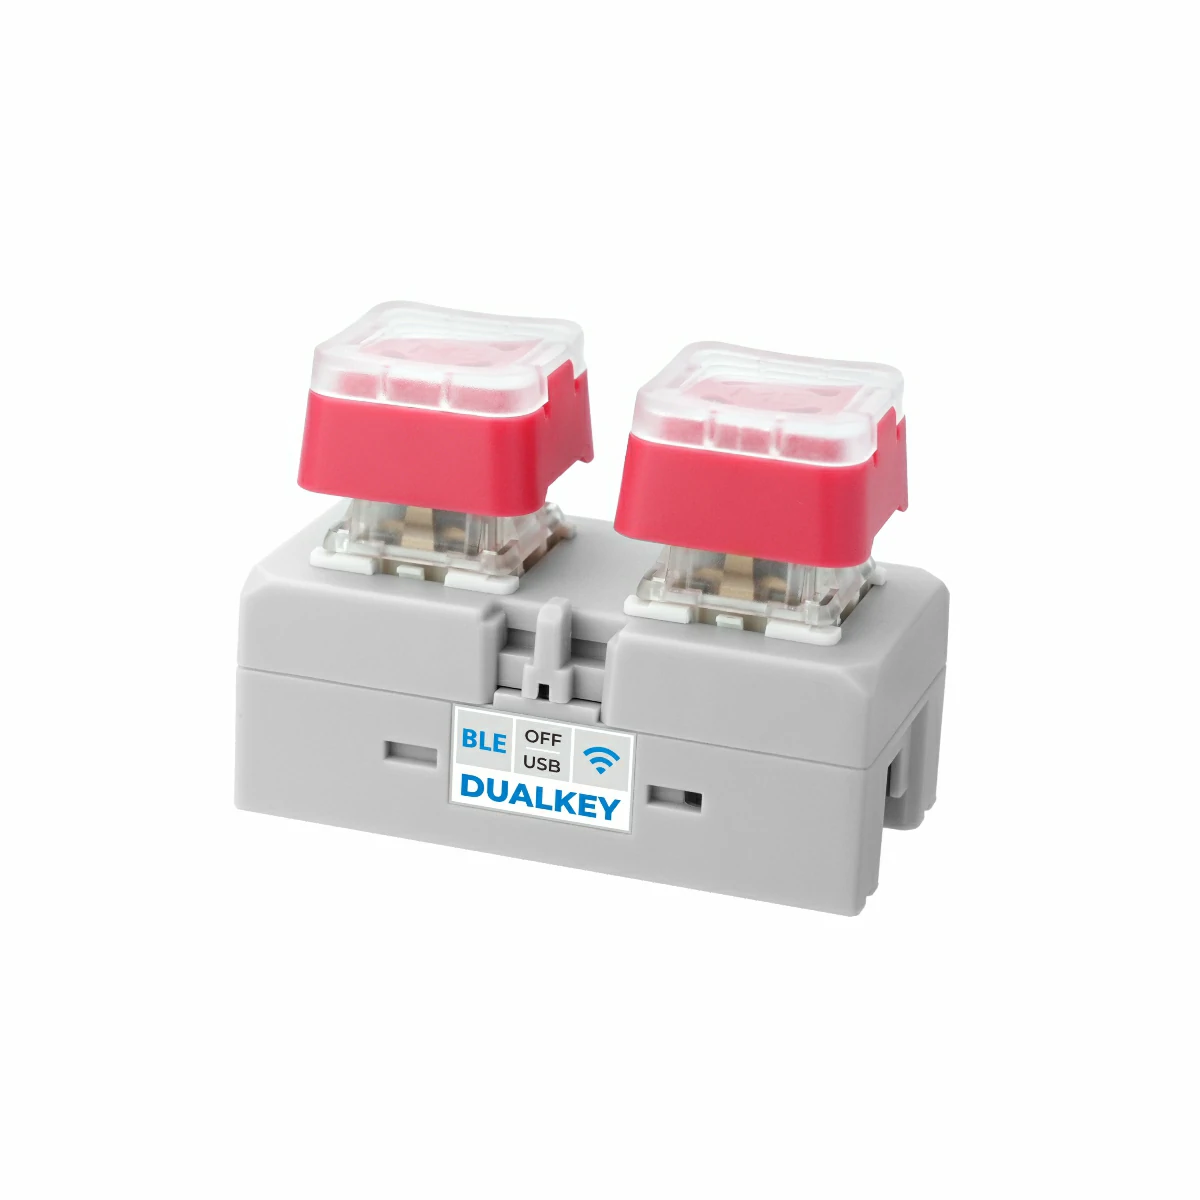
- 使用到的硬件产品:
- Chain DualKey
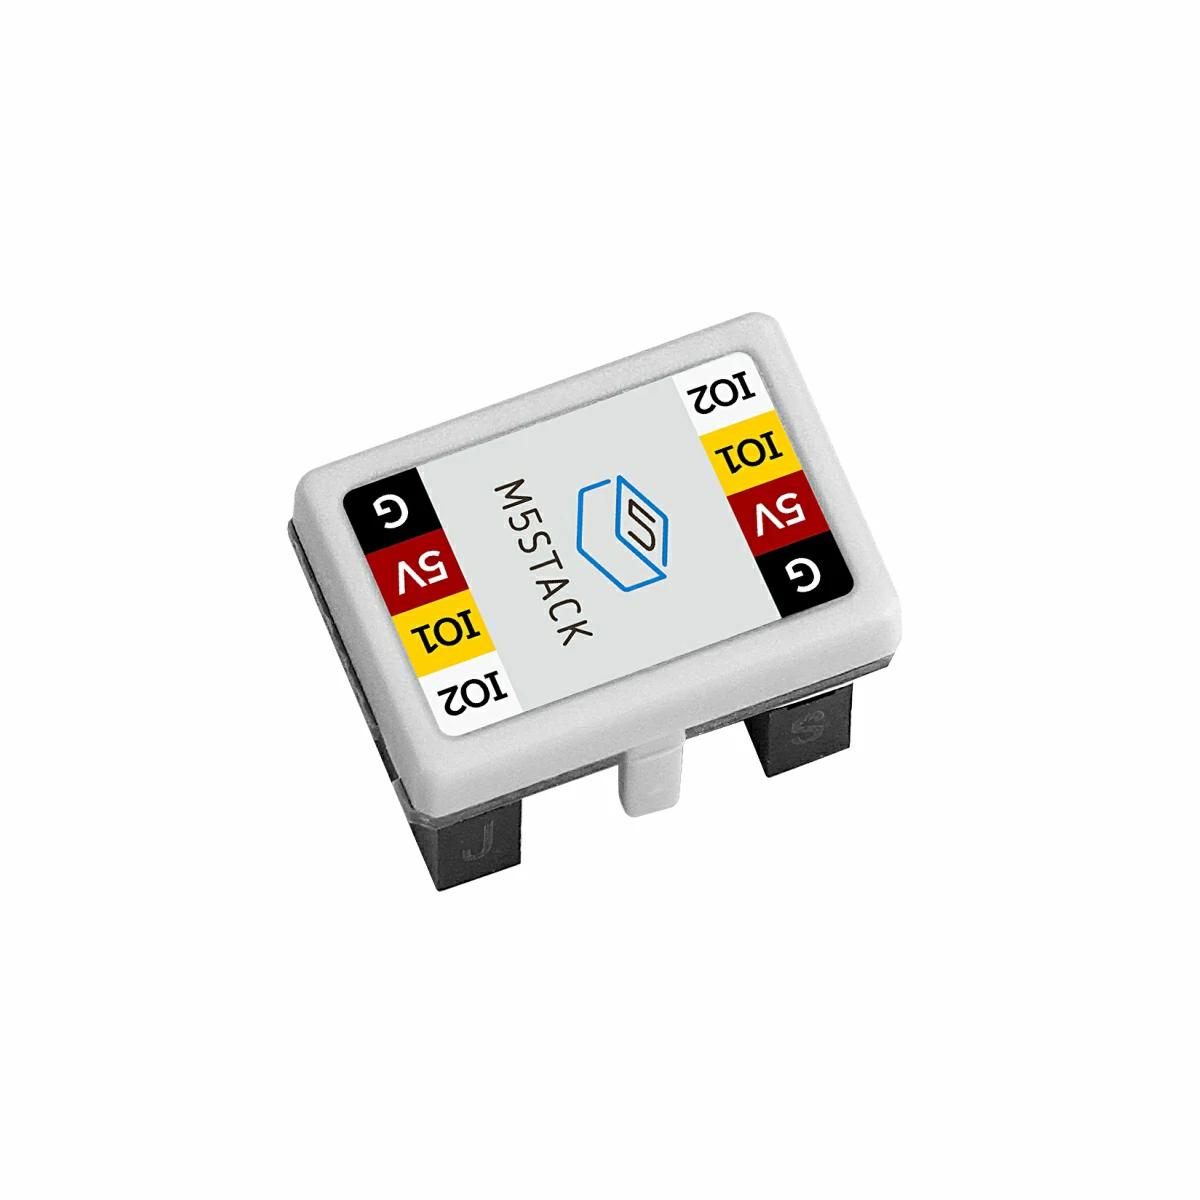
- Chain 系列连接器,如 Chain Bridge 或 Chain Return
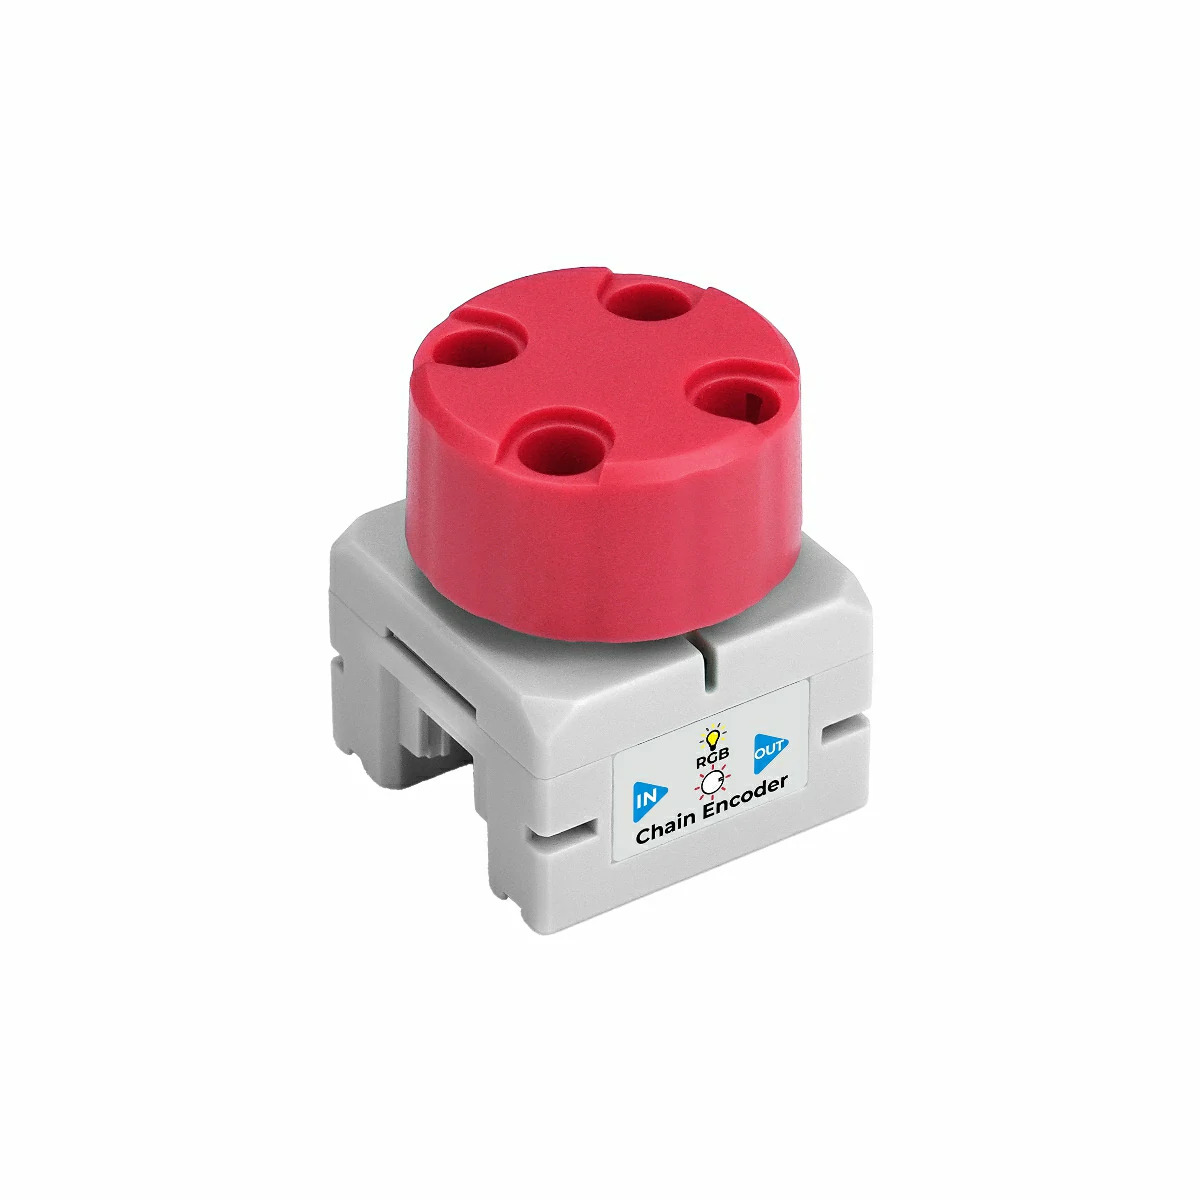
- Chain Encoder
2.示例程序
编译要求
M5Stack 板管理版本 >= 3.2.4
M5Chain 库版本 >= 1.0.0
M5Chain 库版本 >= 1.0.0
cpp
1 2 3 4 5 6 7 8 9 10 11 12 13 14 15 16 17 18 19 20 21 22 23 24 25 26 27 28 29 30 31 32 33 34 35 36 37 38 39 40 41 42 43 44 45 46 47 48 49 50 51 52 53 54 55 56 57 58 59 60 61 62 63 64 65 66 67 68 69 70 71 72 73 74 75 76 77 78 79 80 81
#include "M5Chain.h"

#define RXD_PIN GPIO_NUM_5  // 47 for the other side of Chain DualKey
#define TXD_PIN GPIO_NUM_6  // 48 for the other side of Chain DualKey

Chain M5Chain;

device_list_t *device_list = NULL;
uint16_t device_count = 0;
uint8_t opr_status = 0;

int16_t encoder_value;
int16_t encoder_incre;
uint8_t button_status;
chain_button_press_type_t button_press_type;

void setup() {
  Serial.begin(115200);
  delay(1000);
  Serial.println("===========================");
  Serial.println("M5Stack Chain Encoder Test");

  M5Chain.begin(&Serial2, 115200, RXD_PIN, TXD_PIN);
  while (!M5Chain.isDeviceConnected()) {
    Serial.println("No device connected");
    delay(1000);
  }

  M5Chain.getDeviceNum(&device_count);
  device_list = (device_list_t *)malloc(sizeof(device_list_t));
  device_list->count = device_count;
  device_list->devices = (device_info_t *)malloc(sizeof(device_info_t) * device_count);
  M5Chain.getDeviceList(device_list);

  if (device_list->devices[0].device_type == CHAIN_ENCODER_TYPE_CODE) {
    Serial.println("ID[1] is Chain Encoder\n");
    delay(1000);
  } else {
    Serial.println("ID[1] is NOT Chain Encoder\n");
    return;
  }

  // Device ID, double click interval (100MS/200MS/.../900MS/1000MS), long press interval (3S/4S/.../9S/10S), operation status pointer
  M5Chain.setEncoderButtonTriggerInterval(1, BUTTON_DOUBLE_CLICK_TIME_500MS, BUTTON_LONG_PRESS_TIME_5S, &opr_status);
  Serial.println("Set double and long press intervals");

  // Device ID, increment direction (AB = clockwise, BA = counterclockwise), operation status pointer
  M5Chain.setEncoderABDirect(1, ENCODER_AB, &opr_status);
  Serial.println("Set increment direction\n");

  delay(1000);
}

void loop() {
  M5Chain.getEncoderValue(1, &encoder_value);  // Device ID
  Serial.print("encoder_value:");
  Serial.println(encoder_value);

  M5Chain.getEncoderIncValue(1, &encoder_incre);  // Device ID
  Serial.print("encoder_incre:");
  Serial.println(encoder_incre);

  M5Chain.getEncoderButtonStatus(1, &button_status);  // Device ID
  Serial.print("button_status:");
  Serial.println(button_status);

  while (M5Chain.getEncoderButtonPressStatus(1, &button_press_type)) {  // Device ID
    switch (button_press_type) {
      case CHAIN_BUTTON_PRESS_SINGLE:
        Serial.println("Single pressed");
        M5Chain.resetEncoderValue(1, &opr_status);  // Device ID
        break;
      case CHAIN_BUTTON_PRESS_DOUBLE:
        Serial.println("Double pressed");
        break;
      case CHAIN_BUTTON_PRESS_LONG:
        Serial.println("Long pressed");
        break;
    }
  }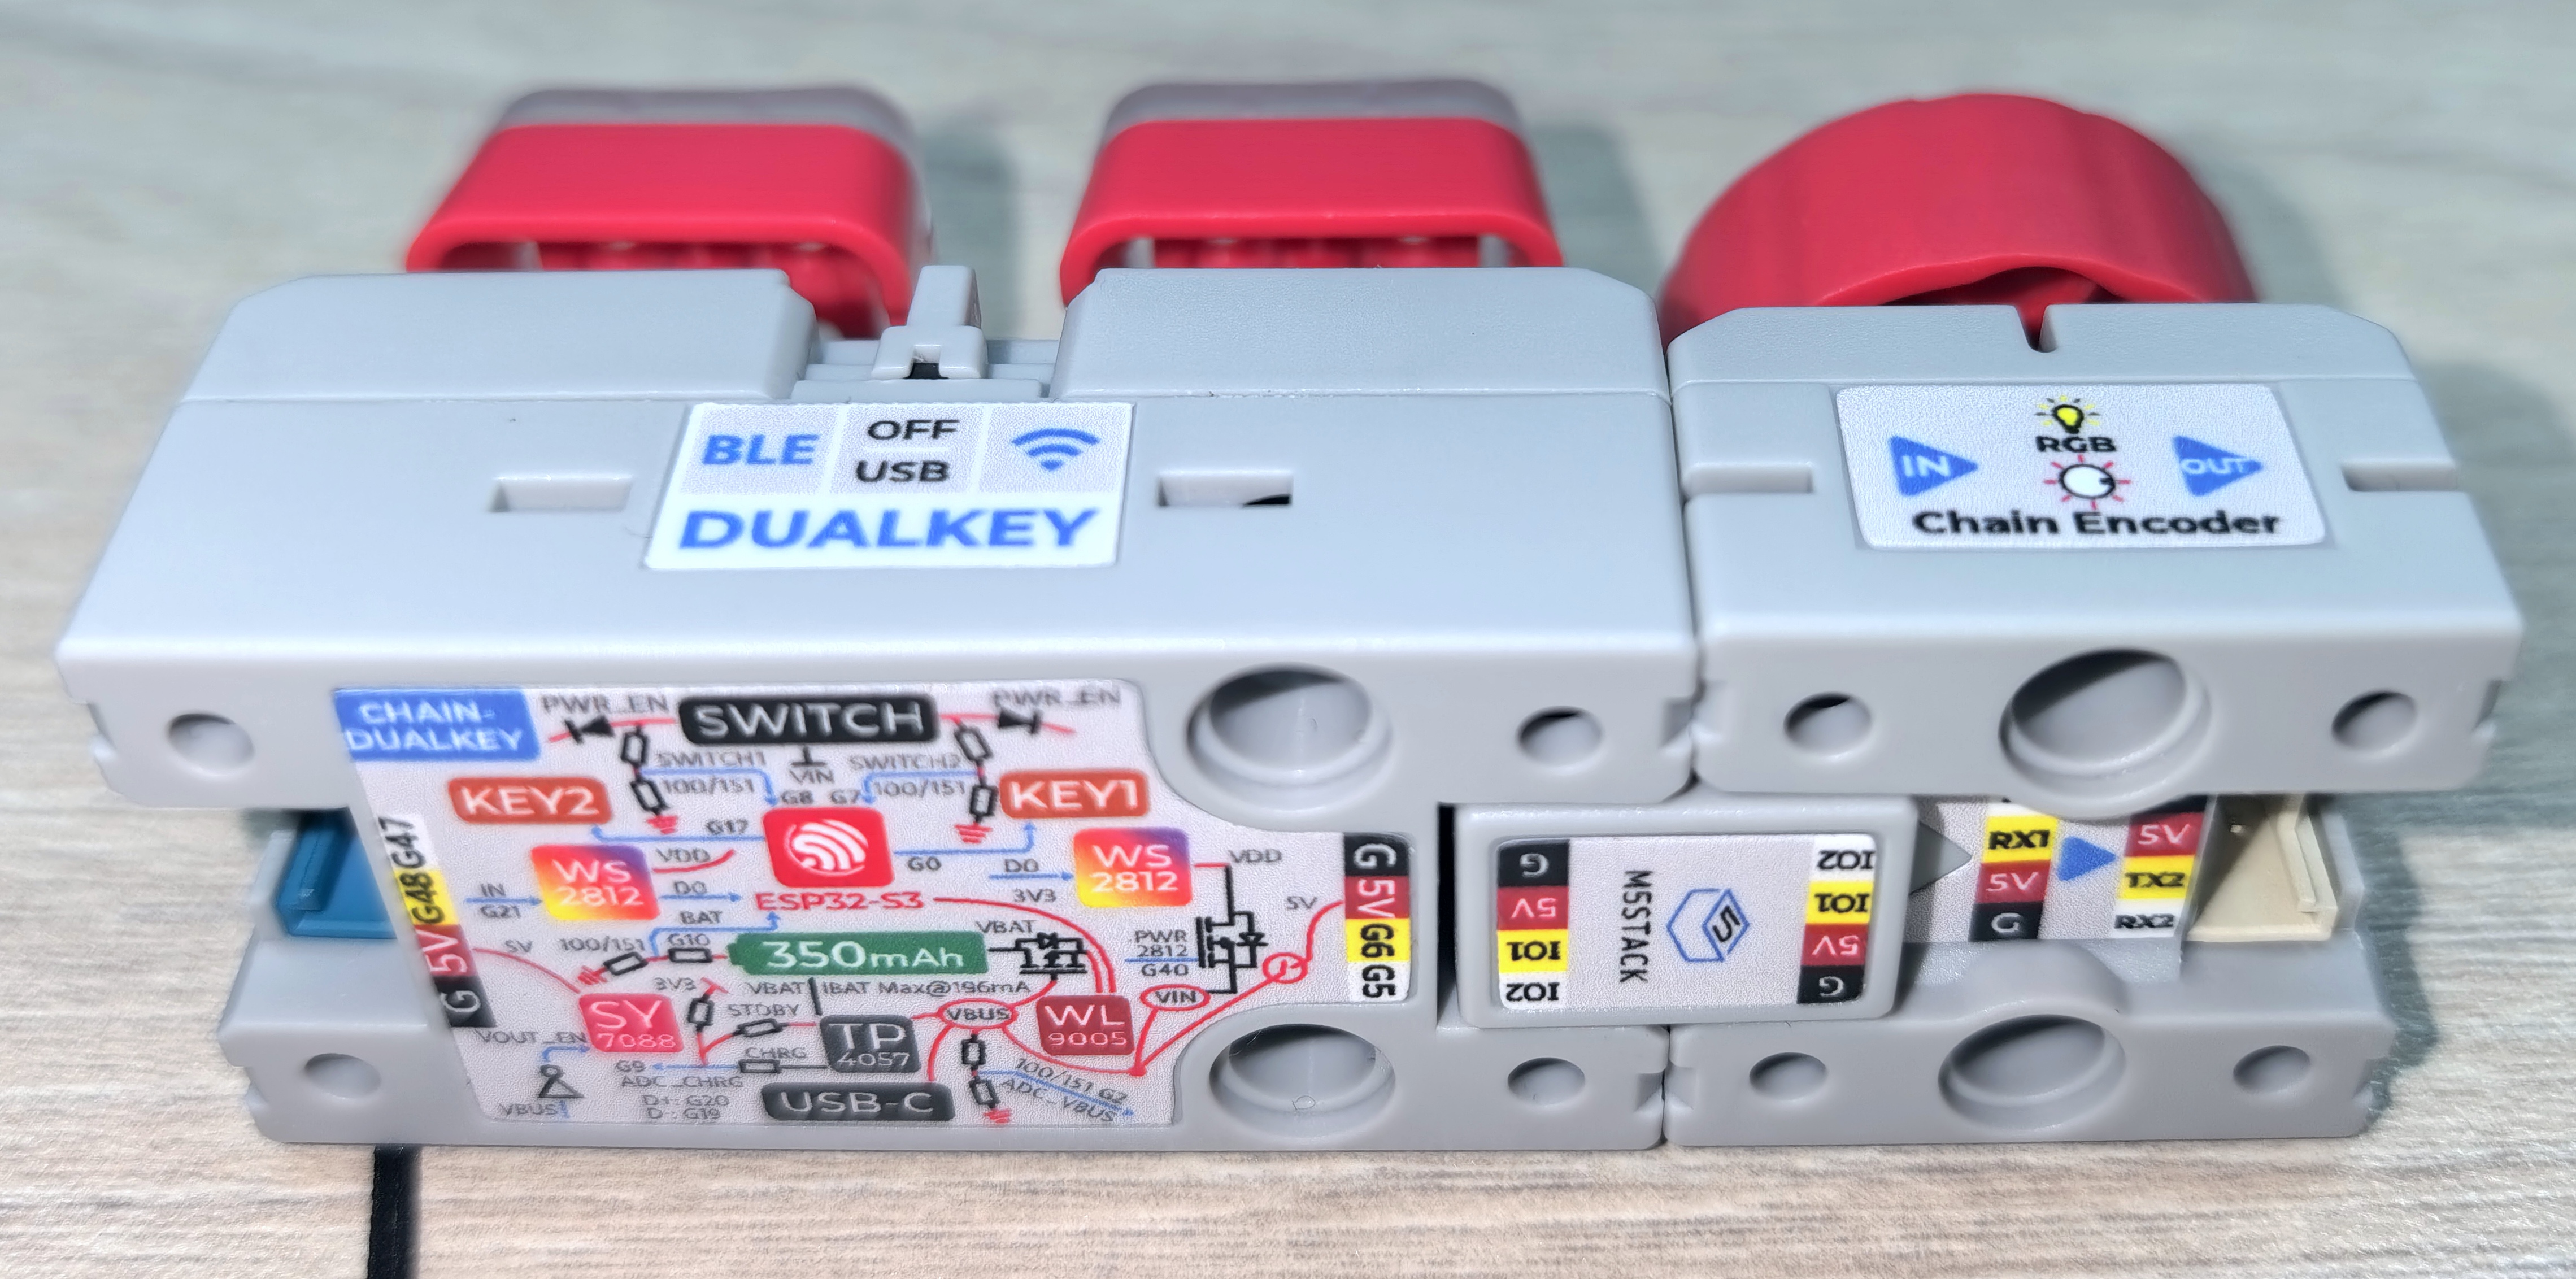
}用 Chain Bridge 连接器连接主控 Chain DualKey 和 Chain Encoder。连接时需要注意方向,三角箭头从主控 Chain DualKey 指向外侧,如图:
将以上程序编译并上传至设备,点击 Arduino IDE 右上角的按钮打开串口监视器(Serial Monitor)和串口绘图器(Serial Plotter)。转动 Chain Encoder 的旋钮,可以看到以下信息:
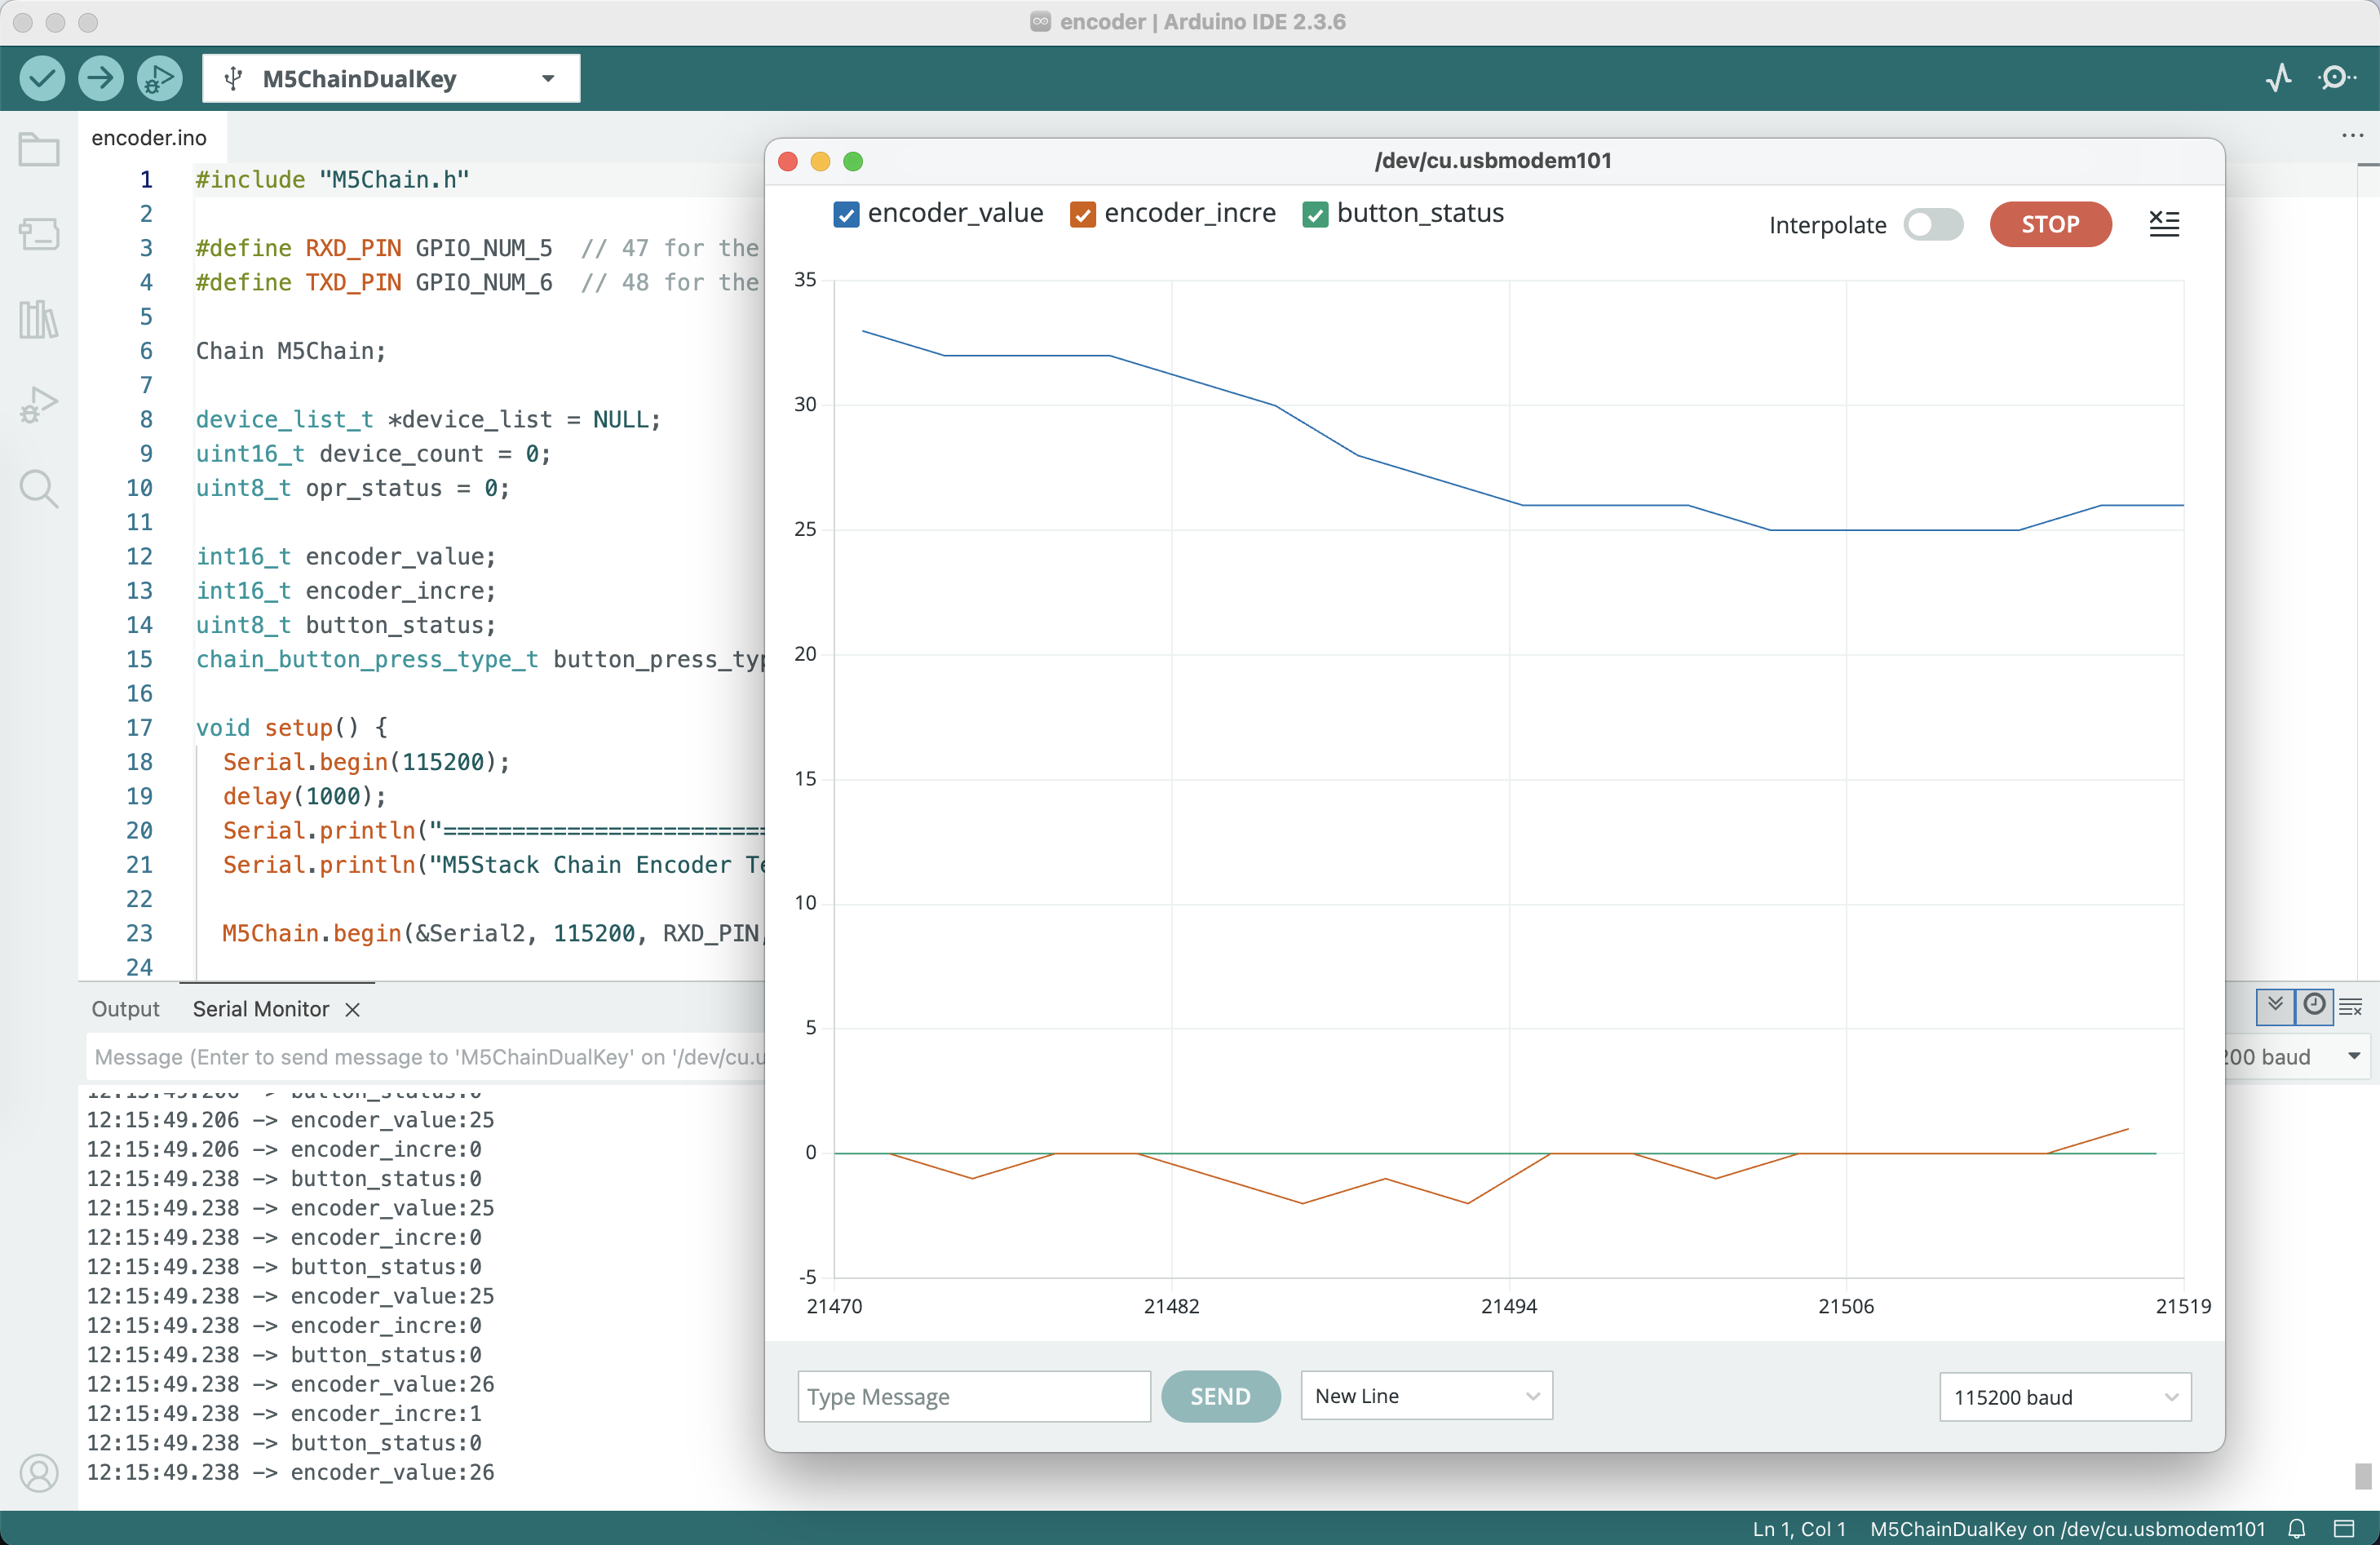
encoder_value:旋钮当前值;encoder_incre:旋钮本次变化值;button_status:旋钮是否被按下;- 旋钮的单击、双击、长按事件;
- 在本程序中,单击旋钮会将
encoder_value重置为 0; - 在 setup 函数的最后部分可以设置旋钮双击、长按的触发时间,以及旋钮取值变化的方向(顺时针旋转增大 / 逆时针旋转增大)。
3.参考链接
Page Tools